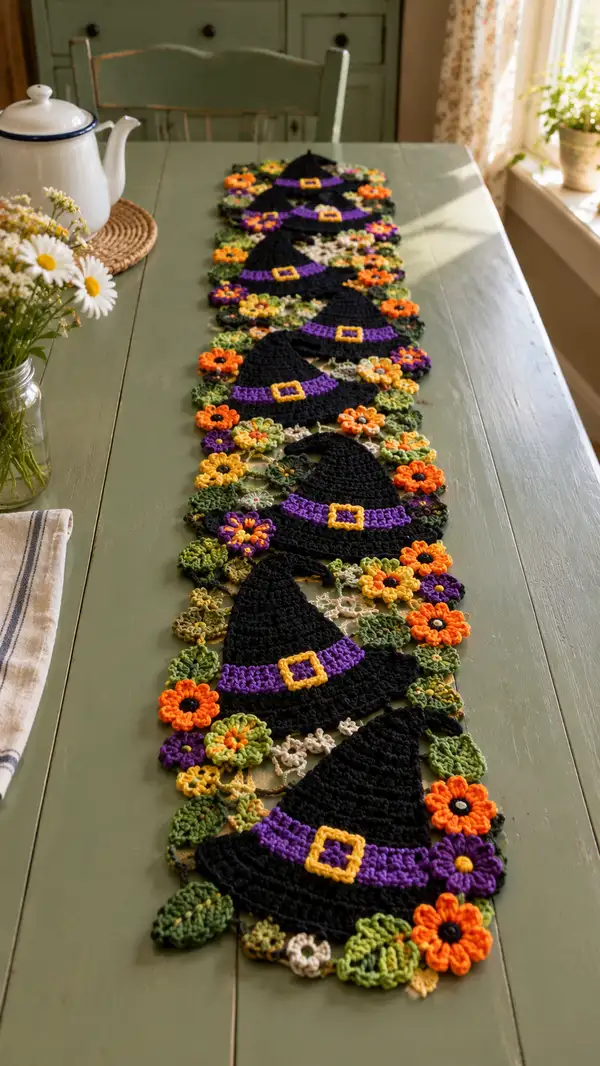
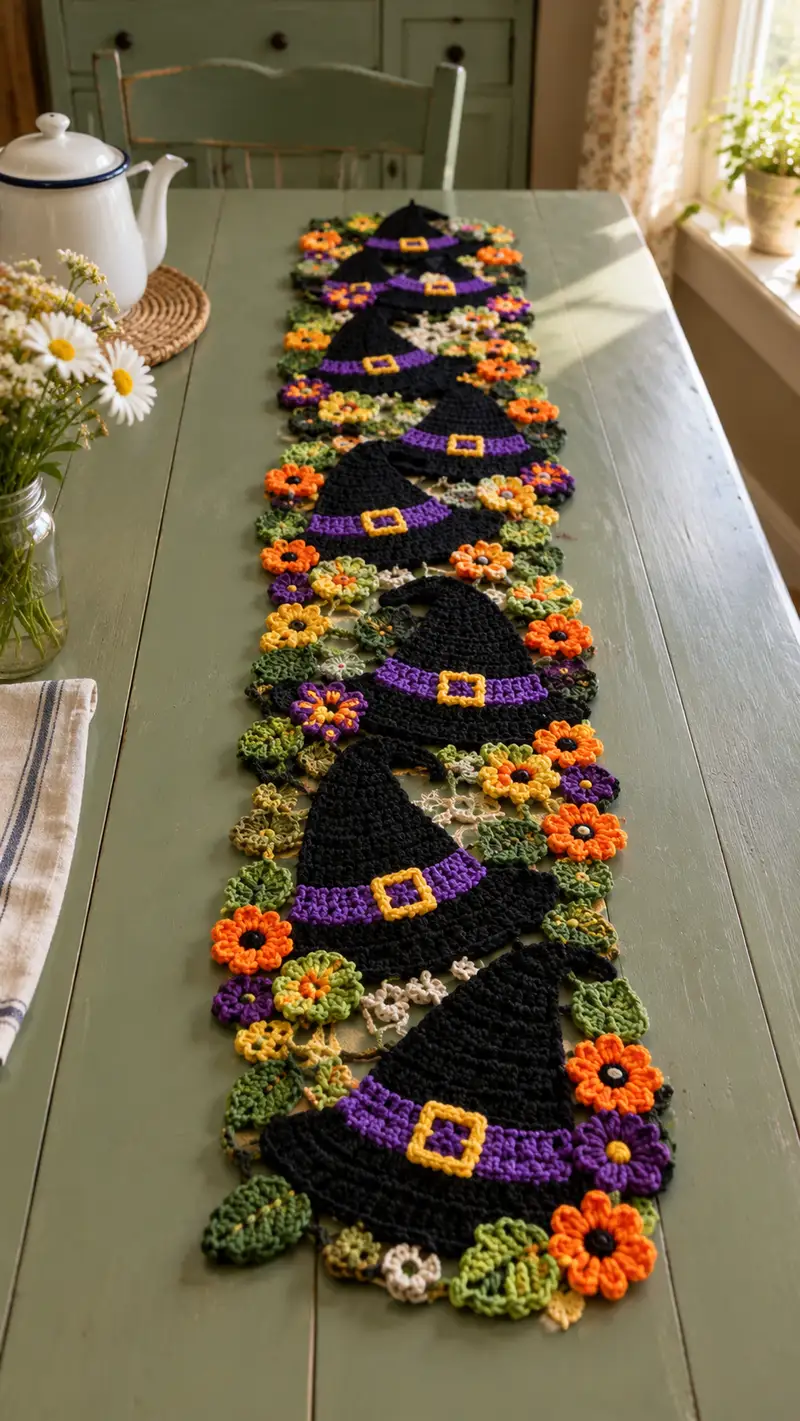
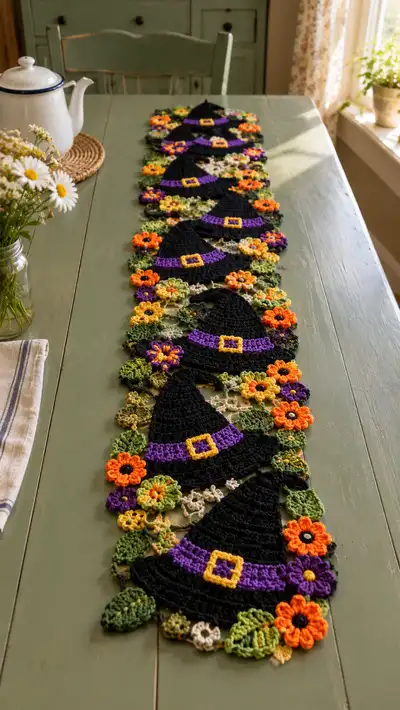
A long, whimsical table runner featuring repeated black witch-hat motifs bordered by colorful floral clusters in orange, purple, yellow and leafy greens. This delicate lace-style runner lays flat across a dining table and makes a perfect autumn or Halloween centerpiece. The design uses small motif construction and join-as-you-go techniques for a vintage, hand-stitched look.
Progress Tracker
0% Complete
— Notes & Gauge :
Info :
This runner is built from repeating motifs assembled with join-as-you-go (JAYG) methods. Make a sample hat motif and one flower cluster to check gauge and proportions before proceeding with full runner. With 3.5mm hook and worsted yarn, a single hat motif (from tip to brim) should measure approximately 12-13 cm across at the brim and 10-12 cm tall. Adjust hook size as needed. Work tightly enough that motifs hold shape, but not so tight the lace becomes stiff.
— Witch Hat Motif (Make X to desired runner length; pictured runner uses 7 hats) :
Info :
Each hat motif is worked in continuous rounds from the tip down to the brim, finishing with a flared brim and a decorative band and buckle. Use black for main hat, purple for band, and yellow/gold for buckle. Join-as-you-go attachment points are made on the last rounds of the brim to connect surrounding floral clusters.
Round 3 :
(1 sc, 1 inc) x 6 (18)
Round 4 :
(2 sc, 1 inc) x 6 (24)
Round 5 :
(3 sc, 1 inc) x 6 (30)
Round 6 :
(4 sc, 1 inc) x 6 (36)
Round 7 :
(5 sc, 1 inc) x 6 (42)
Round 8 :
(6 sc, 1 inc) x 6 (48)
Info :
At this point the tip of the hat has taken on a gently rounded cone. You can check the width and height; for a more elongated hat, add one extra even round before starting the sloping rounds below.
Round 9 :
1 sc in each st (48)
Round 10 :
1 sc in each st (48)
Round 11 :
1 sc in each st (48)
Round 12 :
1 sc in each st (48)
Info :
Rounds 9-12 build the vertical height of the hat cone. Maintain even tension to ensure a smooth slope. If you prefer a taller cone, add additional even rounds here in multiples of two for balance of decreases later.
Round 13 :
(6 sc, 1 dec) x 6 (42)
Round 14 :
(5 sc, 1 dec) x 6 (36)
Info :
Begin a gentle taper here to shape the cone so it sits naturally into the brim curve. Start stuffing a tiny bit of batting or flatten to maintain shape only if you want a gently raised hat—most hats in the runner are left flat and only blocked.
Round 15 :
(4 sc, 1 dec) x 6 (30)
Round 16 :
(3 sc, 1 dec) x 6 (24)
Round 17 :
1 sc in each st (24)
Round 18 :
1 sc in each st (24)
Info :
Tip :
Rounds 13-18 give a subtle neck where the cone transitions to brim. Keep these rounds slightly looser if you want the brim to flare naturally. Block lightly if necessary to coax shape.
Round 19 :
Switch to working taller stitches for brim flare: (1 hdc, 1 dc) in each st around (48 sts counted as 24 hdc+24 dc equivalent) (24 grouped pairs)
Round 20 :
(1 sc in next st, 2 dc in next st) x 12 (36)
Round 21 :
(2 sc, 3 dc in next st, 2 sc) x 6 (42)
Info :
Rounds 19-21 create the flared brim; using a mix of hdc/dc creates a soft ruffle. If your brim is too tight, add one extra increase round repeating Round 20 pattern once more for extra flare.
Round 22 :
Working in FLO: 1 sc in each st (42)
Round 23 :
1 sc in each st BLO (42)
Info :
Use BLO/FLO here to create a subtle ridge where the brim meets the band later. This ridge helps the purple band sit naturally on top of the brim.
Round 24 :
Change to purple yarn. Join with sl st to a prominent front stitch. Ch1, 1 sc in same st, 1 sc in next 5 sts, (2 sc in next st) x 6 across to make band width (48)
Round 25 :
1 sc in each st around (48)
Info :
Work two rounds of purple to make a visible band. Carry black yarn behind work or fasten off and weave in ends for neater look.
Round 26 :
Change to yellow/gold for buckle. Leave a long tail for sewing later. Ch6, sl st back into same stitch to form small square loop; sl st into next 4 rounds to secure buckle base. Fasten off leaving 10 cm tail (buckle made separately)
Info :
Alternatively you can crochet a small 4-round square buckle and sew it onto the center of the band. The buckle should measure roughly 1.5 cm square when using worsted yarn on a 3.5mm hook.
Round 27 :
Finishing rounds for brim edge: With black, join at any outer brim stitch. Ch1, (sc, picot) around to create decorative edge. Sl st to join. Fasten off and weave ends (42 picots)
Info :
Block each hat flat to 12-13 cm brim width if needed. Use pins and a light mist spray—do not overstretch the lace base. Make however many hat motifs you need (runner pictured uses seven equally spaced hats).
— Large 8-Petal Flower Motif (Make many) :
Round 1 :
In chosen flower color (orange), 6 sc in mr (6)
Round 2 :
Inc in each st around (12)
Round 3 :
(1 sc, inc) x 6 (18)
Round 4 :
Switch to contrasting small center color (black or dark brown). Ch2, (5 dc in next st, sl st to base) x 6 to produce puffed-center petals base. Fasten off center color and return to petal color
Round 5 :
Join petal color in any stitch. *ch3, 3 tr, ch3, sl st in same st* repeat in each of 6 foundation points to start petals (6 petals formed)
Round 6 :
Increase petal fullness: In each petal space work (sl st, ch1, 1 sc, ch1, 1 dc, ch1, 1 sc) to shape round and total 8 rounded petal lobes (counts will vary but flower will sit flat)
Info :
For a fuller orange flower, add a second petal round repeating Round 6 instructions, placing stitches evenly in the ch-spaces to avoid distortion. Make several big flowers to place around each hat brim in clusters of 2-3 as seen in photo.
— Small 6-Petal Flower Motif (Make many) :
Round 3 :
*Ch4, sl st into next st* repeat 6 times to make 6 loops
Round 4 :
In each ch4 loop work (1 sc, 3 dc, 1 sc) to make a petal. Fasten off and weave ends (6 petals)
Info :
Small flowers in purple and yellow make pretty fillers between larger flowers. Use small contrasting centers (tiny French knots with yarn or a few sl st in a dark color) to mimic the picture centers.
— Layered Two-Tone Flower (Make several) :
Round 3 :
Switch to contrasting outer color. *ch3, 5 dc in next st, sl st into next st* x6 to create raised loop-petals (6 large petals)
Round 4 :
Work a decorative slip-stitch round around base to flatten and tidy edges. Fasten off and weave ends.
Info :
Layered flowers can be sewn together (small flower on top of larger 8-petal) using the yarn tail from the center. This creates dimension and the look seen around each hat brim in the photo.
— Leaf Cluster Motif (Make many) :
Round 2 :
*ch4, sl st into next st* repeat 5 times to create 5 leaf loops
Round 3 :
In each ch4 loop work (sl st, 1 hdc, 2 dc, 1 hdc, sl st) to form shaped leaf. Fasten off last leaf and weave ends (5 leaves)
Round 4 :
Optional variegated green: for extra interest, work reverse single crochet (crab stitch) around leaf edges to outline (use a slightly darker green to define edges)
Info :
Leaves are worked in two tones for depth; alternate light and dark greens for the runner. Make many and group in clusters of 3-6 around each hat brim where you will join flowers.
— Lace Filler Motif (Small connecting ring) :
Round 1 :
ch6, sl st into first ch to make ring. Ch3 (counts as dc), 11 dc into ring, sl st to top of ch3 (12 dc total)
Round 2 :
*ch3, sl st in next dc* around to make 12 loops. Fasten off. These small rings act as join points for leaves and hats.
Info :
Make numerous small lace ring motifs to sit between larger shapes. They form the airy background that keeps the runner light and flexible. Use cream or tan shades for subtle contrast like in the image.
— Joining & Join-As-You-Go (JAYG) Method :
Info :
Most motifs are joined as you crochet the final round of one motif into the previous motif’s edge using slip stitches or single crochet joins. This keeps edges neat and eliminates long sewing seams. Always pin motifs in the final layout before joining to ensure consistent spacing and orientation. Place hats in a straight center line with alternating clusters of flowers toward each side.
Round 1 :
When working final brim edge of a hat, align hat beside previously completed hat or cluster. Work sl st into corresponding stitches of adjacent motifs at regular intervals—approximately every 6th stitch on the brim—to attach. Continue around brim to create stable join then finish edge as before.
Round 2 :
Attach flower petals to brim by matching petal bases to leaf loops. Use sl st or small whip stitch to secure petals, working through the back loops of hat brim for invisible join. Make 2-3 flowers per hat cluster as shown.
Info :
When joining, do not pull the yarn tight; leave a small amount of ease so the runner remains flexible and can drape. For stronger joins, work through both motif edges with a sc seam instead of sl st every 4th join point.
— Assembly Row-By-Row Example (sequence for pictured runner of 7 hats) :
Info :
Layout order across center: Hat - cluster - Hat - cluster - Hat - cluster - Hat - cluster - Hat - cluster - Hat - cluster - Hat (seven hats with clusters between). Each cluster is composed of: 1 large orange flower, 1 layered purple flower, 1 small yellow flower, 3-5 leaves, and small tan lace filler pieces.
Step 1 :
Place first hat flat and pin onto blocking board. Around brim, pin 3 leaf clusters and 2 large flowers. Using final brim round, join these elements as you complete each motif's edging. This creates the first cluster unit anchored to brim.
Step 2 :
Start second hat and when at final brim round, use JAYG to join to the first hat at three points: near left brim corner, center back, and right brim corner. Repeat for each subsequent hat keeping spacing equal; use a 12 cm visual spacing rule between center points of hats to match photo spacing.
Info :
Use pins liberally to maintain symmetry. Count stitches between join points so each hat is aligned. If using different yarn tensions between motifs, pin then measure distances before final joining and adjust with extra sl st joins if needed.
— Edge & Border Finishing (Final rounds across entire runner) :
Round 1 :
Once all motifs are joined into a long strip, work a delicate border along both long edges. Join black or dark green along edge: sc in each exposed stitch or around motif picots, *ch3, sl st in next ch-space* to form scalloped edge. Repeat across length.
Round 2 :
Optional decorative accent: in select scallops, work a small daisy cluster (ch3, 5 dc in same sp, sl st) in alternating scallops to bring color continuity to ends. Use orange or purple for rhythm.
Round 3 :
Corner finishing: Work an extra cluster of leaves and two small flowers at each short end of runner to create a finished focal point. Sew or join as you go so the motif sits flush with the runner edge.
Info :
Trim and weave all tails thoroughly. Block the entire runner to shape—pin flat to desired dimensions and mist lightly. Allow to dry completely. If you prefer a firmer runner, lightly starch and shape while damp.
— Alternative Hat Band & Buckle Construction (Optional detailed buckle) :
Round 1 :
For a sewn buckle: With yellow, ch6, sl st to form small loop. Round 2: ch1, work 6 sc in loop, sl st to join (6)
Round 2 :
Fold square in half and use short tapestry needle to sew ends together creating a tiny square. Attach to purple band with whip stitch. For a hollow buckle, stitch a small square on top of purple band leaving interior open to show the purple band beneath.
Info :
Embellish with a touch of metallic thread if desired. Sew buckle securely using multiple passes to withstand washing and handling.
— Assembly Finishing Touches :
Info :
Weave in ends using a yarn needle: run tails through several motifs and back over to defeat loosening. Use tiny hidden stitches to anchor bulky tail ends. If any motifs wobble after joining, add a few stitches from back to front to improve stability.
Round 1 :
Final blocking and shaping: Pin runner flat, shape hat points toward same direction (or alternate direction for different effect). Steam lightly or mist and leave to dry overnight. Trim stray fibers and shape buckle loops with finger.
Info :
Photographed runner arranges hats with tips alternating slightly to create flow. You may align all tips in same direction for a formal look or alternate for a more whimsical effect.
— Troubleshooting & Adjustments :
Info :
If your brim pucker occurs, add an extra increase round in the brim and reblock. If motifs gap, consider adding more lace filler rings in the negative spaces. To shorten or lengthen runner, add or remove hat motif repeats—each hat unit (hat + cluster both sides) measures roughly 18-20 cm in length on this gauge.
Info :
Saving tail lengths: Leave long ends when making flowers and leaves so you can use them to sew pieces together; this reduces the need to weave many short tails later.
Completing this Black Purple Witch Hat Floral Table Runner is such a rewarding project—each hat and blossom you crochet adds personality and charm to your table. The mix of solid shapes and airy lace keeps it light while still making a bold statement for autumn or Halloween decor. I hope you enjoy the rhythmic satisfaction of making repeated motifs and the creative joy of arranging clusters just how you like them. Happy crocheting and may each stitch bring a little seasonal magic to your home! 🧶🍂