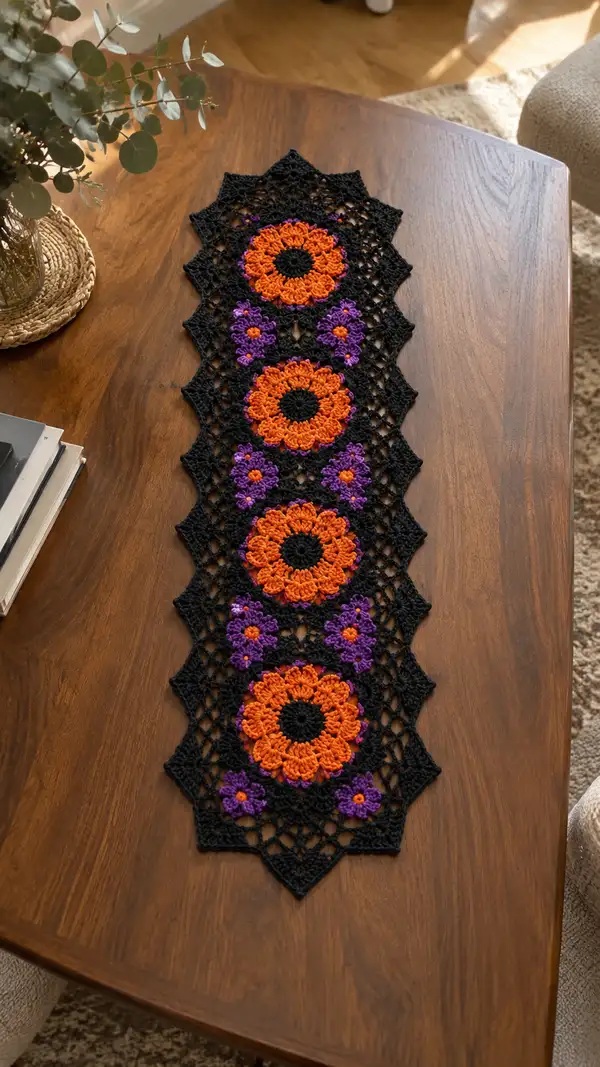
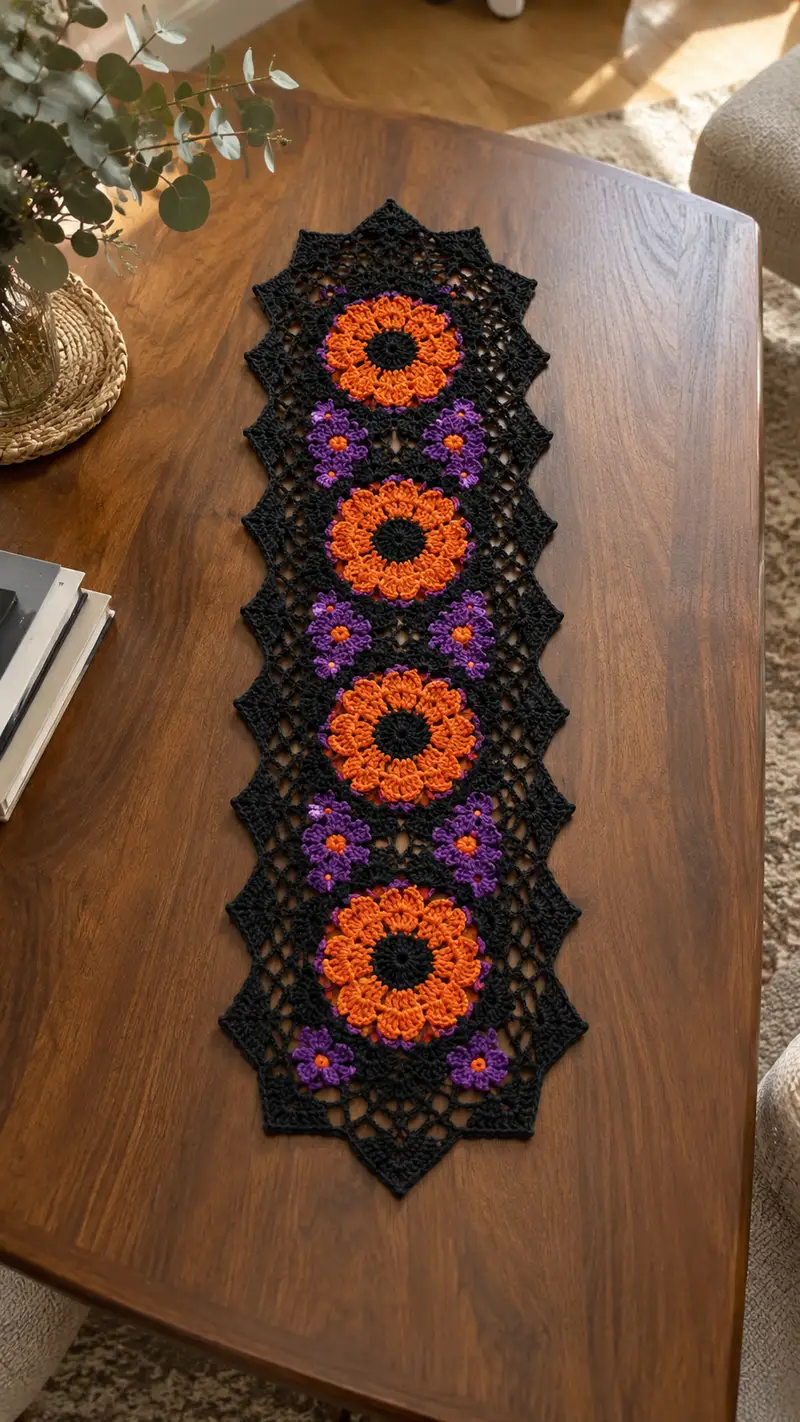
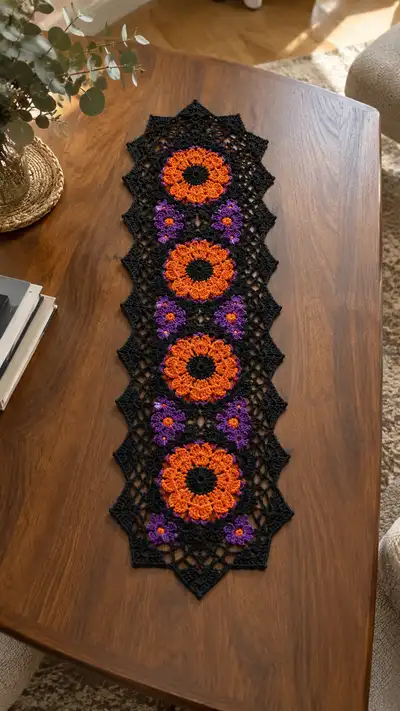
Create a spooky-chic Halloween table runner featuring three bold orange floral medallions framed by lacy black netting and tiny purple blossoms. This elongated runner combines textured puff petals, open lace joins and a pointed scalloped border for dramatic table styling. Suitable for crocheters familiar with puff clusters, color changes and motif joining—perfect for a seasonal centerpiece or mantel accent.
Progress Tracker
0% Complete
— Notes & Stitch Techniques :
Info :
This pattern is worked in individual motifs (Large Flower Motif and Small Flower Motif) which are then joined with lace connector rounds and finished with a pointed scalloped border. Work tightly enough to keep puff and cluster stitches neat but not so tight that stitches cannot be shaped. Use 3.5mm hook for main work unless you prefer a looser/larger motif, in which case increase hook size by one. Puff stitch used here: yarn over, insert hook, yarn over and pull up loop (repeat 3 times to have 7 loops on hook), yarn over and draw through all loops, ch1 to secure (counts as one puff). When joining motifs, block them flat first to ensure even joins.
— Large Flower Motif (Make 3) :
Round 1 :
With black yarn, make a magic ring. 8 sc in magic ring (8)
Round 2 :
Inc in each st around (16)
Round 3 :
(1 sc, inc) x 8 (24)
Round 4 :
(2 sc, inc) x 8 (32)
Info :
These first rounds form a compact black center. Keep tension moderate to prevent the center from puckering; if your center curls, block and steam before continuing to petals.
Round 5 :
(3 sc, inc) x 8 (40)
Round 6 :
(4 sc, inc) x 8 (48)
Info :
Change to orange yarn at the end of this round. Fasten off black tail or carry inside if you prefer; for a clean center cut and weave in the black tail later. Use a slip stitch to join orange securely and continue.
Round 7 :
Join orange. 1 sc in each st around (48)
Round 8 :
(4 sc, inc) x 8 (56)
Round 9 :
1 sc in each st (56)
Info :
Round 9 creates a stable base for petals. We will create 14 petals spaced evenly—56 sts divided by 14 = 4 stitches per petal repeat. Place a stitch marker at the first petal foundation stitch for reference.
Round 10 :
*Ch 3, sk next 3 sts, sc in next st* Repeat from * to * around—14 ch-3 spaces (14)
Info :
Each ch-3 space will become a petal. Keep chains loose enough to work petals easily but not so loose that gaps look sloppy.
Round 11 :
In each ch-3 space: (ch1, puff, ch1, sl st in same space) x 14 to form petal centres—work as: yarn over, insert hook, pull up loop, yarn over insert hook again and pull up loop (repeat 3 times total), yarn over & pull through all loops, ch1 to close puff; ch1, sl st to anchor (14 puff petals)
Round 12 :
Slip to first petal base. *Ch 1, (3 dc, ch 2, 3 dc) in top of puff (i.e., grouped around ch1 above puff), sl st into next sc between petals* Repeat around to form full petals; join with sl st (14 large petals)
Info :
When making the petal shells, work into the ch1 anchor just above the puff to keep petals upright. Block petals slightly outward for fuller look.
Round 13 :
1 sc in each st across the scalloped petal bases around the back of petals (work through back loops if you want petals to sit higher) (approx 84 sc depending on spacing)
Info :
Count stitches after this round: you should have increased stitch count from petal creation; if your count differs by a small amount (±4) the motif will still join provided it's blocked and evenly spaced. Aim for roughly 84 sts for this round.
Round 14 :
Ch 5, *sk 2 sc, sc in next sc, ch5* Repeat around forming 14 chain-5 loops to frame petals—adjust final join to match first loop (14 ch-5 loops)
Round 15 :
In each ch-5 loop: (2 tr, ch2, 2 tr), sl st into next sc between loops—this creates tall arches around petals (14 arches)
Info :
These arches will be the main points for lace joining; count carefully to ensure 14 arches evenly spaced. Pin and block motif now to a 10-11" diameter round (approx), ensuring petals are shaped and centers are flat.
Round 16 :
Switch to black yarn. In each arch: ch3, 3 dc cluster centered over arch, ch3, sl st into center of next arch—work to create a scalloped black framing (14 clusters; stitch count variable)
Round 17 :
Between each cluster make 6-ch mesh: *ch6, sc in space between clusters* Repeat to form a connecting mesh around motif. This prepares the large motif to be joined with lace panels (approx 14 ch-6 meshes)
Info :
After Round 17 your motif outer circumference should be an open mesh of chain spaces; these will be used later for joining motifs with the lace connector rounds. Make sure each ch-6 space is consistent in size so joins look even.
Round 18 :
1 sc in each sc around where applicable and work short decorative picots on every other dc of the clusters: *sc in next st, (ch3, sl st in 3rd ch back) on next st* Repeat around to add delicate points (stitch count variable)
Round 19 :
Fasten off and weave in ends. Block the motif flat, pinning each petal and outer mesh evenly. Make 3 identical large motifs.
— Small Flower Motif (Make 6) :
Round 1 :
With purple yarn, magic ring. 6 sc in ring (6)
Round 2 :
Inc in each st (12)
Round 3 :
(1 sc, inc) x 6 (18)
Info :
These small flowers will be clustered between large motifs. Keep centers compact; if you prefer a brighter little center use a 6-8 stitch popcorn in orange—do this before Round 4.
Round 4 :
Change to orange for a tiny centre seed (optional): sl st into next st, ch1, (3 sc) into same st, sl st into next st to create tiny raised center. If not using orange, skip to Round 5 with purple.
Round 5 :
Back to purple: *ch2, (3 dc in next sc), ch2, sl st into next sc* Repeat around to create 6 petals (6 small petals)
Round 6 :
1 sc around the base of petals to tidy edges (18 sc approx)
Round 7 :
Ch4 picot between petals: *sc in next st, ch4, sl st in 3rd ch from hook* Repeat around to add lacy picots (stitch count variable)
Round 8 :
Fasten off leaving long tail for joining to lace connector. Make 6 small flowers. Block flat.
Info :
Small flowers can be sewn or crocheted onto lace panels; leaving long tails will make sewing easier. Space them out evenly between large motifs as shown in the photo (two small clusters between each large flower).
— Lace Connector Panel (Make 2 identical long panels to join motifs) :
Info :
The photo shows two long side panels connecting three large motifs vertically. Each panel is worked as a repetition of diamond mesh and open netting. Work these panels flat; they will be joined to the arches/chain spaces created in Round 17 of the large motifs.
Round 1 :
With black yarn, ch 44 (or adjust to match motif spacing after blocking). Sc in 2nd ch from hook and in each ch across (43 sc)
Round 2 :
Ch5 (counts as tr+ch2), turn. *Sk 1 sc, tr in next sc, ch2* Repeat across to create tall posts separated by chain-2 nets; end with tr in final sc. Turn (approx 21 tr posts and 20 ch2 spaces)
Round 3 :
Ch1, sc in top of each tr and sc in each ch2 space (approx 43 sc)
Round 4 :
*Ch7, sc in 4th sc across (creating large loops alternating), repeat across to create long diamond loops* Approx 6-7 large loops depending on panel length
Info :
This is the base mesh. You will work a sequence of rounds to build repeating diamond units sized to fit between large motifs. Adjust the number of diamond repeats so that the panel length equals the distance between motifs' joining edges.
Round 5 :
Into each large loop: (3 dc, ch3, 3 dc), sl st to next anchor (this creates a diamond shell)
Round 6 :
Ch4, *sk 2 dc, sc in ch3 center of diamond, ch4* Repeat across forming chain arches between diamond shells
Round 7 :
Sc across anchors, working 2 sc in ch4 arches to stabilize (stitch count variable; anchor count should match external motif arches)
Round 8 :
*Form smaller diamond meshes by working ch3 and sc sequences between the tall posts to form a lattice* Repeat across to create netting texture (stitch count variable)
Info :
Work the lace panel until its length matches the distance between the outer arches of the first and second large motifs when all are blocked. You will make two panels of identical length to place between the three motifs (one between motif 1 & 2, the other between motif 2 & 3).
Round 9-18 :
Repeat Rounds 4-8 sequence to build panel length, working neat, consistent chain spaces and diamond shells. Each 5-round repeat adds a measurable length—count repeats as needed to reach desired spacing. (Work approx 10 repeats to reach panel length for a runner totalling ~34-38" long depending on yarn and gauge)
Round 19 :
Once length matches, work 1 sc around entire panel edge to tidy and make a sturdy join surface (edge sc approx equals previous anchor stitch count)
Round 20 :
Make decorative corner points along the long edge to match the pointed scallops of the finished runner: *ch6, sc in 3rd of next anchor, sl st in next edge stitch* Repeat along both sides every set number of anchors to create triangular points (stitch count variable)
Info :
Make two identical panels and block them flat to the same dimensions. The panels should be slightly narrower than the diameter of the large motifs so that when joined they create the open netting framing seen in the photo.
— Joining Motifs to Panels :
Info :
Lay out motifs and panels on blocking board in final arrangement: large motif at top, then panel, then large motif, then panel, then large motif. Each large motif has 14 chain-6 spaces (Round 17) which will correspond to anchoring points on panel arches. Use blocking pins to locate precise alignment points before sewing.
Round 1 :
With black yarn and yarn needle, whip stitch motif ch-6 loops to panel ch-? anchors—match one motif arch to one panel diamond centre. Work from the back to keep visible surface smooth—use a slip-stitch join for a neater crochet join if you prefer (sew through chain spaces only)
Info :
Sew only at chain spaces and arch centers; avoid pulling too tightly which will deform petals. Use matching black yarn thread and make short, evenly spaced stitches. Join one side of motif to panel, then flip and join the opposite side to secure flatness.
Round 2 :
After joining the first motif and panel, attach the second panel to the opposite side arch sequence and join second & third motifs following the same procedure. Leave small gaps intentionally to create openwork similar to the photograph.
Info :
Sew small purple flowers onto the panel between motifs: position two mini flowers between each large motif pair—pin in place and sew through the flower base and panel chain mesh with a long tail, knot on back and weave in securely.
— Border and Final Edging :
Round 1 :
With black yarn, pick up stitches around entire assembled runner: work sc evenly around all outer edge points (estimate 200-260 sc depending on runner width and blocking). Place 3 sc in each triangular point to support the tip.
Round 2 :
*Ch3, sk 1 sc, sc in next sc* around to create small mesh arches across edge—adjust number to make balanced scallops (stitch count variable)
Round 3 :
In each ch3 loop: (2 dc, ch2, 2 dc), sl st into next anchor to create tall pointed shells—work at each triangular point to form a dramatic zig-zag edge
Info :
These pointed shells produce the star-shaped points on each side and end of the runner. When you reach the long sides, space them equidistantly; when at ends, concentrate points to mirror the photo's sharp diamond tips.
Round 4 :
Ch1, sc around each shell base and add small picot (ch3, sl st into 3rd ch) every other shell for delicate accents (stitch count variable)
Round 5 :
Optional: Work 1 round of slip stitches around entire edge pulling slightly to flatten any curls (this tightens the edge and sharpens points). Fasten off and weave ends on reverse side.
Info :
Block the assembled runner flat, pinning each pointed scallop and petal outward for a crisp finish. Light spray starch can be used sparingly for a more pronounced lace effect; test on a scrap first.
— Optional Decorative Details :
Info :
Add tiny French knots or embroidered dots in the small flower centers with orange thread to echo the larger petals. If you prefer a more subtle look, embroider a small ring around each large motif center with black chain stitch to emphasize the centre ring.
— Finishing :
Round 1 :
Weave in all loose ends with yarn needle, working the tails into multiple stitches inside the back of motifs to secure. Trim close but not flush to avoid unraveling.
Round 2 :
Blocking: pin runner to desired dimensions, smooth petals and flatten mesh. Use steam or wet-block method per yarn instructions. Allow to dry fully before unpinning.
Info :
Final trim: inspect for any pulled loops or gaps in joins and reinforce with small back stitches as needed. Store flat to maintain shape or lightly press with an iron on a low setting with a damp cloth between iron and crochet if yarn care allows.
This Halloween floral runner is both dramatic and elegant—perfect for a seasonal centerpiece or mantel. The bright orange petals and purple accents pop against the deep black lace, creating a bold statement piece you’ll be proud to display. Each motif and lace panel comes together to form a stunning handcrafted heirloom you can customize in colour and length. Enjoy the meditative process of stitching and blocking—then celebrate your finished runner at your next festive gathering! 🎃🖤