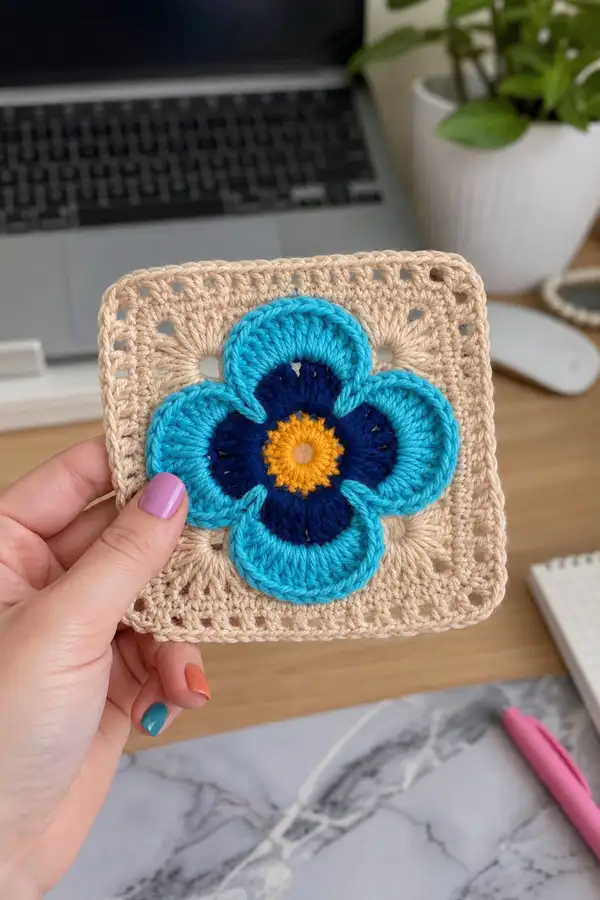
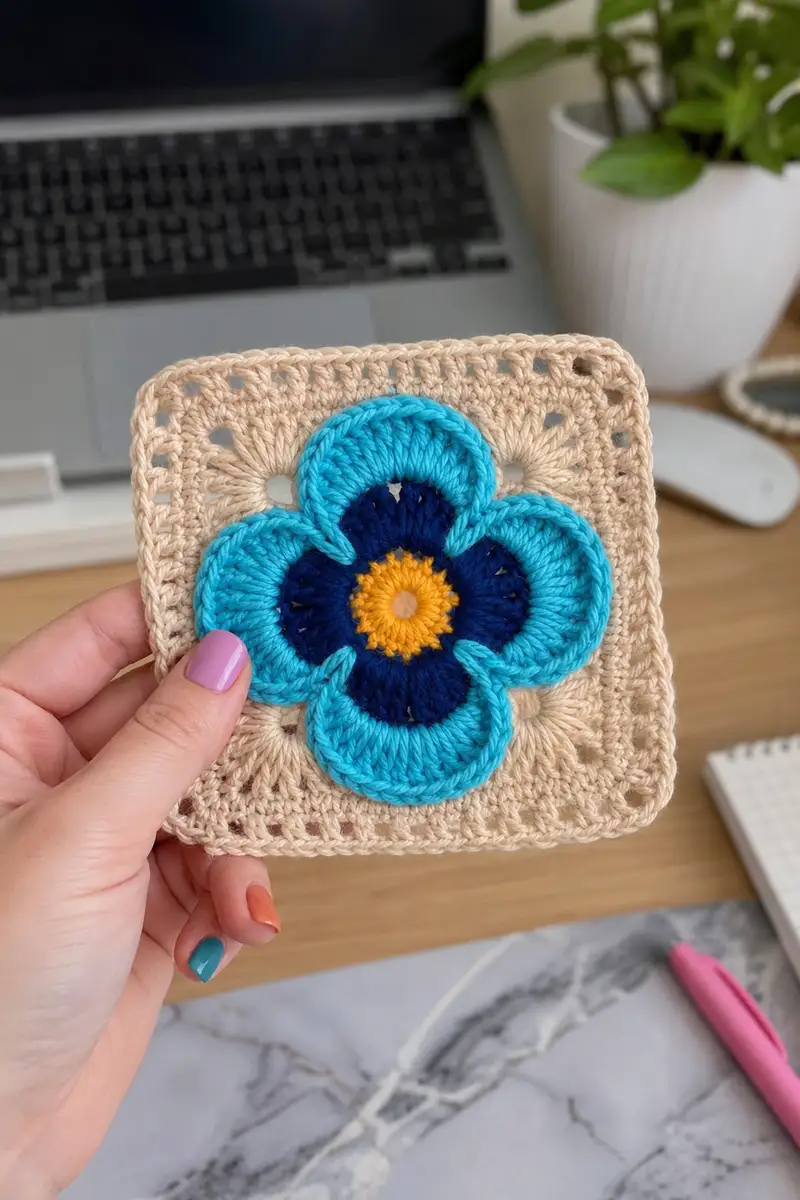
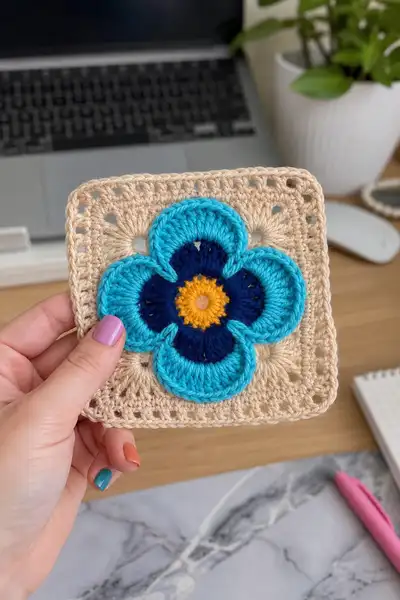
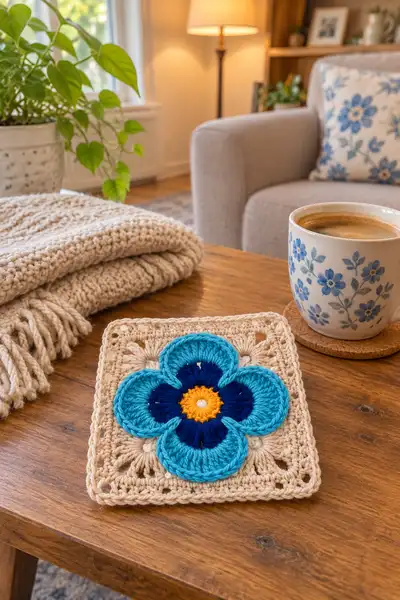
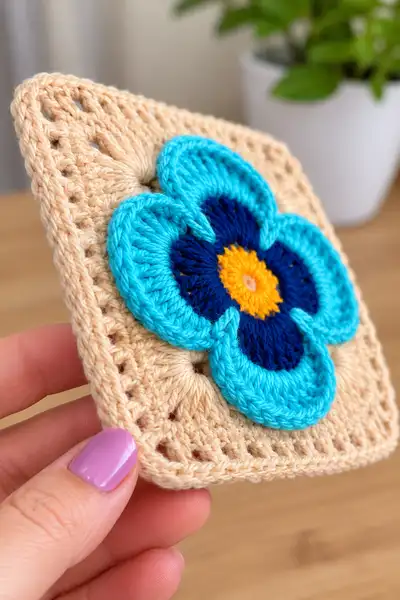
A charming 3D blue flower granny square that layers a bright sunny center, deep navy inner petals and puffed turquoise outer petals onto a lacy neutral square. This pattern recreates the bold layered flower shown in the photos with a textured raised petal effect and a neat neutral border — perfect for blankets, cushions or statements in home decor. Detailed, step-by-step instructions make it easy to follow the construction and replicate the exact layered look.
Progress Tracker
0% Complete
— Notes :
Info :
Use US crochet terms. Work tightly on flower rounds so the petals sit proud of the square. This pattern is written for a single 12cm (approx) square using worsted weight yarn and a 3.5mm hook — gauge will vary by yarn and hook. Each round’s total stitch count is shown in parentheses. Keep a stitch marker at the first stitch of each round.
— Center (Sunny Yellow) :
Round 1 :
6 sc in magic ring (6)
Round 3 :
(1 sc, 1 inc) x 6 (18)
Round 4 :
(2 sc, 1 inc) x 6 (24)
Info :
At the end of Round 4, pull the center closed neatly but not tight; you will be able to stitch into the round for the navy inner petals. Fasten off yellow after Round 4 leaving a 20 cm tail for weaving if you want to sew petals directly to the center.
— Inner Petal Foundation (Navy) :
Info :
Join navy yarn with a sl st into any stitch of Round 4, or use an invisible join as preferred. The navy inner shaping is worked in the 24-st foundation creating four lobes spaced every 6 stitches (24/4 = 6), then expanded to a 48-st working round so that petals can be shaped across more stitches.
Round 5 :
Join navy; 1 sc in each st around (24)
Round 6 :
(2 sc, 1 inc) x 6 (30)
Round 7 :
(3 sc, 1 inc) x 6 (36)
Round 8 :
(4 sc, 1 inc) x 6 (42)
Round 9 :
(5 sc, 1 inc) x 6 (48)
Info :
You now have 48 sts and will work four inner-lobe petal bases into four even segments of 12 stitches each (48/4 = 12). Place markers at the beginning of each 12-st segment to help when forming the lobes.
Round 10 :
1 sc in each st (48)
Round 11 :
*In marker 1 segment: ch1, skip next st, (dc3 in next 3 sts — one DC in each of the next 3 sts), ch1, skip next st; then 1 sc in the following 6 sts to finish the segment; rep from * for each 12-st segment (48)
Info :
Round 11 creates little navy arcs that will be worked up into deeper navy lobes. Work the dc groups loosely but still neat — they'll be the base for the inner petal ridges.
Round 12 :
1 sc in each st (48)
Round 13 :
*Work into the dc3 group of the first segment: (ch2, tr, tr, ch2) in the three-st dc group (this creates a small raised fan), then sc across the next 8 sts of the segment; rep from * for each segment (48)
Round 14 :
1 sc in each st (48)
Info :
Now the navy inner lobes are visible as small raised fans in each quadrant. We will deepen their height slightly using front post stitches in the next rounds to help the turquoise petals sit above them.
Round 15 :
*Fpdc around the center dc of the fan in segment (counts as 3 fpdc worked over the fan area), then sc in remaining sts of segment; rep x4 (48)
Round 16 :
1 sc in each st (48)
Info :
At this stage the inner navy lobes are shallow cups. Fasten off navy leaving a long tail for weaving or sewing to the yellow center if desired. Ensure the navy lobes are evenly spaced and all four are similar height before continuing with outer petals.
— Outer Petal Construction (Turquoise) :
Info :
Join turquoise yarn at the front of any navy lobe base. Each outer petal is worked over a 12-st segment as a multi-round layered petal. You will build a puffed outer petal made of clusters and post stitches so it sits proud off the square.
Round 17 :
Join turquoise with sl st to the first stitch of a 12-st segment; ch2 (counts as hdc), work 1 hdc in the next 2 sts, then work 3 dc cluster (cluster = yo, insert in next st, draw up loop, yo, draw through 2 loops twice, repeat in next 2 sts then draw through all loops together) over the next 3 sts, 1 hdc in each of next 2 sts, ch2 and slip to the next st (this completes petal base for the first segment). Continue around making the same sequence in each 12-st segment (48)
Round 18 :
1 sc in each st (48)
Info :
Round 17 created base clusters for the petal; Round 18 evens them. Keep the petal bases centered on their segments — use your markers to verify placement.
Round 19 :
*Into the center of the cluster of the petal base: (ch1, 5 dc in same st to form a tall fan) then slip to the base edge and sc in next 9 sts of the segment; rep x4 (48)
Round 20 :
1 sc in each st (48)
Round 21 :
*Work (fpdc around the group of 5 dc fan, then bpdc behind for a shell ridge) across the fan to create height; sc in remaining sts of the segment; rep x4 (48)
Round 22 :
1 sc in each st (48)
Info :
The fpdc/bpdc combination pushes the petal forward and creates a defined ridge. If this is your first time using post stitches, practice on a scrap to see the raised effect.
Round 23 :
*Ch2 at the base of the fan, then (dc, dc, dc, dc) in each of the five top loops of the petal fan (5 dc = a rounded outer petal top), sl st into the next st of the grounding round, then sc across to finish the segment; rep x4 (48)
Round 24 :
1 sc in each st (48)
Round 25 :
*Work (2 dc, ch1, 2 dc) around the outermost 5-dc group to create a slight scalloped edge on the petal, finishing with sc across the remainder of the segment; rep x4 (48)
Round 26 :
1 sc in each st (48)
Info :
If your petals look slightly uneven, adjust tension — tighter petals will curl inward slightly, looser petals will lay flatter. You can block lightly, pinning the petal edge outwards to open them slightly.
Round 27 :
*Work 1 sc in next 3 sts, then (hdc, dc, hdc) across the center top of the petal (this creates a mid-ridge), then 1 sc in each of the remaining 6 sts of the segment; rep x4 (48)
Round 28 :
1 sc in each st (48)
Round 29 :
*Work a rope-like edging around the petal top by (sl st in next st, sc in next, hdc in next, dc in next, hdc in next, sc in next) across the 12-st segment to define petal edge; rep x4 (48)
Round 30 :
1 sc in each st (48)
Info :
You now have fully formed four turquoise outer petals sitting over the navy inner lobes. Fasten off turquoise leaving long tail if you want to secure petals down further through center or to square base later.
— Petal Outline & Raised Ridge :
Round 31 :
Join turquoise at the base of any petal and work 1 sc in each st around the square (48)
Round 32 :
*In front loops only around the petal base stitch area (BLO), work 1 sc in each st for 12 sts per segment to create a raised rim that visually outlines each petal; rep x4 (48)
Round 33 :
1 sc in each st (48)
Info :
Using BLO here brings a neat raised outline on the petal, creating the slightly ribbed edging seen in the sample photo. If the ridge is not obvious, repeat one additional round of BLO sc only across the petal tops (optional).
Round 34 :
1 sc in each st (48)
Round 35 :
1 sc in each st (48)
Info :
Fasten off turquoise and weave tails to the back neatly. The front should show a raised bright turquoise petal with navy inner accents and a yellow center.
— Transition to Neutral Square Base :
Info :
We will convert the circular motif into a square using neutral beige. The first neutral round will anchor the petals by working into the existing ground stitches and chain spaces to create four corner points. Place markers at four equally spaced points (directly between each petal) to represent corners.
Round 36 :
Join neutral yarn in any stitch between two petals; ch3 (counts as first dc), dc in next 4 sts, ch2, dc in next 5 sts, 1 dc in each of the next 10 sts to reach across to the next corner marker — for accuracy we will convert to a repeat pattern next round (48)
Info :
Round 36 is setting up placement; the count remains 48 but the stitches are positioned for a corner increase next round. If you want a larger square later you will add rounds of granny-style clusters — instructions follow.
Round 37 :
(14 sc, 1 inc) x 4 (60)
Info :
This round increases the total to 60 to give room for forming true square sides. Place markers at the 15th stitch of each quarter to help mark corners for the next round.
Round 38 :
1 sc in each st (60)
Round 39 :
*Work a corner set at markers: (2 dc, ch2, 2 dc) into the corner stitch, then dc in each of the next 13 sts between corners; rep x4 (60)
Info :
Round 39 creates clear corner chain-2 spaces which will read as square corners. The total stitch count remains 60 since the corner set replaces existing stitches in the corner region.
Round 40 :
1 sc in each st (60)
Round 41 :
*(dc in next 5 sts, ch1, skip 1 st) across to the corner, (2 dc, ch2, 2 dc) in corner sp; rep x4 (60)
Round 42 :
1 sc in each st (60)
Info :
At this stage the square is forming; the petals should still be centered on the front face. If the petals ride up or shift, weave a few of the petal tails through the neutral round to anchor them invisibly from the back.
Round 43 :
*Dc cluster shell into corner ch-2: (3 dc, ch2, 3 dc) in corner, dc in each st to next corner; rep x4 (68)
Info :
Round 43 increases to 68 stitches because each corner cluster adds additional dc relative to previous plain dc corners; this creates a broader square side and more texture.
Round 44 :
1 sc in each st (68)
Round 45 :
*Ch3 (counts as dc), 2 dc in next st, skip next st, (dc in next 6 sts), 3 dc in corner ch-2, (dc in next 6 sts), skip 1 st; rep around (68)
Round 46 :
1 sc in each st (68)
Info :
The square should now read very clearly. If you are making a blanket, make sure the square measures consistently across multiple motifs and adjust hook size if necessary (smaller hook = smaller square, tighter gauge).
Round 47 :
*Work a decorative openwork band: (ch3, skip 2 sts, sc in next st) across the side until corner, in corner work (sc, ch2, sc), rep around (68)
Round 48 :
1 sc in each st (68)
Round 49 :
*Work (hdc, dc, hdc) across each side in the next 12 sts to create a subtle raised stripe, then (sc, ch2, sc) in corner chain spaces; rep x4 (68)
Round 50 :
1 sc in each st (68)
Info :
If you prefer a plainer square, skip rounds 47–49 and move to the final edging. These decorative rounds add texture and dimension and echo the petals visually.
Round 51 :
*In BLO of this round, 1 sc in each st around (68)
Round 52 :
1 sc in each st (68)
Round 53 :
*(sc, ch1, skip 1) across side to create a lacy edge, in corner (sc, ch3, sc); rep x4 (68)
Round 54 :
1 sc in each st (68)
Info :
Rounds 51–54 stabilize the square and create an even edge for the final finishing rounds. Count carefully — each round should remain at 68 stitches unless you intentionally add increases.
Round 55 :
*Sl st into next st, crab stitch (reverse sc) across side for a twisted cord look, work 3 crab sts in corner chain; rep x4 (68)
Round 56 :
1 sc in each st across front-facing loops for a neat frame (68)
Round 57 :
*Work a picot in every 6th stitch as a decorative outer border: (sc in 5 sts, picot — ch3, sl st into top of ch3) around corners picot in center sc of corner cluster; rep (68)
Round 58 :
1 sc in each st (68)
Info :
If you plan to make a full blanket, do not fasten off the squares after Round 58; leave long tails for join-as-you-go or whip-stitch joins. Otherwise, fasten off and weave ends securely.
— Final Finishing Rounds (Optional Variation Edges) :
Round 59 :
Optional variation A: Round of shell edging — *skip next 2 sts, (5 dc) in next st, skip next 2 sts, sc in next st; rep around (68)
Round 60 :
1 sc in each st (68)
Round 61 :
Optional variation B: Scallop row — *(sc, ch2, sc) in every 6th stitch to create soft scallops; rep around (68)
Round 62 :
1 sc in each st (68)
Info :
Choose one outer border (crab stitch, picot, shell or scallop) for every square to maintain consistency across a blanket. The example photos show a fairly simple framed edge — crab stitch then one round of sc — to keep the focus on the flower.
Round 63 :
Crab stitch final: sl st to next st, reverse sc around whole square for a twisted cord finish (68)
Round 64 :
Fasten off and weave in all ends neatly to the back of the work. Use tail ends from petals to anchor any lifted petal bases to the neutral rounds by sewing through the square back to front behind the petal base (no additional visible stitches on front).
Info :
Weave ends through 3–4 stitches and trim close. If making a blanket, block each square lightly and join using slip-stitch join, whip-stitch, or join-as-you-go method described below.
— Alternate Small Detail Rounds (extra texture) :
Round 65 :
If you want extra raised veins on petals, using a contrasting turquoise shade, embroider chain stitch veins from petal base to tip on each petal using tapestry needle (no change in stitch count)
Info :
Embroidered veins add handcrafted charm and are optional. Use matching yarn to keep the look subtle or a slightly darker turquoise to emphasize texture.
Round 66 :
Optional: Add small surface slip stitches around the navy inner lobes to create a slight looped edge (no change in overall stitches)
Round 67 :
Optional: Tack the outer petal tips down with 2–3 invisible stitches that go through the neutral round beneath, this anchors petals for laundering (no change in stitch count)
Info :
These optional details help the square survive use and washing — especially useful for blankets or cushions that will be handled frequently.
— Joining Multiple Squares into a Blanket (if making blanket) :
Round 68 :
Join squares using slip-stitch join (as pictured): With right sides facing, join neutral yarn into any corner of square A and sl st into corresponding corner on square B, sl st along side through both loops across to join neat seam; continue joining squares row by row
Round 69 :
Alternate join option B: mattress stitch/ whip stitch using tapestry needle for an invisible seam using the neutral tail (no change in square exterior)
Info :
When joining across large sections, check petal alignment so flowers sit consistently on the blanket surface — place squares in the exact orientation before joining.
Round 70 :
After joining entire blanket, work one final continuous border around blanket edge in neutral: 2 rounds of sc, 1 round of crab stitch for the outer border to mirror sample look
Info :
For a bedspread as pictured, a lightweight cotton/aran yarn will produce a slightly looser but drapey blanket. A blocking step after assembly will square up overall appearance and flatten join seams.
— Blocking & Care :
Info :
Block each square gently: pin to shape on foam board, steam lightly or wet block depending on yarn fiber. Do not over-stretch petals. Wash by hand or on gentle cycle in a laundry bag if yarn label permits. Dry flat.
This bright layered flower granny square is such a joyful make—classic in structure but fun in color and texture. Each square comes together quickly and the raised petals add an eye-catching 3D effect. Whether you stitch a few for coasters or dozens for a bedspread, you'll love the pop of turquoise and navy against the warm neutral ground. 🧶💙🌼