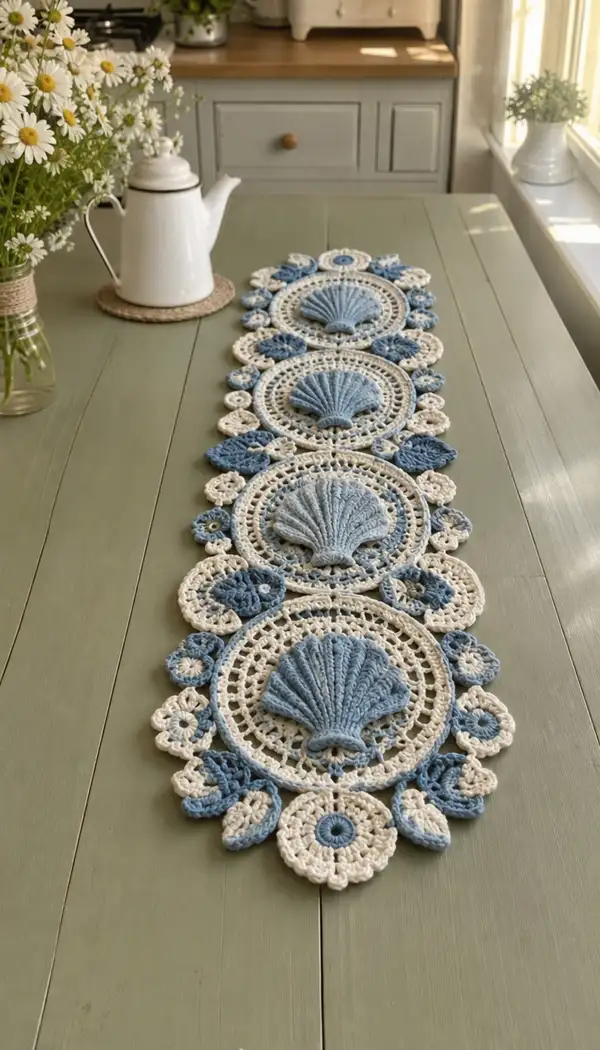
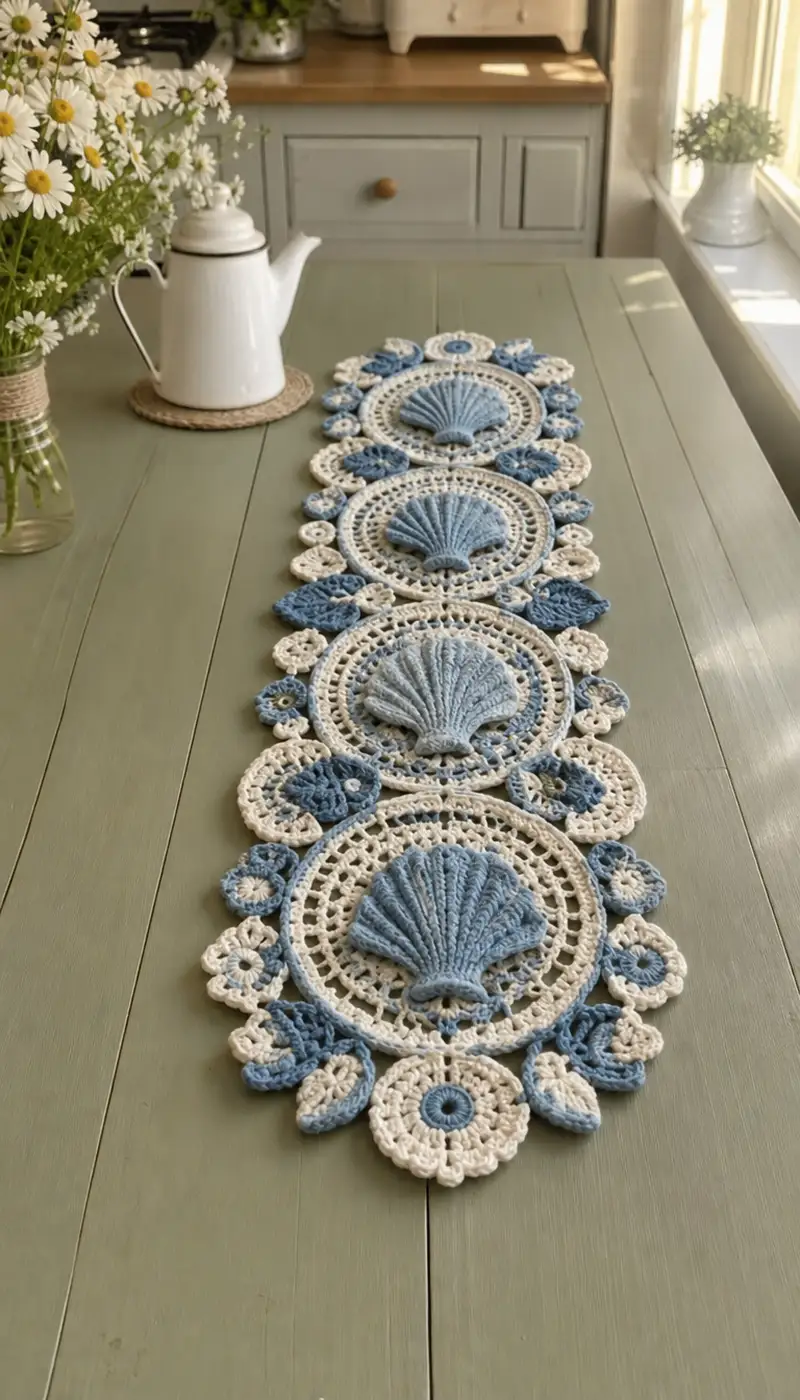
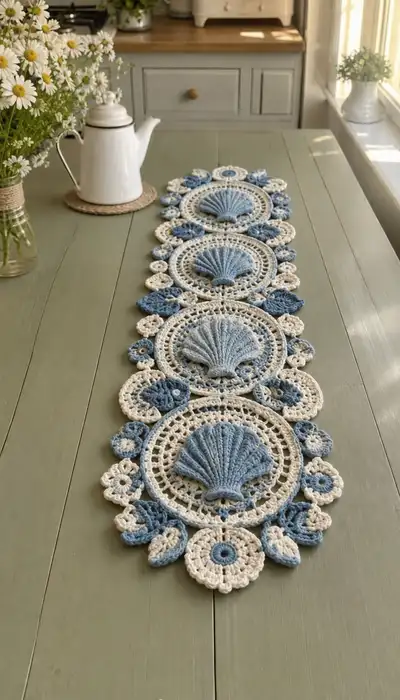
Create a coastal-inspired table runner featuring four large lace medallions each crowned with a raised 3D shell applique, joined by delicate floral and leaf motifs. Soft blue shells contrast with a warm cream lace to form a vintage, airy centerpiece that drapes beautifully along a dining table. This pattern includes step-by-step instructions for all motifs, join-as-you-go tips, and finishing techniques to recreate the textured, layered look seen in the photo. Perfect for adding a seaside touch to your home decor.
Progress Tracker
0% Complete
— Overview and Notes :
Info :
This pattern is modular: you will make 4 large medallion circles with a raised 3D shell applique in the center, plus multiple small round flower motifs and leaf motifs to fill the scalloped border. You can make fewer or more medallions to fit your table. I recommend working one full medallion and its surrounding small motifs as a prototype, blocking it, and using it as a reference for placement and tension.
Info :
Use a slightly smaller hook than recommended on your yarn label to keep stitches firm and to prevent the fiberfill showing through in open lace areas. Keep stitch markers handy to mark round starts and special placement points for join-as-you-go assembly.
— Shell Applique (Make 4) :
Info :
The raised 3D shell is worked flat in rows and then gathered up into a fan. We use front-post double crochets to create pronounced ribs. These instructions produce a shell about 11-12cm wide when finished using worsted cotton and 4.0mm hook. Adjust hook for size variation.
Round 1 :
Ch 6, join with sl st to form a small ring, ch 2 (counts as first hdc). Work 9 hdc into the ring. Join with sl st to top of ch2. (10 hdc)
Round 2 :
Ch 2, hdc in same st, 2 hdc in each st around. Join with sl st to top of ch2. (20 hdc)
Round 3 :
Ch 2, hdc in same st, (hdc in next st, 2 hdc in next) x 9. Join. (30 hdc)
Info :
We will now work short rows to create a fan shape. The shell is shaped by working rows across the foundation, turning as you go. Keep edges neat with ch 2 at the start of each row when working hdc rows.
Row 1 :
Ch 2, hdc in first 15 sts only, turn. (15)
Row 2 :
Ch 2, hdc across 15 sts, turn. (15)
Row 3 :
Ch 2, hdc in first 13 sts, turn. (13)
Row 4 :
Ch 2, hdc across 13 sts, turn. (13)
Row 5 :
Ch 2, hdc in first 11 sts, turn. (11)
Row 6 :
Ch 2, hdc across 11 sts, turn. (11)
Row 7 :
Ch 2, hdc in first 9 sts, turn. (9)
Row 8 :
Ch 2, hdc across 9 sts, turn. (9)
Row 9 :
Ch 2, hdc in first 7 sts, turn. (7)
Row 10 :
Ch 2, hdc across 7 sts, turn. (7)
Row 11 :
Ch 2, hdc in first 5 sts, turn. (5)
Row 12 :
Ch 2, hdc across 5 sts, do not turn, chain 1 and sc evenly along one long straight edge down to the base of the fan, then continue sc across the opposite long edge to complete the outline around the fan, sl st to join. (Approx 28 sc around outer edge)
Info :
Work FPdc ribs: Into the fan body, we will create 8 raised ribs. Mark positions equalized across the fan top edge (approx every 3-4 sts depending on your count). You will work groups of FPdc that travel down into the base to sculpt the ribbed shell effect.
Round 13 :
Working from right to left across the top of fan: ch 2, *FPdc around the central post of clusters or into the stitch where the short rows meet; ch 1 between ribs; repeat for 7 more ribs.* Finish with sl st to join. (8 ribs total)
Round 14 :
Ch 2, working into the top loop of each rib: *FPdc 6 times in same rib base (create tall raised column), chain 1 between ribs; rep across.* Sl st to join. (8 columns)
Round 15 :
Ch 1, sc around entire shell edge in the round placing 2 sc in each base point to help flare the shell slightly. Join. (Approx 32 sc)
Info :
If you want a more sculpted shell, press lightly and add a tiny bit of polyester fill at the base between the two opening edges before finishing the final sc round. The filling should be minimal—enough to lift but not distort the lace behind.
Round 16 :
Optional decorative edge: *(ch 3, sl st into next st) x around* to create picot-like scalloping. Fasten off leaving a 20cm tail for sewing. Block the shell flat with the ribs shaped slightly forward.
— Large Circular Medallion (Make 4) :
Info :
Each medallion surrounds a central opening that will receive the shell applique on top. The circle is worked in rounds with a mixture of dc, chain spaces and decorative clusters to make an airy ring. The finished medallion measures about 18-20cm across depending on yarn and tension.
Round 1 :
Make a magic ring with Cream yarn. Ch 3 (counts as dc), work 11 dc into ring. Join with sl st to top of ch3. (12 dc)
Round 2 :
Ch 1, sc in same st, sc around (12 sc). Join. (12 sc)
Round 3 :
Ch 3, dc in same st, 2 dc in each st around. Join. (24 dc)
Round 4 :
Ch 3, (dc in next 2 sts, 2 dc in next st) x 6. Join. (30 dc)
Round 5 :
Ch 2, hdc in same st, (hdc in next 3 sts, 2 hdc in next st) x 6. Join. (36 hdc)
Info :
We will now create alternating openwork rounds to create airy lace. Keep an even tension to preserve round shape. Use stitch markers to mark every 12th stitch to keep orientation.
Round 6 :
Ch 4 (counts as dc + ch1), *skip next st, dc in next st, ch 1* around. Join to 3rd ch of starting ch4. (Approx 18 dc & 18 ch-1 spaces)
Round 7 :
Sl st into first ch-1 space, ch 3, 2 dc in same space, ch 2, sc in next ch-1 space, ch 2, (3 dc, ch 2, sc in next ch-1 space) x around. Join. (12 clusters)
Round 8 :
Ch 1, sc in same st, *ch 6, sc in top of next 3-dc cluster (between clusters)* Repeat around forming tall loops. Join. (12 loops)
Info :
Round 9 will create a denser ring to hold the shell base. If your shell base is slightly larger, add 1-2 sts to accommodate the shell insertion. Test-fit the shell before final joining.
Round 9 :
Into each ch-6 loop: sl st, ch 3, 7 dc, ch 3, sl st in same loop (create petal ring). Join. (12 petals)
Round 10 :
Ch 2, hdc in same st, hdc in next 13 sts across each petal top; when you reach the seam between petals, work (2 hdc, ch 2, 2 hdc) to form small arch spacers. Continue around. Join. (Approx 72 hdc and 12 arches)
Round 11 :
Ch 3, dc in next 2 sts, *ch 2, sk 2, dc in next 3* around, adjust at the arches to maintain spacing. Join. (Approx 54 dc)
Info :
Round 12 forms the inner circular frame that the shell will lie on. We will create a ring of slip-stitch loops for a secure join of the shell later.
Round 12 :
Ch 1, sc in each st across, placing 3 sc evenly across each petal and 2 sc in each arch. Join. (Approx 84 sc)
Round 13 :
Ch 4, FPdc around the post of the third stitch in each petal to create a subtle raised ridge around the interior. Between each FPdc sequence, ch 1 to maintain spacing. Join. (12 FPdc groups)
Round 14 :
Ch 1, sc across each st and into each ch-1 spacer to tidy the interior (84 sc). Join. This completes the inner frame. Fasten off. Leave long tail for assembling shell — about 25cm.
Info :
Block the medallion flat. Center the shell over the inner open frame; use the tail to whip-stitch the shell base to the medallion so it sits on top as a raised applique. See assembly section for exact placement and placement marks (we will center the shell with its base tucked under the inner ch-arches of Round 9).
— Small Round Flower Motif (Make 12 or more) :
Info :
These small round motifs create the lace scallop around each large medallion. They are simple and quick to work and will be made in cream with some blue accent motifs for variety. Each small flower is about 3.5-4cm across.
Round 1 :
Make mr, ch 2, work 10 hdc into ring. Join. (10 hdc)
Round 2 :
Ch 1, sc in same st, *ch 3, sk 1, sc in next* around to form 5 ch-3 loops. Join. (5 loops)
Round 3 :
In each ch-3 loop: (sc, hdc, 3 dc, hdc, sc) to make 5 tiny petals. Join. (5 petals)
Round 4 :
Ch 1, sc around petals placing 3 sc in each petal tip to create fullness. Join. Fasten off leaving a 15-20cm tail for sewing. (Approx 30 sc)
Info :
Make several of these in cream and half in blue to mimic the pattern in the photo. These will be positioned in the gaps between larger petals of the medallion and at medallion junctions to create a scalloped look.
— Leaf Motif (Make 8-12) :
Info :
Leaf motifs are worked in blue and cream pairing to create the layered teardrop shapes seen between medallions. These are worked flat in rows and edged with sc to create a raised profile.
Row 1 :
Ch 6. Row begin: sc in 2nd ch from hook, hdc, dc, hdc, sc in last ch. Turn. (5 sts)
Row 2 :
Ch 1, sc in first st, hdc in next, dc in center, hdc in next, sc in last. Turn. (5)
Row 3 :
Ch 1, sc in first st, (hdc, dc, hdc) in next three center stitches to slightly lengthen, sc in last. Fasten off and fold leaf along center; sc through both layers along one long edge to create raised ridge shape. (5)
Info :
Make leaves in pairs: one in cream and one slightly smaller in blue stacked on top to mimic the layered look. Use a small amount of whip-stitch to secure the small blue leaf centered on the cream leaf before attaching to medallion.
— Oval Connector Motif (Half-Moon Shapes) :
Info :
These small ovals fill spaces between medallions and help create an elongated runner shape. They are worked in rounds with an oval increase method.
Round 1 :
Ch 8, sc in 2nd ch from hook across (6 sc), 3 sc in last ch, working along opposite side of foundation chain sc in each of the remaining 6 ch, 2 sc in inner starting ch to finish oval. Join. (18 sc)
Round 2 :
Ch 1, sc around placing 3 sc in each rounded end to preserve oval, and 1 sc along straights. Join. (Approx 24 sc)
Round 3 :
Ch 2, hdc around for a smoother raised surface, fasten off with tail for sewing. (Approx 24 hdc)
Info :
Use these connectors in pairs and alternate colors for rhythm. They help shift the eye along the runner and give graceful curves to the overall silhouette.
— Larger Decorative Petal Motif (Make 8) :
Info :
These larger petal motifs are the rounded shapes adjacent to each medallion's border that alternate in blue and cream. They are constructed as small fan medallions worked in the round.
Round 1 :
mr, ch 3, 11 dc into ring, join. (12 dc)
Round 2 :
Ch 1, sc around (12 sc). Join. (12 sc)
Round 3 :
Ch 4, (3 dc in same st, ch 2, sl st into base of cluster) around to make 6 scalloped petals. Join. (6 petals)
Round 4 :
Ch 2, hdc around each petal top working 3 hdc in each petal top to create fullness; join and fasten off leaving long tail for sewing. (Approx 36 hdc)
Info :
Place these larger petals at cardinal positions around the medallion (top and bottom near the joins) to echo the photo layout. One petal cluster sits adjacent to another medallion or connector to create a continuous chain.
— Assembly Preparation and Layout :
Info :
Before joining, block all pieces. Lay the runner out on a large surface and arrange medallions in a straight line with roughly 3-4cm spacing between large medallions. Position small round flowers and leaves around edges to mimic the composition in the photograph—flowers sit at the small gaps while leaves tuck under petal points. Take a photo of your layout as a guide for sewing or join-as-you-go.
Info :
Decide whether to join motifs using join-as-you-go (JAYG) while working final rounds of motifs, or sew them together using tails. JAYG yields fewer visible seams and stronger joins for a table runner that will be handled often.
— Join-As-You-Go Method (Suggested for final round of medallions) :
Info :
We will demonstrate a join-as-you-go method when working Round 14-15 of the medallion: you will align the adjacent motif's final scallop and slip-stitch into its spacer to join. If you prefer sewing, use the long tails and mattress stitch to attach motifs after blocking.
Round 15 :
Working on Medallion B final round: ch 1, sc in next 4 sts, when you reach the position adjacent to Medallion A, insert hook into corresponding outer loop of Medallion A and sl st to join, then continue sc across Medallion B. Repeat at each contact point with neighboring motifs. Continue around and join final end of medallion to the first. Fasten off. (Final medallion remains approx 84 sc before joining)
Info :
Work slowly when you make these joins and use pins to keep the two motifs perfectly aligned. If working more than two medallions, attach each new medallion to the previously attached chain of motifs to avoid distortion of the runner line.
— Alternate Sewing Attachment (If not JAYG) :
Info :
Place medallions edge-to-edge and use a whip stitch or ladder stitch along the contact points, catching two loops from each motif per stitch for strength. Use the cream tail to make the seam less visible. Reinforce by stitching both on top and underside if runner will be used frequently.
— Final Decorative Edging (Worked after all motifs joined) :
Info :
With runner assembled and blocked, add a continuous lace edging around the entire outer edge—this unifies motifs and creates the continuous scalloped border in the photo. Work in cream for a clean frame, adding blue picots intermittently for rhythm.
Round 1 (Edging) :
With Cream yarn and working around the outer perimeter, sc evenly around the raw outer edges of the assembled runner. Work 2 sc in each deep curve and 1 sc on straighter edges to maintain shape. Join. (Count will vary—aim to keep stitches evenly spaced)
Round 2 (Edging) :
*Ch 4, sl st into 2nd ch from hook to create small loop (picot-like), ch 1, skip 2 sc, sc in next;* repeat around placing a small picot after each 3-4 stitches. Join and fasten off.
Info :
Optional: alternate cream picots with single blue shells or small blue round motifs to echo the blue throughout. Use the tail from each small motif to sew it into place at the edge.
— Finishing Touches and Blocking :
Info :
After joins are complete, wet-block or steam lightly. Pin each scallop and petal to shape. Shape the raised shell ribs so they curve outward slightly and dry completely. Trim and weave in all tails securely on the underside of the runner to keep the top face clean.
Round-like Finishing Step :
Steam lightly and press shells to shape. Use a yarn needle to tuck any slightly visible ends under a couple of loops, and secure with a knot on the underside only. Trim excess yarn.
Info :
Optional: if the runner will be on a table frequently used for cups, you can apply a very small amount of clear-drying fabric glue to the underside of shell bases to hold them flat. Test fabric glue on a scrap first to ensure it does not discolor yarn.
— Measurements, Yield and Customization :
Info :
The sample runner in the photo shows four medallions joined in a row and measures approximately 100-115cm long and 18-22cm wide depending on blocking and spacing. To lengthen, add additional medallions; to shorten, omit one. To create a placemat or doily instead, make a single medallion with surrounding petals and edging.
Info :
Color swaps: Reverse colors (blue medallion, cream shell) for a bolder look. Use two shades of blue for an ombre effect. For a beachier look, use natural cotton and sand-colors with bright teal shells.
— Troubleshooting and Tips :
Info :
Keep counting consistent across medallions by making the first medallion as your sample and using it to measure new motifs against. If a subsequent medallion is larger, either re-block it tighter or reduce hook size and re-make.
Info :
When whip-stitching shells to medallions, work small, even stitches and pull just enough to secure—over-tightening will pucker the lace. Leave a little give to allow the shell to sit naturally on the ring.
Info :
For a long-lasting runner, use mercerized cotton yarn which handles blocking and cleaning well. Always check washing instructions for your yarn type and hand-wash if uncertain.
Completing this Blue Shell and Cream Lace table runner is such a satisfying project—every shell, petal, and little flower comes together into a timeless coastal statement piece. Blocked and edged neatly, it will brighten a table and invite touch with its sculpted shells and airy lace. I hope you enjoyed the rhythmic repetition and the meditative joy of joining motifs as much as I did making the sample. 🧶🌊 Display it proudly or gift it to someone who loves seaside charm!