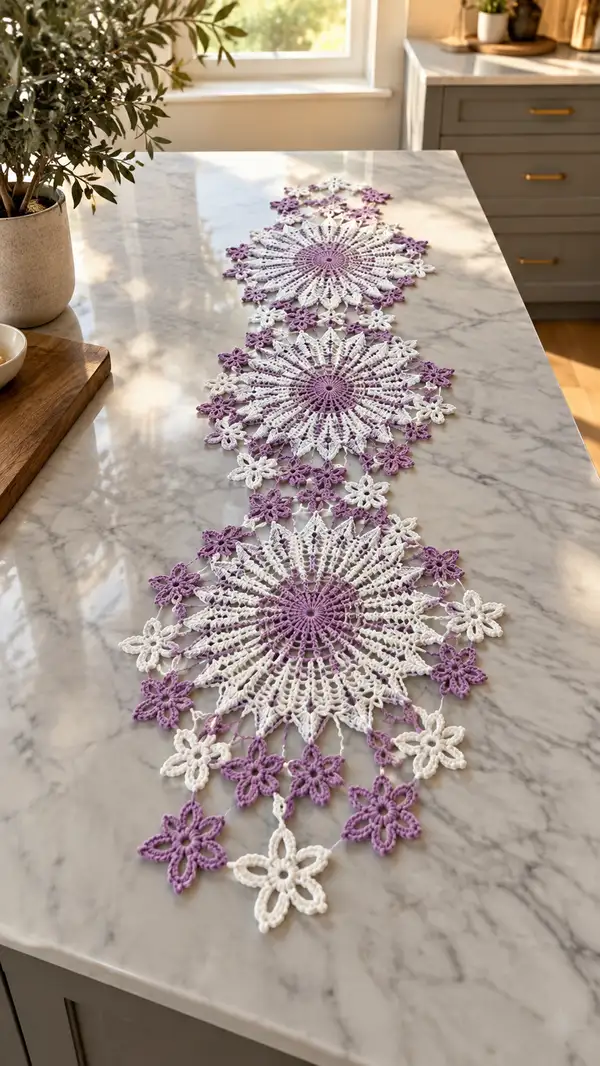
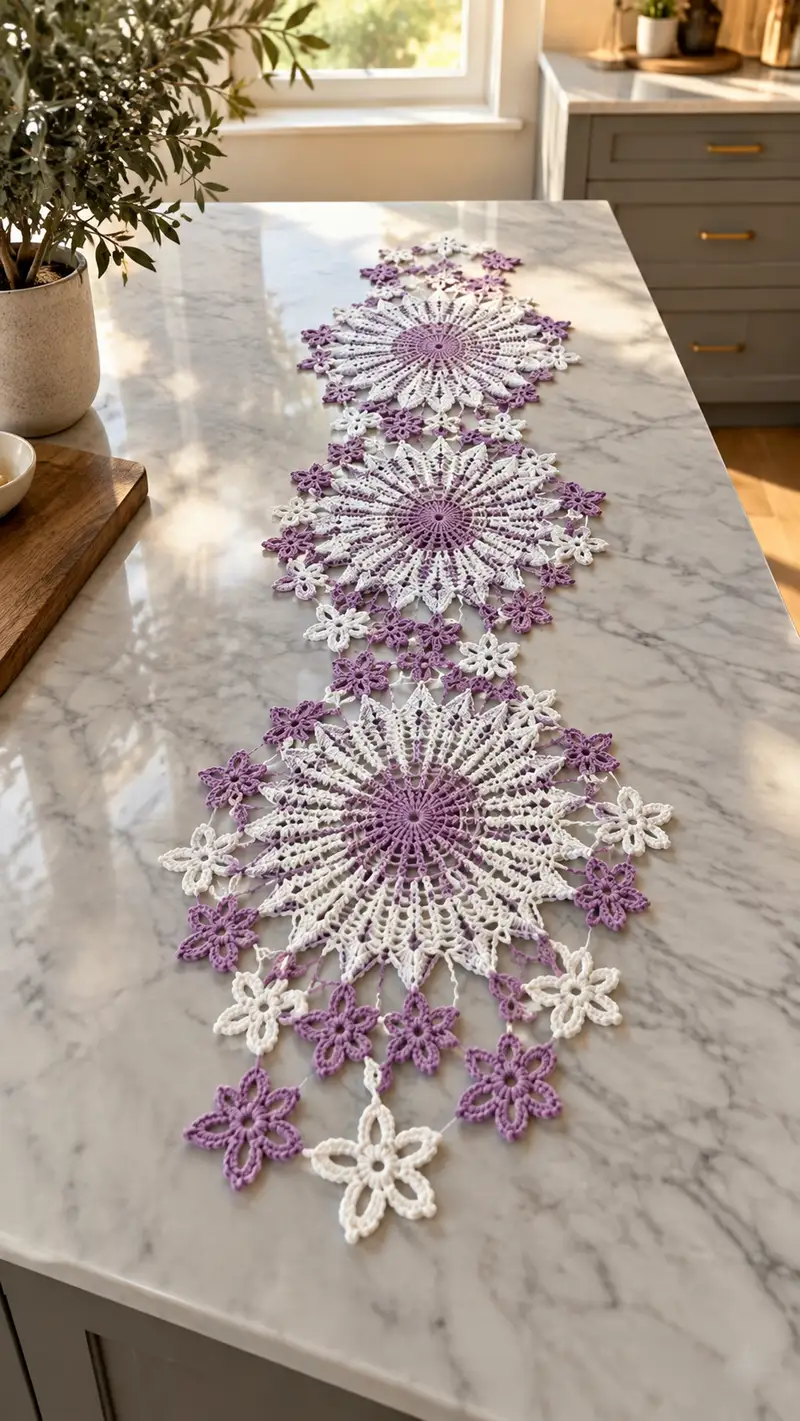
A delicate lace table runner composed of three large circular medallions linked by alternating six-petal flowers in soft lavender and crisp white. This elegant runner creates a romantic, vintage-inspired focal point for a dining table, buffet or kitchen island. The pattern uses fine cotton thread and a combination of classic lace stitches to build spokes, picot edges and petal motifs. Finished look is airy, decorative and perfect for seasonal styling or everyday elegance.
Progress Tracker
0% Complete
— Materials and Gauge :
Info :
This runner is shown in size 10 cotton thread with a 1.5mm hook. Gauge is not critical for lace pieces, but stitch definition matters: 1 medallion (unblocked) measures approximately 22-24 cm across. Blocking will open it to 24-26 cm. Adjust hook size to reach similar scale if desired.
— Stitch Notes and Techniques :
Info :
Work in continuous rounds for most medallions, joining with sl st where noted. Use stitch markers for the first stitch of a round. When changing colors, fasten off and weave tails, or carry yarn behind if preferred for minimal ends. Picots provide pointed lace edges—make them neat for crisp points.
— Large Medallion Motif (Make 3) :
Info :
Work three identical medallions; each medallion uses a 16-repeat spoke structure. The pattern below is written for one medallion. Use lavender for rounds indicated and white for contrast rounds as directed in Info sections. All stitch counts are checked to maintain 16 repeat math.
Round 1 :
Make a magic ring. Ch3 (counts as dc), work 15 dc into ring. Join with sl st to top of ch3. (16 dc)
Round 2 :
Ch5 (counts as dc+ch2), *sk next dc, dc in next dc, ch2; rep from * around. Join with sl st to 3rd ch of starting ch5. (16 dc, 16 ch2 sps)
Round 3 :
Sl st into the first ch2 sp, ch3 (counts as dc), (2 dc, ch3, 3 dc) in same ch2 sp to form a shell; *in next ch2 sp work (3 dc, ch3, 3 dc); rep around. Join with sl st to top of starting ch3. (16 shells)
Round 4 :
Ch1, sc in same st, *ch7, sc into center dc of next shell (center of 3-dc group); rep around to create 16 long chain loops. Join with sl st to first sc. (16 ch7 sps)
Info :
These ch7 loops will form the long spokes and later be filled with lace. Keep chains even and don't pull too tight so the lace will lay flat when blocked.
Round 5 :
Sl st into first ch7 sp, ch3, (2 dc, ch3, 3 dc) all worked into same ch7 sp (mini shell), *in next ch7 sp work (3 dc, ch3, 3 dc); rep around. Join with sl st to top of starting ch3. (16 mini shells)
Round 6 :
Ch1, sc in same st, *ch5, sc in center of next mini shell; rep around. Join with sl st to first sc. (16 ch5 sps)
Round 7 :
Sl st to first ch5 sp, ch2 (counts as hdc), 7 dc into same ch5 sp, sl st into next ch5 sp and 8 dc into that sp? (Reworked for math:) Instead: Sl st into ch5 sp, ch2 (counts as hdc), work 7 dc evenly into ch5 sp (total 8 including starting ch2 as hdc), *sl st to next ch5 sp and work 8 dc into that sp; rep around. Join with sl st to top of starting ch2. (16 clusters × 8 = 128 dc equivalents)
Info :
Round 7 creates a denser ring; keep clusters even. Count stitches occasionally: each repeat equals 8 dc-equivalent posts; there are 16 repeats so 128 posts around. Treat them as group anchors for the next lace rounds.
Round 8 :
Ch1, sc in first dc of cluster, *ch9, sc in 4th dc of next cluster (approx center); rep around to create 16 long chain arches. Join with sl st to first sc. (16 ch9 sps)
Round 9 :
Sl st into first ch9 sp, ch3 (counts as dc), (dc, ch2, dc) in same ch9 sp; *in next ch9 sp work (dc, ch2, dc); rep around. Join with sl st to starting ch3. (16 sets)
Info :
These small V shapes create the spoke openings. Keep the ch2 loops consistent—use the hook to measure each loop if needed for uniformity.
Round 10 :
Ch1, sc in same stitch, *ch6, sc in center of next V (between the two dc where the ch2 sits); rep around. Join with sl st to first sc. (16 ch6 sps)
Round 11 :
Sl st to first ch6 sp, ch3 (counts as dc), 2 dc, ch3, 3 dc in same ch6 sp (a shell), *in next ch6 sp work (3 dc, ch3, 3 dc); rep around. Join with sl st to top of starting ch3. (16 shells)
Round 12 :
Ch1, sc in same st, *ch4, sc in center of next shell; rep around. Join with sl st to first sc. (16 ch4 sps)
Info :
From here the medallion begins to form distinct star points. Keep stitch counts exact to preserve point symmetry. If you prefer less open lace, reduce chain lengths by one or two, but then adjust later rounds accordingly.
Round 13 :
Sl st into first ch4 sp, ch4 (counts as tr), 3 tr in same ch4 sp, ch3, 4 tr in same ch4 sp (creates tall petal); *in next ch4 sp work (4 tr, ch3, 4 tr); rep around. Join with sl st to top of starting ch4. (16 tall petals)
Round 14 :
Ch1, sc in same st, *ch8, sc between the two tall petals (in the chain space created by previous round); rep around. Join with sl st to first sc. (16 ch8 sps)
Round 15 :
Sl st into first ch8 sp, (ch3, 2 dc, ch3, 3 dc) into ch8 sp—(a decorative shell with extended arch), *in next ch8 sp work (3 dc, ch3, 2 dc, ch3, 3 dc) symmetrical; rep around. Join with sl st to starting ch3. (16 decorative shells)
Info :
At this stage you will notice the medallion resembles a sunburst. If you want a stronger color center, switch to lavender (if not already). If switching colors, fasten off and join new color with a sl st in any stitch before starting Round 16.
Round 16 :
Ch1, sc in same st, *ch5, sc in center top of next decorative shell; rep around. Join with sl st to first sc. (16 ch5 sps)
Round 17 :
Sl st to first ch5 sp, ch3 (counts as dc), 5 dc in same ch5 sp, ch3, 6 dc in same ch5 sp; *in next ch5 sp work (6 dc, ch3, 6 dc); rep around. Join with sl st to top of starting ch3. (16 large clusters)
Round 18 :
Ch1, sc in same st, *ch10, sc in middle of next large cluster; rep around. Join with sl st to first sc. (16 ch10 sps)
Info :
Round 18's long arches will be the basis for forming the final pointed lace edges. Keep chains looser to allow for blocking. If you prefer smaller edges, work ch8 instead and expect a slightly smaller final diameter.
Round 19 :
Sl st into first ch10 sp, ch3 (counts as dc), (dc, dc, ch4, dc, dc) into same ch10 sp to create a fan; *in next ch10 sp work (dc, dc, ch4, dc, dc); rep around. Join with sl st to top of starting ch3. (16 fans)
Round 20 :
Ch1, sc in same st, *ch6, sc at tip of next fan (in the ch4 center); rep around. Join with sl st to first sc. (16 ch6 sps)
Round 21 :
Sl st into ch6 sp, ch5 (counts as tr+ch2), 4 tr in same ch6 sp, picot (ch3 sl st in top of last tr), 5 tr in same sp; *in next ch6 sp repeat (5 tr, picot, 5 tr); rep around. Join with sl st to top of starting ch5. (16 pointed petals with picots)
Info :
Make picots carefully for sharp points: ch3 and sl st back into the top of the previously worked treble. If picots look loose, tighten by pulling the working yarn gently while positioning the picot stitch with the hook.
Round 22 :
Ch1, sc in same st, *ch3, sc in second treble from base of next petal (this creates a small connecting arch); rep around. Join with sl st to first sc. (16 ch3 sps)
Round 23 :
Sl st to first ch3 sp, (ch3, 2 dc, ch3, 3 dc) in same ch3 sp; *in next ch3 sp repeat (3 dc, ch3, 2 dc, ch3, 3 dc); rep around. Join with sl st to starting ch3. (16 small shells)
Round 24 :
Ch1, sc in same st, *ch4, sc between small shells; rep around. Join with sl st to first sc. (16 ch4 sps)
Info :
Fasten off color if switching to the other color for the floral edge connectors. Each medallion will have small flowers crocheted separately and joined to these ch4 sps by short chains and sl sts.
Round 25 :
Optional finishing round for medallion center reinforcement: join contrasting color with sl st, ch1 and work 1 sc in each st around (count approx 160 sc) to create a firm edging. Join and fasten off leaving long tail for weaving and joining. (Approx 160 sc)
Info :
Block each medallion individually: pin out points with T-pins on a foam board and mist lightly. For crisper edges, use a fabric-safe starch or light steam. Allow to dry completely before joining into the runner.
— Small Six-Petal Flower Motif (Make approximately 28-34) :
Info :
These small flowers alternate lavender and white and are used to join medallions. Work as many as required to join medallions into a runner—approximate counts are 10-12 flowers between each pair of medallions and 3-4 at each outer end. The pattern below yields a small 6-petal flower; adjust hook size to match scale of medallion.
Round 1 :
Make a magic ring. Ch1, work 6 sc into ring. Join with sl st to first sc. (6 sc)
Round 2 :
*Ch5, sl st into next sc; rep around to make 6 loops. (6 ch5 loops)
Round 3 :
Sl st into first ch5 loop, (ch3, 2 dc, ch3, sl st) all into same loop to make a petal. Repeat in each loop to make 6 petals. Join with sl st and fasten off leaving a 20 cm tail for joining. (6 petals)
Info :
Weave tails invisibly or leave slightly longer to seam flowers to medallions. Work half the flowers in lavender and half in white, alternating color placement when assembling runner for the pictured color rhythm.
— Joining Chains and Connector Layout :
Info :
Layout: Place three large medallions in a straight line with the long axis of the runner. Place small flowers alternating in color between medallions and at outer ends. The small flowers are joined to medallions by short chain bridges worked between ch4 sps on medallion edges and the petal tips of the small flowers.
Join Step 1 :
Pin medallions on blocking board in desired spacing—leave approximately 7-10 cm between medallion edges before adding connector flowers. Measure to ensure even spacing along center axis.
Join Step 2 :
Identify the ch4 spaces on medallion edges (Round 24 ch4 sps). For each ch4 sp you want to connect, thread a small flower tail through the center of a petal and sew using invisible whip stitch, or use a small chain bridge: from medallion ch4 sp, join yarn with sl st, ch6, sl st into top of petal of small flower, secure and fasten off. Repeat for each connection point.
Info :
Alternate method: crochet short chain connectors directly while joining: Sl st into medallion ch4 sp, ch6, sl st into petal tip (center top of petal), ch6 back, sl st into next medallion ch4 sp to create a visible chain bridge. This method is decorative and adds continuity between motifs.
Join Step 3 :
Work flower-to-flower joins with ch5 bridges: after a flower is secured to a medallion, join another flower by chaining a short bridge of ch5 and sl st into the adjacent flower petal tip. Pin sequence ahead of sewing to guarantee symmetrical spacing across the runner length.
Info :
If you prefer a looser, more drapey connection, use ch7 bridges instead of ch5. If you want a firmer, flatter runner, use sewn joins (whip stitch) through petal bases for minimal chain slack.
— Edge and Final Finishing Rounds :
Edge Round 1 :
Once all medallions and flowers are joined, pick up the working yarn at any medallion outer edge. Work 1 sc evenly around each joined piece to tidy joins: sc into each visible join stitch and each chain bridge, smoothing irregularities. (Stitch count variable based on joins)
Info :
This tidy round evens out the runner and creates a base for a final decorative picot edging. Work evenly; if a section seems too tight, add extra sc in a chain bridge to maintain flatness.
Edge Round 2 :
For a picot edge: *sc in next st, ch3, sl st in same st (picot made), sc in next 4 sts; rep around edges of medallions and flower tips. Adjust 'next 4 sts' to maintain even spacing across small petals and medallion points. Fasten off and weave in all ends.
Info :
Picot spacing may need adjustment where small flowers meet medallion points. If picots bunch, increase or decrease the number of sc between picots to even spacing visually. Keep picots consistent for a unified finish.
— Blocking and Final Care :
Info :
Blocking is essential for lace runners. Pin the runner flat on a foam mat, stretching each medallion and flower gently to open lace. Pin every picot and petal tip. Spray lightly with water or steam using a steam iron held above the fabric (do not touch the iron to the thread). Allow to dry completely before removing pins.
Info :
For longer-term crispness, use a fabric-safe starch spray after initial blocking. Store flat or rolled to avoid creases. Hand wash in lukewarm water and reshape on drying board when necessary.
— Alternate Sizes and Customization :
Info :
To make a longer runner, add more medallions and proportionally more connecting flowers. To shorten, reduce medallions. To change scale, use a different thread size and adjust hook: a slightly thicker cotton and a 2.0 mm hook will enlarge motifs while preserving lace pattern, but you may need more yarn.
— Troubleshooting and Tips (Throughout) :
Info :
If spokes begin to twist, examine your ch-lengths in earlier rounds and loosen tension. If points pull in, you may need longer chains at lace rounds or a lighter blocking tension. Always block motifs before joining to ensure uniform shape and spacing.
— Visual Layout Reference :
Info :
Suggested layout: medallion - 10 small flowers - medallion - 10 small flowers - medallion, with 3-4 small flowers at each outermost tip to create tapered ends. Center spacing between medallions in the picture is approx 7-10 cm before blocking; adjust based on desired drape.
This lace floral runner brings handcrafted elegance to any table with its sunburst medallions and dainty flower connectors. Each stitch contributes to a vintage-inspired centerpiece that brightens daily moments. Blocked and finished, it becomes a treasured home accent that feels delicate yet durable. 🧶 Add it to your table to make everyday dining feel special—happy stitching! 🌸