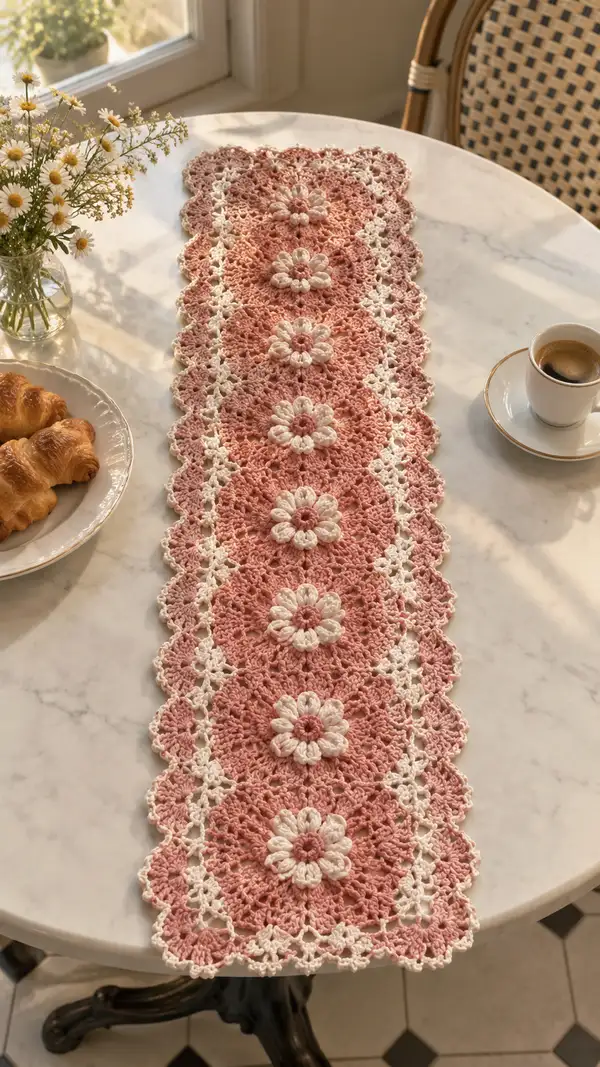
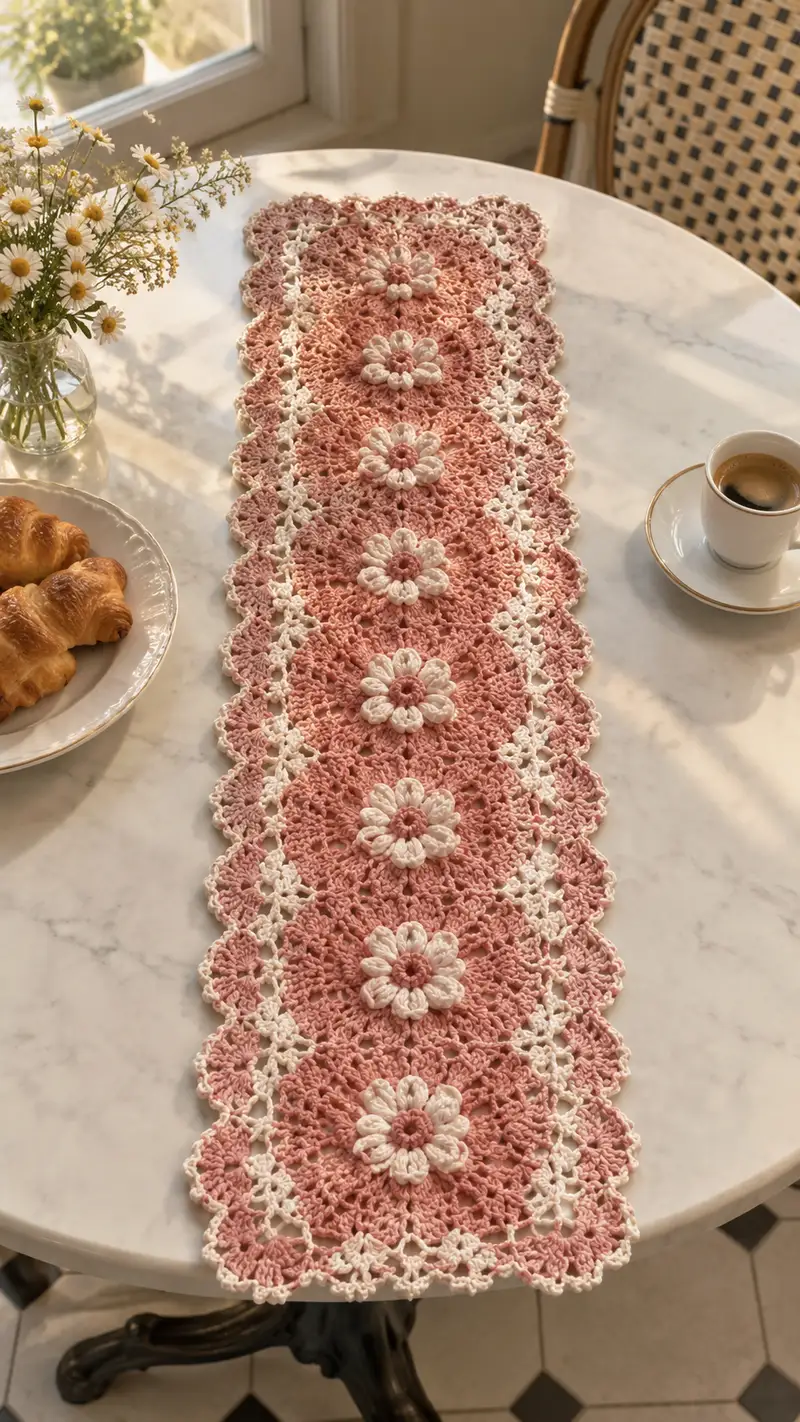
A delicate, vintage-inspired table runner made of repeating daisy motifs in blush pink with cream accents. The runner features raised puff-petal daisies, open lacy joins, and a scalloped cream border for a romantic, cottagecore look. Perfect for a breakfast nook, dresser, or as a centerpiece accent. Instructions include motif construction, joining methods, and a detailed scalloped edging to finish beautifully.
Progress Tracker
0% Complete
— Overview :
Info :
This runner is constructed from 7 round daisy motifs joined in a straight line with a lacy cream strip down each side, finishing with a scalloped cream border. Work each motif in blush (MC) and use cream (CC) for petals, side joins and edging. Gauge is flexible; finished width is approximately 10-12 inches depending on tension and exact yarn. Repeat motifs to desired length or adjust number of motifs. Rounds and stitch counts are carefully provided for a 7-motif runner as shown in the photo.
— Daisy Motif (Make 7) :
Note :
Each motif is worked in continuous rounds but the counts are given as round-by-round for clarity. For Motif 1 work full rounds only. For Motifs 2-7 work the same rounds but follow the Join Info in Round 20 (or Round indicated) to connect to the previous motif; the join procedure is described in detail under Motif 2 Join Info and repeated for each subsequent motif.
Round 1 :
With MC (blush) make a mr, ch1, 6 sc in ring (6)
Round 2 :
6 inc (12) (work 2 sc in each st)
Round 3 :
(1 sc, 1 inc) x 6 (18)
Round 4 :
(2 sc, 1 inc) x 6 (24)
Round 5 :
(3 sc, 1 inc) x 6 (30)
Info :
At this stage you have the small central disc. Keep tension even and place a stitch marker at the first sc of each round if you prefer. This inner disc will form the base for the petals worked in CC (cream).
Round 6 :
(4 sc, 1 inc) x 6 (36)
Round 7 :
1 sc in each st (36)
Round 8 :
1 sc in each st (36)
Round 9 :
Switch to CC (cream). *1 sc in next st, ch3, sk next 2 sts* repeat around x12 (12 sc and 12 ch3 loops; 36 anchor points)
Info :
Change to cream yarn with a standing sc into the first stitch of Round 9. Carry the blush tail inside the work or weave later. The ch3 loops will be the foundation for the raised petals; use a slightly smaller hook if your petals feel loose.
Round 10 :
Work petals in each ch3 loop: *(yo, insert in ch3 loop, pull up loop) repeat 7 times to make a 7-loop puff, yo and pull through all 7 loops, ch1, sl st into base between the two anchor scs* repeat around (12 petals). Keep petals uniform; do not pull puff too tight or it will flatten.
Info :
Puff stitch method: yarn over, insert hook, pull up a loop to same height; repeat designated times in same space, yarn over and pull through all loops, ch1 to close puff if you prefer a small ch, then sl st into the base join. Alternatively finish puff with a small sc into base if you prefer less height.
Round 11 :
Switch back to MC (blush). 1 sc in each sc and sl st anchor around, working a light picot between petals: *sc in base sc, ch2, sl st into top of petal, sc in next base sc* repeat around (36)
Round 12 :
(2 sc, 1 inc) x 12 (48)
Info :
Round 12 expands the motif circumference so subsequent shell stitches sit neatly between petals. Keep count accurate: 36 + 12 increases = 48 total.
Round 13 :
1 sc in each st (48)
Round 14 :
(3 sc, 1 inc) x 12 (60)
Round 15 :
1 sc in each st (60)
Round 16 :
Shell round: *sk 2 sts, (2 dc, ch2, 2 dc) all in next st, sk 2 sts, sc in next st* repeat around x12 shell groups (60 anchors remain but 12 shells create 12 broad scallops; maintain 60 total anchor points)
Info :
When working shells count the anchor points rather than individual dc stitches. Each shell unit is worked into a single anchor space created by earlier rounds; after the shell round the motif edge is noticeably scalloped. Keep the shells evenly spaced by counting repeats carefully.
Round 17 :
1 sc in each st (60)
Round 18 :
Lacy filler row: *ch4, sl st into 3rd dc of next shell, ch1, sc between shells* repeat around to create an openwork band (this completes the motif outer lacy band)
Info :
If your ch4 loops seem large, use ch3 instead. The openwork band will be used for joining motifs: make sure ch loops align with corresponding loops on adjacent motifs for easy join-as-you-go or whipstitch connection.
Round 19 :
1 sc in each anchor st around to stabilize the lacy band (60)
Round 20 :
Final motif round: *(sl st, ch3, sl st) into each shell valley to form points* repeat around creating 12 small points for a pretty joining edge (60 total anchor actions)
Info :
Fasten off leaving long tail for weaving if not joining right away. For Motif 1 this is the final round. For Motif 2 onward proceed to the Join Info below at the same round number to attach to the preceding motif while maintaining pattern symmetry.
— Motif 2-7 (Make motifs 2 through 7 and Join to previous motif) :
Info :
Work Rounds 1-20 exactly as for Motif 1. When you reach Round 18 and Round 20 for Rounds described you will execute joining steps to attach to the previous motif. The method shown uses join-as-you-go at Round 20 for a neat connection that keeps the lace continuous and the cream side strips aligned.
Round 1-19 :
Work rounds 1-19 as in Motif 1 (follow all counts and color changes). Ensure your tension matches Motif 1 and that petals line up evenly.
Round 20 (Join-as-you-go) :
When you reach the first ch3 point at Round 20, position the new motif over the previously completed motif so that the 12 points line up. For each corresponding point: work your (sl st, ch3, sl st) as follows—before pulling yarn through final loop of the sl st to close the point, insert hook through the corresponding point (sl st or ch3) on the adjacent finished motif, pull up a loop and finish the sl st to form a single locked sl st joining the two points. Continue around aligning 6-7 joins on the long sides, leaving the ends unjoined so the runner remains flexible. Fasten off and weave in tails securely.
Info :
Joining tip: Use pins to hold motifs in perfect alignment before attempting the join. Make sure you join only at the outer point locations (Round 20 points) so the inner lace and petals stay free and retain their texture. Keep tension loose enough so the join lies flat without pulling motifs out of round.
— Repeat and layout :
Info :
Repeat motif construction and join steps to create a row of 7 motifs for this runner. After making Motif 7 leave it unjoined on one side (unless you desire a continuous wraparound) — the sample runner has a straight edge. When all motifs are joined side-by-side, block motifs gently to align stitch patterns and flatten daisies for a clean look before continuing to side strips and border.
— Center side strips (Create lacy columns between daisies) :
Info :
Each long side shows a narrow repeating lacy chain column in cream that visually links the motifs. We will create a continuous lacy column by picking up ch4 loops from motifs and bridging across the seams to create a ladder of small 4-ch loops and sc anchors. This is worked after motifs are joined to ensure loops align perfectly.
Round 1 :
With CC and starting at one short end, join with a sl st into the first ch3 point on the motif edge (the small point formed in Round 20). Ch1, sc into same point to secure (counts as anchor)
Round 2 :
*ch4, sk next point, sc into the next ch3 point* repeat along the entire side of the runner making a column of ch4 loops anchored by scs. When you reach the next motif seam, continue the same repeat without break to form a continuous column along the full runner (number of repeats will match the sides but is flexible depending on motifs joined)
Info :
If your ch4 loops look too large, switch to ch3 for tighter visual effect. The side strip should lie flat and even; check alignment along the entire runner as you work, adjusting spacing slightly by using sc or hdc anchors where needed.
Round 3 :
1 sc in each anchor st and sl st into each ch loop to stabilize, working around each loop: *sc, (sl st in ch4 loop), sc* repeat around (this secures the ch4 ladder)
Info :
Fasten off and weave ends. Repeat the same column on the opposite side of the runner so both sides have the same lacy ladder. These columns will be integrated into the edging rounds so keep tails tucked and motifs blocked flat.
— Scalloped Cream Edging :
Info :
The scalloped edging is worked in CC around the entire runner edge. Work evenly around corners and both short ends, adjusting shell counts to keep scallops symmetrical. Pin motifs flat before starting. We recommend using a slightly smaller hook for the edging for crisp scallops; a 3.0mm (D) hook works well.
Round 1 :
With CC join in any outer point (Round 20 point). Ch1, sc into same st to begin.
Round 2 :
*ch3, (2 dc, ch2, 2 dc) into next outer valley (shell space), ch3, sc into next point* repeat around to make a scalloped shell at each valley. Adjust the number of shells on short ends so they mirror each other for a square-finished look.
Info :
If your shells create more stitches than the anchor points around the runner, insert extra sc anchors between shells on longer straight sides to spread the scallops evenly. The mathematical aim is to have the same number of shells across the long side for symmetry.
Round 3 :
*sc in between shells, ch3, picot: (ch3, sl st in 3rd ch from hook) to create a small point on shell tips* repeat around creating delicate points on each scallop (this is optional for a picot trimmed look)
Round 4 :
Finishing round: 1 sc in each st and into picots to unify the edge. If desired add a final tiny slip-stitch loop between scallops for a delicate fringe. Fasten off and weave all ends.
Info :
For short ends where motifs terminate with a half-shell, you may work a tailored smaller shell of (2 dc, ch1, 2 dc) to avoid crowding. Keep the edging tension relaxed — too tight will curl the runner inwards.
— Optional center accent round (Raised centers) :
Info :
For extra texture you may add an additional round of small puffs or bobbles around the daisy centers before joining motifs. Work a round of small 3-loop puff clusters between petals to create a pellet-like ring. This is entirely optional—sample runner includes simple raised petals only.
— Blocking and Finishing :
Info :
Gently wet-block the runner to even out lace and flatten daisy petals. Pin each motif so petals open symmetrically and scallops are evenly spaced. Allow to dry fully. Press lightly with steam if needed but avoid direct hot iron contact on yarn. Weave in all ends securely with yarn needle.
— Troubleshooting & Tips :
Info :
If motifs do not sit flat, check that puff stitches are not worked too tightly; use a slightly larger hook or reduce puff loop count. If runner edges ripple, adjust shell counts during edging to distribute scallops evenly. Keep counts exact during increase rounds to ensure shell rounds line up for joining.
Assembly Instructions
- Lay out all motifs on a flat surface in the desired order. Use pins to align outer points and petals so there is no overlap and petals face the same direction before beginning join-as-you-go steps.
- Attach motifs using the join-as-you-go method at Round 20 points: when finishing the sl st that forms a point on the new motif, draw a loop through the matching point on the adjacent motif and complete the sl st to lock them together.
- After joining motifs across one side, attach the cream lacy columns by picking up ch loops from the motifs and working ch4 ladders anchored by scs for even alignment along the full runner length.
- Once both side columns are completed, work the scalloped cream edging around the whole runner, adjusting shell counts at the short ends to keep the scallops symmetrical.
- Block the runner while pins hold petals and scallops in place; stretch gently to open lace and leave to dry completely for crisp results.
- Weave in all ends using a yarn needle; trim close to the fabric. If desired, stitch a few securing hidden stitches at motif joins for extra durability in high-use surfaces.
Important Notes
- 💡Use stitch markers at the start of rounds and at repeating anchor points to maintain accurate counts throughout motif construction
- 💡Stuffing is not required for this project; instead focus on even tension and consistent puff formation for petal definition
- 💡When changing colors, carry yarn neatly behind work or clip and weave ends for a cleaner finish at petals and edging
- 💡Join motifs while the yarn tail is still available from the last round when possible; this makes join-as-you-go seamless and faster than sewing pieces together
- 💡Block gently and pin each daisy petal into place; blocking opens lace pattern and helps keep motifs the same size
- 💡Use a slightly smaller hook for petal and edging rounds if you want more defined petals and crisp scallops
- 💡Pin motifs in place before joining to ensure the runner lies flat and motifs are evenly spaced
- 💡Keep a row counter or notepad to track which motif and which round you are on for longer projects to avoid confusion
Completing this blush pink and cream daisy runner is such a joyful, calming process — a lovely mix of texture and open lace that makes every table setting feel special. Each motif stitches together into a cohesive, romantic design that’s perfect for gifting or brightening your home. I hope you enjoy blocking the petals open and seeing the runner come to life — the little scallops and puff petals are absolutely worth the time! 🧶🌸