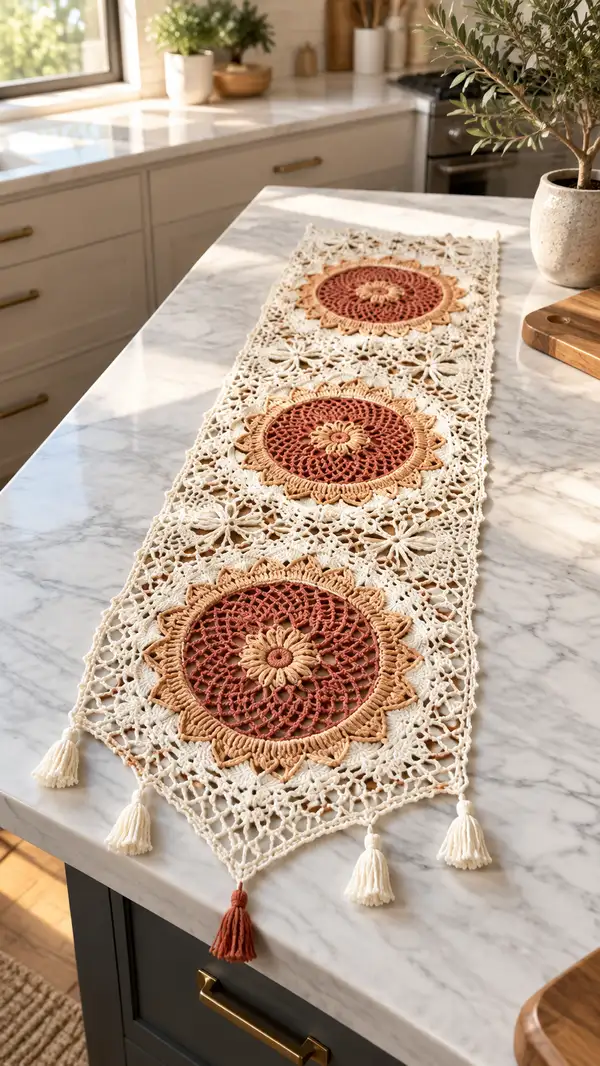
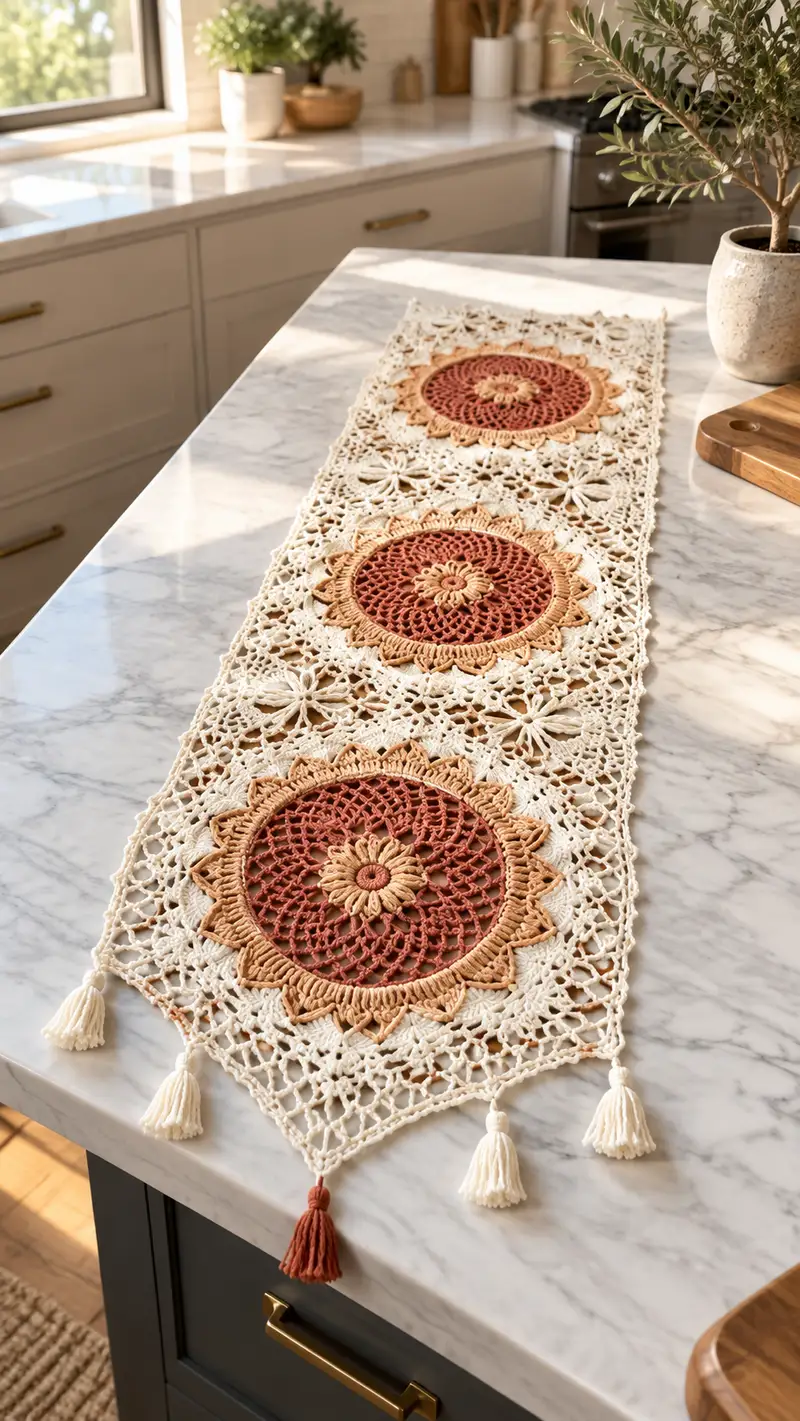
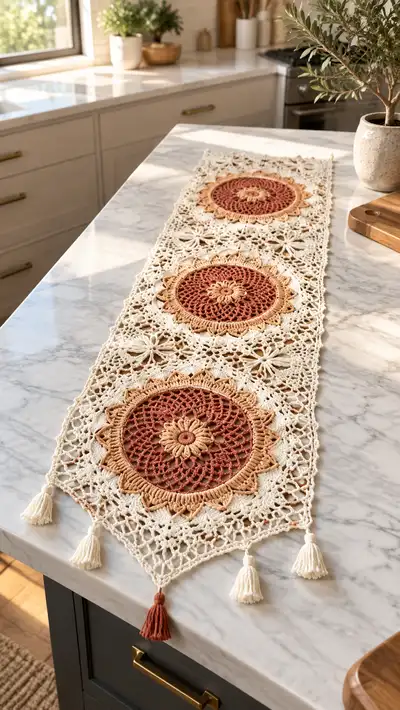
Create a stunning boho-inspired table runner featuring three sunburst medallions joined by delicate lace motifs and finished with playful tassels. This pattern uses warm terracotta and gold centers with a soft cream lace background for a timeless farmhouse look. Detailed stitch work and modular motifs make it perfect for decorating a dining table, console, or island. Follow the step-by-step instructions to crochet, join, and finish each medallion and the surrounding lace for a beautiful heirloom piece.
Progress Tracker
0% Complete
— Overview :
Info :
This pattern is modular: you will make 3 identical sunburst medallions, multiple small lace connector motifs, join them into a long rectangular panel, work a pointed lace border and finish with tassels. All rounds are worked in continuous rounds for the medallion center until otherwise stated, but many outer rounds use joined or marked round ends to produce flat lace. Work with a 3.5mm hook for the lace background and a 3.0–3.5mm hook for the medallion center if you prefer crisper texture.
— Sunburst Medallion (Make 3) :
Round 1 :
6 sc in magic ring (6)
Round 3 :
(1 sc, inc) x 6 (18)
Round 4 :
(2 sc, inc) x 6 (24)
Round 5 :
(3 sc, inc) x 6 (30)
Info :
Use a smaller hook (3.0mm) if you prefer a firm, defined medallion center. Keep rounds joined with sl st to first sc to maintain a flat disk or work in continuous spiral for invisible joins; choose method consistently for all 3 medallions.
Round 6 :
(4 sc, inc) x 6 (36)
Round 7 :
(5 sc, inc) x 6 (42)
Round 8 :
(6 sc, inc) x 6 (48)
Round 9 :
*Sc in next st, ch3, sk next st* x 24 (24 ch-3 loops around; uses up 48 base sts)
Info :
Round 9 creates evenly spaced chain arches—each arch will become a decorative shell. Keep tension even and count repeats to ensure 24 arches total. Mark the beginning of the round if working in continuous spiral.
Round 10 :
Into each ch3 loop: (sc, ch2, 3dc, ch2, sc) in next ch3-sp (24 shells) (24)
Round 11 :
Ch1, sc in same st, *ch4, skip to next shell, sc between shells in the single sc from previous round* x 23, ch4, sl st to first sc to join (24 ch-4 loops)
Round 12 :
Into each ch4 loop: (2 dc, ch1, 2 dc) in loop (creates 24 small fans) (24 fans)
Info :
This round builds a lacy fan that visually expands the medallion. Keep clusters uniform; use stitch marker at first fan to track rounds if working in continuous spiral style.
Round 13 :
Ch1, sc in same st, *ch5, sl st at top of next fan (bridge), sc in base between fans* x 23, ch5, sl st to join (24 ch-5 arches)
Round 14 :
Into each ch5 arch: (sc, ch2, 5 dc, ch2, sc) forming elongated petals (24 petals) (24)
Round 15 :
Ch1, sc in same st, *ch3, puff into center of 5dc petal (see Info), ch3, sc in base between petals* x 23, ch3, sl st to join (24 puff petals)
Info :
Puff stitch technique: Yarn over, insert hook into designated stitch or space, yarn over and pull up a loop (repeat 3 times to have 7 loops on hook), yarn over and pull through all loops, ch1 to close puff. Secure with an extra sc around base if desired to keep puff defined.
Round 16 :
Working behind petals: *sc in the base sc between petals, ch6, sc in top of next base sc* x 24 (24 ch-6 arches forming an outer lattice)
Round 17 :
Into each ch6 arch: (sc, ch2, 3tr, ch2, sc) to make tall arches that will form the sunburst points (24 tall arches)
Round 18 :
Ch1, sc in same st, *ch4, (sl st, ch1) around center of tall arch to create a looped texture, sc in next base sc* x 23, ch4, sl st to join
Info :
At this stage the medallion center is textured and has 24 sunburst points. Check that the medallion lays flat. If slight cupping occurs, block lightly and adjust tension or add one extra sc evenly around to release tension.
Round 19 :
Switch to Warm Gold yarn now (Info instructs exact color change) - join with sl st to any sc between tall arches
Round 20 :
With Gold: *(ch2, 7dc cluster worked into the top of each tall arch space), sl st to base sc between arches* x 24 (24 large petal clusters)
Round 21 :
Ch1, sc in same st, *ch3, sc into the space between petal clusters to anchor, ch3, sc in next anchor point* x 24, sl st to join
Info :
These large petals create the sunflower look. Keep clusters close but not tight; use consistent loop counts for each cluster. If needed, tug clusters slightly to shape petals before moving to next rounds.
Round 22 :
Switch to Terracotta yarn now - join with sl st to any sc
Round 23 :
With Terracotta: Ch1, sc in same st, *ch7, sl st in base sc between petals* x 24 (24 ch-7 loops forming outer openwork)
Round 24 :
Into each ch7 loop: (sc, ch2, 5dc, ch2, sc) building a larger scallop shell that deepens the sunburst ring (24 shells)
Round 25 :
Ch1, sc in same st, *ch6, sc in tip of next shell (use top dc) to create linking loops* x 24, sl st to join (24 linking loops)
Info :
Make sure the last Terracotta round is even and the shells align over the Warm Gold petals. If a shell lands slightly off, shift the join point by 1 st the next repeat to re-center.
Round 26 :
Switch to Cream yarn now - join with sl st and work behind scallops: *sc in base between shells, ch8, sc in base between next two shells* x 24 (24 ch-8 arches forming the first large lace ring)
Round 27 :
Into each ch8 arch: *(sc, ch3, 4dc cluster, ch3, sc) in each arch* x 24 (24 lace clusters)
Round 28 :
Ch1, sc in same st, *ch5, sl st into center of next cluster, ch5, sc in base between clusters* x 24, sl st to join (24 ch-5 connectors)
Info :
Round 27 and 28 transition the medallion into the surrounding lace network. Keep the Cream yarn stitches slightly loose to allow for neat joining to adjacent lace motifs later; this gives a pretty open field while maintaining structural integrity.
Round 29 :
Working in Cream: *sc in space between clusters, ch3, 2dc in next ch5 arch, ch3, sc in next base sc* x 24 (this begins a decorative trellis) (24)
Round 30 :
Ch1, sc in same st, *(ch4, sl st to center of trellis space), sc in next base* x 48, sl st to join (48 small connectors)
Info :
This completes the medallion unit with a structured lace perimeter that will make clean joins to surrounding connector motifs. Fasten off leaving a 30cm tail for blocking and temporary basting if you plan to baste medallions in position while joining. Make 3 identical medallions.
— Small Lace Connector Motif (Make 12) :
Round 1 :
6 sc in magic ring (6)
Round 3 :
(1 sc, inc) x 6 (18)
Round 4 :
Ch1, sc in same st, *ch4, sc in 3rd stitch of previous round to create spaced loops* x 6 (6 ch-4 loops)
Round 5 :
Into each ch4 loop: (sc, ch2, 3dc, ch2, sc) x6 (6 mini-shells)
Info :
These small motifs become the star-like connectors that sit between medallions. Make a minimum of 12 to fill the 3 gaps in the runner (4 between each medallion including ends). Depending on spacing you can make additional small motifs to widen the runner.
Round 6 :
Ch1, sc in same st, *ch6, sc in base between shells* x6 (6 ch-6 arches)
Round 7 :
Into each ch6 arch: (sc, ch3, 3dc, ch3, sc) x6 (6 larger arches)
Round 8 :
Ch1, sc in same st, *ch3, sc in center of next large arch* x 12, sl st to join (12 centers)
Info :
Make 12 motifs total: these combine with medallion perimeter loops to form the continuous lace panel. Block them lightly and keep tails for join locations.
— Joining Medallions and Connectors into Runner Panel :
Info :
Layout plan: Arrange medallion - connector - medallion - connector - medallion in a straight line. The medallion outer round (Round 30) has 48 small connectors (loops). Each small connector motif has 12 outer centers. You will join motifs by slip-stitching through corresponding loops and using the ch-spaces as anchor points. Pin the pieces on a blocking board or flat towel to ensure exact alignment before joining.
Join Step 1 :
Pin the first medallion at one end of your layout. Position four small connector motifs around the medallion so that their outer loops align with medallion ch-5 and ch-3 loops. Use matching Cream yarn and a 3.5mm hook.
Join Round A :
With Cream, join to a ch-3 loop on medallion edge. Sl st into ch-3, ch1, *sl st into the nearest connector motif loop, sl st into next medallion loop, sl st into next connector loop* repeating around to attach 4 connector motifs evenly into the medallion perimeter. Fasten off and weave in short tails. Repeat for second and third medallions so that you have medallion-connector-medallion-connector-medallion sequence.
Info :
Joining is easiest if you use a visible color tail to baste first—use large safety pins or removable stitch markers to hold pieces in position while you slip-stitch them together. Keep joins flat, avoid pulling too tight or the lace will pucker.
Join Round B :
To strengthen joins, with Cream yarn and working across the backs of the joins: *sc evenly through both motif loops being joined, placing 3 sc across each connector loop and 3 sc across each medallion loop* working around each pairing to make a neat flat seam. This reinforces the panel and also visually ties the lace pattern together.
Info :
When seaming, aim for 3 sc per larger loop or 2 sc per smaller loop depending on loop circumference. Adjust slightly if counts do not match exactly; distribute sc evenly to avoid distortion. Use a blunt tapestry needle to weave ends under join stitches after finishing.
— Middle Lace Fill Rows (Between Medallions) :
Round 1 :
Working across the long edge between medallions: attach Cream yarn at the seamless join point, ch1, sc in same st, *ch5, sk 2 loops, sc in next join point* repeat across to reach next medallion join (creates scallop connectors)
Round 2 :
Into each ch5: (sc, ch2, 5dc, ch2, sc) to build an open floral field (repeat for number of ch5 loops across gap)
Info :
Adjust how many ch5 units you make depending on distance between medallions—aim to evenly distribute connectors so the runner sits flat. You will probably have 12–18 such floral units between medallions depending on your joining tension.
Round 3 :
Ch1, sc in same st, *ch3, sc into center of 5dc cluster to create star-like flower centers* repeat across and sl st to join at medallion edge
Round 4 :
Work a mesh row: *ch6, sk next star center, sc in next anchor point* repeat across entire panel width to create an airy grid (counts vary with runner length)
Info :
These middle lace rows create consistent visual rhythm connecting medallions. Keep the ch counts consistent and use blocking pins to align top and bottom edges so the runner ends up straight rather than trapezoid-shaped.
— Border and Pointed Ends :
Round 1 :
With Cream, join yarn to any outer connector point on long side edge, ch1, sc in same st, *1 sc in each st along edge around full runner perimeter until you reach first corner point* (work even sc along sides)
Round 2 :
(Work along long edge) *ch5, skip 2 sc, sc in next st* across to create scalloped loops along the sides
Round 3 :
Into each ch5 scallop: (sc, ch3, 5dc, ch3, sc) making side scallops consistent with medallion details
Info :
If your runner edge sits too full after scallops, reduce to ch4 on alternate scallops to harmonize spacing; blocking after finishing will also help even out any discrepancies.
Pointed End Round 4 :
At each short end create the pointed finish: mark the center bottom loop and count outwards an equal number of scallops for a neat point. Work: *ch7, sl st into the top of the next scallop, repeat until forming a triangle that comes to a point at the center.*
Pointed End Round 5 :
Into each ch7: (sc, ch3, 7 dc, ch3, sc) to make strong, decorative points (counts per point depend on runner width; usually 9–11 scallops per triangular section)
Info :
For symmetry, build the pointed ends in mirror steps on both short sides. After rounds are complete, trim tails and weave in ends temporarily, then block by pinning to exact measurements and spraying with water or using a steam iron at safe distance for cotton yarn blocking.
— Decorative Edge Lace Rounds (Optional Additional Texture) :
Round 1 :
Once main border is complete, add an optional picot trim: join Cream to any side, ch1, sc, *(ch3, sl st into the same st) picot, sc in next st* repeat around for tiny picot edging
Info :
Picot edging gives a little vintage feel to the runner. If your yarn is very soft, attach picots every other st to avoid heavy fringing. This is optional but lovely on delicate tables and sideboards.
— Tassels (Make 6) :
Info :
Tassels echo the runner colors. Each short end gets 3 tassels: two Cream and one Terracotta centered. Make tassels approx 6–7cm long after trimming for the photo look. You will need small amounts of both colors.
Step 1 :
Wind yarn around a 7cm cardboard form about 30 times for a medium-thick tassel using Cream yarn for majority and wrap a small Terracotta wrap for the center tassel.
Step 2 :
Slide loops off form, tie a double knot close to the top of the loops with a 10cm tail, fold tassel in half, wrap the top 1.5cm of tassel with a small length of yarn in a contrasting color and secure with a few stitches. Trim ends to even length.
Step 3 :
To attach: thread long tail through the pointed edge apex created earlier, tie securely on the underside using multiple half-hitch knots, then weave ends through a few stitches in back to hide. Trim close and secure with a tiny dab of fabric glue if desired.
Info :
For longevity, sew tassel tops through the runner apex with a tapestry needle and 3 passes, knot securely, then hide tails inside the tassel head for a neat finish.
— Finishing & Blocking :
Info :
Carefully block your assembled runner. Pin the runner to exact rectangular measurements and shape the pointed ends to equal length. Spray with water or steam gently, then leave pinned until fully dry. Cotton yarn will relax and open the lace; after blocking, weave in all tails and trim excess yarn.
Final Step :
Give the runner a final once-over: trim stray fibers, check tassel symmetry, and ensure all joins are secure. Label your work with yarn details and date if gifting or selling.
Info :
Store flat or rolled to prevent creasing. The runner will soften over time with use and laundering; machine wash on gentle and dry flat to preserve lace shape.
This Boho Sunburst Table Runner brings beautiful handcrafted detail to any surface — the warm sunburst centers and airy lace create a perfect balance of texture and light. Each medallion and connector comes together like a piece of lacework jewelry stitched across your table. I hope this pattern brings you joy as you make and display it — every stitch is part of the story. 🧶🌞✨