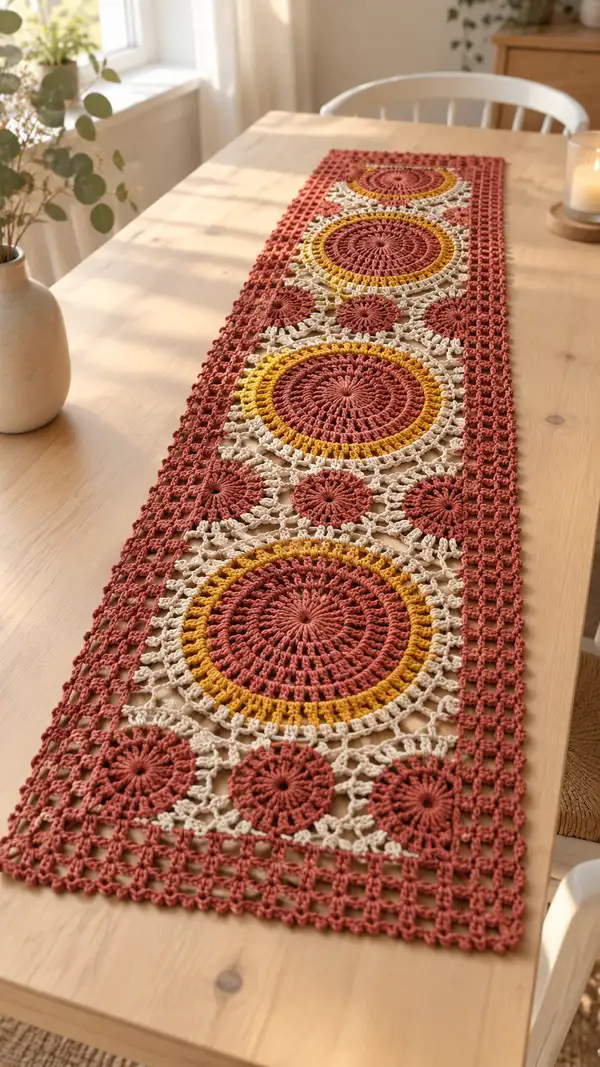
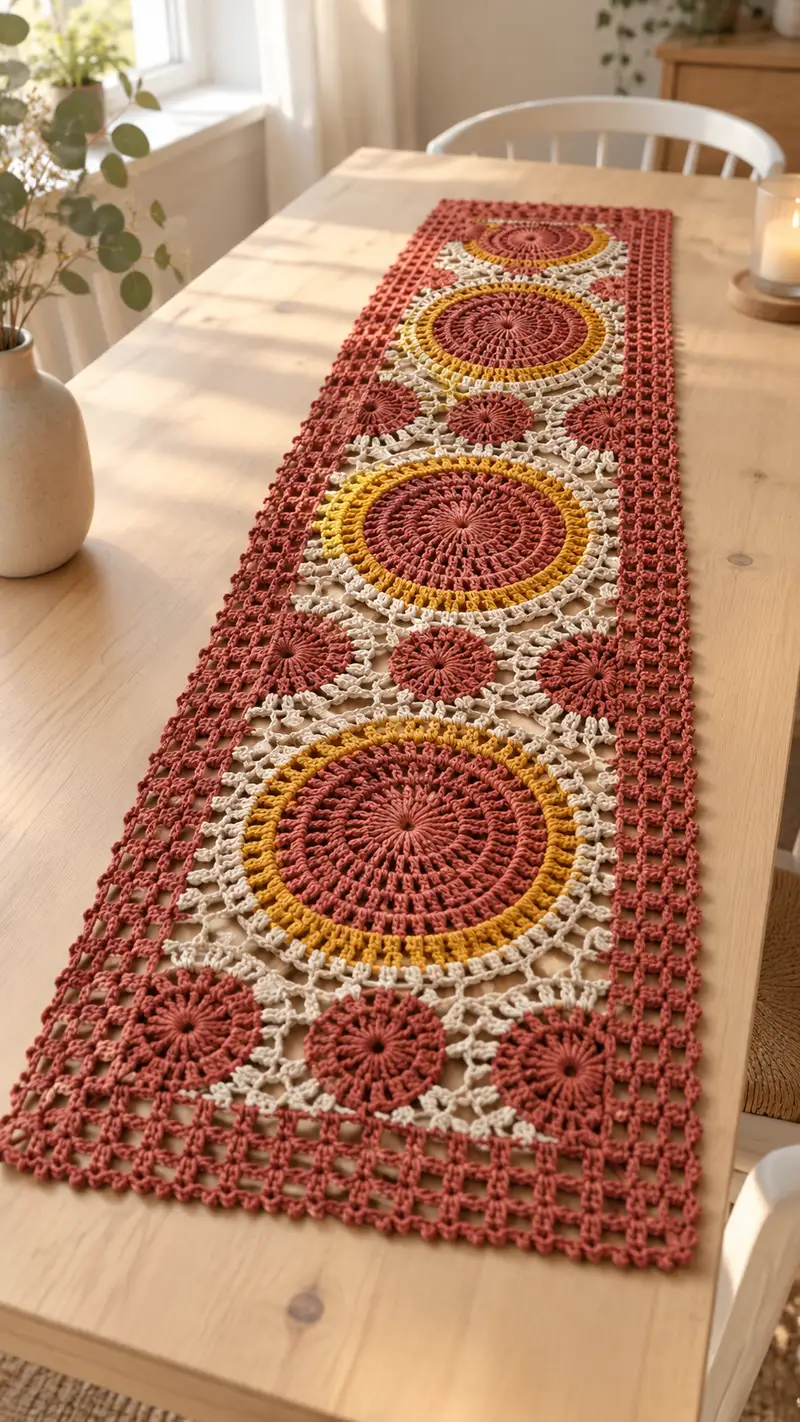
A long, lacy boho table runner composed of three large sunburst medallions, coordinating smaller circles and an open grid border. Made in warm terracotta, mustard and creamy neutral cotton, this runner brings organic texture and vintage charm to your table. The design uses circular motifs joined into a rectangular layout with a delicate filet-style border for a handcrafted, elegant finish.
Progress Tracker
0% Complete
— Notes and Overview :
Info :
This runner is constructed from circular motifs (Large Sunburst Motif x3, Small Circle Motif x6) joined with a lacy cream connector motif into a long rectangle. All motifs are worked in the round and blocked flat before final join and edging. The pattern will give a runner approximately 12-14 inches wide and 44-48 inches long with three large medallions; adjust the number of units to lengthen or shorten. Gauge is not critical, but consistent tension will ensure neat joins and straight borders.
Info :
Recommended color plan: Color A = Terracotta (main large rounds), Color B = Mustard (accent ring round around large centers), Color C = Cream (lacy connectors and border). Carry unused colors or fasten off and weave ends; I recommend changing color and fastening off at motif color transitions for cleaner joins.
— Large Sunburst Motif (Make 3) :
Round 1 :
Work a magic ring. Ch 3 (counts as dc), 11 dc into ring. Join with sl st to top of ch3. (12)
Round 2 :
Ch 3, 1 dc in same st, 2 dc in each st around. Join with sl st to top of ch3. (24)
Round 3 :
Ch 3, (1 dc, 1 inc) x 12 around. Join. (36)
Round 4 :
Ch 3, (2 dc, 1 inc) x 12 around. Join. (48)
Round 5 :
Ch 3, (3 dc, 1 inc) x 12 around. Join. (60)
Info :
Ensure increases are spread evenly; mark the first stitch of the round with a removable marker so you don't lose the start. After round 5 the circle should lie flat. If it cups, check for missing increases; if ruffles, remove an increase round.
Round 6 :
Ch 3, (4 dc, 1 inc) x 12 around. Join. (72)
Round 7 :
Ch 3, 1 dc in each st around. Join. (72)
Round 8 :
Ch 3, 1 dc in each st around. Join. (72)
Round 9 :
Ch 1, sc in same st, *ch 3, sk 2 sts, sc in next st; rep from * around to create a light ring of chain spaces. Join. (24 ch-3 spaces)
Info :
Switch to Color B (Mustard) for the accent ring. Fasten off Color A with a long tail if you prefer to seam later, or carry it if you are comfortable with stranded carrying inside the back of the work.
Round 10 :
Join Color B in any ch-3 sp. Ch 3 (counts as dc), 2 dc in same ch-3 sp, *3 dc in next ch-3 sp; rep from * around. Join to top ch3. (24 clusters x 3 dc =72 dc total)
Round 11 :
Ch 1, sc in same st, *ch 4, sc in center dc of next 3-dc cluster; rep from * around. Join. (24 ch-4 spaces)
Info :
These ch-4 spaces will create an airy ring that reads as the mustard accent in the photograph. Keep tension slightly loose on these chain loops so the ring sits open rather than tight.
Round 12 :
Change back to Color A (Terracotta). Join in any ch-4 sp with sl st, ch 2 (counts as hdc), work 7 hdc into same ch-4 sp (8 hdc in each ch-4 sp). Join to top of ch2. (24 x 8 = 192 hdc)
Round 13 :
Ch 3, 1 dc in each hdc around. Join. (192)
Info :
Round 12-13 form the thick textured band visible around the center in the photo. If your motif becomes bulky, you may substitute dc for hdc to reduce height — keep stitch counts consistent.
Round 14 :
Ch 1, sc in same st, *ch 5, sc in 8th st (space between 2nd and 3rd dc of the previous round) to create lacy arches; rep from * around. Join. (24 ch-5 spaces)
Round 15 :
In Color C (Cream) join in any ch-5 sp with sl st. Ch 3, (2 dc, ch 2, 3 dc) in same ch-5 sp to make a shell; *skip next 7 sts, (3 dc, ch 2, 3 dc) in next ch-5 sp; rep from * around. Join. (24 shells)
Info :
Round 15 forms the first lace shell ring that visually separates the dense sunburst center from the surrounding mesh. This is a good place to block the motif: pin the shell points evenly so all motifs match size before joining.
Round 16 :
Ch 1, sc in same st, *ch 4, sc in ch-2 sp of next shell; rep from * around. Join. (24 ch-4 spaces)
Round 17 :
Ch 3, 1 dc in same st, *(3 dc in next ch-4 sp), skip to next ch-4 sp; rep from * around to create a rounded spoke effect. Join. (72 dc)
Round 18 :
Ch 1, sc in same st, *ch 3, sc in next dc 3 sts ahead to create triangular connecting points; rep around. Join. (24 ch-3 spaces)
Round 19 :
Change to Color C (Cream). Join in any ch-3 sp. Ch 3, 2 dc, ch 3, 3 dc in same ch-3 sp (creates a large open picot-like space), *skip to next ch-3 sp and repeat; rep around. Join. (24 large shells)
Info :
These larger shell spaces in cream form the interstitial lace that will later be crocheted into the grid connector. Keep the last color join loose enough to weave tails under the next round to hide them.
Round 20 :
Ch 1, sc in same st, *ch 7, sc in next shell center (between shells); rep from * around. Join. (24 ch-7 spaces)
Round 21 :
Working in Color C still: Join in any ch-7 sp with sl st, ch 3, work 11 dc into same ch-7 sp to form a decorative open fan, *work 12 dc in each ch-7 sp around. Join. (24 x 12 = 288 dc)
Info :
At this stage the large motif is quite wide. If you prefer a slightly smaller medallion, omit round 21 and proceed to the connector step. Blocking now ensures consistent diameter across all three large motifs.
Round 22 :
Ch 1, sc in same st, *ch 3, sc in 6th dc of next fan to create alignment points for joining; rep around. Join. (24 ch-3 spaces)
Round 23 :
Slip stitch into adjacent sc to move, ch 3, 2 tr in same st, *ch 1, sk 2, 3 tr in next designated sc; rep around to create a roped textured outer band. Join. (72 clusters of 3 tr)
Round 24 :
Ch 1, sc in each st around to create a firm edge. Join and fasten off if you prefer individual motifs. (72)
Info :
Fasten off with a 10-12 inch tail for sewing if you will join motifs by whipstitch; alternatively leave motifs attached and join with the cream connector motif. Make 3 identical large motifs, block flat and pin to exact size before joining.
— Small Circle Motif (Make 6) :
Round 1 :
Work mr, ch 3, 11 dc into ring. Join. (12)
Round 2 :
Ch 3, 1 dc in same st, 2 dc in each st around. Join. (24)
Round 3 :
Ch 3, (1 dc, inc) x 12 around. Join. (36)
Round 4 :
Ch 1, sc in same st, *ch 3, sc in next dc 2 sts ahead; rep from * around. Join. (12 ch-3 spaces)
Info :
Use Color A (Terracotta) for small motifs to echo the centers of the large medallions. Block small motifs to flatten before joining.
Round 5 :
Join Color C (Cream). In ch-3 sp: (3 dc, ch 2, 3 dc) to make a shell. Rep around. Join. (12 shells)
Round 6 :
Ch 1, sc in same st, *ch 3, sc in next shell ch-2 sp; rep around. Join. (12 ch-3 spaces)
Round 7 :
Ch 3, 2 dc in each ch-3 sp around. Join. (36 dc)
Round 8 :
Ch 1, sc in same st, *ch 5, sc in every 3rd dc to create airy loops; rep around. Join. Fasten off and weave tails. (12 ch-5 spaces)
Info :
Small motifs behave as decorative fillers between large medallions in the layout. Make six and block to match diameter alignment with large motifs' intermediate lace ring.
— Connector Lace Square (Make 6) :
Info :
The photograph shows a rectangular lace grid that links the three large motifs and small circles into a runner. We will make a repeating rectangular connector panel in Cream that has open squares (filet grid) and specially-placed join points that match the large motif shell centers. Make 6 connector panels to link across length (3 between large motifs and edges).
Round 1 :
With Color C, ch 8, join with sl st to form a loop (or start with mr if you prefer), ch 3 (counts as dc), 11 dc into loop. Join. (12 dc)
Round 2 :
Ch 3, 1 dc in same st, 2 dc in each st around. Join. (24)
Round 3 :
Ch 1, sc in same st, *ch 5, sc in next 2nd dc; rep around to form large chain arches to align with the large motif shells. Join. (12 ch-5 spaces)
Round 4 :
Ch 1, sc in same st, *work (dc, ch 3, dc) in ch-5 sp, ch 1, sc in next sc; rep around to create small arches. Join. (12 small arches)
Round 5 :
Ch 4 (counts as tr), tr in next st, *ch 1, tr in next sc and across to create a short ladder; rep to make a rectangular mesh base. Join. (mesh established)
Round 6 :
Ch 1, sc in same st, *ch 3, sc in next tr to form squared mesh openings; rep around. Join. (mesh repeats)
Info :
These connector panels are worked to the approximate width between large motifs and will be joined to large motifs by matching the shell and ch spaces. Make 6 identical panels, blocking flat to exact measurements so the grid lines match when assembled.
— Joining Motifs Into Runner :
Info :
Lay out the runner on a large blocking board or table: the order from one end to the other is Border corner / small circle / Large motif / connector panel / Large motif / connector / Large motif / small circle / Border corner (you will add border mesh around the entire perimeter). Pin motifs in place so they are perfectly aligned. The joints occur at regular shell centers and chain spaces described in motif rounds above.
Round 1 (Joining Step) :
Start with two large motifs and a connector panel between them. With Color C and right sides facing up, align the outer shell points of large motif round 15 (the cream shells) to the matching ch-7 or ch-5 spaces of the connector panel. Join using sc whipstitch or single crochet join: insert hook into motif shell center and into connector ch-space, yo, pull up loop and sc to join; *continue around at each corresponding shell; rep until motifs are joined in full. Fasten off and weave tail. (join at 24 points)
Info :
Alternate join option: join-as-you-go (JAYG) during the final round of motifs. If comfortable, during the final round of the large motif slip stitch into the connector panel's ch spaces rather than fastening off, creating a seamless join without sewing.
Round 2 (Joining Small Circles) :
Position each Small Circle between large motifs in the layout. Align small motif shells to the adjacent large motif shell points and connector mesh ch-spaces. Using Color C, join small circles with sc or mattress stitch through designated points creating six evenly spaced small circles across the runner. Fasten off and weave ends.
Info :
When joining, keep tension gentle so the join is flat and not puckered. Use pins to hold junctions and check symmetry before final sewing. If using JAYG, work a slip stitch join at the last round's ch loops to connect to connectors.
— Filet Grid Border (Work After All Motifs Joined) :
Info :
After the motifs are joined into a rectangular assembly, work a filet-style border in Color A (Terracotta) around the full perimeter. The border uses alternating blocks of dc and chain spaces to create a grid, with a decorative picot edge at the outside rim. Work evenly around, keeping corner increases to maintain straight edges.
Round 1 :
With right side facing, join Color A at any outer round sc. Ch 1, sc evenly around the entire perimeter to create a firm base for filet rounds. Work 2 sc in each corner point (approx every 90 degrees) to maintain a square corner. Join and fasten off if desired. (base round)
Round 2 :
Join Color A again. Ch 4 (counts as tr + ch 1), *dc in next 3 sc, ch 1, sk 1 sc, repeat across each long side. At corners: (dc3, ch 3, dc3) to create corner arch. Continue around. Join. (grid established)
Round 3 :
Ch 1, sc in same st, *ch 3, sc in next ch-1 space to make even mesh squares. Rep around. Join. (mesh squares)
Round 4 :
Ch 3, dc in next ch-space, *ch 1, dc in next ch-space to create framed squares. Rep around. Join.
Round 5 :
Repeat Round 3 to deepen the border mesh. Join.
Info :
Work as many filet rounds as necessary to reach the desired border width — the photographed runner uses approximately 10 rounds of filet grid to achieve the thick frame. Keep track of mesh repeats so corners remain square; add or remove mesh repeats evenly at each corner to maintain straight edges.
Round 6-12 :
Repeat the mesh sequence: (Round 3 style, Round 4 style) alternating for 7 rounds or until border reaches desired depth. Maintain corner increases (dc3,ch3,dc3) at each corner repeat. After Round 12 the border should be wide and framed. (Repeat count varies with desired width)
Round 13 :
Prepare decorative outer picot edge: Ch 1, sc in same st, *ch 3, sl st back into the 3rd ch from hook to make a tiny picot, sc into next mesh intersection; rep around. Join and fasten off. Weave in ends. (picot scallop)
Info :
Blocking final runner: soak the whole runner gently in lukewarm water and lightly shape on blocking board to exact rectangular proportions using rust-proof pins to flatten the motifs and square the border. Allow to dry completely before use. Light steam-blocking with an iron (use a press cloth) also helps set the picot edge and the grid border.
— Alternate Join Method: Join-As-You-Go (JAYG) Overview :
Info :
If you prefer no sewing, use join-as-you-go during the final round of each motif. On the last round of each motif, instead of finishing, slip stitch into the adjacent motif's matching ch-space, then continue the round, using sl st as join points. This method produces a seamless front, but requires working with pinned layout and careful counting to match ch-spaces exactly. I recommend practicing one sample join before attempting all joins.
— Finishing Touches :
Info :
Weave all tails on the wrong side by threading tails through several stitches along the seam and trimming close. For extra longevity, lightly apply fabric glue to join seams along the reverse side for heavy-use tables. Optionally, add small non-slip felt pads at table contact points to protect the runner and table surface.
Info :
If you notice the runner cupping at any edge, re-block with slightly more tension on that corner. For a stiffer, flatter finish, spray with diluted PVA fabric stiffener on the wrong side and press flat while drying.
You did it — a gorgeous boho sunburst table runner with warm terracotta, mustard accents and delicate cream lace! The combination of dense medallions and airy mesh brings a cozy, handmade elegance to any table. Pin, block and admire the balanced geometry and texture you created. 🧶✨ Use it for dinners, seasonal styling or as a thoughtful handmade gift. Enjoy every table-setting moment and be proud of your handcrafted centerpiece! 🎨