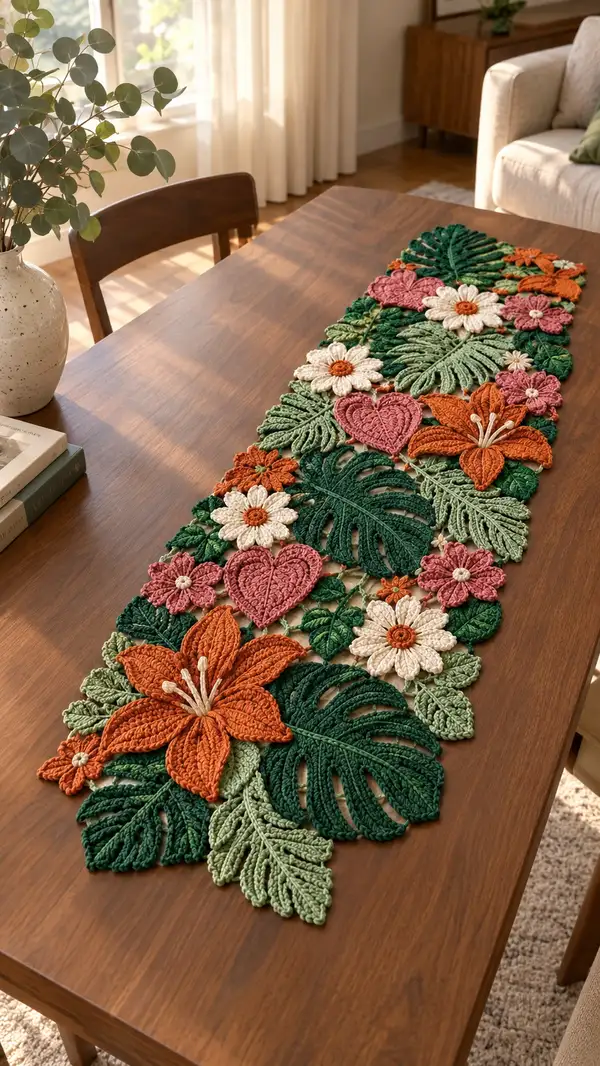
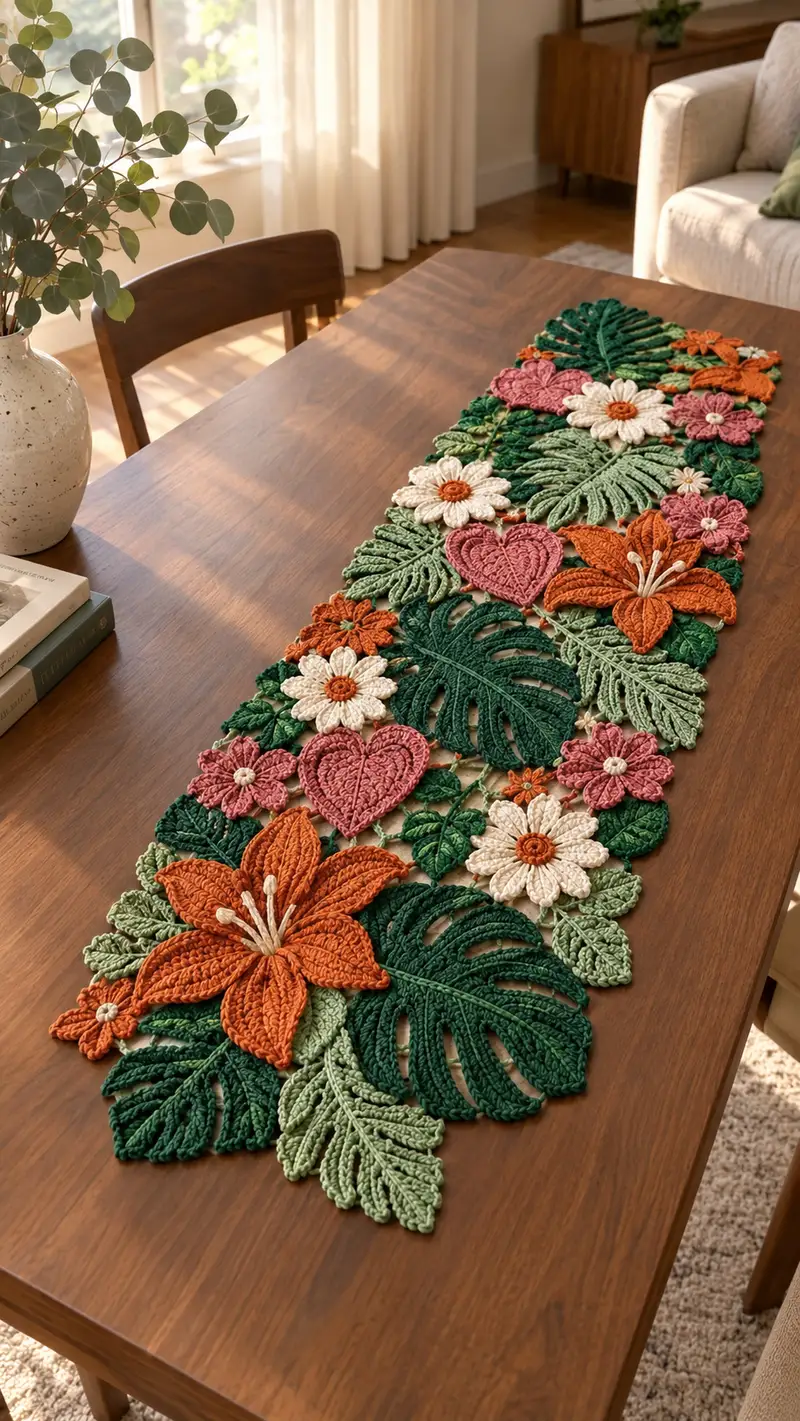
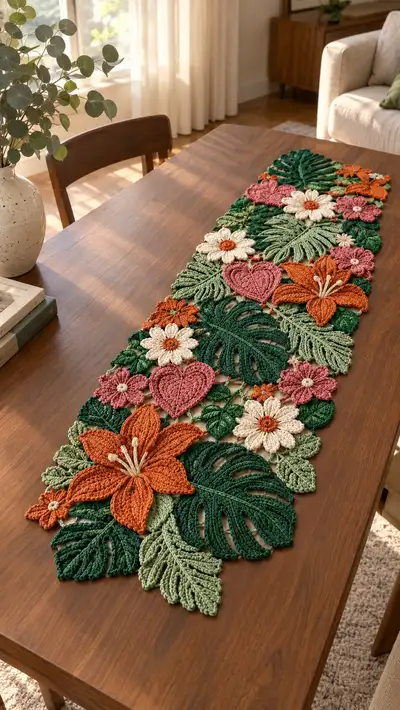
A lush botanical table runner made from layered crochet leaves and dimensional flowers. This pattern features large monstera leaves, sculpted lilies, daisies, heart-shaped petals and small filler blossoms arranged in an organic, overlapping composition. Colors used include deep forest green, sage, dusty rose, cream and warm rust for an earthy, modern look. Detailed assembly instructions guide you through motif construction and joining for a seamless, gallery-ready centerpiece.
Progress Tracker
0% Complete
— Large Lily Flower (Make 2 large lilies) :
Round 1 :
6 sc in magic ring (6)
Round 3 :
(1 sc, 1 inc) x 6 (18)
Round 4 :
(2 sc, 1 inc) x 6 (24)
Round 5 :
1 sc in each st (24)
Info :
This is the central disk of the lily. Work a slightly tighter tension here so the center is firm and does not sag under petal weight. Use a different color for contrast if desired.
Round 6 :
Sl st to next st, ch1, sc in next 6 sts to create sl st points for petal attachment (6) — mark 6 petal anchor points evenly spaced
Info :
Petals are worked individually from the center outward. Each petal is tall and sculpted using chains and treble stitches; leave long tail to embroider or stitch petal base if needed.
Petal 1 - Round 7 :
Attach yarn at first anchor point, ch8 (counts as turning chain), 1 sc in 2nd ch from hook, hdc in next, 2 dc in next, 2 tr in next, 2 dc in next, hdc in next, sc in next, sl st to same anchor point (this shapes a large petal)
Petal 1 - Round 8 :
Turn petal: sl st into base chain space, ch2, 1 hdc in each st back along petal, working 2 hdc in center top to create roundness, sl st to join (approx 16 sts in petal)
Info :
Repeat Petal 1 instructions for Petals 2-6, attaching at each anchor point. Make sure petals overlap slightly; block each petal to shape before final assembly.
Petal 2-6 - Rounds 9-18 :
Work as Petal 1, adjusting stitch spacing slightly to keep petal widths consistent (repeat 5 times)
Round 19 :
After all petals are attached, work 1 rnd of sc across the back loop only around petal bases to create a neat backing and unify center (join with sl st) (approx 42 sc)
Info :
For raised veins on each petal, use surface slip stitch or embroidery with a contrasting cream/ivory yarn: chain a short length on the petal's center and surface-slip down the center and across ribs to mimic natural vein texture.
Round 20 :
Embellish center: attach contrasting terracotta yarn and ch4, work 6 sc around chain to form small raised center ring; fasten and weave ends (6)
Round 21 :
Make stamens (optional): using cream yarn, make 6 small cords (ch6, sl st back) and secure into center, knot each cord for a bulb and tack down.
Info :
Block lilies flat with lightly misting and pins to hold petal curvature. If you prefer more sculpting, use small hand-stitched shaping inside petals by pulling a few strategic gathering stitches at the petal base.
— Monstera Large Leaf (Make 4) :
Row 1 :
Ch 30, sc in 2nd ch from hook and across to end (29 sc) — this is worked flat (foundation row)
Row 2 :
Ch1, turn, sc in BLO across (29) — creates a ridge for central vein
Row 3 :
Ch2, turn, hdc in 1st st, (hdc, dc, tr) in each grouping to widen leaf, inc at center 2 sts, continue to end (approx 33 sts)
Info :
Monstera leaves are worked flat in rows. You will create a central midrib by working rows, then shape the lobes by decreasing and cutting strategic slits using chains and skipped stitches.
Row 4 :
Ch1, turn, sc across in each st (33)
Row 5 :
Ch3 (counts as dc), turn, dc in next 2 sts, *sk 2 sts, 5 dc in next 2 sts centered over the edge to create a lobe; repeat across; end with dc in last sts (adjust to maintain symmetrical lobes)
Info :
To create characteristic monstera slits, skip pairs of stitches in the central rows and work clusters of dc along each side of the skip. This produces open areas that mimic natural holes.
Row 6-9 :
Repeat shaping rows, decreasing slightly every 2 rows toward the tip so leaf tapers (rows 6-9 shape to approx 25 sts at tip)
Row 10 :
Work single crochet border around entire leaf, placing 2 sc in each corner and 1 sc in each end to give a smooth edge (approx 80 sc around)
Info :
For a 3D look, pick up stitches along central midrib and work a contrasting ridge: 1 sc in each st along center in FLO to create a raised vein.
Row 11 :
Floss vein: with same yarn or contrasting shade, work 1 sc in each st along center BLO to form a raised midrib (approx 20-30 sts depending on leaf length)
Row 12 :
Finish and fasten off, leaving long tail for blocking and sewing. Block to shape and pin slits open if necessary.
— Monstera Medium Leaf (Make 6) :
Row 1 :
Ch 22, sc in 2nd ch from hook across (21)
Row 2 :
Ch1, turn, sc in BLO across (21)
Row 3 :
Ch2, turn, hdc then dc increases across to shape small lobes; make 3 small slits by sk 2, 3 dc cluster, repeat (approx 24 sts)
Info :
Smaller monstera leaves are simplified: fewer lobes and shallower slits. Adjust slit spacing to fit your composition.
Row 4-7 :
Repeat shape rows and taper towards tip; finish with sc border and midrib as for large leaf (approx 60 sc around border)
Row 8 :
Fasten off and block flat; leave tail for assembly
— Fern-style Leaf (Make 8 varied) :
Round 1 :
Ch 18, sl st to form a foundation loop (work flat along one side then back the other)
Round 2 :
Work along one side of chain: sc in 2nd ch from hook, hdc, dc, hdc, sc across 9 sts; work chain end then work back along opposite side mirroring stitches (approx 36 sts total)
Info :
Fern leaves are built from a central stem (the chain) with symmetrical leaflets worked into each chain space. Vary length for visual interest.
Round 3 :
Edge with 1 rnd of sc around entire leaf in BLO to form a defined edge (approx 40 sc)
Round 4 :
Add light surface veins: with a contrasting lighter green work surface sl st down each leaflet center.
Info :
Make some fern leaves longer and some shorter to create layered texture; block and starch lightly if you want extra crispness.
Round 5 :
Fasten off and leave long tail for sewing
— Heart Petal Motif (Make 6) :
Round 1 :
6 sc in magic ring (6)
Round 3 :
(1 sc, 1 inc) x 6 (18)
Round 4 :
Ch6 from one side of ring to form heart top curve, sl st back to ring creating a loop; repeat for second curve (this forms two lobes)
Info :
Hearts are worked by pairing two curved lobes and then tapering to a point. Work densely so hearts retain shape when displayed flat.
Round 5 :
Work 1 rnd of sc around entire heart, placing increases at the lobes to keep roundness (approx 36 sc)
Round 6-8 :
Work 3 rows of sc decreasing at the pointed base to shape the tip: on each row do (4 sc, dec) across last section until base narrows to 10 sts
Round 9 :
Fasten off leaving long tail for placement; add fusible surface veins using chain loops stitched into heart center.
— Large Daisy (Make 5) :
Round 1 :
6 sc in magic ring (6)
Round 3 :
(1 sc, 1 inc) x 6 (18)
Round 4 :
Change to cream yarn. Ch4, *sl st in next sc to make petal loop; repeat around to make 18 loops (18 loops)
Info :
Each petal is a looped petal made by ch4 and sl st back into the center - puffing and blocking will give them dimension. Alternate petal heights by ch3 for variety in smaller daisies.
Round 5 :
Work 1 sc into base ring between each petal loop to secure petals (18 sc)
Round 6 :
Attach terracotta yarn to center and work 2 rnds of sc to form raised central disk; on second round, work 6 inc evenly spaced to create a slightly domed center (approx 24 sc)
Round 7 :
Fasten off and weave in ends; shape petals by gently pulling out loops and pressing with steam from a distance, if desired.
— Small Five-Petal Flower (Make 8) :
Round 1 :
6 sc in magic ring (6)
Round 2 :
Ch5, sl st into next sc to form petal; repeat 5 times to create 5 petals (5 loops)
Round 3 :
Sc between each petal base and add a tiny bead of cream in center (optional) (5 sc)
Info :
These small flowers are excellent for filling gaps and layering on top of leaves; make a few in contrasting colors for visual interest.
Round 4 :
Fasten off leaving tails for sewing
— Small Round Filler Motif (Make 10) :
Round 1 :
6 sc in magic ring (6)
Round 3 :
1 sc in each st (12)
Info :
Use these to visually fill tiny gaps between larger motifs. Work in cream or terracotta for little pop centers.
Round 4 :
Fasten off leaving long tail for sewing
— Joining Mesh & Center Band (Worked as long continuous strip) :
Round 1 :
With forest green, ch 6, sl st to form a small ring; ch4, 1 dc into ring, ch3, 1 dc into ring repeat until you have 8 small motifs across the width of the runner to act as junction points (creates decorative nodes)
Round 2 :
Ch6 between each node to create open mesh; sl st to previous nodes to hold spacing. Continue until desired runner length (mesh foundation)
Info :
Make the joining mesh slightly shorter than your runner length so motifs overlap naturally; you can create extra nodes where you plan to attach larger elements like lilies and big leaves.
Round 3 :
Work 1 rnd of sc along both edges of mesh to stabilize (work 2 sc in chain corners for smooth corners) (edge sc counts vary with length)
Round 4 :
Block mesh flat and measure to match motif placement; use stitch markers where each motif will attach
Info :
Joining is modular: you can pin motifs on top of mesh and then whip-stitch them through both mesh and motif edges for a strong connection. Avoid heavy tension that distorts mesh shape.
Round 5 :
After motifs are attached, add decorative picot edging: *ch3, sl st into edge sc, skip 1 sc, repeat across exposed edges to create a delicate lace finish*
— Edge & Final Border :
Round 1 :
Work 2 rnds of sc around entire runner edge (after motifs are joined). Place 2 sc in gaps to maintain flatness (edge sc count varies with runner size)
Round 2 :
For final decorative finish, work 1 rnd of shell stitches (5 dc in same st, skip 2, sc in next) along both long edges to create a subtle scalloped border
Info :
Blocking the entire assembled runner pinned to shape and lightly steamed will flatten joins and ensure motifs sit correctly. Use pins generously at motif overlaps while drying.
Round 3 :
Weave in all ends and trim carefully; inspect joins and secure any loose motifs with additional hidden stitches.
Info :
If you plan to launder runner, use colorfast yarns and consider hand-washing flat with gentle detergent; reshape while damp and dry flat to keep motifs intact.
This botanical table runner invites you to bring a touch of garden whimsy to your dining table! Each layered leaf and bloom is a small act of craft that combines to form a striking centerpiece you will be proud to display. The detailed motif instructions and joining guide make the process approachable and creative. Enjoy the tactile joy of crocheting dimensional flowers and leaves—your table will sing with handmade charm! 🌿🧶