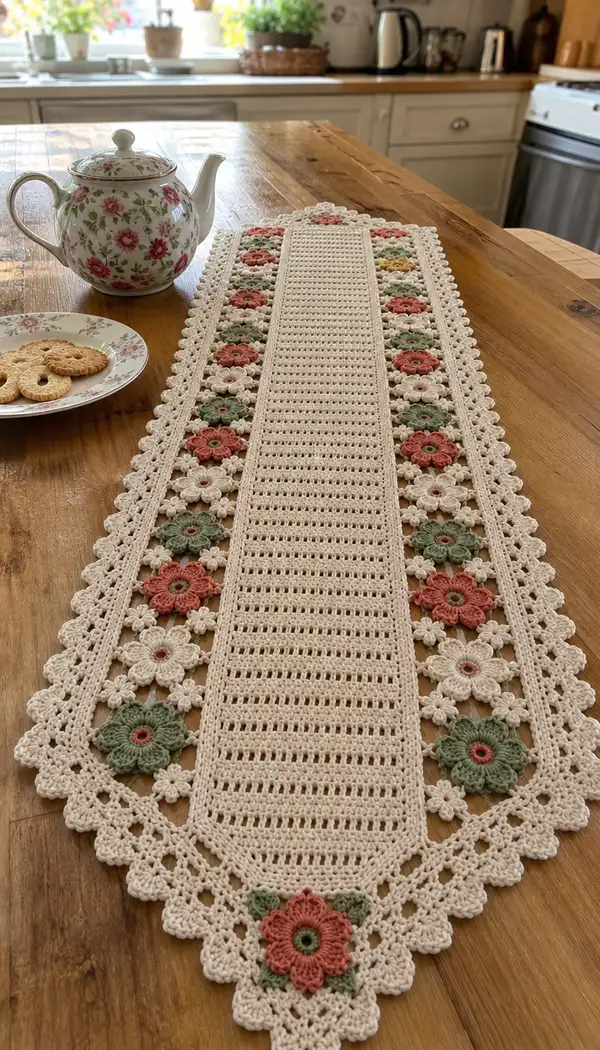
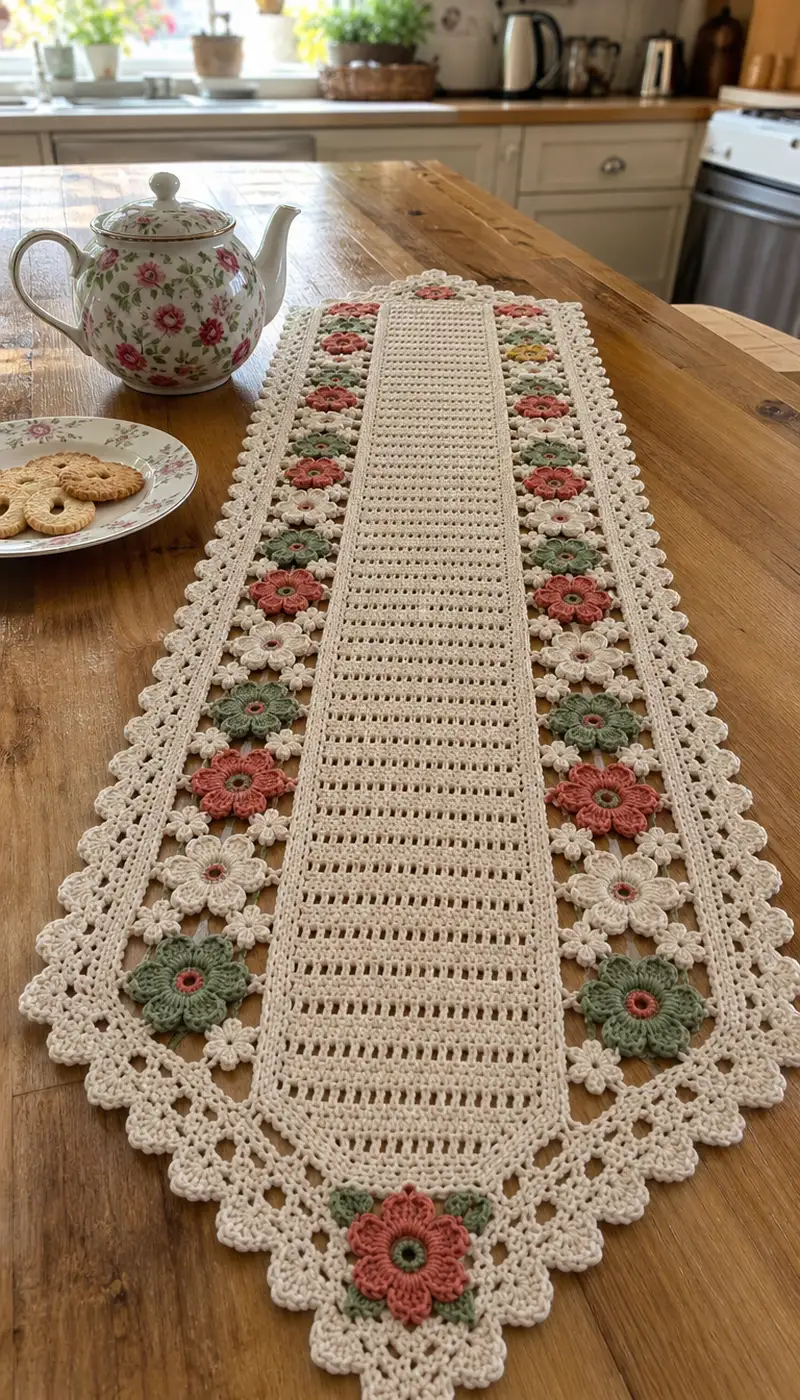
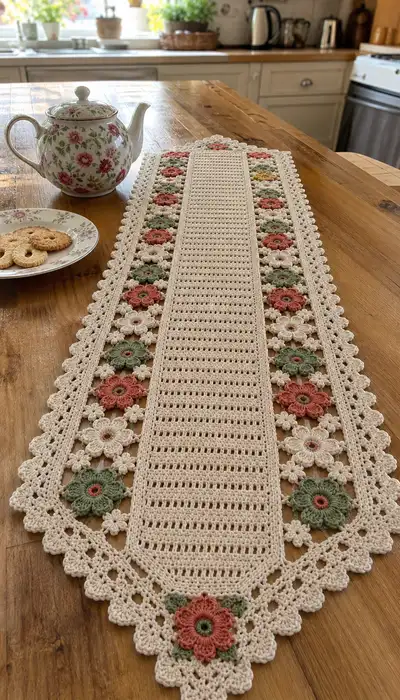
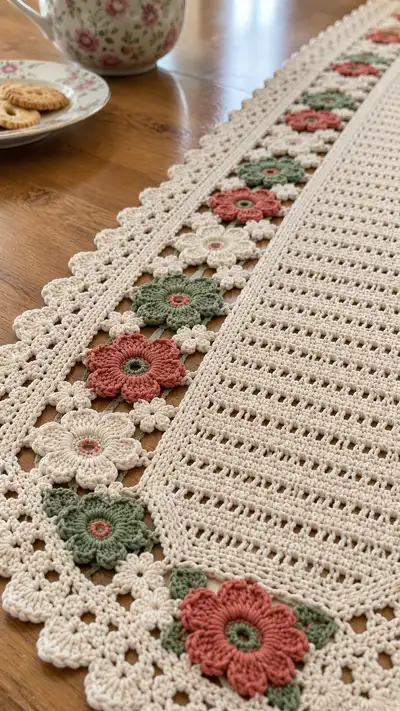
A delicate vintage-inspired table runner featuring a central openwork panel bordered by rows of floral motifs and a scalloped lace edge. Soft cream base with dusty rose, sage green and muted mustard flowers brings classic charm to any table. The runner is constructed in separate motif strips and a worked center panel, then joined and edged for a polished finish. Perfect for tea time, brunch or as an heirloom accent.
Progress Tracker
0% Complete
— Materials & Gauge :
Info :
Gauge is not critical for table runner but for reference: 10cm x 10cm (4" x 4") = 14 dc x 8 rows in pattern using 3.5mm hook. Adjust hook if necessary to match drape. Finished runner in photos measures approximately 14" wide by 44" long (35cm x 112cm).
— Center Panel (worked flat in rows) :
Round 1 :
Foundation chain 86 (this gives a center column width of 80 stitches plus turning chains). Ch 3 (counts as first dc), dc in 4th ch from hook and in each ch across. (84 dc)
Round 2 :
Ch 3, turn. *Dc in next 3 sts, ch 1, sk 1 st* across until last 4 sts, dc in last 4 sts. (Est. 84 sts including ch-1 spaces; pattern creates small eyelet channels across surface)
Round 3 :
Ch 3, turn. Dc in each st and in each ch-1 space across (84 dc).
Info :
These three rounds create a subtle openwork repeat. Keep edges straight by working the first and last 4 dc in every row as solid dc columns; the center repeat forms the eyelet rows.
Round 4 :
Repeat Round 2 (ch 3, turn, dc3, *ch1 sk1* repeat, end dc4). Maintain consistent tension for even fabric. (84 sts)
Round 5-6 :
Repeat Round 3 twice (ch 3, turn, dc in each st including ch-1 spaces) to seal openwork. (84 dc)
Round 7 :
Ch 3, turn. Dc in next 2 sts, *(dc, ch1, dc) in next ch-1 sp (creates small vertical cluster), dc in next 2 sts*; rep across ending with dc in last 3 sts. (84 effective stitches distributed as dc clusters and singles)
Info :
Work a total of 40 rows for a mid-length runner center. If you want a longer runner, increase rows in multiples of 3 to preserve pattern repeat symmetry with the motifs on the sides.
Round 8-15 :
Repeat Rounds 2-7 as established (rotate the eyelet and solid rounds) for 8 more rows to build height. Keep first and last 4 dc solid to create a neat seam for joining. (84 sts each row)
Round 16 :
Ch 3, turn. Dc in each st across, working in back loops only on the last 4 sts to create a small ridge for joining later. (84 sts)
Info :
If you prefer a firmer center, you can use a 3.25mm hook for the center panel. Remember to maintain the same number of rows on both sides of the central axis so the motifs align.
Round 17-30 :
Continue alternating the established openwork repeat (R2-R7 pattern) until the center panel measures approximately 38" long from the place where you will join motif strips (or until desired length minus borders). For the sample runner, work a total of 38 rows (including the starting row) to reach the pictured scale. (84 sts)
Round 31 :
Ch 3, turn. Dc in each st across. (84 dc). Fasten off leaving long tails for sewing to motif strips.
Info :
Block center panel lightly to flatten and square the edges before joining. Pin it on your blocking board and spray lightly with water if using mercerized cotton for crisp blocking.
— Large Flower Motif (make 24 total: 12 per side or adjust to your runner length) :
Round 1 :
With accent color for center (e.g., muted mustard). Make mr, ch 1, 8 sc into ring. Sl st to first sc. (8)
Round 2 :
Ch 1, 2 sc in each st around (inc x8). (16)
Round 3 :
Ch 1, (1 sc, inc) x 8. (24)
Info :
Change to flower main color (dusty rose or sage) with an invisible join at the last sc of Round 3; leave a long tail for weaving. Blocking now will round the center nicely.
Round 4 :
Ch 1, (sc in next 2 sts, (hdc, 3 dc, hdc) in next st for petal base) x 8. This creates 8 petal clusters around the ring. After each petal, ch 1 and sc in next 2 sts before next petal to separate. (24 sc placements and 8 petal clusters)
Round 5 :
Join with sl st to base of first petal, ch 2 (does not count as st), *work 7 dc into top of petal (dc cluster forming rounded petal)*, sl st between petals to the base of next petal; rep around for 8 rounded petals. Fasten off and weave in ends. (8 petals)
Info :
The profile of the petal is achieved by working tall stitches (dc) over the earlier cluster. Keep tension slightly loose on this round so petals puff slightly above the background.
Round 6 :
Rejoin at base between two petals with contrasting color (small accent ring color), ch 1, sc evenly around the edge of the petal round (approx. 56 sc around) to tidy the petal joins and create a small rim. (approx. 56)
Round 7 :
Ch 1, *ch 3, sl st in next ch space between petals* around to form small picot-like spaces. Adjust spacing to keep motif flat. Fasten off leaving a long tail for joining. (8 spacing loops)
Info :
Weave in ends but leave long tail for join-as-you-go. Make 24 large flower motifs total using dusty rose, sage, and cream in alternating order for the decorative border.
— Small Four-Petal Connector (make many) :
Round 1 :
With cream color. mr, ch 1, 6 sc in ring. Sl st to join. (6)
Round 2 :
Ch 1, (ch 2, dc in same st, ch 2, sl st in next st) x 3 to create 3 small loops and small connectors. End with sl st and fasten off. These small units will act as four-petal mini flowers when joined two together in cross pattern. (3 small loops)
Info :
Alternatively work a tiny 4-dc petal: (ch1, *4 dc in next st, sl st in next* x 3) to create small daisies. These are used to fill gaps between large flowers so add many as needed to match your layout spacing.
— Small Leaf (optional, make 24) :
Round 1 :
With sage green. Ch 7. Row 1: sc in 2nd ch from hook, hdc, dc, hdc, sc. Turn to work opposite side of chain: sc in first chain (total: 9 sts including both sides). Fasten off leaving tail for sewing. This makes a small symmetrical leaf. (9)
Info :
Leaves are worked flat and sewn under petals for added dimension. Make fewer or more leaves depending upon your spaced floral arrangement.
— Corner Square Motif (make 4) :
Round 1 :
With cream. mr, ch 1, 8 sc into ring. Sl st. (8)
Round 2 :
Ch 1, 2 sc in each st around (inc x8). (16)
Round 3 :
Ch 3, dc in next 3 sts, ch 3, sk 2, dc in next 4, ch 3, sk 2, dc in last 4 to create four corner arcs. Fasten off. (patterned layout)
Info :
These corner squares are used at the tapered ends of the runner to create the pointed triangular termination seen in the photos. Attach a single large flower in the final round for a focal point.
— Making the Floral Strips (assembly of motifs into a continuous strip) :
Round 1 :
Layout: Plan to make two identical floral strips to attach to either side of the center panel. For the pictured runner make 12 large flowers per strip interspersed with small connectors (24 large flowers total and approx. 22-26 small connectors). Pin them on a blocking board spaced roughly 2.5cm apart center-to-center.
Round 2 :
Join-as-you-go method: Rejoin cream yarn at edge of a large flower where you left a long tail. Ch 1, sc around the edge until you reach the next petal base where you will join a small connector. At connector point, sl st through connector ch-space and continue sc around flower. Continue this way joining motifs sequentially to form a chain. (Circular join counts vary per motif but average 56 sc around each large motif)
Info :
Always hold next motif behind the one you’re working and sl st through its outer loop at the desired joining point to connect. Pin everything first so spacing is even along the strip.
Round 3 :
After joining each large motif to its neighbors, add small four-petal connectors in the gaps: place connector so that its loops sit between petals and sl st through both motif and connector loops for a secure join. Repeat along entire strip. Fasten off and weave ends after completing the strip to prevent slipping. (strip length equals number of motifs)
Round 4 :
Work one leaf under every other large flower by sewing the leaf tail to the underside of the motif center. This should tuck the leaf up under the petal for a natural look. (optional)
Info :
Make both strips identical. Blocking the assembled strips flat will create even spacing and a consistent edge for joining to the center panel.
— Joining Floral Strips to Center Panel :
Round 1 :
With cream yarn and the center panel blocked and lining flat on your work surface, position the floral strip along the long edge of the center panel so the motif centers align with the eyelet pattern. Pin every 2-3 motifs to secure placement. Ensure motifs are oriented with petals pointing outward from the center panel.
Round 2 :
Starting at one end, whip stitch the edge of the center panel to the inner rim of the flower strip (the sc rim around the flower) using a long tail left at the sc round of the motif. Use small, close stitches to maintain a flat seam. Work along the entire length, making sure to sew through the back loop of the center panel edge stitches (the BLO ridge created earlier) to keep the seam invisible. (stitch count depends on panel length)
Info :
If you prefer a cleaner join, use a slip-stitch join: with right sides facing, hold the strip over the panel edge and sl st through both layers at each stitch so that the seam lies flat. This is faster but slightly more visible than sewing.
Round 3 :
Repeat the join process for the second floral strip on the opposite long edge. Double-check symmetry by measuring distances from runner center to edge at several points. Adjust if necessary before finishing the join. Fasten off and weave in tails securely. (Use roughly 1 stitch per 3 panel sts to match seam tension)
— Filling the Triangle Ends and Attaching Corner Squares :
Round 1 :
At each tapered end of the runner, you will see triangular gaps between the floral strips where the panel tapers. Position the corner square motif there, aligning its arcs with the floral row. Sew the corner square to both floral strips and to the end edge of the center panel with small whip stitches to make a neat point. (use 4 corner squares total)
Info :
Attach a single large flower centered on each corner square as decoration: place flower on top, pin, then stitch through square and flower rim to secure. This creates the pointed finished look at both ends of the runner.
— Outer Scalloped Lace Edging :
Round 1 :
Rejoin cream yarn along the outer rim of the floral strips and corner squares. Ch 1, work sc evenly around entire outer perimeter to neaten joins and create base for scallops. Work approx. 140 sc around the full runner (count will vary with your exact motif placement). Fasten off and rejoin for scallops.
Round 2 :
For each scallop: *sk 2 sc, (5 dc in next sc), sk 2 sc, sl st in next sc* repeat around. This produces bold scallops matching the photo. Adjust sk counts as needed so scallops are evenly spaced across the perimeter. (number of scallops depends on perimeter, aim for even spacing such as 24-28 scallops total)
Info :
To create delicate picot details between scallops, after each sl st add ch 3 and sl st back into the same st before continuing to the next scallop. This adds vintage texture to the edge.
Round 3 :
Work a reverse single crochet (crab stitch) along the very outer edge: join with sl st, ch 1, crab stitch around (reverse sc) to create a braided neat border that resists curling. Fasten off and weave ends. (counts vary)
Info :
For an extra-fine lace look, replace 5 dc scallops with (sc, hdc, dc, hdc, sc) to lower the profile and create a more delicate edge. Both options are shown in the photos: the runner pictured uses taller scallops for emphasis.
— Final Finishing Rounds & Blocking :
Round 1 :
Weave in all remaining yarn tails invisibly with yarn needle. Use matching yarn to go through the backside of stitches multiple times so the ends won’t come loose in wash and use.
Round 2 :
Block entire runner flat. Lay on a blocking board and pin edges and scallops so the runner is symmetrical. Spray lightly with water and allow to dry overnight. For cotton, a low steam iron (do not press directly) over a cloth can further flatten and shape scallops.
Info :
Final measurement for sample: approx. 14" wide by 44" long (35cm x 112cm). Measurements will vary with yarn choice and tension; block to final desired dimensions.
— Variations & Color Placement :
Info :
Alternate flower colors in a sequence (e.g., dusty rose, cream, sage, cream) to emulate the picture. For a more modern look, make all flowers the same color with contrasting centers. Add tiny seed bead centers if you want sparkle (sew in with thread and secure knot inside center ring).
Info :
If your runner is wider or narrower, adjust foundation chain for center panel in multiples of 6 to preserve the openwork repeat, and add or remove flower motifs per side to retain balanced proportion.
This charming vintage-inspired table runner will bring a soft, romantic touch to your home. Each floral motif and delicate scallop is a little act of handmade love, coming together into an heirloom piece you can display for years. I hope you enjoy the calming, rhythmic process of making every flower and joining them into this beautiful runner. 🧶🌸 There is real joy in laying it on a table and seeing tea and cookies come alive with pattern and color. Happy stitching and savor every petal! ✨