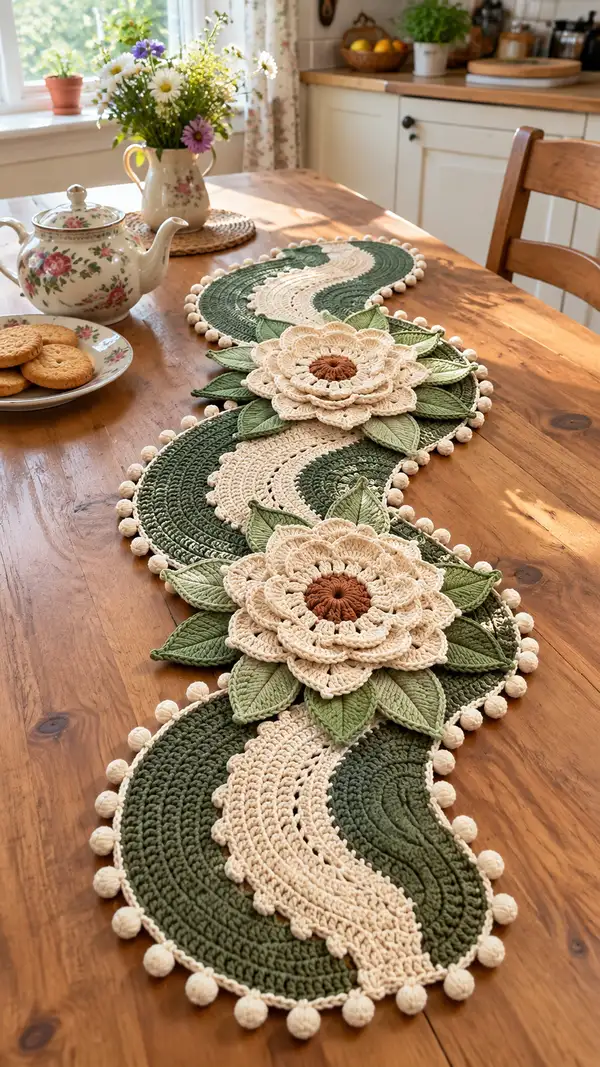
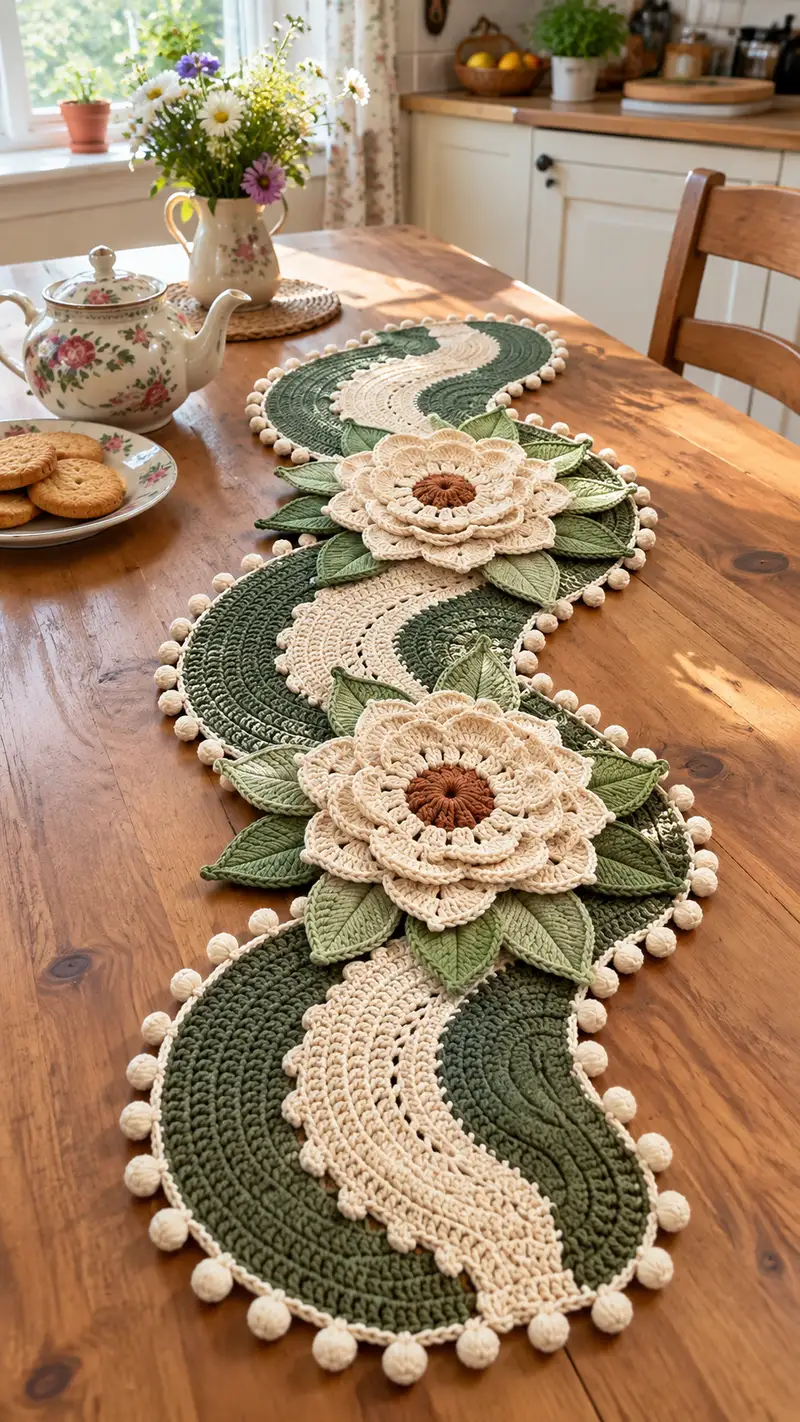
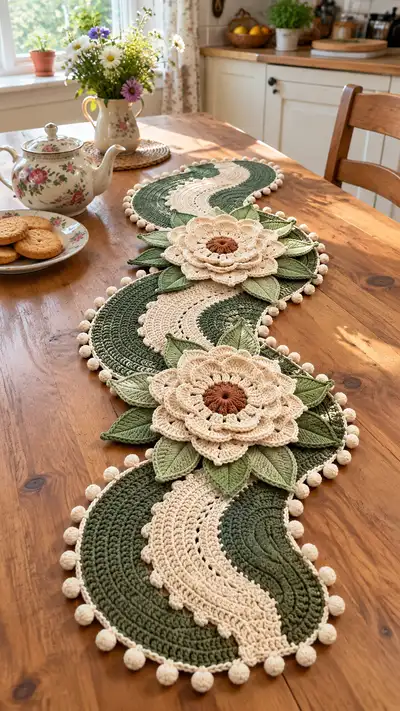
Create a beautiful wavy table runner inspired by botanical shapes and layered flowers. This design features alternating deep olive waves and a soft cream serpentine band, finished with 3D layered flowers, sculpted leaves, and a charming bobble edge. The runner is made in modular motifs that are joined, allowing customization of length and color. The finished piece lies flat and has a contemporary cottage look that dresses any dining table.
Progress Tracker
0% Complete
— Overview & Construction Notes :
Info :
This table runner is built from modular 'wave modules' worked flat in rounds as elongated ovals. Each module consists of a deep olive outer crescent, a cream serpentine inset worked onto the module, and layered flowers with sculpted leaves attached on top. Make 3 full modules for a runner of the size shown, or repeat modules to lengthen. Work tightly enough to avoid lacey holes because the runner must sit flat, but not too tight that the cotton yarn loses drape. Blocking between assembly steps improves alignment.
Info :
Gauge note: Each wave module (single large oval) in sample measures approximately 35cm long by 18cm wide when using 4.5mm hook and worsted cotton. Adjust hook if necessary. Use stitch markers at the beginning of each round and every 12–16 stitches for long rounds to avoid losing place.
— Main Wave Module (Make 3-5 as desired) :
Round 1 :
6 sc in magic ring (6)
Round 3 :
(1 sc, 1 inc) × 6 (18)
Round 4 :
(2 sc, 1 inc) × 6 (24)
Round 5 :
(3 sc, 1 inc) × 6 (30)
Round 6 :
(4 sc, 1 inc) × 6 (36)
Info :
These first 6 rounds create a compact circular base. We will begin to elongate the circle by working extended increase rows to form an oval/wave shape. Keep counts accurate and check for twist when working longer rounds.
Round 7 :
(5 sc, 1 inc) × 6 (42)
Round 8 :
(6 sc, 1 inc) × 6 (48)
Round 9 :
(7 sc, 1 inc) × 6 (54)
Info :
To begin shaping the long sides of the oval, the next rounds will increase more selectively at the two 'end curves' of the oval. Use stitch markers to mark the two center end points of the long axis. Increase clusters will be worked into those markers to pull the circle into an oval shape.
Round 10 :
1 sc in each st around, placing an extra inc (2 sc) into each marker stitch at the two opposite ends (total increases 2 × 2 = 4 added) (58)
Round 11 :
1 sc in each st around, + 1 inc in the 3 stitches on either side of each end-marker (add 6 × 2 = 12 increases across both ends) (70)
Info :
By adding increases on the ends only, you elongate the circle. Check that the piece lays flat; if it begins to ruffle, reduce the number of increases next round. Conversely, add more increases at end clusters if too tight.
Round 12 :
1 sc in each st (70)
Round 13 :
(3 sc, inc) × 14 + (6 sc in end arc) × 2 to maintain oval form (84) - work increases distributed evenly on the long-axis end clusters only
Round 14 :
1 sc around (84)
Round 15 :
(4 sc, inc) × 14 + 1 sc in each end arc (98)
Info :
At this size we begin to define a textured field of dc and hdc rows to create the ribbed look that appears in the sample runner. The dark olive field is mostly hdc/dc alternating rows to give a low profile rib. For a softer drape you can substitute all hdc for all dc—experiment on a swatch.
Round 16 :
1 hdc in each st around (98)
Round 17 :
1 dc in each st around (98)
Round 18 :
1 hdc in each st BLO around to make a subtle ridge (98)
Round 19 :
1 sc in each st around (98)
Info :
Work 6–8 even rounds now to build the long flat body of the wave motif. If you prefer more texture, alternate FLO/BLO rows. Keep the stitch count constant so the oval grows only in length from the end clusters already created.
Round 20-25 :
1 sc in each st (98)
Round 26 :
(4 sc, dec) × 14 + 1 sc in each end arc (84)
Round 27 :
(3 sc, dec) × 14 + 1 sc in each end arc (70)
Info :
These decrease rounds begin to narrow the module toward the opposite end to create the wave’s tapered connection point. Do decreases symmetrically to avoid twisting. Fasten off the main module after Round 27 and weave in ends, leaving the top edge ready to accept the cream serpentine inset.
Round 28 :
Optional decorative scallop round: Join cream yarn in first st, ch2, *(3 dc in same st, sk 2, sl st in next)* repeat around to form scallops; adjust sk stitches to end with 14 scallops per long edge (counts vary with tension)
Info :
If replicating the exact sample, leave a wide central path for the contrasting serpentine band. This path will be crocheted directly onto the module as an inset. Ensure the module is blocked flat and ends are symmetrical before joining the inset.
— Cream Serpentine Inset (Work 1 per module) :
Info :
The serpentine inset is worked separately as a long meandering strip that hugs the long curve of the module and is then seamed. It uses chain-and-shell shaping to create scalloped edges that tuck into the wave.
Round 1 :
With cream yarn ch 12, sc in 2nd ch from hook and in next 9 ch (10), turn to work other side of chain: 5 sc across next 5 chains, then 1 sc in final chain (10) joining to make a narrow oval foundation. (20 total)
Round 2 :
Ch1, 1 sc in each st around (20)
Round 3 :
(1 sc, inc) × 10 (30)
Round 4 :
1 sc around (30)
Round 5 :
Ch 3 (counts as dc), *sk 1, (2 dc, ch1, 2 dc) in next st (shell), sk 1, dc in each of next 3*, rep across to create shells; end with dc to finish row. (shells spaced to produce scalloped serpentine edge)
Info :
Lengthen the serpentine by adding rows of dc and shell motifs. Make sure the curve matches the path on the wave module by holding the inset along the module while making it. You can lengthen or shorten the inset by adding or removing rows of dc between shells.
Round 6-12 :
Alternate dc rows and shell rows until the inset reaches approximate length of the central path for your module (7–9 total rows in sample). End with a neat sc edge for seaming (30)
Round 13 :
Fasten off and leave a long tail for sewing. Block the inset flat to curve slightly so it sinks neatly into the module.
Info :
Sew inset to module using mattress stitch or whip stitch along the inner curve. Work slowly and use pins to match scallops to waves. Sew through both layers and hide ends between layers when finished.
— Large Layered Flower (Make 3 per runner) :
Info :
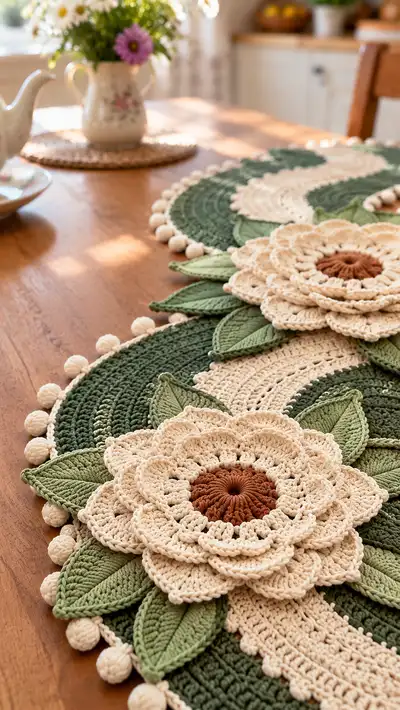
The sample shows a triple-layered flower: a small terracotta center disk, a cream mid petal layer, and a detailed outer petal layer. Each petal layer is made flat then layered and stitched together for depth. Petal edges are sculpted using post stitches and shell repeats.
Center Round 1 :
With terracotta, 8 sc in magic ring (8)
Round 3 :
(1 sc, inc) × 8 (24)
Round 4 :
1 sc around (24)
Info :
Switch to cream for the first petal layer. Join cream to any st on Round 4. Keeping the center taut and slightly gathered gives the flower a natural cupped center.
First Petal Layer Round 1 :
Join cream, ch1, sc in same st, *ch3, sk 1 st, sc in next st* around to create 12 ch-loops for base petals (12 loops)
First Petal Layer Round 2 :
Work into each ch-loop: *(sc, hdc, 3 dc, hdc, sc) in each ch-loop* to form full petals (12 petals)
First Petal Layer Round 3 :
1 sc around the base of the petals to tidy edge and anchor to center disk
Info :
Ensure petals are evenly spaced and stay slightly raised — do not overstretch loops when working petals. Place petals perpendicular to center so subsequent layers can overlap.
Second Petal Layer Round 1 :
Join cream behind first petal layer, ch1, *sk 2 sts at base between petals, (sc, ch4, sc) in space* around to form 12 larger loops offset from first layer (12 loops)
Second Petal Layer Round 2 :
Work into each loop: *(sc, hdc, 5 dc, hdc, sc) in each loop* (12 larger petals)
Second Petal Layer Round 3 :
Work a decorative picot round: *(sl st, ch3, sl st in top of petal, sl st in next base)* around to give lacy scallop highlights
Info :
For depth, sew the first and second petal layers together with long whip stitches around the base, stacking the smaller petals slightly above the larger ones. Gently shape each petal by pinching and steaming lightly (spray-block) if needed.
Third Petal Layer (Optional Detailed Overlay) Round 1 :
Using the same cream color, join at edge and ch4, *(sk 1, (2 dc, ch2, 2 dc) in next space, sk 1, sl st in next st)* to create lacy overlay points (repeat around to form 12 points)
Third Petal Layer Round 2 :
Work 1 sc around to secure overlay, then 1 sl st to finish. Fasten off, weave ends under petals (no raw tails showing).
Info :
Stack the petals so the terracotta center peeks out. Sew the assembled flower to the module across the center disk; use small, even stitches to hide attachment. Sew from back to front, pulling gently to seat the flower on the module.
— Sculpted Leaves (Make 12–18 leaves per runner) :
Info :
Leaves are worked flat with ridge definition using post stitches and surface slip-stitch veins. Make a couple sets of sizes (small/medium/large) to layer around flowers as shown in the sample.
Leaf Round 1 :
With light sage yarn ch 12, sc in 2nd ch from hook and next 9 ch across, then work around other side of chain 9 sc, join (18)
Leaf Round 2 :
Ch1, 1 hdc in first 2 sts, (1 hdc, inc) × 6 across the long side to create gentle widening, then 1 hdc in last 2 sts on tail side (24)
Leaf Round 3 :
1 sc around edge, at the tip of leaf work 3 sc to form a point, then 1 sc along opposite side back to start (24)
Leaf Round 4 :
Surface ribbing: With same color, working from center top down: *1 sl st, 1 fpdc (front post double crochet) around next st* repeat down center line to make raised vein (24)
Leaf Round 5 :
Edge shaping: *(sl st, sc 2tog along edge to taper) × 2 to make a tapered base* finish and fasten off leaving a long tail for sewing
Info :
After stitching the center vein, pinch the leaf along the center and steam-block lightly to get a three-dimensional curve. Sew leaves around the flower base with needle and cotton thread; overlapping leaves as in photos creates that lush, layered look.
— Bobble Edge & Final Border :
Info :
The bobble edge is a key detail. It is worked around the full perimeter of the joined modules. Create small bobble clusters, spaced evenly (approximately one bobble per 3–4 stitches), and then work a sc round to hold them in place.
Bobble Round 1 :
Join cream yarn at the outermost edge, ch1, sc in next 3 sts, *make bobble: (yarn over, insert hook, pull up loop, yarn over, pull through 2) × 4 leaving loops on hook, yarn over and pull through all loops to close bobble, ch1, sk 2 sts, sc in next 3 sts* repeat around to form evenly spaced bobbles
Bobble Round 2 :
Sc evenly around to secure bobbles; adjust spacing so bobbles sit rounded and consistent. If a bobble sits too flat, add one more yarn-over cluster next time to make it taller.
Info :
You can experiment with puff stitch instead of bobble for a softer look. Make sure all bobbles are worked on the same face of the fabric so they point outward from the runner.
— Joining Modules & Assembly :
Info :
Work modules individually then block flat. Align modules with a slight overlap on the short ends to create smooth S-shaped waves. Use mattress stitch or whip stitch with matching yarn to join them invisibly. After joining, add the cream serpentine inset and flowers, then finish with bobble edging.
Joining Step 1 :
Place two modules right sides up, aligning long axes. Pin at 1.5 cm intervals along the seam where they meet; the seam should curve like an S. Using matching olive yarn, sew with slip stitch or whip stitch through the back loops only of both modules to create a seam that reads like a single continuous row.
Joining Step 2 :
Attach cream serpentine inset with small whip stitch through the sc edge of the inset and into the base module, matching scallop-to-wave points. Keep tension even; do not pull tight or the inset will pucker.
Info :
Attach flower centers and leaves last. Arrange each flower cluster symmetrically along the central cream band as in the image (approximately centered on each module junction). Secure with strong stitch through center disk and under petals; weave in ends under petals to hide them.
Final Finishing :
Work the bobble border around the entire perimeter. Block the whole runner lightly — a single gentle steam or spritz followed by shaping on a flat surface — and allow to dry completely. Weave in all ends and trim close to fabric.
Info :
For extra stability, consider a thin non-slip fabric glued to the underside at table contact points, or stitch a lightweight fabric backing to the runner’s underside using running stitch. This prevents sliding and protects the runner from spills.
— Alternate Smaller Decorative Motifs (Optional) :
Info :
If you prefer a shorter runner or place mats, scale down modules by reducing initial increases: start with 6–10 rounds of growth instead of 15, and shorten the height of petal layers accordingly. Use thinner yarn and a smaller hook for delicate placemats.
Mini Module Rounds 1-8 :
Follow Main Wave Module Rounds 1–8 but stop after Round 14 and omit second petal layer for a tidy mini motif (counts will be proportional to your tension)
Info :
Keep a sample swatch and measure often — modular crochet depends on consistent repeat size. If one module runs larger, adjust hook or add/subtract a dc/htr row to match the others before assembly.
I hope you enjoy making this botanical runner as much as I did designing it — those layered flowers really transform a table! Each module comes together into a flowing, sculptural piece that’s both decorative and practical. Add or remove modules to create a runner that perfectly fits your table. 🧶🌿 Happy stitching and don’t forget to style it with fresh flowers when finished! 🌼