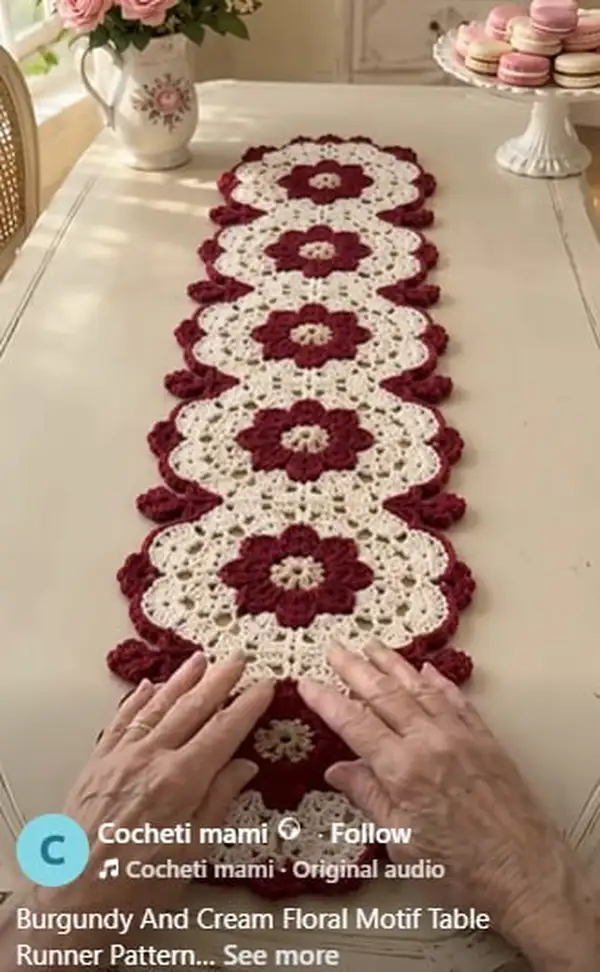
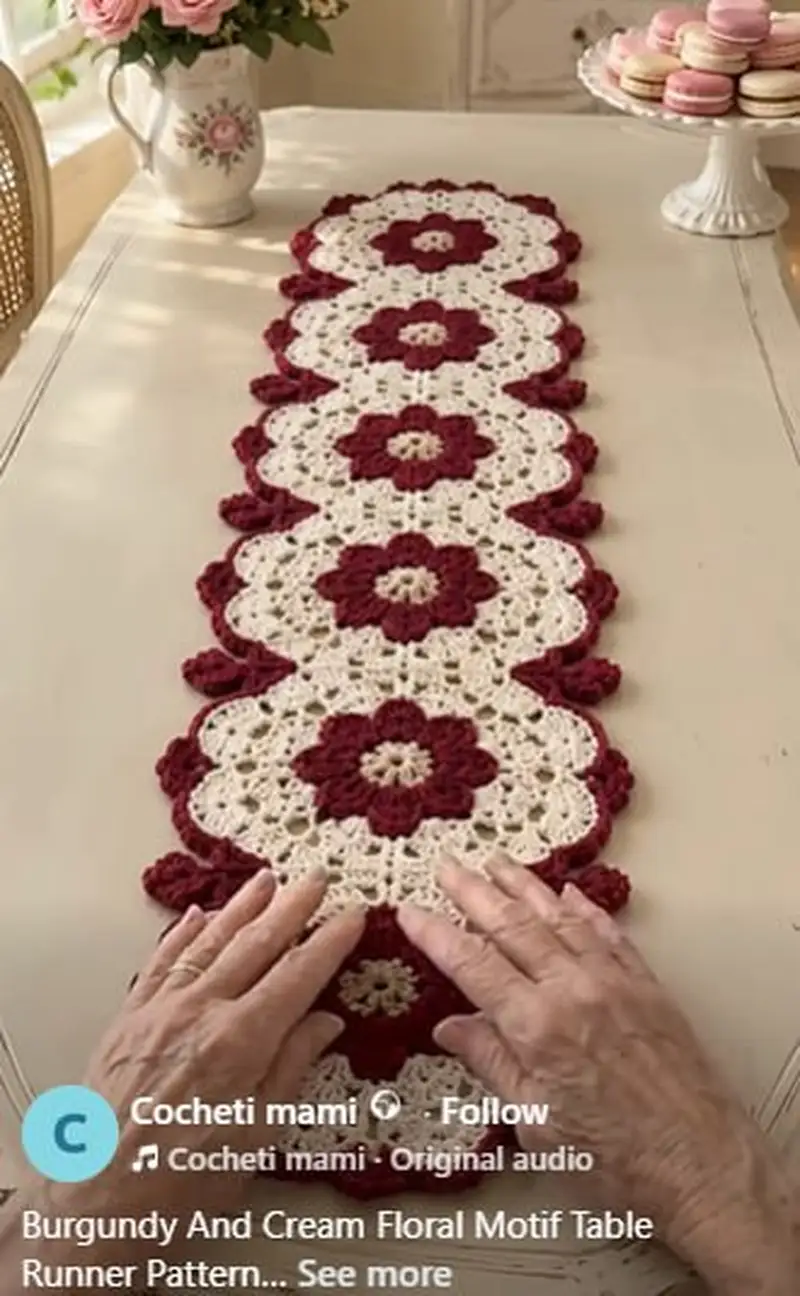
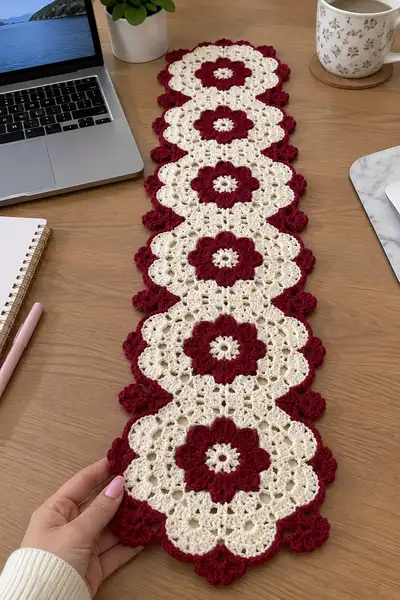
A classic, vintage-inspired table runner made of linked floral motifs in rich burgundy and soft cream. Each motif features a deep burgundy center flower with a lacy cream scallop surrounding it and a decorative burgundy scalloped edge. The runner is composed of consecutive motifs joined as you go, creating a long elegant centerpiece perfect for dining tables, sideboards or dressing a hall console.
Progress Tracker
0% Complete
— Overview :
Info :
This pattern describes how to make a single floral motif and then how to make 7 motifs and join them to form the table runner pictured. Each motif is worked in rounds using burgundy for the center flower and cream for the surrounding lacy rounds. The pattern lists the full sequence for Motif 1 through Motif 7 (repeat the motif rounds for each motif), followed by the join-as-you-go steps and an outer scalloped border. Stitch counts are given for each round; maintain consistent tension for even motifs.
— Notes Before You Begin :
Info :
Gauge is not critical for this decorative runner but approximate motif diameter should be about 9-10 cm (3.5-4 in) across when blocked using the yarn and hook specified. The sample runner uses 7 motifs to create an approximately 95-105 cm (37-41 in) long runner. You can adjust motif count to change length. Block each motif flat before joining for best results.
— Motif Structure (Make 7 identical motifs) :
Info :
Each motif is worked in the round and has 14 rounds total (named Round 1 through Round 14). Work the first four rounds in burgundy to create the center flower and switch to cream for Round 5 onwards to create the lacy field and scalloped outline. Maintain stitch counts given at the end of each round for consistency.
— Motif 1 :
Round 1 :
Using burgundy. Magic ring, ch1, 8 sc into ring. Pull ring closed. (8)
Round 2 :
8 inc (work 2 sc in each stitch around) (16)
Round 3 :
(1 sc, inc) x8 (24)
Info :
Rounds 1-3 build a sturdy center disc that will anchor the petal round. Keep tension even so petals sit neatly on top of the disc in the next round.
Round 4 :
*ch3, sl st in next stitch* repeat around to create 24 ch-3 loops (24 ch loops). Join with sl st to first ch-3 loop.
Round 5 :
Change to cream in the last pull of the joining sl st. Into first ch-3 loop: (sc, hdc, 3 dc, hdc, sc) to form a petal. *Skip next sc on disc, work (sc, hdc, 3 dc, hdc, sc) into next ch-3 loop* repeat around to make 8 petals. After working all petal clusters, join with sl st to first sc. (8 petals; stitch count around equals 8 cluster petals sitting on top of disc)
Info :
Petals are worked into the ch-3 loops created in Round 4. Each petal cluster sits in a loop rather than into a single stitch, so the total stitch count around will expand. Keep petals consistent by counting the clusters; there should be 8 petals.
Round 6 :
In cream. After joining, ch3 (counts as first dc), *ch2, skip to top of next petal cluster, dc into top of next petal; rep across placing a dc into the highest stitch of each petal and ch2 between petals. You will create 8 dc separated by ch-2 spaces. Join with sl st to top of beginning ch-3. (8 dc + 8 ch-2 spaces)
Round 7 :
Ch3, dc into same st, *3 dc into each ch-2 space to form shell, ch2, 3 dc into same ch-2 space* this establishes larger scallops around (work shells centered in each ch-2 space between petals). Repeat around to make 8 larger shells. Join with sl st to beginning ch3. (8 shells)
Info :
Round 7 builds the first lacy ring of shells that begin to shape the hexagonal scalloped outline. Count shells (8) so the following rounds line up with shell centers.
Round 8 :
Ch3, dc in next 2 sts to create a short DC group, *ch3, skip next shell group, 3 dc across the top of the next shell (evenly) creating a bridge; ch3, 3 dc in next shell top* repeat around. This round creates chain arches between shells forming lacy openwork. Count: you will have 8 shell zones and 8 ch-3 arches. (8 arches, 24 dc groups)
Round 9 :
Ch1, sc into same st, *ch4, skip to center of chain arch from previous round and work (sc, ch1, sc) into arch center; ch4, sc into next shell top* repeat around placing 8 sc clusters separated by ch-4 decorative loops. Join. (8 small sc clusters; 8 ch-4 loops)
Info :
Round 9 places little bridging clusters that stabilize the lace while keeping the motif airy. Keep chains even so the motif blocks flat later.
Round 10 :
Ch3, dc in same st, *(dc, ch1, dc) across the ch4 loop to create a small peaked shell into each ch4 loop, ch1, 3 dc into shell top* repeat around to reinforce scallop edges. Join. (8 larger peaks)
Round 11 :
Ch1, sc in same st, *ch5, sc into top of next shell peak* repeat around to create a tall open lacy scallop; you should have 8 ch-5 loops. Join. (8 ch-5 loops)
Info :
Round 11 expands the lacy field and readies the motif for the final scalloped shaping. Check that you still have 8 repeated spaces — motifs are built around this 8-point symmetry.
Round 12 :
In cream. Into each ch-5 loop work (sc, hdc, 5 dc, hdc, sc) to create the prominent scallop edge. This round will dramatically increase the outline and gives the motif its rounded, petal-like scallop. Join with sl st. (8 scallops)
Round 13 :
Ch1, sc across the top of the long scallops: *5 sc across top of each scallop evenly, slip to next scallop base* Repeat across all scallops to create a neat even edge. You should have approx 40 sc total when worked evenly across scallops (5 sc x 8 scallops = 40 sc). Join and fasten off leaving a length of cream for joining. (40)
Round 14 :
With burgundy, join in the outermost stitch and work small picot-like clusters between scallops to create the decorative burgundy edging and the points used to join adjacent motifs: *ch1, sc into first stitch, ch3, sl st back into same stitch to make a small petal bump; skip 2 sc and repeat* around making 16 small burgundy bumps spaced evenly (2 per scallop). Join, fasten off and weave in ends. (16 small bumps)
Info :
Fasten off motifs after Round 14 and block flat. Motif centers will be burgundy and the body will be cream with a burgundy scalloped tip at each scallop junction. Make 7 identical motifs following Motif 1 timing and rounds.
— Motif 2 :
Round 1 :
Using burgundy. Magic ring, ch1, 8 sc into ring. (8)
Round 3 :
(1 sc, inc) x8 (24)
Round 4 :
*ch3, sl st in next stitch* repeat around creating 24 ch-3 loops. Join. (24 loops)
Round 5 :
Change to cream and work petals into ch-3 loops: (sc, hdc, 3 dc, hdc, sc) into each ch-3 loop around to make 8 petals. Join. (8 petals)
Round 6 :
Ch3, dc into the tops of petals and ch2 between petals to make 8 dc separated by ch2 spaces. Join. (8 dc)
Round 7 :
Ch3, 2 dc in same space, *3 dc in each ch2 space to form shells, ch2 between shells* repeat around to create 8 shells. Join. (8 shells)
Round 8 :
Ch3, dc across shells and ch3 to form arches between shells: *dc, ch3, dc across shell top* repeat creating 8 arches. Join. (8 arches)
Round 9 :
Ch1, sc into same, *ch4, sc into arch centre (sc, ch1, sc) to build bridge*, repeat around creating 8 ch4 loops. Join. (8 loops)
Round 10 :
Ch3, dc across loops making small peaks: (dc, ch1, dc) in each ch4 loop; then 3 dc into each shell top to bind structure. Join. (8 peaks)
Round 11 :
Ch1, sc, *ch5, sc into peak top* repeat to make 8 ch5 loops. Join. (8 loops)
Round 12 :
Into each ch5 loop: (sc, hdc, 5 dc, hdc, sc) forming the large scallop. Join. (8 scallops)
Round 13 :
Work 5 sc evenly across each scallop top to create an even outer ring (5 sc x 8 scallops = 40 sc). Join and fasten off cream. (40)
Round 14 :
With burgundy join to the outer ring and make small 2-stitch clusters/picots between scallops (2 clusters per scallop for 16 bumps). Fasten off and weave ends. (16)
Info :
Repeat motif pattern consistently to produce identical motifs. If you prefer fewer bumps on the outer edge, work a single picot per scallop instead of two.
— Motif 3 :
Round 1 :
Using burgundy. Magic ring, ch1, 8 sc into ring. (8)
Round 3 :
(1 sc, inc) x8 (24)
Round 4 :
*ch3, sl st next stitch* x8 around to make ch-3 loops for petals. Join. (24 loops)
Round 5 :
Switch to cream. In each ch-3 loop: (sc, hdc, 3 dc, hdc, sc) to make 8 petals. Join. (8 petals)
Round 6 :
Ch3, dc into top of each petal separated by ch2 spaces (8 dc). Join. (8 dc)
Round 7 :
Work shells across ch2 spaces: 3 dc, ch2, 3 dc into each ch2 space to make 8 shells. Join. (8 shells)
Round 8 :
Create arches between shells using ch3 and dc groups: *dc, ch3, dc across shell top* repeat to create 8 arches. Join. (8 arches)
Round 9 :
Ch1, sc into the first arch, *ch4, (sc, ch1, sc) into arch centre, ch4, sc into top of next shell* repeat across to create 8 ch4 loops. Join. (8 loops)
Round 10 :
Form small peaks across each ch4 loop: (dc, ch1, dc) in each loop and 3 dc across shell tops to bind. Join. (8 peaks)
Round 11 :
Ch1, sc and make ch5 loops across peaks to prepare scallops (8 loops). Join. (8 loops)
Round 12 :
Into each ch5 loop work (sc, hdc, 5 dc, hdc, sc) to form a full scallop edge. Join. (8 scallops)
Round 13 :
Work 5 sc evenly across each scallop top to create a tidy outer ring (40 sc total). Join and fasten off cream. (40)
Round 14 :
With burgundy, add small clustered picots between scallops to match previous motifs (16 small bumps). Fasten off and weave in ends. (16)
Info :
Motifs 1-3 are identical in structure. Continue making motif sets with the same 14-round sequence. Blocking each motif now helps keep joining even and flat.
— Motif 4 :
Round 1 :
Burgundy. Magic ring, ch1, 8 sc (8)
Round 3 :
(1 sc, inc) x8 (24)
Round 4 :
*ch3, sl st next* around to create ch3 loops for petals. Join. (24 loops)
Round 5 :
Switch to cream. Petal clusters: (sc, hdc, 3 dc, hdc, sc) in each loop (8 petals). Join. (8 petals)
Round 6 :
Ch3, dc in top of petals with ch2 between to form 8 dc separated by ch2 spaces. Join. (8 dc)
Round 7 :
Shell round: 3 dc, ch2, 3 dc into each ch2 space to make 8 shells. Join. (8 shells)
Round 8 :
Bridge round using ch3 arches and dc groups bridging shell tops; create 8 arches. Join. (8 arches)
Round 9 :
Ch1, sc into arch, *ch4, sc cluster into arch center (sc,ch1,sc)* repeat to form 8 ch4 loops. Join. (8 loops)
Round 10 :
Peak formation: (dc, ch1, dc) in each ch4 loop plus 3 dc across shell tops to secure. Join. (8 peaks)
Round 11 :
Ch1, sc, create ch5 loops across peaks to prepare scallops (8 loops). Join. (8 loops)
Round 12 :
Large scallop round: (sc, hdc, 5 dc, hdc, sc) into each ch5 loop to shape scallops. Join. (8 scallops)
Round 13 :
Evening round: 5 sc across each scallop top (5 sc x 8 = 40 sc). Join and fasten off cream. (40)
Round 14 :
Burgundy edge: small 2-stitch cluster/picot bumps between scallops (total 16). Fasten off and weave ends. (16)
Info :
Make Motif 4 exactly as Motif 1 to ensure a consistent runner. Keep all outer picots aligned to make join points even later.
— Motif 5 :
Round 1 :
Burgundy. MR, ch1, 8 sc (8)
Round 3 :
(1 sc, inc) x8 (24)
Round 4 :
*ch3, sl st next* x8 loops. Join. (24 loops)
Round 5 :
Change to cream: (sc, hdc, 3 dc, hdc, sc) into each loop to make 8 petals. Join. (8 petals)
Round 6 :
Ch3, dc into petal tops with ch2 between (8 dc). Join. (8 dc)
Round 7 :
Shells: 3 dc, ch2, 3 dc into each ch2 space to make 8 shell groups. Join. (8 shells)
Round 8 :
Ch3 arches and dc groups bridging shells: form 8 arches. Join. (8 arches)
Round 9 :
Ch1, sc and ch4 loops placed into arch centers to create 8 ch4 loops. Join. (8 loops)
Round 10 :
Form peaks: (dc, ch1, dc) in each ch4 loop; finish with 3 dc across shell tops to lock shape. Join. (8 peaks)
Round 11 :
Ch1, sc and create ch5 loops across peaks (8 loops). Join. (8 loops)
Round 12 :
Into each ch5 loop make (sc, hdc, 5 dc, hdc, sc) forming scallops. Join. (8 scallops)
Round 13 :
5 sc across each scallop top for an even outline (40 sc total). Join and fasten off cream. (40)
Round 14 :
Burgundy: add two small bumped clusters between scallops (16 bumps total). Fasten off and weave in ends. (16)
— Motif 6 :
Round 1 :
Burgundy. MR, ch1, 8 sc (8)
Round 3 :
(1 sc, inc) x8 (24)
Round 4 :
*ch3, sl st next* repeat to create 24 loops for petals. Join. (24 loops)
Round 5 :
Switch to cream and form petals: (sc, hdc, 3 dc, hdc, sc) into each loop making 8 petals. Join. (8 petals)
Round 6 :
Ch3, dc across petal tops separated by ch2 spaces (8 dc). Join. (8 dc)
Round 7 :
Shell round across ch2 spaces: 3 dc, ch2, 3 dc to make 8 shells. Join. (8 shells)
Round 8 :
Bridge round creating ch3 arches between shells and dc groups across shell tops. Join. (8 arches)
Round 9 :
Ch1, sc and create ch4 loops across arches (8 loops). Join. (8 loops)
Round 10 :
Form small peaks (dc, ch1, dc) in each ch4 loop and secure shell tops with 3 dc. Join. (8 peaks)
Round 11 :
Ch1, sc and make ch5 loops for scallops (8 loops). Join. (8 loops)
Round 12 :
Work (sc, hdc, 5 dc, hdc, sc) in each ch5 loop to form scallops. Join. (8 scallops)
Round 13 :
5 sc evenly across each scallop top (40 sc total). Join and fasten off cream. (40)
Round 14 :
Burgundy: add small edge bumps (16) between scallops to match other motifs. Fasten off and weave in ends. (16)
Info :
Make Motif 6 to match Motifs 1-5. Keep motif edges identical to ensure neat join points where burgundy bumps align for join-as-you-go connections.
— Motif 7 :
Round 1 :
Burgundy. MR, ch1, 8 sc (8)
Round 3 :
(1 sc, inc) x8 (24)
Round 4 :
*ch3, sl st next* x8 loops for petals. Join. (24 loops)
Round 5 :
Change to cream. Work (sc, hdc, 3 dc, hdc, sc) in each loop to create 8 petals. Join. (8 petals)
Round 6 :
Ch3, dc into petal tops with ch2 spaces between across (8 dc). Join. (8 dc)
Round 7 :
Shells: 3 dc, ch2, 3 dc in each ch2 space - 8 shells total. Join. (8 shells)
Round 8 :
Create arches between shells with ch3 and dc groups, 8 arches. Join. (8 arches)
Round 9 :
Ch1, sc and build ch4 loops in arch centers to make 8 ch4 loops. Join. (8 loops)
Round 10 :
Create peaks: (dc, ch1, dc) in each ch4 loop, then 3 dc into shell tops to bind. Join. (8 peaks)
Round 11 :
Ch1, sc and create ch5 loops across peaks for scallops (8 loops). Join. (8 loops)
Round 12 :
Large scallop: (sc, hdc, 5 dc, hdc, sc) into each ch5 loop. Join. (8 scallops)
Round 13 :
Work 5 sc across each scallop top for evenness (40 sc). Join and fasten off cream. (40)
Round 14 :
Burgundy: add two-picot cluster bumps (16) between scallops for joining hubs. Fasten off and weave in ends. (16)
Info :
You now have 7 finished motifs. Block all motifs flat with pins, shaping scallops to be even and round. Allow motifs to dry completely before joining.
— Joining Motifs (Join-As-You-Go) :
Info :
The motifs are joined by connecting the burgundy outer bumps (16 per motif) to the adjacent motif's bumps. The runner pictured is a straight line of 7 motifs joined side-by-side using a single slip-stitch join-as-you-go. Join motifs 1 to 2 first, then 2 to 3 and so on. The following rounds provide a step-by-step join method using the final burgundy round as the joining framework.
Join Step 1 :
Place Motif 1 and Motif 2 with right sides up, lining up scallops so their burgundy bumps meet. With burgundy yarn and RS facing, join in the outer bump on Motif 1 where you want the join to begin.
Join Round A :
Insert hook into the bump on Motif 1, draw up a loop, insert hook into the corresponding bump on Motif 2 and pull a loop through both bumps, ch1 and work sl st to join the two bumps together. Fasten off the yarn tail from Motif 2 if necessary and continue around the motif edge joining each corresponding bump pair with sl st until the desired number of bump joins are complete (usually join 4-6 bump pairs across the adjacent sides depending on motif placement). Secure yarn and weave in end. (variable joins)
Info :
When joining, keep tension even. The join-as-you-go method binds motifs neatly without bulky seams. If you prefer a more visible decorative join, use a contrasting color and single crochet through both edges instead of sl st.
Join Round B :
Position Motif 2 adjacent to Motif 3 and repeat Join Round A, ensuring Motif 2 is now connected both to Motif 1 and Motif 3. Continue in sequence until all motifs are connected in a straight row. After joining, press motifs gently with a steam iron through a damp cloth or wet-block to even out joins and open lace.
Info :
Always join motifs with RS (right side) facing you. If you accidentally join with WS, the runner will have an inverted look. Check placement before making permanent joins.
— After Joining: Flattening & Alignment Rounds :
Round J1 :
Once motifs are linked, use cream yarn and join at any seam inside the runner body where two motifs meet. Ch1, work 1 sc into each outer stitch across the seam area for 1 full round along the top face of the runner to stabilize joins (approx 8-12 sc per motif seam depending on join points). Continue across all seams to form a continuous stabilizing ring along the top side of the runner. Join with sl st and fasten off. (approx 7 seams x 10 sc = 70 sc total across runner length)
Info :
This stabilizing round evens the runner surface and helps keep motifs aligned. Work gently to avoid pulling motifs out of shape; use stitch markers to mark seam edges while you work.
Round J2 :
Turn runner over and repeat Round J1 on the underside to further stabilize joins. Work 1 sc into each stitch across seams and along motif outer rings where motifs meet. Join and fasten off. (approx same count as Round J1)
Info :
After these two stabilization rounds the motifs should lie flat and stay firmly connected. If you notice gaps, add a few extra sl st joins between bumps to tighten join areas.
— Final Outer Border and Scalloped Edge :
Border Round 1 :
With cream yarn and RS facing, join in any outermost sc. Ch3 (counts as dc), work 2 dc in same st, *skip to next outer scallop top and work (3 dc, ch2, 3 dc) in scallop center to emphasize the scallop, ch1 and sc in space between scallops* repeat across entire outer edge of runner to reinforce scallops. For straight-runner sides (where two motifs meet adjacent edges) work 3 dc, ch2, 3 dc into the central seam space to maintain symmetry. Join and fasten off. (work symmetric clusters across approx 14 scallops down runner edges)
Info :
Border Round 1 strengthens the outer scallop shape and evens out variations from motif joins. Keep your hook into the same size used previously or one size smaller to create a neat, un-floppy border.
Border Round 2 :
With burgundy yarn, join to the point between two cream scallops. *Work (sc, ch3, sl st back into same stitch) to create a raised bump; skip 3 sc and repeat across the border.* This produces a decorative burgundy scalloped picot around the entire runner edge. Join and fasten off; weave in ends. (Approximately 2 bumps per cream scallop across runner circumference, matching motif bumps.)
Info :
The burgundy bumps repeat the motif outer-edge look and make the runner edge cohesive. If you prefer a subtler edge use single crochet only instead of picot bumps.
Border Round 3 :
Optional finishing round in cream: join to any st and work single crochet around the edge evenly, placing 1 sc per 2 dc cluster or 1 sc per picot to even everything out. This creates a neat continuous folded edge and gives the runner a finished look. Fasten off and weave in all ends securely. (approx 120 sc around depending on motif count)
Info :
After the final border rounds, block the entire runner again to set final shape. Stretch gently into desired shape on a blocking mat and pin the scallops and outer picots carefully for a crisp, even finish. Allow to dry completely before use.
— Finishing Touches :
Info :
Weave in all ends on the backside of the runner. Trim any stray fibers. If you want extra stiffness for decorative-only runners, apply a light fabric stiffener to the underside following product instructions. For table use, avoid stiffeners if you want the runner to lay soft and natural.
Care :
Hand wash cold and lay flat to dry for best results. If machine washing, place runner in a mesh bag and use a gentle cycle; reshape and lay flat to dry immediately to avoid stretching.
This burgundy and cream floral runner is a lovely heirloom-style project that brings a warm, handmade touch to your tabletop. Each motif is a little delight to make — watch color and texture come together as you create petals, lacy rounds and scalloped accents. Linking motifs with the join-as-you-go method is satisfying and quick, and the final burgundy edging gives the runner a polished, finished look. I hope this makes a beautiful centerpiece in your home — enjoy the relaxing rhythm of creating it! 🧶🌸