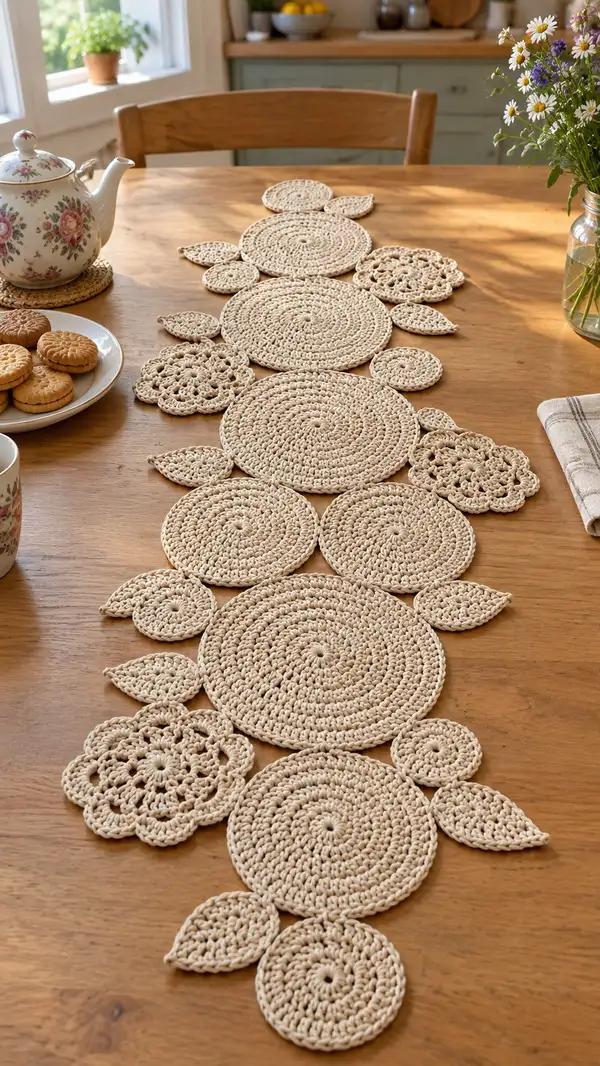
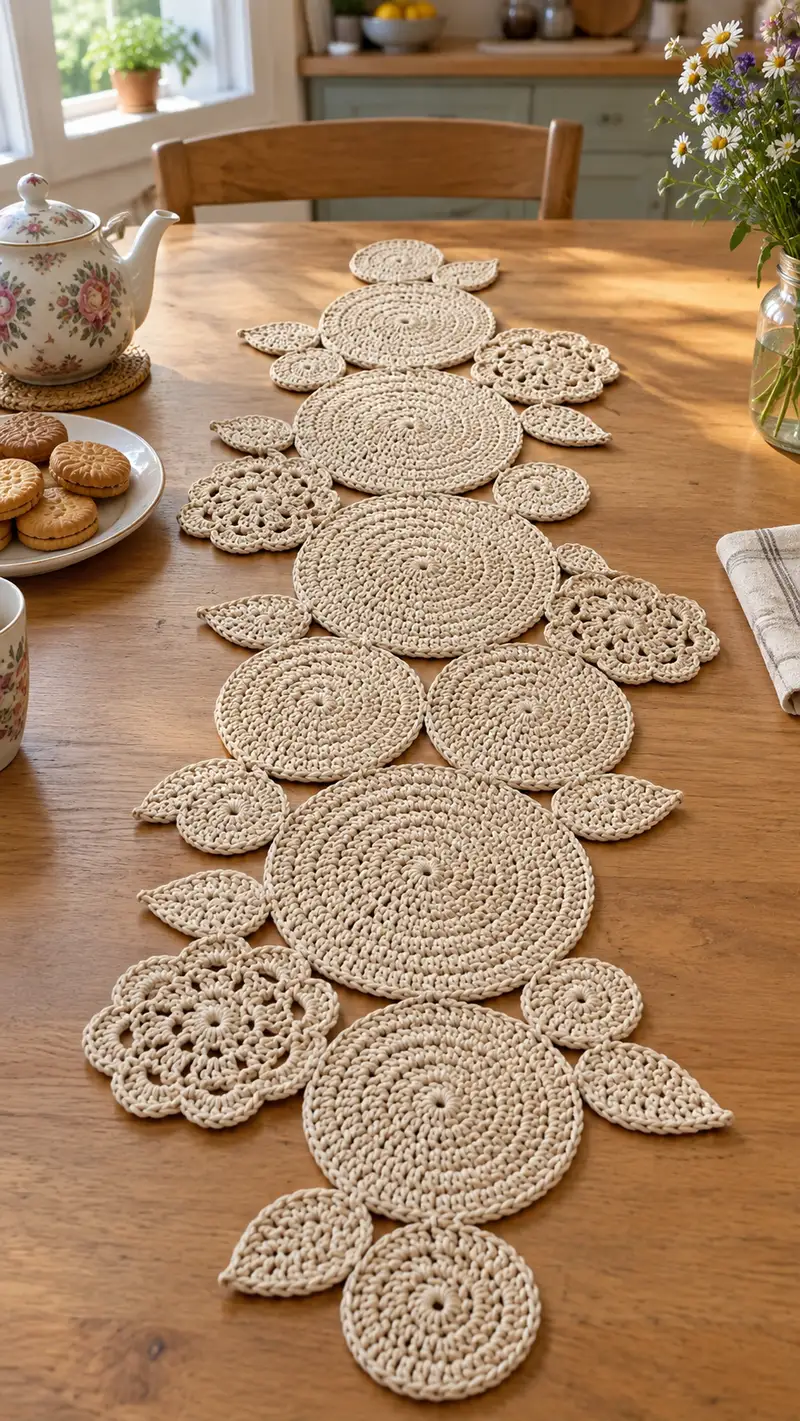
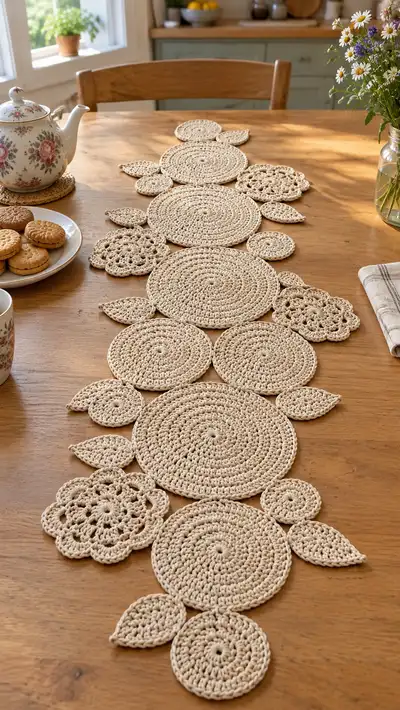
Create a soft, neutral floral table runner made from circular motifs, lacy flower rosettes and sculpted leaves. This pattern uses bulky cotton cord (or t-shirt yarn) to produce flat, sturdy circles and openwork flowers that sit beautifully on a wooden table. The runner is modular — make as many motifs as you like and join them for a custom length. Includes detailed round-by-round instructions for every motif, joining tips, and an edging to finish.
Progress Tracker
0% Complete
— Notes and Overview :
Info :
This runner is modular: it is built from large, medium and small flat circles, lacy flower rosettes and sculpted leaves. Make the number of each motif to suit your table. All circular motifs begin with a magic ring and grow by standard round increases. Tension should be fairly firm to keep pieces flat when working with bulky cord. I recommend blocking each motif flat immediately after finishing to help stitches relax and sit nicely for joining.
Info :
Throughout the pattern, counts are given at the end of each round in parentheses. Use stitch markers at the beginning of each round to keep track. Work in continuous rounds (spiral) for the circles unless otherwise stated; for lace flower rounds and scallops you may join with a sl st to create a neat round end.
— Large Circle (Make 3–4 for runner) :
Round 1 :
6 sc in magic ring (6)
Round 3 :
(1 sc, inc) x 6 (18)
Round 4 :
(2 sc, inc) x 6 (24)
Round 5 :
(3 sc, inc) x 6 (30)
Info :
Check your circle size at this stage; bulky cord will create a larger stitch, so if your circles are growing too quickly, maintain tension or use a slightly smaller hook for subsequent rounds.
Round 6 :
(4 sc, inc) x 6 (36)
Round 7 :
(5 sc, inc) x 6 (42)
Round 8 :
(6 sc, inc) x 6 (48)
Round 9 :
(7 sc, inc) x 6 (54)
Info :
For truly flat circles, check for cupping or ruffling after round 9. If the circle cups, work the next round with fewer increases (for example (6 sc, inc) x 6) until it flattens. If it ruffles, add one more increase evenly to flatten.
Round 10 :
(8 sc, inc) x 6 (60)
Round 11 :
(9 sc, inc) x 6 (66)
Round 12 :
(10 sc, inc) x 6 (72)
Round 13 :
(11 sc, inc) x 6 (78)
Info :
If your runner needs to be smaller or larger, stop this round earlier/later. Large circles in the photos measure roughly 20–24cm / 8–9.5" across when worked with bulky cotton cord and a 6–6.5mm hook — adjust rounds to fit your desired diameter.
Round 14 :
(12 sc, inc) x 6 (84)
Round 15 :
(13 sc, inc) x 6 (90)
Round 16 :
(14 sc, inc) x 6 (96)
Info :
Finish off after your desired round. Leave a long tail (approx. 30–40cm) to use for joining. Block flat by pinning to shape and lightly dampening the cord; allow to dry completely before arranging for joining.
— Medium Circle (Make 3–4) :
Round 1 :
6 sc in magic ring (6)
Round 3 :
(1 sc, inc) x 6 (18)
Round 4 :
(2 sc, inc) x 6 (24)
Round 5 :
(3 sc, inc) x 6 (30)
Info :
For a medium diameter similar to the photo, stop increasing around round 10–12 depending on cord thickness. The medium circles in the pictured runner are about 12–15cm / 4.5–6" across.
Round 6 :
(4 sc, inc) x 6 (36)
Round 7 :
(5 sc, inc) x 6 (42)
Round 8 :
(6 sc, inc) x 6 (48)
Round 9 :
(7 sc, inc) x 6 (54)
Round 10 :
(8 sc, inc) x 6 (60)
Round 11 :
1 sc in each st (60)
Round 12 :
1 sc in each st (60)
Info :
Finish and leave a long tail for joining. If you prefer a slightly smaller medium circle, omit round 10 and finish after round 9 (54 sts).
— Small Circle (Make 4–6) :
Round 1 :
6 sc in magic ring (6)
Round 3 :
(1 sc, inc) x 6 (18)
Round 4 :
(2 sc, inc) x 6 (24)
Round 5 :
(3 sc, inc) x 6 (30)
Round 6 :
(4 sc, inc) x 6 (36)
Round 7 :
1 sc in each st (36)
Round 8 :
1 sc in each st (36)
Info :
Small circles can be used as spacer motifs between larger circles or as simple accents. In the photos they are approximately 6–8cm / 2.5–3" across.
— Tiny Circle / Mini Disc (Make 6–8) :
Round 1 :
6 sc in magic ring (6)
Round 3 :
(1 sc, inc) x 6 (18)
Round 4 :
1 sc in each st (18)
Info :
These tiny discs are useful to fill small gaps between motifs or to anchor a small leaf. Leave a long tail for sewing or weave-in when finishing.
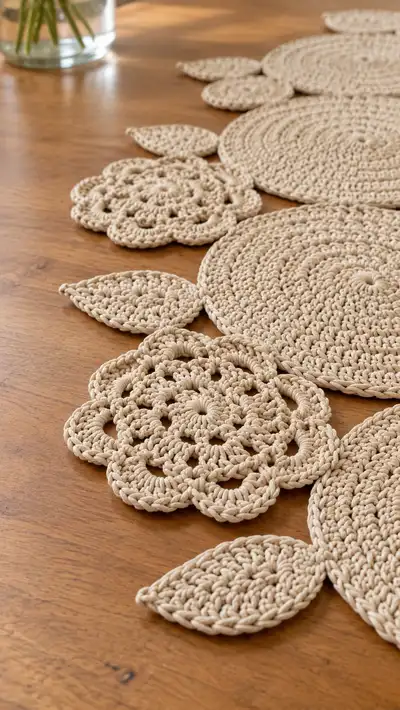
— Lace Flower Rosette (Make 3–4) :
Round 1 :
8 dc in magic ring, join with sl st (8) [If working in continuous rounds, mark first dc]
Round 2 :
Ch 2 (does not count as st), *dc in same st, ch 1, skip next st* around, join with sl st to first dc. You will have 8 dc clusters separated by chain-1 sps (8 clusters)
Info :
The second round creates 8 small petals. Keep tension loose enough for the chain spaces to open slightly; bulky cord will make smaller-looking chain spaces so check after making two petals.
Round 3 :
Join in a chain-1 space, *(ch 3, 2 dc, ch 3) in same sp, sl st to next chain-1 sp* around. This creates 8 larger scalloped petals. Join and fasten off (8 petals)
Round 4 :
Optional: With same color, join in base of any large petal, *(sc, hdc, 3 dc, hdc, sc) in petal base, sl st between petals* around to add a textured outer edge. Join and fasten off.
Round 5 :
Optional extra round for a fuller flower: sl st to the tip of a petal, *(ch 2, sc in tip, ch 2, sl st in space between petals)* around. Fasten off and weave ends.
Info :
Block lace flowers carefully on a towel or blocking board to open the petals fully. Use pins to shape each petal and spray lightly with water; allow to dry completely.
— Sculpted Leaf (Make 10–12) :
Round 1 :
Ch 8 (foundation chain). Starting in 2nd ch from hook: sc in next 3 ch, hdc in next ch, dc in next ch, hdc in next ch, sc in last ch (7 sts across foundation) then continue down the other side of the chain to shape the leaf: sc in first st (base), hdc in next, dc in next, hdc in next, sc in last 3. Join with sl st to first sc. (15 sts total around)
Round 2 :
Ch 1, sc in same st, sc in next 3, inc in next st (2 sc in same st), sc in next (top tip), inc in next st (2 sc), sc in next 4, join with sl st to first sc (17)
Info :
Leaves in the photo are elongated with a neat ridge down the center. To create that ridge work the next round in BLO so the front loop edge stands slightly proud.
Round 3 :
Ch 1, 1 sc in each st BLO around (17)
Round 4 :
Ch 1, *sc in next 2, dec, sc in next 3, dec, sc in next 4* adjust as needed to keep leaf tapered (13)
Round 5 :
Fasten off, weave in ends, fold slightly and steam-block to set centre ridge. If you want a stronger ridge, use one strand of yarn doubled and couch a chain stitch down the center with contrasting thread.
Info :
Make leaves in two sizes by adjusting foundation chain length. For a smaller leaf use ch 6; for a larger leaf use ch 10 and continue similar shaping rounds.
— Joining Motifs - Basic Method (Slip-Stitch Join) :
Round 1 :
Lay two motifs right sides up and with RS facing you, using a new length of yarn join with sl st through a st on motif A and the corresponding st on motif B, *sl st in next st of A, sl st in next st of B* across the join. Use even spacing; for large circles aim for joining every 3rd-4th stitch to avoid pulling edges in. Fasten off and weave ends.
Info :
Pin motifs prior to joining to ensure the seam sits flat and not twisted. For bulky cord you will likely join every 4th stitch to keep the seam neat and not bunched.
Round 2 :
Alternative join - whip stitch: Place motifs RS together and whip stitch through corresponding loops around the edge using the long tail from one motif. Work evenly and do not pull too tight to keep seam flat and flexible.
Round 3 :
Surface join with crochet: On the assembled runner you can reinforce joins by working a surface sc around the seam line with a smaller hook and a thinner yarn to keep a subtle decorative ridge.
Info :
In photos, motifs are joined with a combination of slip stitches and invisible whip stitches so the seams are unobtrusive. Choose the method you prefer and practice on two spare motifs first.
— Decorative Scallop Edge Around Flower Motifs (Optional) :
Round 1 :
With RS facing, join yarn in any outer chain space of lace flower, *(sl st, ch 3, 3 dc, ch 3, sl st) in next petal gap* around to create scalloped edging. Join and fasten off.
Round 2 :
Optional: Work a final round of sl st around entire runner perimeter to tidy edges. Use same cord or a thinner yarn to create a subtle outline.
Info :
When adding scallops around bulky cord flowers, make the ch spaces slightly larger (ch 4) if the petals sit flat or reduce to ch 2 if petals are already wide — adjust based on how open your petals are.
— Full Border and Finishing Edge for Runner :
Round 1 :
Once all motifs are joined into the desired runner shape, join yarn at any outer stitch and work 1 round of sc in each available stitch around the entire perimeter to create a uniform edge. For bulky cord you may work 1 sc in each 2 sts if the stitches are close together.
Round 2 :
Work a decorative round: *sc in next 3, ch 3, skip 1* repeat around to form tiny chains as a decorative element. Join and fasten off.
Round 3 :
Work a finishing round of slip stitches to smooth any remaining roughness. Fasten off, weave in ends with tapestry needle, trimming tails close to the work.
Info :
Blocking the entire assembled runner lightly at the end will relax join seams and help the border sit flat. Pin generously along seams that tend to ripple and steam lightly if needed.
— Alternate Large Circle Variation A (Textured Ridge) :
Round 1 :
6 sc in magic ring (6)
Round 3 :
(1 sc, inc) x 6 (18)
Round 4 :
1 sc in each st BLO (18)
Round 5 :
(2 sc, inc) x 6 (24)
Round 6 :
1 sc in each st (24)
Round 7 :
(3 sc, inc) x 6 (30)
Round 8 :
1 sc in each st BLO to emphasize a ridge (30)
Round 9 :
(4 sc, inc) x 6 (36)
Round 10 :
1 sc in each st (36)
Info :
This variation uses a BLO round every few rounds to create a subtle concentric ridge in the large circles similar to the photo. Use BLO on rounds you want to sit slightly lower to create definition.
— Alternate Small Flower Motif (Openwork Rosette) :
Round 1 :
10 dc in magic ring, join with sl st (10)
Round 2 :
Ch 3, dc in same st, *ch 2, skip next dc, 2 dc in next* around, join (5 clusters)
Round 3 :
In each chain-2 space: *(ch 2, 4 dc, ch 2, sl st)* to create open petals. Join and finish off.
Info :
Use this motif in place of one lace rosette to introduce variety. Block to open up the petals before joining to the rest of the runner.
— Placement & Layout Tips :
Info :
Lay out all motifs on the table before joining. Aim for a balanced but organic layout—large circles spaced along the center with medium circles adjacent and lace flowers tucked as accents. Use tiny discs and leaves to fill gaps. Pin everything in position before you begin permanent joins.
Info :
For an asymmetrical look similar to the photos, place larger circles off-center and cluster leaves and rosettes on one side of each circle. For a formal runner, mirror the clusters left and right along the runner center line.
— Assembly Sequence Example (Comprehensive) :
Step 1 :
Create all motifs: 3 large circles, 3 medium circles, 4 small circles, 4 lace flowers, 10 leaves, 6 tiny discs. Block each motif flat.
Step 2 :
Arrange motifs on table into desired runner shape. Take a photo of your layout for reference before joining so you can maintain the order if you need to step away.
Step 3 :
Begin joining at the center of the runner: join a large circle to a medium circle using slip-stitch join every 3–4 sts for bulky cord. Add a small circle and a lace flower adjacent, joining them to the large circle first then to each other to create a tight cluster.
Step 4 :
Pin each joint and test flexibility as you go. Add leaves by sewing using the long tail and a tapestry needle; sew along the leaf base into the seam of the two motifs for stability.
Step 5 :
Once all motifs are connected, work a uniform border round as described above to neaten the perimeter and even out joins that may be slightly recessed.
Info :
If seams are visible after joining, disguise them by couching a thin cord or yarn in a matching color across the seam or by working a surface chain stitch along the join for a decorative, integrated look.
— Final Blocking & Care :
Info :
After assembly, block the entire runner flat. Pin to desired measurements, steam lightly or spray with water, and allow to dry fully. For cotton cord, hand wash gently in warm water with mild detergent and lay flat to dry; avoid machine washing which can distort the shape.
Info :
Store flat or rolled to avoid creasing. If using under hot items (teapot), use a coaster under very hot vessels to protect the cotton fibers from prolonged heat exposure.
Completing this floral circle runner is such a rewarding finish — each circular motif and delicate leaf comes together to create an organic, timeless table accent. The natural color and chunky cord make the texture sing and the modular approach lets you craft exactly the length you need. Pin and block your pieces with care and enjoy the tactile pleasure of a handmade runner gracing your table. 🧶🌼 Add a teapot and fresh flowers for the perfect cozy setup! 🍵