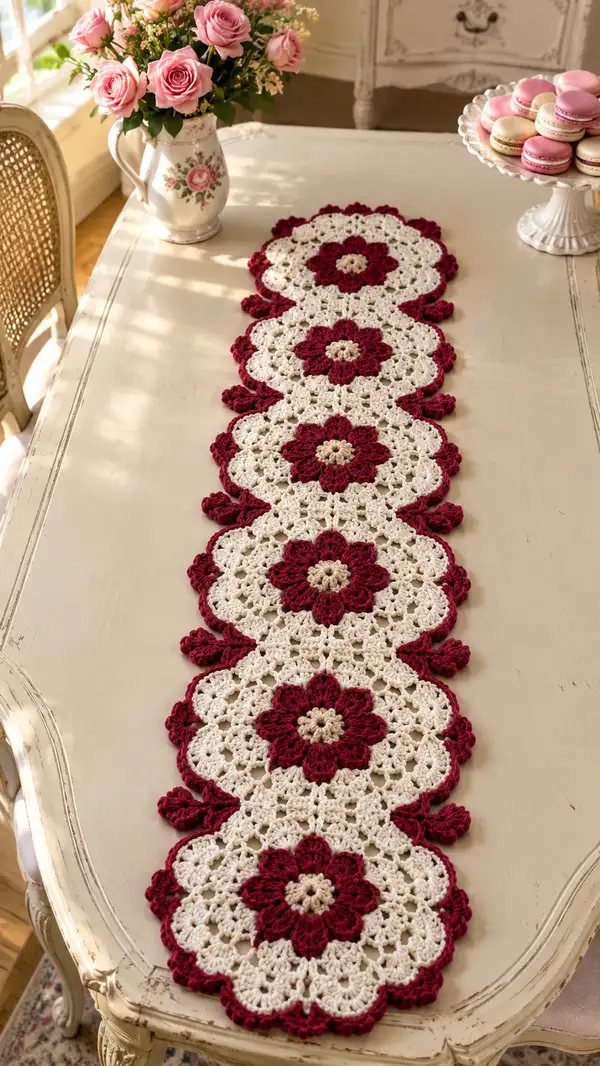
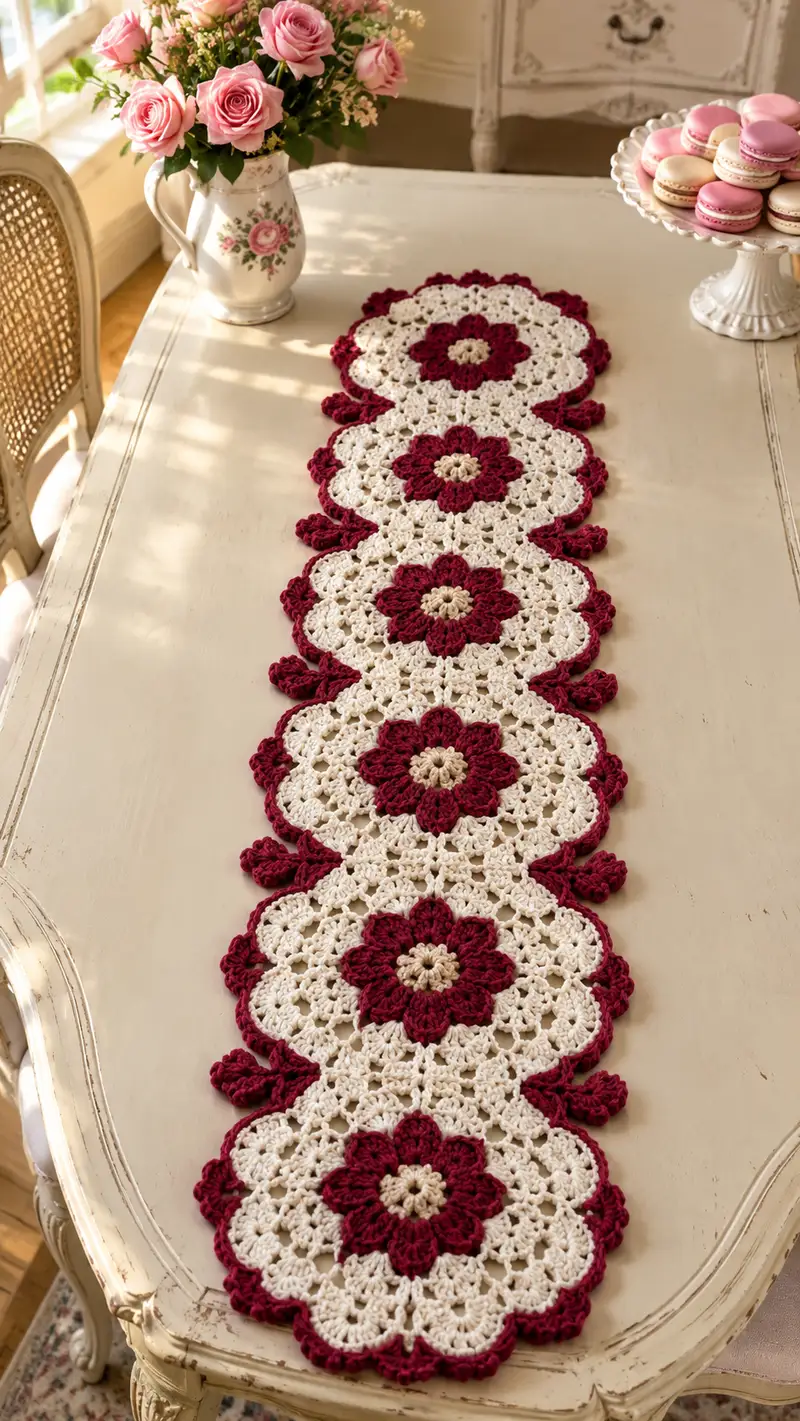
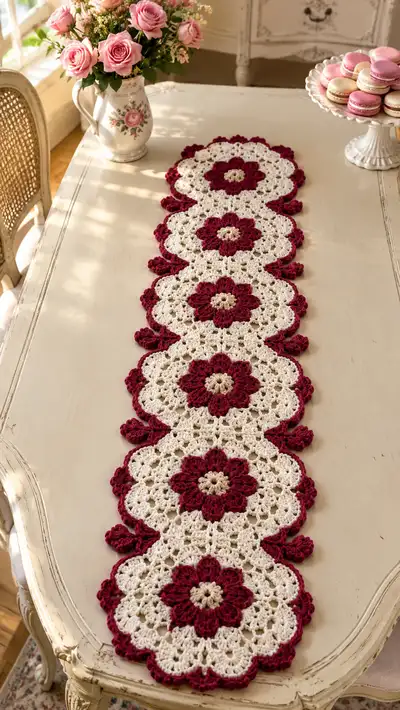
A vintage-inspired table runner made from linked floral crochet motifs in rich burgundy and warm cream tones. Features bold eight-petal flowers, lacy openwork rounds and a scalloped edge to create an elegant, elongated runner. Perfect for dining tables, sideboards or dresser tops, this runner combines classic motifs and modern color blocking for a timeless look. Clear step-by-step instructions and helpful tips make it an approachable intermediate project.
Progress Tracker
0% Complete
— Motif 1 :
Round 1 :
With tan color, make a magic ring. Ch1, work 8 sc into ring. Pull tight. (8)
Round 2 :
Change to burgundy in last loop of final sc. Ch2 (counts as hdc), 2 hdc in same st, *ch2, sk next sc, 3 hdc in next sc; rep from * around to create 8 small petal bases. Join with sl st to first hdc. (8 petals)
Info :
Petal bases are built on alternating base stitches; maintain even tension on ch2 loops to keep petals uniform. Place a stitch marker in the first petal base to mark round starts.
Round 3 :
Working into each petal base: sl st into ch2 space, *ch3, work 7 dc cluster into same ch2 sp (make cluster by working 7 partial dcs leaving final loops and finishing together), ch3, sl st into same ch2 sp to form a full petal; rep from * around for 8 full puff-style petals. Finish with sl st to join. (8 petals)
Info :
If unfamiliar with clustered petals, practice one petal before continuing. Count petal points visually; there should be 8 evenly spaced petals around the center.
Round 4 :
Fasten burgundy and change to cream. Sl st to space between petals. Ch3 (counts as dc), in same sp work 2 dc, *ch1, sk petal top and sl st to base between petals, ch1, in next space work 3 dc; rep from * around. Join with sl st to top of ch3. (8 shell groups of 3 dc)
Round 5 :
Ch4 (counts as tr), tr in same sp, *ch2, 3 tr in next shell (worked into center dc of shell), ch2, sl st into space behind petal; rep around to produce a ring of elongated loops. Join with sl st to first tr. (8 looped points)
Info :
Work tr stitches gently to avoid pulling petals upward; this round forms the inner lacy ring that visually separates flower and body.
Round 6 :
Ch1, sc evenly in each tr and ch space around to create a sturdy foundation for the next round. Count should equal 48 sc (approx). (48)
Round 7 :
Work in BLO. Ch3 (counts as dc), 1 dc in next 2 sts, *ch2, sk2, 3 dc cluster in next st (shell cluster), ch2, sk2, 3 dc across next 3 sts; rep around to form 8 larger shell groups. Join with sl st. (48 base sts structured into 8 shell clusters)
Info :
BLO here creates a subtle ridge that helps the lacy frame lay flat; use a stitch marker at first shell cluster to keep orientation consistent.
Round 8 :
Ch1, sc in each st and ch space around for one even round to tidy up shell bases. (48)
Round 9 :
Ch3, dc cluster patterns: *(3 dc, ch2, 3 dc) in ch2 spaces of previous round to create granny-style shell motifs, sk next set to maintain openwork; rep around producing 8 larger scalloped segments. Join. (8 large shells)
Info :
At this stage your motif should begin to look circular with eight defined scalloped segments. Keep tension even; measure across heart of motif to ensure it’s approximately 10-12cm across (gauge dependent).
Round 10 :
Change to cream if not already. Ch1, sc evenly across each shell and in dc spaces, placing 2 sc in top of each shell apex to stabilize the round. Estimated stitch count: 64 sc. (64)
Round 11 :
Ch4 (counts as tr), in each group of 8 consecutive stitches work: *(ch2, 5 tr cluster in next 8-st group), ch2, skip 2; rep around to make delicate openwork petals framing the center flower. Join with sl st. (8 clusters)
Round 12 :
Ch1, sc across all top loops and ch spaces from previous tr clusters, placing 2 sc in each ch2 space to maintain openness; expected count approx 72 sc. (72)
Info :
This is a good point to check block shape. Gently pin the motif flat to a mat to check for any twisting. Blocking after completing all motifs helps final alignment.
Round 13 :
Ch3, dc in next 2 sts, *ch3, skip 2, (dc, ch1, dc) in next st to create scallop arches across the face of motif; rep around producing 16 small arches. Join with sl st. (16 arches)
Round 14 :
In each arch work: sl st into arch, ch3, (7 dc cluster) into arch, ch3, sl st to close; rep around to create 16 small petal-like scallops. Finish and fasten off cream. (16 scallops)
Info :
Fasten off cream and weave in tail sufficiently. The motif body is now ready for burgundy scalloped edging. Keep the tail long if you plan to sew motifs together using the burgundy strand later.
Round 15 :
Join burgundy at a scallop base. Ch1, sc around scallop base and into adjacent chain spaces; at the top of each previously made small petal, work (sc, ch3, sc) to produce a decorative picot peak. Continue around and join. (16 decorative peaks)
Round 16 :
Ch3, (2 dc, ch2, 3 dc) in same sp at every other decorative peak to form deep scallops around motif edge. Slip stitch between scallops to anchor. Expected repeating scallops: 8. (8 deep scallops)
Info :
These deep scallops will be the visual seam line when joining motifs. Keep them consistent across motifs for a neat join. Use the same stitch orientation for every motif.
Round 17 :
Ch1, sc in each dc and ch space around, placing 3 sc across the center of each deep scallop to create a robust joining edge. Approx stitch count: 96 sc. (96)
Round 18 :
Working in the back loops only, ch1, sc in each BLO around to stabilize the edge and create a subtle ridge to sit on the table. (96)
Info :
Finish off motif 1 by weaving in ends. Block flat remembering the final shape must be round with eight large scallops. Repeat this motif to create a total of five motifs for the runner.
— Motif 2 :
Round 1 :
Repeat Rounds 1-18 from Motif 1 exactly to produce second motif. Ensure color changes and petal orientation mirror Motif 1. Make sure to leave a long tail (approx 20-25 cm) of burgundy before finishing Round 17 if you plan to join motifs by sewing. (Complete motif as per Motif 1)
Info :
When making motif 2, plan joins so petals and scallops align; placing motifs on a flat surface as you go helps visualize the final runner.
— Motif 3 :
Round 1 :
Repeat Rounds 1-18 from Motif 1 exactly to produce third motif. Match scallop spacing to Motif 1 and 2. (Complete motif as per Motif 1)
Info :
It helps to alternate center tan yarn tension slightly to keep centers identical—try to keep the same number of tug-offs on the magic ring for consistent center size.
— Motif 4 :
Round 1 :
Repeat Rounds 1-18 from Motif 1 exactly to produce fourth motif. (Complete motif as per Motif 1)
Info :
By motif four you should have consistent tension and shape. If one motif looks noticeably different, unravel and rework rather than forcing join.
— Motif 5 :
Round 1 :
Repeat Rounds 1-18 from Motif 1 exactly to produce fifth motif. (Complete motif as per Motif 1)
Info :
Make sure all five motifs are blocked and dry before joining; blocked motifs sit flat and join more easily and evenly.
— Joining Motifs :
Info :
Plan the layout: arrange the five motifs in a straight line with scallops facing outwards and burgundy peaks aligned. The runner pictured is five motifs long; add more for longer runner. Join using either whip stitch with matching yarn or crochet join-through-backs of scallop edges to create a seamless seam.
Join Method A - Slip Stitch Join (Crochet) :
Place two motifs with right sides together. Insert hook through corresponding deep scallop base on both motifs and join with burgundy: sl st through both loops, ch1, sl st again across the next 3 sts to sew across deep scallop base. Repeat across 4-6 points of contact between two motifs to secure them. Repeat for each seam between motifs. (Join points per seam: 8-10 depending on scallop points)
Info :
When slip stitching, work snugly but not tightly — you want the motifs to be connected securely but not to pucker or pull the scallops.
Join Method B - Mattress/Whip Stitch (Sewing) :
With burgundy yarn and a yarn needle, hold two motifs wrong sides together. Using the long tails left at Round 17, sew through the base of scallops securing corresponding stitches. Make sure to sew through the same number of loops on each motif for symmetry. Tie securely and weave in ends. (Sewing points per seam: 6-8)
Info :
Sewing gives greater control for shaping; use small, even stitches and keep them hidden on the underside when possible. Pin motifs in place before sewing for consistent alignment.
Round J1 :
Once all motifs are joined, using cream yarn work a single crochet round around the entire runner edge to tidy joins. Work evenly in each stitch and in any visible join lines to close gaps. Approx stitch count will vary; expect ~450-520 sc around the full runner depending on gauge. (approx 450-520)
Info :
This tidy-up round helps unify motifs visually. If gaps remain between joins, add extra sc to bridge holes, placing increases sparingly to maintain flatness.
Round J2 :
Change to burgundy. Work scalloped edging around runner edge: *(3 dc, ch2, 3 dc) in alternate spaces along the scalloped outer edge, sl st between scallops to anchor; rep around to create a unified scalloped border. Expected scallops around runner: approx 40-48 depending on motif joins.
Info :
Make sure outer scallops from each motif flow into the next; adjust spacing slightly at joins so scallops look continuous and even.
Round J3 :
Ch1, sc in each dc and ch space around the burgundy scallops. In the center of each deep scallop work (sc, ch3, sc) for decorative points if desired. Finish off and weave in ends. (approx 480-560 sc)
Info :
If you prefer a subtler edge, omit the decorative points and finish with a single round of sc in cream instead of burgundy. Make sure to weigh the runner to ensure even drying during blocking.
Round J4 - Decorative Petals Between Motifs :
To duplicate small burgundy petal clusters visible between motifs (small leaf-like accents), join burgundy at each interior join point and work: ch1, sc into join, ch3, work 5 dc cluster in same sp, ch3, sc into corresponding join point of adjacent motif. Repeat at each inner seam between motifs row to create small lovey petal clusters. (Clusters per join: 1-2)
Info :
These small petal clusters soften the seam and visually echo the main flower color; alternate them at every other seam for the same look as the photo.
Round J5 - Final Stabilizing Round :
Change to cream. Work one final round of sc across the entire runner, placing sc evenly and 2 sc in any place that needs extra body. Finish with sl st, fasten off and weave in all ends securely. (final approx 500 sc)
Info :
Leave long tails when finishing to weave through several rounds for greater security. Trim close after weaving through at least 4-5 cm of stitches.
— Blocking & Finishing :
Info :
Once assembled, steam or wet-block the runner on a blocking mat: pin all scallops evenly using blocking pins and apply gentle steam or damp blocking until dry. This opens lace spaces and sets the scalloped edge flat and even.
Final Care :
Hand wash gently in cool water. Reshape while damp and dry flat to preserve form. Cotton yarn will soften after washing; reblock if necessary.
Completing this burgundy and cream floral motif table runner is such a satisfying finishing moment — seeing five delicate flowers linked together into a graceful runner is truly rewarding! Each scallop and petal adds personality and vintage charm to your table. The blocking step smooths everything into a polished heirloom-ready piece. 🧶💕 Whether you keep it for your own home or gift it to someone special, it will bring warmth and handcrafted elegance to any room. Happy stitching and enjoy the lovely results! 🌸