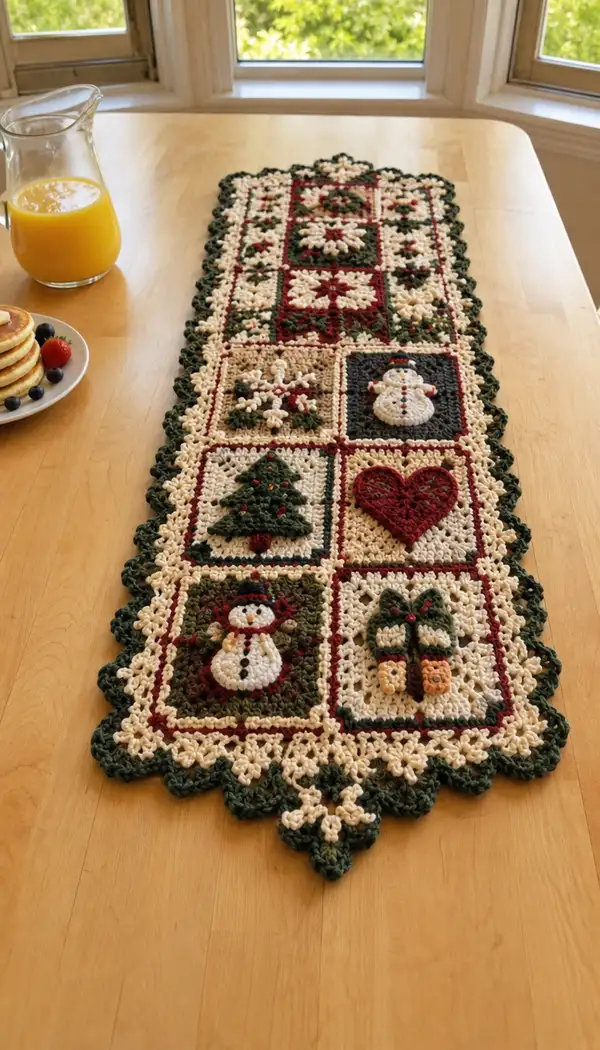
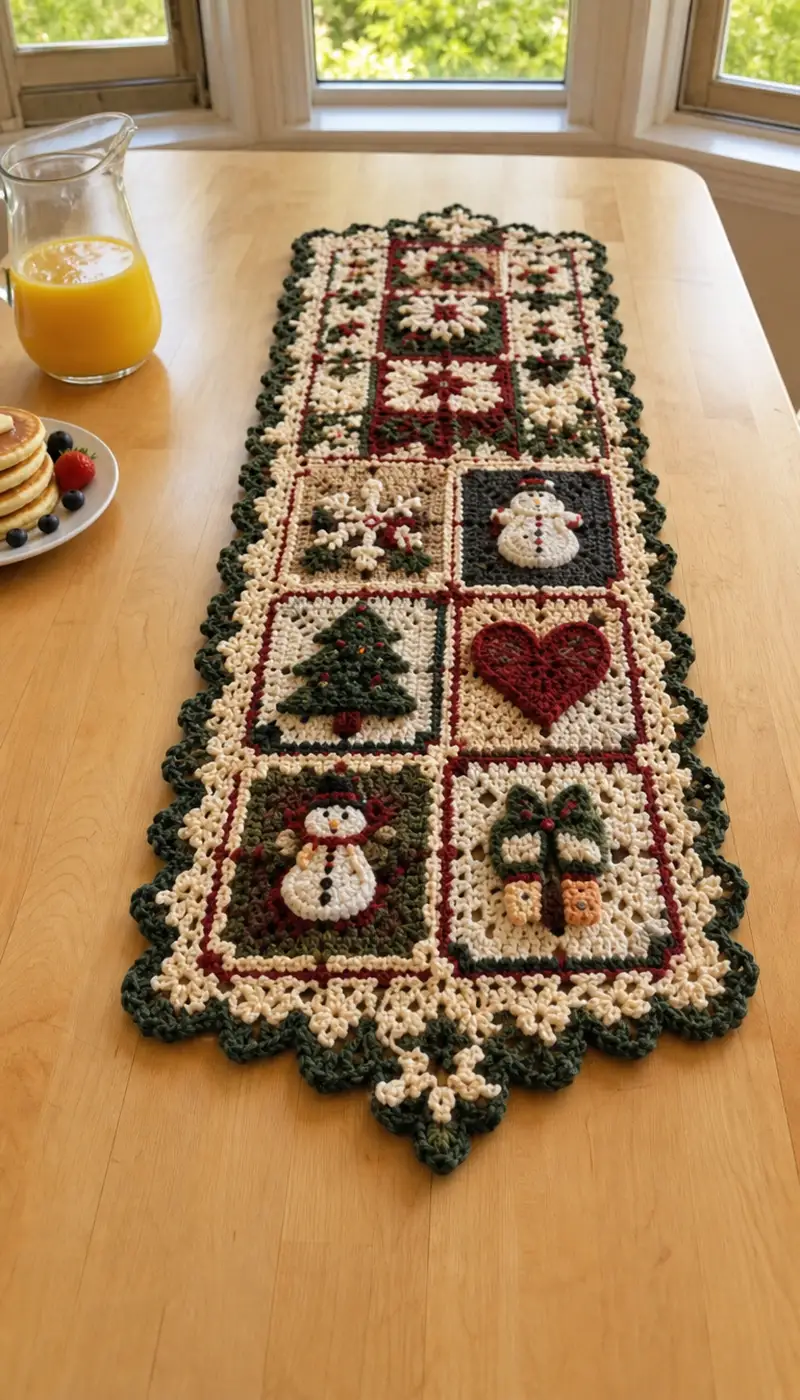
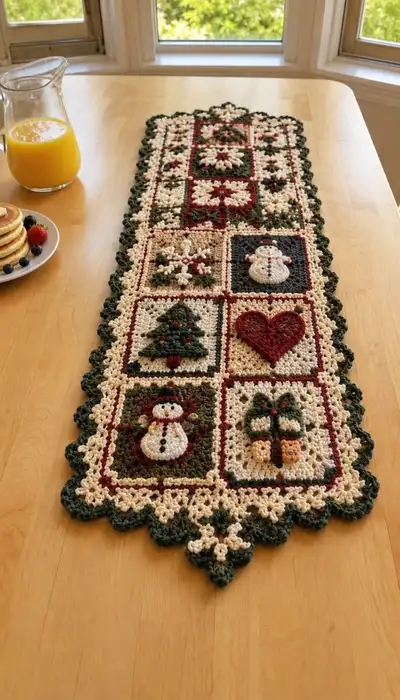
A festive rectangular Christmas panel runner made from an array of textured granny-style motif squares in deep burgundy, forest green and warm cream. This runner features appliqued motifs — snowmen, Christmas trees, hearts, presents and snowflake/star centers — joined into a long table runner and finished with a scalloped scallop border. The finished piece sits flat and decorative on a dining table or sideboard and shows off layered texture, raised applique accents and classic holiday colors.
Progress Tracker
0% Complete
— Overview :
Info :
This runner is constructed from 12 individual motif squares (approx. 12cm/4.7in per square before blocking) arranged into a long rectangular layout. Each square is worked in rounds using cream as the primary background with burgundy and forest green used for centers, frames and appliques. After making all squares, they are blocked flat, joined, and the runner is finished with a multi-row scalloped shell border using forest green and cream to frame the whole piece.
Info :
Square size and stitch counts assume worsted weight yarn and a 4.0mm hook. For tighter fabric or smaller appliques, use a 3.5mm hook for details. Marker placement, blocking and even tension are critical for a flat, neat runner.
— Basic Motif Square (Background square template) :
Round 1 :
With Cream, make a magic ring; ch3 (counts as dc), 2 dc into ring, ch2, (3 dc into ring, ch2) repeat total of 4 corners. Join with sl st to top of ch3. (24 dc total arranged as 4 corner shells)
Round 2 :
Sl st into first corner ch2-sp, ch3, (2 dc, ch2, 3 dc) in same ch2-sp to form corner. *Working along side, between corners make 3 dc into the space between the corner shells, then in next corner make (3 dc, ch2, 3 dc)*. Repeat from * around. Join. (Corner shells: 4; 3-dc clusters inserted along sides create a square expansion)
Round 3 :
Change to burgundy or green as desired for one-round frame. Sl st into corner ch2-sp, ch3, (2 dc, ch2, 3 dc) in same corner, then make 3 dc clusters across each side into center gaps between shells (one cluster per gap), finish with corner shell. Join. (Square size increases and frame color shows as a thin colored band)
Info :
Work rounds 2-4 in this shell/corner method until your square is approximately 10-12 rounds in total for the background template, making sure you end on a cream round so appliques sit on a neutral background. Arrange color rounds so that the immediate frame around applique is burgundy or green as pictured.
Round 4 :
With Cream: Sl st to corner ch2-sp, ch3, (2 dc, ch2, 3 dc) in corner. *Work (3 dc) into each side gap (there will be an increased number of side gaps now) until next corner, then work corner shell.* Repeat and join. (Square continuing to grow; work evenly and keep corners consistent)
Round 5 :
Repeat the corner shell round; if you need a slightly larger square for appliques, add an additional round using the same formula (corner: (3 dc,ch2,3 dc), sides: fill gaps with 3 dc clusters). Join. (Continue until square measures approx 12cm/4.7in across after blocking)
Info :
To maintain flat squares, distribute increases only at the four corners; do not add increases in side clusters. If edges ripple, block flat by pinning to measurements and spraying with water, then allow to dry. If edges cup, reduce number of side clusters on last round or switch to a slightly larger hook for the final rounds.
— Snowflake/Star Medallion Square (Make 4) :
Round 1 :
With Burgandy (center color), ch4, join to form ring. Ch3 (counts as dc), 2 dc in ring, ch2, (3 dc, ch2) repeat total 4 times; join. (24 dc in corner shells)
Round 2 :
Change to Cream. Sl st to nearest ch2 corner, ch3, (2 dc, ch2, 3 dc) in corner. *Ch1, sk next cluster, in gap make (3 dc) cluster, ch1* repeat along side until next corner. Finish corner and join. (adds lacy rows between shells)
Round 3 :
With Forest Green: Sl st to corner ch2-sp, ch3, (2 dc, ch2, 3 dc) in corner. Along each side: make (dc, ch1, dc) in each side gap to create a lattice between corners, finish corner shells as before. Join. (Subtle lattice contrasts the center burgundy)
Round 4 :
Change to Cream. In the center of the original burgundy ring, create a raised star: From the center, attach cream and ch6, sl st into ring (repeat 8 times to make 8 points). Then in each ch6 loop: (sc, hdc, dc, tr, dc, hdc, sc) to create raised petal. Finish by joining and working a round of 1 dc in each side gap between corner shells to square it up. Join. (This creates a raised star/snowflake texture)
Info :
When making the raised star, keep tension slightly looser for the long loops so the petals sit nicely on the square. Make sure all petals are the same height. Use a 3.5mm hook for this round if you want tighter petals.
Round 5 :
With Cream: Work standard corner shells into the corner ch2-sp, and 3-dc clusters across sides filling each gap, join. (Square is now reinforced around the raised star)
Round 6 :
With Burgundy: Create a thin frame by working 1 dc in each stitch across with corner shells done as (2 dc, ch2, 2 dc) to keep corners defined. Join. (This frames the medallion in burgundy)
Round 7 :
With Cream: Work one final neat even round of 1 dc in each stitch and 2 dc in corner spaces to square up edges. Join and fasten off. (Square finished. Weave in ends and block flat)
Info :
Make 4 of these medallion squares. Block them to exact measurements and keep them paired with the squares that will sit beside them so color frames align when joined.
— Snowman Applique Square (Make 2) :
Background Rounds 1-6 :
Make a basic background square using the Basic Motif Square template above: work rounds 1-6 in Cream with a burgundy round at round 3 for a colored frame. Ensure the background has a centered, even square at the end of round 6 for applique placement.
Info :
Place applique center about 3 rounds in from the center of the square so the snowman has an even cream margin around it. Mark center with a removable stitch marker to guide placement.
Snowman Body Round 1 :
Make snowman applique separately. With Cream and 3.5mm hook: ch2, 6 sc in 2nd ch from hook (6). This forms the bottom body circle.
Snowman Body Round 2 :
(1 sc, inc) x3 (9) — work evenly to round out bottom circle.
Snowman Body Round 3 :
Change to slightly smaller circle for mid-body: join to one side, ch2, 5 sc into 2nd ch (5) and join; this creates a mid-body sewn overlapping bottom for a tiered look. (Make 3 concentric pieces: base, mid, head)
Snowman Head Round 1 :
With Cream: ch2, 6 sc in 2nd ch from hook (6). Round 2: (1 sc, inc) x3 (9). Fasten off leaving long tail for sewing the head to the mid section.
Snowman Details :
With Black, embroider two small french knots or tiny sewn eyes on the head. With Orange or brown yarn embroider a small triangle nose. With Burgundy, crochet a tiny scarf: ch10, sc back across, leaving tails for tying; or make a 6-ch scarf loop and sew around the neck. Add small burgundy hat: ch6, join; work 6 sc around, then a round of sc and a small brim with sl sts. Sew hat to head. Sew completed snowman to square centered using mattress stitch around the edge of the applique pieces.
Info :
Sew appliques using invisible stitches; sew through only the background stitch and the very edge of the applique for a neat finish. Place a small dab of fabric glue at the top of the head under the hat brim for extra stability if gifting to small children (optional).
— Christmas Tree Applique Square (Make 2) :
Background Rounds 1-6 :
Use Basic Motif Square template for background; alternate the frame colors so one tree sits on burgundy framed square and the other on forest green framed square for visual balance.
Tree Applique Round 1 :
With Forest Green and 3.5mm hook: ch8, sl st into 2nd ch from hook and work sc across to form a short strip forming the trunk base; fasten off leaving long tail for sewing. This will be underneath the triangular tiers.
Tree Tier 1 :
Attach green in center above trunk, ch3, *dc, ch2, dc* into ring to create small triangular top; make three tiers by increasing each tier width: Tier 2: work (dc clusters) into next round to create wider tier; Tier 3: larger cluster row. For exact shaping: make three semi-circular shell rows decreasing in curvature so tiers stack. Fasten off and sew tiers stacking downward over trunk with small stitches.
Tree Details :
Add tiny seed bead ornaments in burgundy and cream sewn onto the tree or embroider French knots with burgundy yarn. Add a small brown trunk by sewing a tiny square of brown yarn or crocheting a 4-sc square and sewing at base. Sew entire tree to center of background square aligning vertically centered.
Info :
For a neater silhouette, block each tier flat before assembling; use a little starch or spray to stiffen for crisp edges. Sew beads carefully and secure knot ends on the WS of the square.
— Heart Applique Square (Make 1) :
Round 1 :
Background: Use Basic Motif Square template with cream background and burgundy frame. Make sure the final cream round is large enough to center the heart; work one extra cream round if needed.
Heart Applique Round 1 :
With Burgundy and 3.5mm hook: ch5, sc in 2nd ch from hook and across (4 sc). Turn and work 1 sc along one side to shape a small square, create two small lobes by 3 sc in next stitch, then continue decreasing to form heart point. Exact method: ch5, 4 sc, ch1, rotate to form left lobe: (3 sc, sl st) into top ch, rotate and work right lobe symmetrical. This creates a small heart shape approx 3-4cm across. Fasten off and sew to center of square.
Info :
Note :
If preferred, work heart as two rounded lobes joined at top using 2 small circles seamed together to form a flatter heart — either method gives a raised burgundy heart that will be visible from across the table.
— Gift Applique Square (Make 1) :
Round 1 :
Background: Basic Motif Square template with cream background, forest green frame. Ensure the frame creates a visible box around the center for the present applique.
Present Applique :
Crochet a small square parcel in burgundy: ch6, sc in 2nd ch from hook to end (5 sc) for 4 rows (5x4 rectangle). Fasten off. For ribbon, with forest green, ch12 and chain a small bow: form a looped bow with 6 ch loops and sew the bow center with a short band. Sew parcel to square, then sew ribbon and bow across the parcel. Add a small seed bead or embroidered accent to represent a tiny gift tag. Fasten off and weave in ends.
Info :
Make sure present is centered vertically and horizontally; pin in place before sewing. Use small, even stitches through the background and parcel edge for invisible attachment.
— Mitred Star Square (Make 2) :
Round 1 :
Background: Basic Motif Square template with a cream center and forest green frame. At round 4, change to burgundy for a thin inner frame to create contrast around the star.
Star Applique Round 1 :
With Cream: ch6, sl st into ring 6 times to form a small looped ring. Into each small loop work (sc, hdc, dc, hdc, sc) to form small petals. Join and sew this medallion centered on the square.
Round 2 :
With Forest Green: Surround the medallion with a set of picot loops: ch5, picot into previous round every other stitch to create a spiky star effect. Fasten off and sew medallion to square.
Info :
Use a contrasting bobble or tiny popcorn stitch in burgundy at star center if you want a pronounced contrast dot.
— Runner Assembly & Joining (12 squares total) :
Info :
Arrange your 12 finished, blocked squares into the layout shown in the picture: three columns by four rows, alternating motif types so that the tree, snowman, heart, gift and medallion squares are balanced. Make a mock layout on the floor or table and photograph it to reference while joining.
Step 1 :
Place two squares RS together and join using whip stitch or flat invisible join: with burgundy yarn for vertical joins where the frame is burgundy and forest green where frame is forest green to make seams appear as intentional color lines. Sew through the back loops of both squares for a neat seam. Repeat to form each row of 3 squares (joining square 1 to 2, then 2 to 3).
Info :
When joining squares with different frame colors, use whichever frame color borders the seam for the thread so the seam reads as a continuation of the frame. Work slowly and pin frequently to keep edges matched and corners aligned perfectly.
Step 2 :
Once rows are created, join rows together using the same seam method along the long edges to create the full runner. Aim for an even tension during joining so the runner sits flat. After joining, weave in all joining tails and block the entire runner flat to prepare for border.
Info :
At least 2-3 pins per seam across the width help maintain straight seams when seaming long rows. If you notice slight gaps, use small mattress stitches to pull edges snug without puckering.
— Long Scalloped Border (Outer Border — 12 rounds) :
Info :
The border is worked around the entire perimeter of the joined runner and uses alternating rounds of forest green and cream to create the scalloped layered edging seen in the photograph. Work five even rounds to build a base then add two decorative scallop rounds and finish with a point at each end of the runner.
Round 1 :
With Forest Green, join yarn at any corner on RS. Ch1, work 1 sc evenly around the entire perimeter placing 3 sc in each corner ch2 gap to maintain square corners; join with sl st. (This secures the edge and gives a foundation)
Round 2 :
With Cream: Ch3, *skip 2 sc, 5 dc in next sc (shell), skip 2 sc, sl st in next sc* repeat around placing shells centered along the side and 5 dc shells into corner groups; join. (Creates the first scallop row)
Info :
Position shells so they align with the center of each motif square to emphasize the grid pattern. Use stitch markers at each side midpoint to help center shells evenly.
Round 3 :
With Forest Green: Ch1, sc around placing 1 sc between each dc shell cluster, and 3 sc in each shell center to anchor them; join. (This gives a neat green outline between cream shells)
Round 4 :
With Cream: Ch3, work 7-dc shells in every second shell of round 2 to produce larger scallops: *7 dc in center of every other shell, sl st between shells* repeat around. Join. (Creates deeper scallops for the decorative edge)
Round 5 :
With Forest Green: Sc around to tidy edge, place 3 sc in each large shell to anchor, and sl st between large shells. Join. (Edge stabilized; prepare for corner points)
Round 6 :
With Cream: Create pointed end tips at both short ends of runner. On each short end center, work *ch3, sl st into base to form a picot point* and then work 3 small shells spaced evenly to create central diamond points; join. (This produces the diamond pointed tips visible at runner ends)
Info :
For symmetry, count the number of scallops on one side and make sure the opposite side matches exactly. If necessary, adjust spacing by adding a sc or skip in Round 3 to rebalance shell placement.
Round 7 :
With Forest Green: Work a decorative popcorn accent on the tip points: in each diamond point work (dc, pop, dc) into same space where pop = (5 dc in same st, remove hook, insert hook through first dc, pull loop through to close popcorn), then sl st to anchor. Join. (Gives textured peaks as in the picture)
Round 8 :
With Cream: Work 1 sc around, placing 2 sc into the top of each popcorn and 1 sc between shells to tie everything together. Join and fasten off leaving a long tail for finishing. Weave in ends neatly on WS.
Info :
Make sure popcorn stitch loops are held consistently so the texture faces outward. If you do not like popcorns, substitute with small bobbles of 3 dc clusters.
— Finishing Details & Embellishments :
Info :
Sew tiny burgundy seed beads or french knots in strategic places on trees and medallions. If adding beads, secure with strong thread and knot on the WS then weave in ends. Optionally apply a tiny dab of fabric glue to secure each bead base.
Detail 1 :
Use matching yarn to embroider a center running stitch around each gift bow and tiny buttons on snowmen using black yarn. Keep stitches small and knot ends on the WS for a neat face.
Info :
When weaving in ends on lacy backgrounds, weave tails back and forth across several stitches and knot if needed, then trim close. Avoid long tails that may snag when used as a table runner.
Edge Finalization :
After final border rounds, block the runner again to ensure all scallops and points lay flat. Pin points firmly and spray lightly with water then allow to dry fully on blocking board to set shape.
Info :
For increased stability when used on a dining table, tack corners to a thin, non-slip pad beneath the runner (invisible under centerpiece) or use a runner pad to keep it from sliding. Avoid direct heat or open flames on runner surface.
— Pattern Notes and Gauge :
Info :
Gauge: one motif square worked to round 7 should measure approximately 12cm/4.7in across after blocking when using worsted weight yarn and 4.0mm hook. If your squares are larger/smaller, use a smaller/larger hook for the background rounds or adjust rounds in the square to match measurement.
Info :
Color placement: use color photograph as guide for where green and burgundy frames sit relative to motif centers. Swap colors to suit your decor but aim to keep the outer border alternating to create color rhythm.
Info :
Care instructions: Hand wash gently in cool water, reshape, and dry flat. Avoid machine washing or tumble drying to preserve appliques and beadwork.
This festive runner brings classic holiday colors and charming appliques to your table — each square filled with little scenes and texture that capture the season. The layered scalloped border frames the whole piece like a treasured heirloom and the appliqued snowmen and trees add personality and warmth. Work slowly, block carefully and enjoy the meditative rhythm of making each square. 🧶🎄 Your finished runner will be a centerpiece that invites compliments and holiday cheer. Happy crocheting!