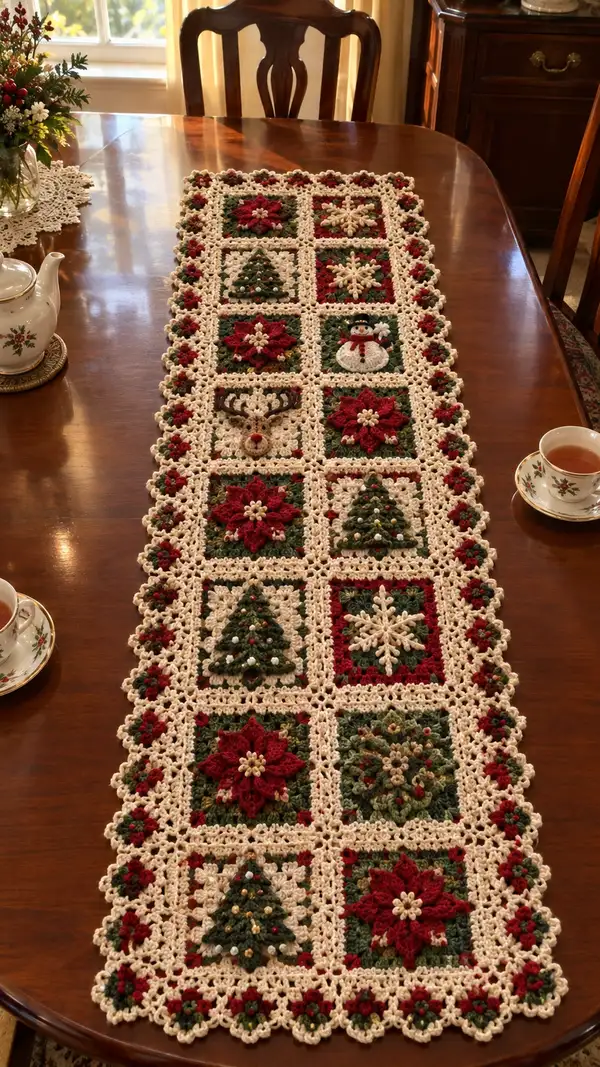
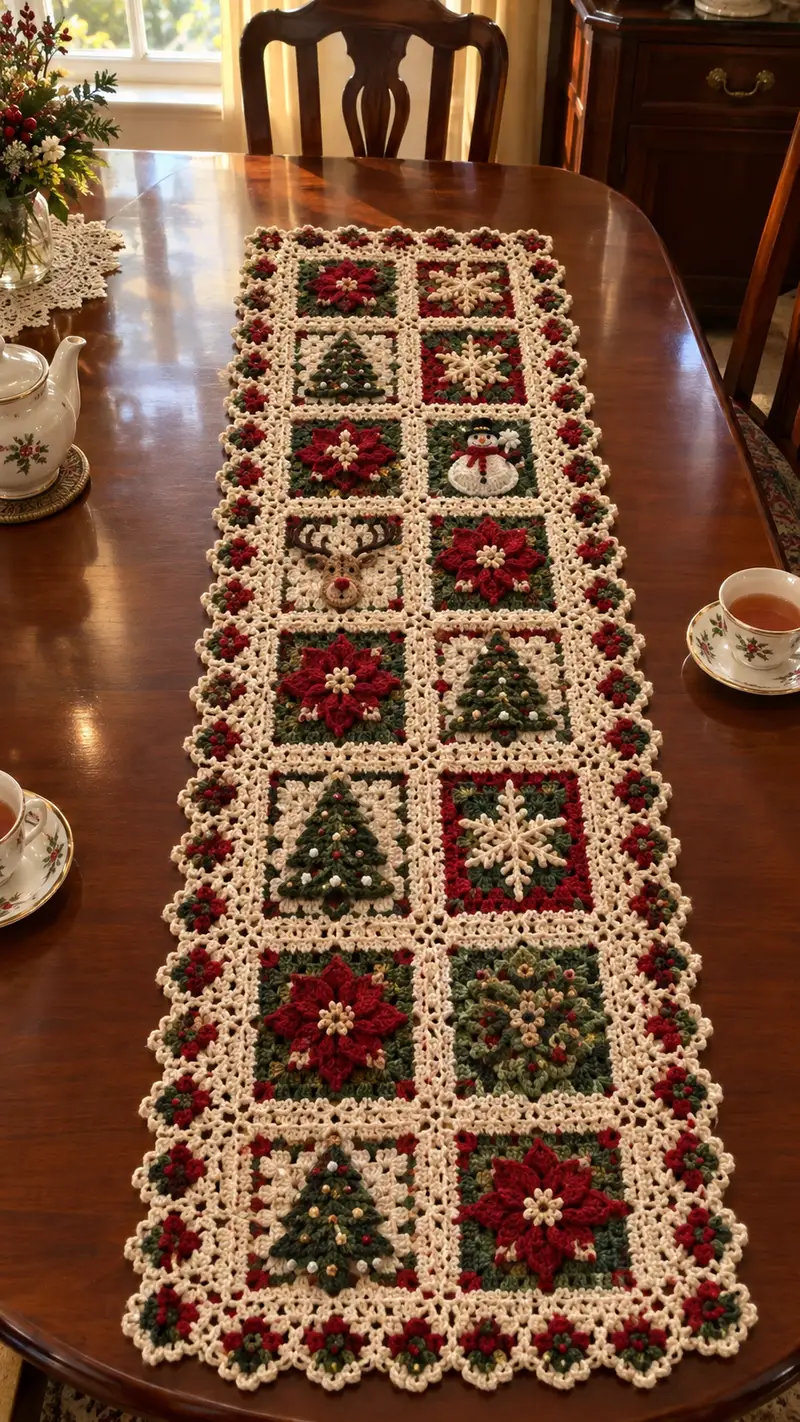
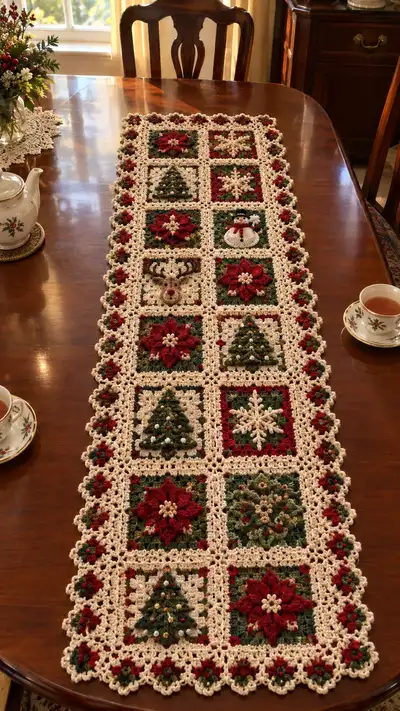
A classic holiday table runner featuring textured poinsettias, decorated Christmas trees, snowflakes, a reindeer and a snowman in rich burgundy, forest green and warm ivory. Each square is worked as a layered motif with 3D petals and tiny bead accents, then joined with a lacy cream lattice and a scalloped floral edging. Detailed stitch counts, color-change tips and joining instructions make this an approachable project for crocheters seeking a festive centerpiece.
Progress Tracker
0% Complete
— Pattern Notes :
Info :
Gauge is flexible for a runner; each finished square measures approximately 4.5" to 5" depending on tension. The sample runner pictured is approximately 14" wide and 54" long using worsted weight yarn and a 4.0mm hook. Squares are worked flat in rounds with layered 3D elements worked in contrasting colors. Join-as-you-go (JAYG) method is used to assemble the squares into columns, then columns are joined and a scalloped floral border is added. Use stitch markers at the start of rounds and block each square to measure before joining.
— Poinsettia Square (Make multiple) :
Round 1 :
With burgundy, mr, ch2 (does not count as st), 8 dc in mr, pull ring closed (8)
Round 2 :
Ch2, (1 dc in same st, ch1, skip next st) x8, join with sl st to first dc to form 8 spaces for petal bases (8 dc, 8 ch-1 sps)
Round 3 :
In each ch-1 sp: *(ch3, puff3 in same sp (see Info), ch3, sl st in top of next dc to anchor) x8 to form 8 petal clusters; fasten off burgundy
Info :
Puff3: yarn over, insert hook, pull up loop, yarn over, insert, pull up loop, yarn over, insert, pull up loop (you will have 7 loops on hook), yarn over and pull through all loops, ch1 to close puff. Keep puff height consistent. Do not stuff puffs; tension creates the petal bulge.
Round 4 :
Change to ivory. Join in back of each petal base to work a round that secures petals: ch1, 1 sc evenly around petal edge placing 3 sc across each puff and 1 sc in the dc join (total 40 sc) (40)
Round 5 :
Ch3, *2 dc in next st, ch1, skip 1 st; rep around to form a loose shell between petals. Join (approx 24 shells/ch-1 spaces)
Round 6 :
Change to green. Ch2, work 1 dc in each dc and 1 sc in each ch-1 space to begin square fill, aiming for a near-circular fabric with 32-40 sts total depending on exact spacing (approx 36)
Round 7 :
Continue in green: (2 dc in next st, 1 dc in next 4 sts) x multiple so total increases are even and shape becomes an octagon; after this round expect approx 48 sts (48)
Round 8 :
Change to burgundy. Ch1, 1 sc BLO in each st to create a defined ridge around motif (48)
Round 9 :
Switch to ivory. Ch3, *2 dc in next st, ch1, skip 1 st; rep to create corner ch-1 sps where corners will be formed (work increases at four positions to create square outline). After completing increases the round should sit square. Approx (56)
Round 10 :
Ch1, sc around filling in ch-1 spaces with 3 sc to create corner clusters, sc across sides evenly so each side measures equal stitches (56)
Round 11 :
Ch3, 2 dc in next st, dc across until corner, in corner work (2 dc, ch2, 2 dc) to make a clear square corner; repeat for all 4 corners. (This shapes the square; approx 64)
Round 12 :
Ch1, sc around in ivory; place small beads or French knots now: put a single gold or white bead in the center of each petal if desired; fasten and weave ends
Info :
Blocking tip: pin the square to a 5"x5" block and spritz lightly to shape the petals and square corners before the join. Secure beads by stitching through the yarn and knotting at the back.
— Christmas Tree Square (Make multiple) :
Round 1 :
With green, mr, ch2, 8 hdc in mr, pull tight (8)
Round 2 :
Ch2, (1 hdc in next st, inc) x4 around to make 12 sts (12)
Round 3 :
Ch3, (dc cluster: 2 dc, ch1) across to create 8 small ridges that will anchor tree layers; finish round with join (approx 16-20)
Round 4 :
Change to ivory. Work a round of sc around to set a circular base for triangular tree shaping (approx 24)
Round 5 :
Change to green. For tree trunk and layered branches: Ch2, *work (dc2tog, ch1, dc3 in one st) in three successive clusters to create first row of branches, leave center top area free; rep shaping until you have three tiered branch rows — wide base to narrow top (visual shaping, after this expect a triangular cluster formed over 3-4 rounds)
Round 6 :
In each branch tip make a 3-loop puff to create a textured triangular tree silhouette. Anchor puffs by sl st in surrounding sts. After shaping, fill the background around the triangle with green dc until number of sts around equals approx 48 (48)
Round 7 :
Sprinkle on tiny bead 'ornaments': with a sewing needle, stitch small ivory and gold beads across puff tips and branch points (Info details)
Info :
Bead placement tip: place beads where puffs meet the background so threading doesn't pull through easily. Use a hand-sewing needle; stitch twice and tie a small knot at the back of the square to secure each bead.
Round 8 :
Change to ivory. Work even sc around the entire motif, making small corner ch-2 spaces by placing (sc, ch2, sc) at four cardinal points so this square will join neatly with others. Approx (56)
Round 9 :
Ch3, in each side work (2 dc, ch1, 2 dc) in corner sps, dc across sides to deepen the square edges and prepare for join-as-you-go. (approx 64)
Round 10 :
Change to burgundy and work 1 sc BLO around to form a framed ridge; fasten off and weave ends.
Info :
Tree shaping is mostly visual—work puff and cluster placement so the triangle is centered. If your triangle is off-center, adjust the number of filler dc on either side to recentre before the final rounds.
— Snowflake Square (Make multiple) :
Round 1 :
With ivory, mr, ch3, 12 dc in mr, join (12)
Round 2 :
Ch4 (counts as tr+ch1), *1 tr in next st, ch1; rep to form 12 tr separated by ch1 sps (12)
Round 3 :
Change to burgundy. In each ch1 sp work (ch2, picot, ch2) anchored back into the tr to begin forming decorative arms; sl st to join. This begins the delicate snowflake arms (visual count varies)
Round 4 :
Change to ivory. Ch1, 1 sc around each tr and picot to tidy edges; create 4 corner ch-2 spaces by grouping sts at four points to square up motif. Approx 48
Round 5 :
Work a shallow 2-round square: ch3, dc across sides, in corner (2 dc, ch2, 2 dc) to set a square frame. (Approx 56)
Round 6 :
Change to green. Fill the background with dc and hdc rounds, keeping the snowflake centered; at this stage you should have a soft square with distinct snowflake center. (56)
Round 7 :
Switch to ivory and do a final round of sc placing small clusters of 3 sc in corners to form the joining corners; add tiny white beads to the snowflake tips for shimmer. Fasten off.
Info :
Snowflake detail: use a thinner yarn tail and small beads for crisp points. If you prefer embroidered snowflake arms, you can embroider chain-stitched lines after blocking instead of working the picots.
— Reindeer Head Square (Make 1 or 2) :
Round 1 :
With light brown, mr, ch2, 8 hdc in mr, pull closed (8)
Round 2 :
Ch2, (hdc, inc) x4 (12)
Round 3 :
Ch2, hdc around working increases to form a round face approx 24 sts (24)
Round 4 :
Change to dark brown for antler base: ch1, sc around to tighten shape (24)
Round 5 :
With dark brown, create two antler bases on opposite upper sides: mark positions then work into those sts: ch4, sc back along chain to form a short branched antler, anchor to head by sl st; repeat for second antler (antlers are constructed as small attached motifs)
Round 6 :
Change to ivory for nose and face charm: embroider eyes with black and highlight with a small white bead; create a tiny burgundy nose with a french knot or a short bobble stitch in a central lower face position
Round 7 :
Work an ivory frame around the head: ch1, sc around leaving corners as ch-2 spaces so head reads as part of a square. Add a small red bobble at the nose if you like 'Rudolph' style. Fasten off. (Approx 40 around frame)
Info :
Antler tip technique: if you want sturdier antlers, work them on waste yarn, insert florist wire, and slipstitch edges closed before sewing to the head. Alternatively use brown yarn with extra rows of sc to thicken branches.
— Snowman Square (Make 1) :
Round 1 :
With white, mr, ch2, 8 hdc in mr, pull tight (8)
Round 2 :
Ch2, (hdc, inc) x4 (12)
Round 3 :
Ch2, hdc around (12) — this is the head. Fasten off and set aside.
Round 4 :
With white, create the body circle: mr, ch2, 12 dc in mr, pull closed (12)
Round 5 :
Ch2, (dc, inc) x6 to make 18 dc; ch1, join to create a slightly larger body disk (18)
Round 6 :
Sew the head to the body using whip stitch; embroider eyes with black and a carrot nose in orange using satin stitch; add a small burgundy scarf by working a 6 ch strip of yarn, then fringe ends and stitch around neck
Round 7 :
Work an ivory frame around the assembled snowman as part of the square's background: sc around, making corner ch-2 sps to square up (approx 56)
Info :
Snowman details: keep sewn features flat so the square still lies mostly flat. Use small tight stitches for facial details and secure the scarf well so it won't shift with wash.
— Filler Floral/Cluster Square (Make multiple) :
Round 1 :
With green, mr, ch2, 8 dc in mr, close (8)
Round 2 :
Ch2, dc around making a small disk (16)
Round 3 :
Change to burgundy. Create a dahlia/puff center: in next 8 sts make puff stitches (puff3) spaced evenly to form 8 small bumps; secure and fasten
Round 4 :
Change to ivory. Ch1, sc around forming corners with (sc, ch2, sc) at 4 points to square up (approx 40)
Round 5 :
Ch3, dc round to create a final framed square; fasten off (approx 48)
Info :
This square is a textural filler to balance the runner layout. Keep puffs low-profile to avoid too much bulk under plates; if desired, use single crochet embroidered french knots instead of puffs.
— Square Blocking & Trimming :
Info :
Block all squares to a consistent size (aim for 4.75" square). Pin corners on a blocking board and spritz steam lightly. Allow to dry completely. Trim any long tails before joining to keep joins tidy.
— Join-as-you-go Columns (JAYG) :
Round 1 :
Work the final round of the square in ivory up to the corner where you will join to an adjacent square. When ready to join, align new square with already-blocked square and sl st into corresponding st on joined square in each corner to secure. Continue final round, sl st in every 6th st into adjacent square to create neat lattice bonds. Finish one side then repeat for the other sides to form columns.
Round 2 :
When joining in the middle of a side: at each ch-2 corner of the square being joined, ch2, sl st into corner ch-2 of adjacent square, ch2 and continue. For the side spaces between corners, sl st into every third sc of the neighboring square to keep spacing even. This will create the white lattice frame seen in the runner.
Info :
Always join while squares are still flat and pinned; this prevents warping. Work joins while squares are slightly damp from blocking for a cleaner seam and allow the join to set as it dries.
— Assembling Columns into Runner :
Round 1 :
Once you have complete columns (each column is a stack of squares joined vertically), join columns horizontally using the same JAYG method: align columns square-to-square and work the final round of the squares, sl st into adjacent column's stitches at even intervals to create the grid lines between columns. Ensure all corner ch-2 spaces on every square line up before finalizing joins. The runner pictured uses 3 columns of 6 squares each (total 18 squares) but you can adjust length by adding or removing full rows.
Info :
Keep consistent stitch counts when joining columns or irregular gaps will appear. If you need to widen or reduce column spacing, add or subtract an extra row of sc between joins before completing the round.
— Inner Lattice & Corner Motifs :
Round 1 :
After joining all squares into the rectangle, work one continuous round of ivory sc around the entire assembled rectangle to build up the lattice width; in each internal corner ch-2 space work (sc, ch2, sc) to maintain corners. This creates the thick lattice frame between squares visible in the sample.
Round 2 :
Work a second round in ivory of sc placing small picot stitches (ch3, sl st into first ch) at evenly spaced intervals along each side to provide an anchor for the outer floral border. Fasten off and weave ends. (This strengthens the lattice and prepares outer edge for scallops.)
Info :
If your lattice looks too tight or the runner pulls, block the entire assembled runner flat and repeat the sc round with a slightly looser tension to reduce pull.
— Scalloped Floral Border (Edge) :
Round 1 :
With burgundy, join anywhere on the outer edge. Ch1, sc evenly around the outer edge of runner working 1 sc in each st and (sc, ch3, sc) in outermost corner loops for rounded corners. Place 3 sc in any tight spaces to keep edges even. (Count varies with runner length.)
Round 2 :
Change to green. Work clusters along the edge to form small leaf-like shapes: *ch1, skip 1 st, (dc3tog cluster over next 3 sts), ch1, sc in next st; rep across. These clusters will sit behind the burgundy flower centers we will add next. Fasten off green.
Round 3 :
Change to ivory. Work a decorative chain-and-shell foundation: ch1, *(3 dc, ch2, 3 dc) in the next space to form scallop shell, sc in the center of the next cluster; rep. This forms a scalloped frame around the runner. (Shells spaced evenly; count approx 1 shell per 1.5" of edge)
Round 4 :
With burgundy, in each shell make a tiny poinsettia center: into the shell ch-2 space work 5 small puff petals (puff2) separated by ch1; secure and add a small ivory bead in center. Repeat around full perimeter (this gives the cameo floral edging visible in the photo).
Info :
Make sure shells line up with the lattice openings to echo the interior motif spacing. Add beads after shell rounds for consistent placement; block again after border is complete for best drape.
— Final Rounds & Finishing Touches :
Round 1 :
Weave all ends snugly into the lattice using a tapestry needle. For beads added by hand, use a small knot and dab a tiny amount of fabric glue on the knot if you expect heavy handling or washing. Trim loose ends close to the knot and tuck into stitches.
Round 2 :
Lightly steam-block the entire runner pinned to shape (do not press directly—use a steam iron and keep a towel barrier if needed). Allow to dry thoroughly. This evens the squares and sets the border scallops.
Info :
Care instructions: hand wash gently in cool water with mild detergent, reshape and lay flat to dry. Avoid tumble drying to protect beads and the 3D petals.
This Burgundy Green Poinsettia Table Runner brings vintage holiday charm to your table with layered poinsettias, textured trees and quaint seasonal motifs. Each square is a little scene stitched with love and joined into an heirloom centerpiece. The scalloped floral border ties every motif together into a cohesive, festive design you’ll be proud to display. 🧶✨ Make one for your holiday table or gift it to someone special — each stitch tells a story. 🎁