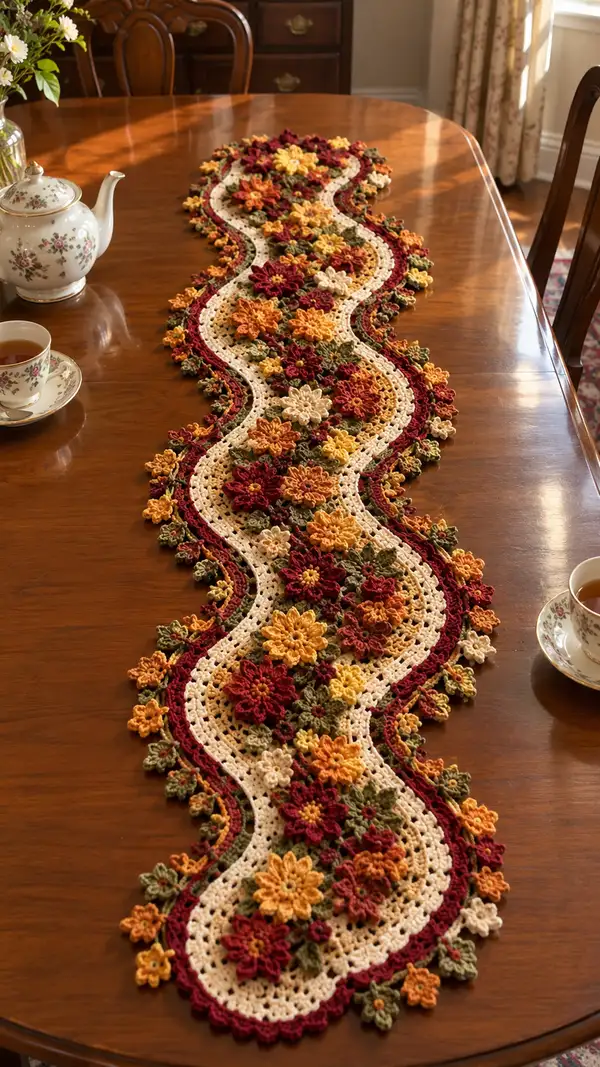
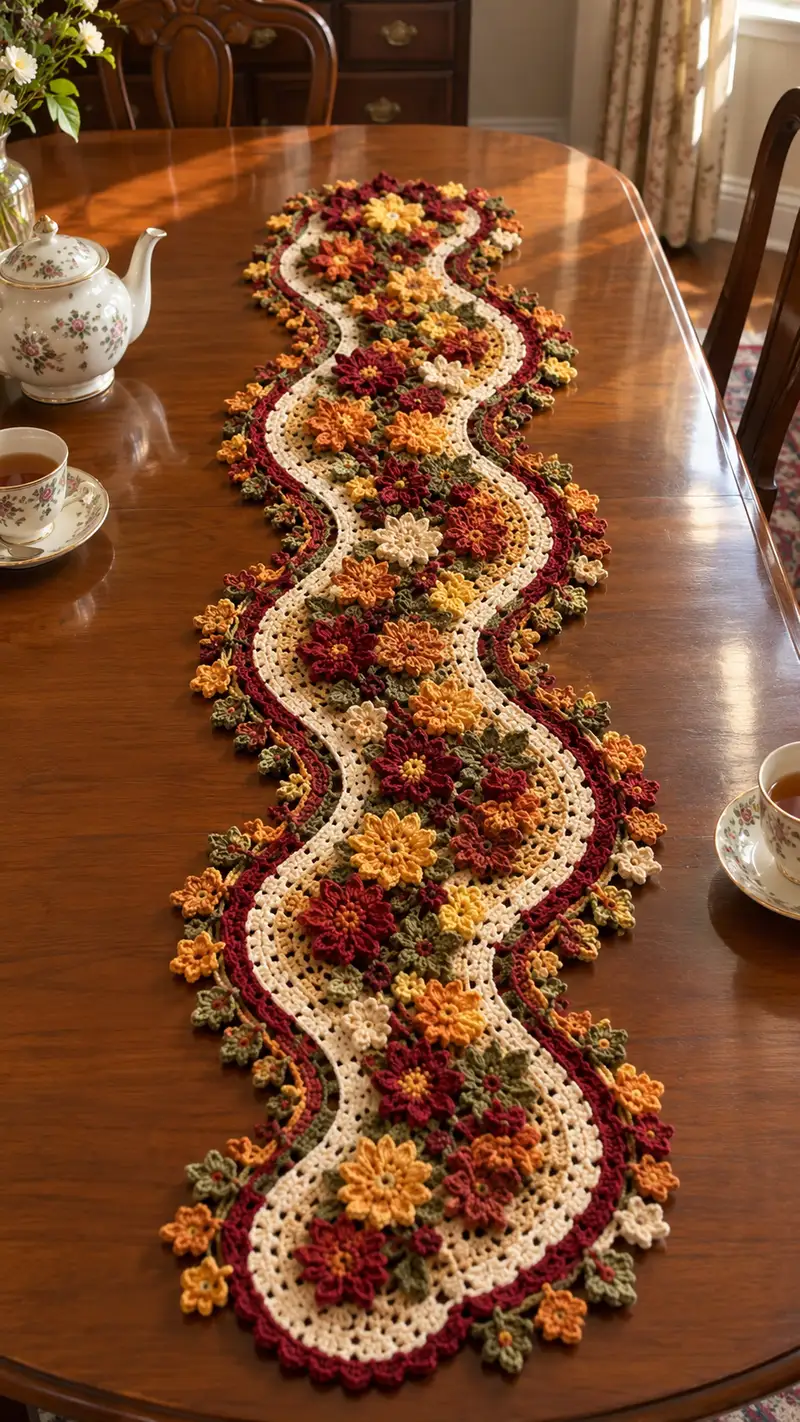
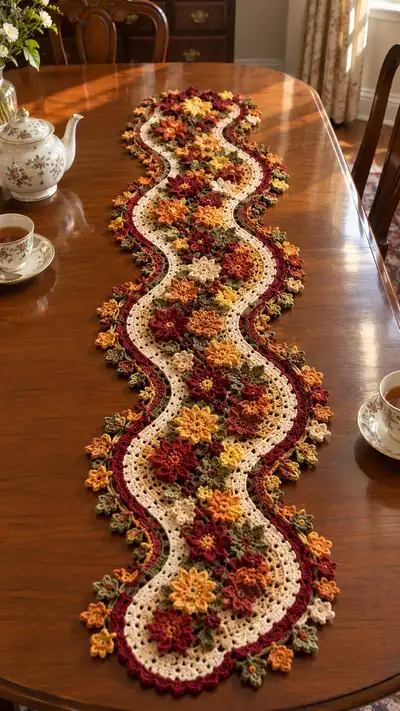
A long, elegant wave-shaped table runner covered in layered floral motifs in rich burgundy, mustard, cream and olive tones. This runner features a delicate openwork cream mesh center, scalloped burgundy borders and clustered flowers and leaves joined in a flowing wave. Perfect for dining tables, mantel displays, or seasonal décor with a warm autumn palette.
Progress Tracker
0% Complete
— Notes and Overview :
Info :
This pattern is modular: the runner is constructed from a foundation wave repeat. Make N repeats to fit your table. Example measurements and yarn amounts are for 12 repeats (approx 60-72 inches long depending on stitch tension). Use a 3.5mm hook for main fabric; use a 3.0mm hook for small, tight flowers if desired. Work tightly enough so the openwork does not gape when motifs are attached.
Info :
Terminology: 'wave repeat' refers to one serpentine unit across the width. Throughout I note stitch counts for one repeat; multiply or repeat the sequence across length. Block the cream base before attaching flowers to stabilize shape.
— Foundation Chain (Make a multiple for desired length) :
Round 1 :
Ch (24 x number of repeats) + 1. Example: for 12 repeats ch 288+1 = ch 289. Do not fasten off. This forms the foundation chain across which you will work in joined rounds to build the mesh base.
Info :
Ensure your base chain is straight and not twisted when you join for rounds. Place a stitch marker at the beginning chain to mark the join point. For a runner 60-72 in, 12 repeats is a good starting point; add or subtract repeats in multiples of 24 to lengthen or shorten.
— Base Wave Panel (worked in joined rounds across whole chain) :
Round 2 :
RS: Join with sl st to first ch to form a ring (do not twist). Ch 1, sc in same ch and in each ch across to last ch, sl st to first sc—working in a spiral is optional but this pattern uses joined rounds to maintain wave edges. (Sts = foundation chain count, example 289)
Round 3 :
Ch 3 (counts as dc), *sk 2 ch, (dc, ch1, dc) in next ch (creates small mesh arch), sk 2 ch, sc in next ch* repeat across to join. This creates an alternating mesh and sc baseline to accept later shaping. Maintain count consistent with repeats.
Round 4 :
Ch 1, sc in each st and in each ch-1 space across; when you reach the end of each 24-st repeat, work (sc, inc, sc) in the designated repeat crest point to start the wave bulge (see layout diagram). Repeat for each 24-st section. Example: within each 24-ch repeat arrange increases at stitches 20-22 to form bulges.
Info :
At the start of Round 4 mark the first stitch of each 24-ch repeat so you can precisely place the increases that make the wave crest and trough. Each repeat will have 3 small increases forming the outward curve and 3 decreases forming the inward curve later.
Round 5 :
Ch 3, dc in each st and in ch-1 spaces across, except at the designated crest points (every 24 ch) where you work (2 dc, ch1, 2 dc) in the same stitch to create a gentle outward bulge. This will expand each repeat by 3-4 sts at the crest. Adjust counts by making the crest increases symmetrical on both sides of the repeat center.
Round 6 :
Ch 1, sc across in each dc and sc, placing (sc, dec, sc) centered at the designated trough area (the opposite side of the 24-st segment) to draw the panel inward. Maintain balanced shaping so each repeat remains visually wavy. If you used 3 increases at crest, use 3 decreases at trough to keep overall stitch counts controlled.
Info :
Round 5-6 shape the panel. Work evenly for several rounds after establishing the crest/trough shaping so the waves become smooth. If your panel begins to ruffle unevenly, adjust by adding or removing single increases at crest points until the width is stable.
Round 7-10 :
Work 4 rounds even: ch1, sc in each st and in each ch-sp across (st count constant within each repeat after shaping). These even rounds build the mesh height of the cream center. Example counts per repeat will stabilize around 30-34 sts depending on increases used.
Round 11 :
Ch 3, dc in each st across, except at crest points work (dc, ch2, dc) to create a slightly taller arch for flower placement. This gives a flush place to attach multi-layer flowers later.
Info :
Work three even rounds after Round 11 (ch1, sc across) to create a broad flat area on top of the wave where most flowers will be attached. Keep this area lightly firm by tension but not tight so motifs can be sewn on without puckering.
Round 12-16 :
1 sc in each st round (maintain count). Use stitch markers to mark the crest top in each repeat every 24 sts. These rounds form the central cream field where flowers will be placed.
Round 17 :
Change to burgundy yarn. Ch 1, sc in each st for one round to anchor the border color (counts unchanged). Carry cream yarn inside if you plan to weave in later, or fasten off and weave in ends if you prefer clean edges.
Info :
Switch to burgundy for inner scallop foundation. The burgundy rounds will create a defined edge between the cream center and outer scallops. Carry or fasten off as you prefer; carrying saves tails but can bulk edges slightly.
Round 18 :
With burgundy: ch 3 (counts as dc), *dc in next 4 sts, (2 dc, ch2, 2 dc) in next st (scallop at crest), dc in next 4 sts, sk 2 sts, sc in next st;* repeat across. The (2dc,ch2,2dc) creates the upright scallop along crest areas that visually follow the wave curve.
Round 19 :
Ch 1, sc in each st and in each ch-2 space across; where the previous round had ch-2 spaces work (sc, hdc, sc) within the ch-2 to create a compact sep between double-high scallops. This reinforces the burgundy ridge.
Info :
At this stage you have established the cream center and a burgundy ridge. This ridge frames future flower clusters. Work even two rounds of burgundy sc to get a stable base for outer edging.
Round 20-21 :
Ch1, sc across in burgundy (2 rounds). Confirm counts per repeat; adjust small changes by adding a sc in less-critical spacing to maintain smooth edges.
Round 22 :
Change to olive green for a narrow leaf-stem round: ch1, sc in BLO across for subtle ridge (sc in back loop only of each st) which gives a line to mirror leaf placement. Work 1 round BLO sc.
Info :
The BLO round creates a ledge that helps small leaves sit naturally. Use this as your placement guide: every repeat crest will have 6-8 small leaf spaces between flower groups.
Round 23-24 :
Change back to burgundy: ch1, sc across (2 rounds) to secure BLO ridge and to prepare for scalloped outer edge. These two rounds ensure the final edge has depth for large outer scallops.
Round 25 :
Edge scallop foundation: ch3, dc in next 3 sts, (3 dc, ch3, 3 dc) in crest point (make large scallop), dc in next 6 sts, sl st in next st; repeat across for each repeat. This begins the full scalloped edge which will be worked up into final shell edging.
Info :
When you reach the end of each repeat, align shell centers with the previously marked crest stitch. This keeps scallops consistent along the length of the runner.
Round 26-28 :
Work 3 rounds of shell shaping and refinement: Round A (26): ch1 sc across shells and spaces; Round B (27): ch3 dc across, working (2dc,ch2,2dc) in shell centers; Round C (28): ch1 sc across and tidy edges. These rounds build the dimensional burgundy scallops visible along the outer curve.
Info :
At the end of Round 28, you should have a stable cream center with a double burgundy ridge and prepared outer shells. Block this base to final wave shape before attaching motifs: pin to blocking mat following wave, pin scallops out evenly, mist and allow to dry.
— Large Layered Flower (Make multiple in burgundy and mustard) :
Round 1 :
MR: 6 sc in magic ring (6). Pull ring closed. This makes the center of a large flower.
Round 2 :
(Inc) x 6 (12). Work evenly to create a small disc for stability.
Round 3 :
(1 sc, inc) x 6 (18). Keep stitches tight so petals sit high.
Round 4 :
Change to petal color (burgundy or mustard). Ch 3, *skip next sc, (7 dc cluster in next st) to form a long petal, sl st into same st to secure, ch1, sl st into next st;* repeat around for 6 petals. The 7-dc cluster is worked as 7 dc all into the same stitch, finishing the petal by sl st back to base.
Info :
Keep petals slightly loose on hook to create a pronounced arc. Use a hook 0.25mm smaller if your petals look too floppy. After Round 4, adjust petals outward with fingers and steam lightly if needed when blocking.
Round 5 :
Change back to center color: sl st into base between petals, ch1, *sc in same sp, ch2, sc in base between next two petals;* repeat around to create small picot-like separators (12 sc separated by ch2 spaces).
Round 6 :
Second petal layer: attach contrast color (rust or mustard) to back of each first-layer petal by sl st at its base, ch3, (5 dc in base of petal), sl st to same place; repeat for all 6 petals to form a denser layered look. This increases texture and depth. Fasten off and weave tail to center back.
Info :
Stitch counts: Center rounds produce 18 sts before petals. Petal clusters do not alter the underlying stitch count; they are attached by sl sts into existing sts. Make as many large flowers as you want; typical runner uses 10-14 large flowers spaced in clusters of 2-3 across length.
— Medium Flower (Make multiple in mustard, rust) :
Round 1 :
MR: 6 sc in magic ring (6). Pull tight.
Round 3 :
Change color to contrast and work petals: *ch2, 5 dc into next st, sl st into same st, ch1, sl st into next st;* repeat around to make 6 medium petals. Fasten off and weave in tail.
Info :
Medium flowers are flatter and useful to fill spaces between large flowers. Use mustard and rust interchangeably for variety. Make 15-20 medium flowers for a 12-repeat runner.
— Small Flower (Make many in cream and yellow) :
Round 1 :
MR: ch 1, 6 sc in magic ring (6)
Round 2 :
(1 sc, inc) x 3 (9)
Round 3 :
Attach petal color: *ch2, 3 dc in next st, sl st in same st;* repeat around for 6 small petals. Fasten off and leave long tail for sewing.
Info :
Small flowers are accent elements used densely along edges and between larger flowers. The small petals are tight and compact; use a 3.0mm hook for a crisp finish.
— Tiny Blossom (Make many for edge clusters) :
Round 1 :
MR: 6 sc in magic ring (6)
Round 2 :
Ch1, sc in each st (6). Fasten off leaving tail for stitching. These tiny discs act as centers or filler buds.
Info :
Tiny blossoms are great for edging; they can be attached with a sl st or sewn on with a yarn needle using the tail left during finishing.
— Leaf (Make multiple in olive green) :
Round 1 :
Ch 6, sc in 2nd ch from hook, hdc in next, dc in next, hdc in next, sc in last, ch1, turn working on opposite side of foundation chain: sc in next, hdc in next, dc in next, hdc in next, sc in last, sl st to first sc. (Creates a double-sided leaf.)
Round 2 :
Work BLO sc around edge: ch1, sc BLO in each st around to create a crisp ridge; fasten off leaving tail for sewing. Optional: add central vein with surface slip stitch using darker green yarn.
Info :
Make small and medium leaves by using ch 4-7 foundation chains. Vary sizes to match cluster needs. Leaves are stitched onto the base following the olive BLO ridge placement.
— Flower Centers and Embellishments :
Round 1 :
For centers use small beads or embroidered French knots. Alternatively, make a 6-sc tiny disc in dark brown then use a contrasting mustard yarn to embroider small French knots in the center for a textured look. Sew centers to flowers before attaching flowers to the base.
Info :
If using beads, secure with strong thread and knot tightly, then apply a small dot of fabric glue to the knot for extra security (especially if runner may be handled frequently).
— Layout and Placement :
Info :
Block the base to final dimensions. Use T-pins to arrange flowers. Place large flowers at crest tops in staggered clusters (2-3 per wave crest) and media/small flowers between and along trough sides. Leaves fill gaps and soften edges; tiny blossoms dot the scallop outer edge.
Info :
Work in clusters: sew one large flower first, then place medium and small flowers radiating around it. This grouping mimics the image's layered garden effect and balances color across repeats.
— Attaching Flowers (Sewn and crocheted-join methods) :
Round 1 :
Position a large flower on cream crest. Using tapestry needle and matching yarn tail from the flower, sew through the cream mesh base in several places (at least 6 evenly spaced stitches around the flower base). Fasten off and weave in ends. Repeat for every flower piece.
Round 2 :
For sewn leaves, place leaf under flower seam and stitch through leaf base and cream mesh using ladder stitch for invisible join. Secure with several passes and weave in tail. Tiny blossoms are best attached with a few sl sts through ch-1 spaces on the base.
Info :
Alternate method: crochet-join small flowers by working a sl st from flower base into the cream base ch-1 spaces directly while both pieces are held together. This can be faster but is visible on the wrong side; choose the method you prefer.
— Joining Multiple Pieces While Building (Optional 'Join-As-You-Go') :
Round 1 :
When making medium flowers you'll sometimes sl st a petal edge into the base ch-1 space to lock placement. To do this, hold flower on base, insert hook through back of flower base and into base ch-1 space, sl st, ch1, continue to next petal. This permanently joins without sewing later.
Info :
Join-as-you-go saves assembly time but is less forgiving for repositioning. Use for small filler flowers and tiny blossoms where placement is clear.
— Outer Scallop and Final Edge (worked after all motifs attached) :
Round 1 :
With burgundy: around outermost scallop edge, ch1, sc in each st and in each ch-space, working (sc, ch3, sc) in shell points to create loop base for final picot edging. This evens out any irregularities from flower joins.
Round 2 :
Change to cream: sl st in next st, *ch3, picot (ch3, sl st into 1st ch of ch3), sl st into next st;* repeat around to create decorative tiny picot scallops along the very edge. This light cream picot frames the burgundy shell beautifully.
Info :
Alternate color for the final edge for a crisp two-tone look. If you prefer a stronger border, work an additional round of (2dc, ch2, 2dc) in burgundy on shell tops before the cream picot round.
Round 3 :
Optional final reinforce: with olive, work a single round of BLO sc along inside of outer shells to make the edge sit flat and provide leaf contrast. Fasten off and weave all ends.
— Final Finishing Touches :
Info :
Once all motifs are sewn, press lightly with steamer or iron using protective cloth, reshape shells and petals with fingers, and re-block if necessary. Trim any stray fibers and weave all ends on wrong side so the runner looks tidy from both sides when on the table.
Info :
For extra stability, you may hand-stitch small clear glass beads as extra centers to catch light; secure with strong thread and apply a small dab of glue to back knot for security if the runner will be handled often.
Completing this Burgandy Mustard Floral Wave Table Runner is such a satisfying project — the layered blooms and wavy silhouette feel like creating a textile garden! Each repeat you assemble adds to the beautiful flow of color and texture, and the finished runner brings a cozy, elegant touch to your table. 🧶🌼 Take your time arranging clusters and blocking for the best effect. Enjoy every stitch and the beautiful centerpiece you created! ✨