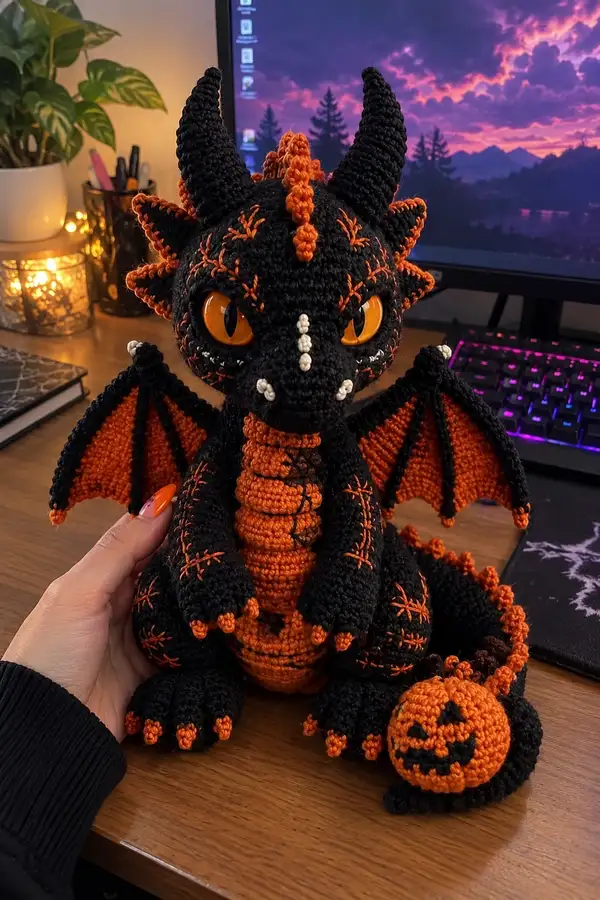
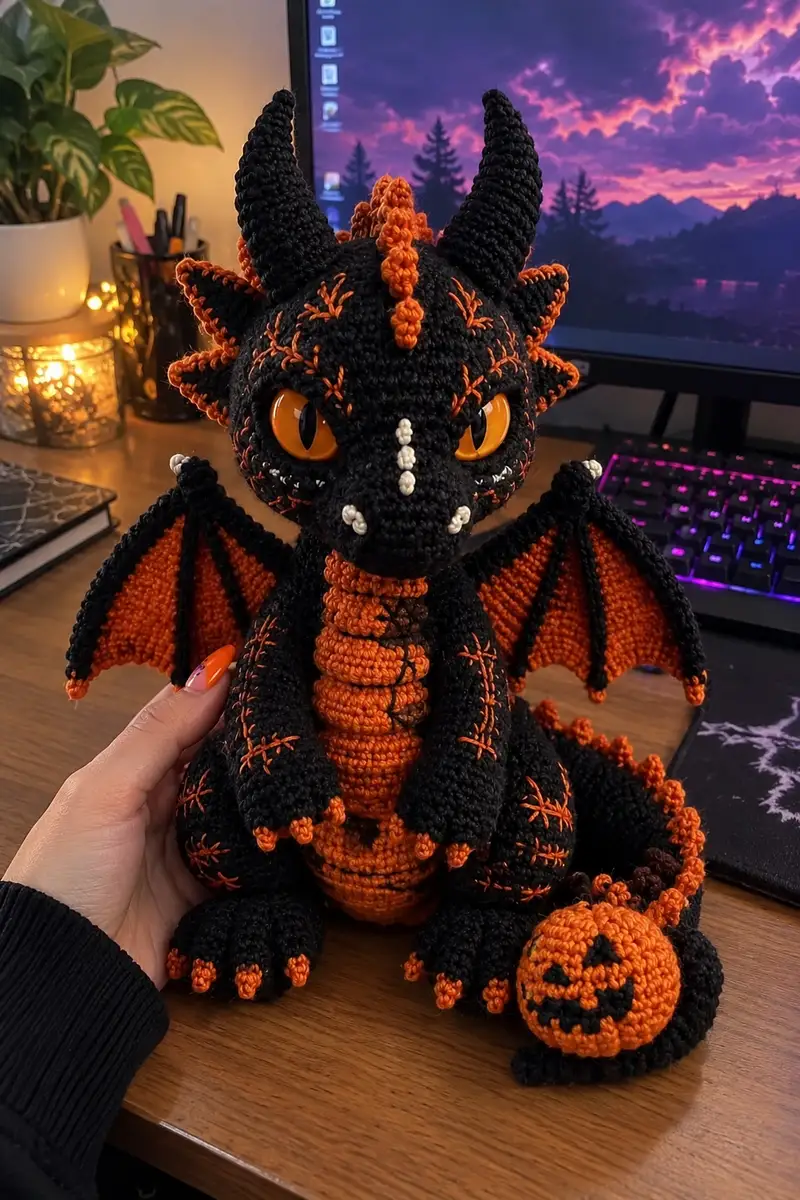
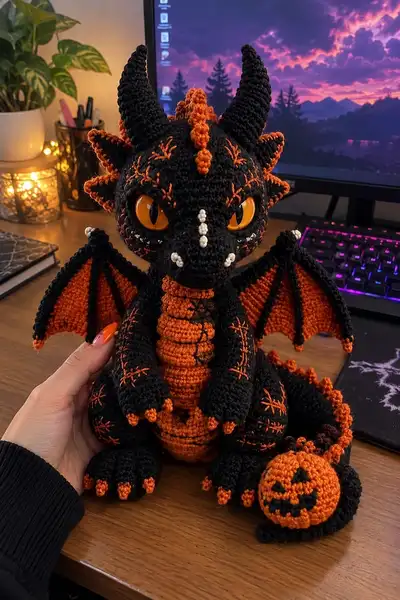
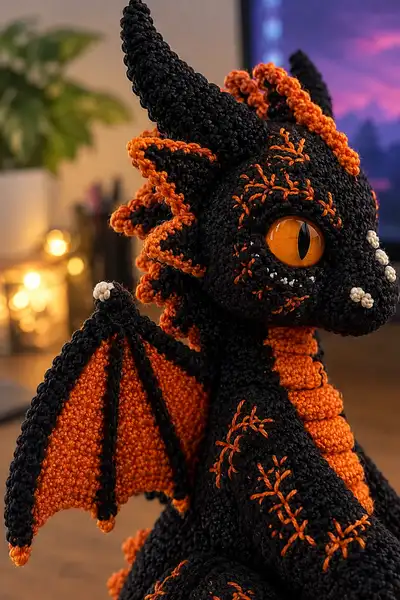
Create a spooky-cute black and orange dragon with pumpkin buddy in this detailed amigurumi pattern. This design features textured ridges, curled horns, expressive cat-like eyes, embroidered scars and stitches, articulated wings, and a segmented belly. Perfect as a Halloween decoration or a cuddly collectible, the finished dragon pairs deep black with vibrant orange accents and tiny cream teeth for a striking contrast.
Progress Tracker
0% Complete
— Head :
Round 1 :
6 sc in magic ring (6)
Round 3 :
(1 sc, inc) x 6 (18)
Round 4 :
(2 sc, inc) x 6 (24)
Round 5 :
(3 sc, inc) x 6 (30)
Round 6 :
(4 sc, inc) x 6 (36)
Round 7 :
(5 sc, inc) x 6 (42)
Round 8 :
(6 sc, inc) x 6 (48)
Info :
Work in continuous rounds (do not join) and keep a stitch marker at the first stitch of each round. This head will be fairly large; final circumference is 48 sts. Use black yarn for all head rounds until otherwise noted.
Round 9-12 :
1 sc in each st (48)
Info :
Place safety eyes between rounds 12-14. For the look in the photo place eyes on round 13 spaced approximately 12-14 stitches apart center-to-center depending on eye size. If using 20mm eyes, mark eyes 13 sts apart (leaving 12-14 sts between the inner rims).
Round 13-16 :
1 sc in each st (48)
Round 17 :
(6 sc, dec) x 6 (42)
Round 18 :
(5 sc, dec) x 6 (36)
Info :
Begin stuffing the head firmly but evenly. Add fiberfill in small handfuls, shaping cheeks and brow as you stuff. Secure eyes now if using safety eyes, then sew the eyelid shaping by pulling a running stitch around the eye opening from the inside to create that slightly almond expression.
Round 19 :
(4 sc, dec) x 6 (30)
Round 20 :
(3 sc, dec) x 6 (24)
Round 21 :
(2 sc, dec) x 6 (18)
Round 22 :
(1 sc, dec) x 6 (12)
Info :
Stop decreasing when you have a small opening left for neck insertion. Leave a long tail for sewing the head to the body. Final shaping of the snout will be done later with a few sculpting stitches and small surface embroidery for the nose ridges.
Round 24 :
Fasten off leaving 30-40cm tail for sewing. Finish stuffing firmly and close opening by threading tail through remaining stitches and pulling tight. Weave tail into head for secure finish.
Info :
Before fully closing the head, insert a small piece of felt (optional) behind each eye to make them sit flush. If embroidering the nose ridge and nostril bumps, secure a short length of cream yarn now and make small french knot-like clusters of 3-4 single crochet popped clusters to mimic the cream bumps seen on the snout.
— Snout / Nose Details :
Round 1 :
Using black yarn, join at front center of head with slip stitch and crochet 6 sc in a tiny magic ring for snout nose base (6)
Round 3 :
1 sc in each st (12)
Info :
Flatten slightly and sew the snout disk to the front of the head aligned with eye placement. Use a few securing stitches to shape the bridge of the nose. Add 4 small cream popped stitches for the nostril/teeth bumps using embroidery yarn by making tiny knotted clusters on top of the snout and along the muzzle as in the photo.
— Neck :
Round 1 :
Attach black yarn to bottom center of head opening and sc around joining head opening to body tube, pick up 12 sts evenly around neck opening (12)
Round 2 :
1 sc in each st (12)
Round 3 :
(1 sc, inc) x 4 (16)
Round 4-6 :
1 sc in each st (16)
Info :
Work the neck a bit taller if you prefer a longer-necked dragon. The neck should align to be sewn into the top of the body later. Keep the neck stuffing light to allow body attachment to tuck in neatly.
— Body :
Round 1 :
6 sc in magic ring (6) - start body base
Round 3 :
(1 sc, inc) x 6 (18)
Round 4 :
(2 sc, inc) x 6 (24)
Round 5 :
(3 sc, inc) x 6 (30)
Round 6 :
(4 sc, inc) x 6 (36)
Round 7-12 :
1 sc in each st (36)
Info :
Change to orange yarn at the belly area if doing a stripe or segmented belly. The pictured dragon has an orange segmented belly worked separately and sewn, so continue body in black while you create a separate belly panel in orange to attach later.
Round 13 :
(5 sc, dec) x 6 (30)
Round 14-16 :
1 sc in each st (30)
Round 17 :
(4 sc, dec) x 6 (24)
Info :
Begin stuffing the body from the bottom up as you work. Stuff fairly firmly around the base to provide a stable seated posture. Add more fiberfill as you approach rounds 14-16 to avoid lumps.
Round 18 :
(3 sc, dec) x 6 (18)
Round 19 :
(2 sc, dec) x 6 (12)
Round 20 :
(1 sc, dec) x 6 (6)
Info :
Fasten off leaving a long tail for sewing to neck. The head's neck tube will be sewn into this opening. Ensure body is stuffed to hold head securely.
— Belly (Segmented Orange Belly) :
Round 1 :
With orange yarn make a magic ring and 6 sc in ring (6)
Round 3 :
(1 sc, inc) x 6 (18)
Round 4 :
(2 sc, inc) x 6 (24)
Round 5-6 :
1 sc in each st (24)
Info :
The segmented belly is composed of stacked short tubes sewn on top of each other. Make 6-8 short ribbed discs of orange then join them vertically with slip stitches or whip stitch to create the ribbed column seen on the finished dragon.
Make 6 small discs (repeat) :
Round A1: 6 sc in mr (6); Round A2: inc around (12); Round A3: 1 sc around (12); Fasten off leaving long tail. Repeat to make 6 discs total and stack.
Info :
Sew discs together stacked with their rounds offset slightly to create a ribbed appearance. Stuff each disc lightly before closing; this gives the segmented look. Attach assembled belly column to the front center of the body aligning to rounds 8-14 so it sits between chest and abdomen on the finished toy.
— Arms (Make 2) :
Round 1 :
6 sc in magic ring (6) - base of paw
Round 3 :
(1 sc, inc) x 6 (18)
Round 4 :
(2 sc, inc) x 6 (24)
Info :
These first rounds shape the hand/paw. The claws will be added later in orange. Stuff the paw firmly but leave the top unstuffed so that the arm will lie flat against the body.
Round 5-8 :
1 sc in each st (24)
Round 9 :
(3 sc, dec) x 6 (18)
Round 10-12 :
1 sc in each st (18)
Round 13 :
(2 sc, inc) x 6 (24) - slight flare for upper arm
Round 14-18 :
1 sc in each st (24)
Round 19 :
(2 sc, dec) x 6 (18)
Round 20 :
1 sc in each st (18) - finish to shoulder height
Info :
Leave a long tail for sewing arms to body at side seams. Stuff hands fairly firmly and upper arms moderately. For a poseable arm you can insert wire prior to stuffing, making sure wire ends are folded and padded to avoid poking through stitches.
— Hands / Claws (Make 2 sets of 3) :
Round 1 :
4 sc in magic ring (4)
Round 3 :
1 sc in each st (8) - change to orange yarn
Round 4 :
1 sc in each st (8) - fasten off leaving tail for sewing
Info :
Sew three small orange claws to the tip of each hand, spacing evenly to mimic the small claw tips visible in the photo. You can also embroider tiny nails using darker orange or brown yarn for contrast.
— Legs (Make 2) :
Round 1 :
6 sc in magic ring (6) - start foot
Round 3 :
(1 sc, inc) x 6 (18)
Round 4 :
(2 sc, inc) x 6 (24)
Round 5-8 :
1 sc in each st (24) - shape foot pad
Info :
Stuff the foot pad firmly to give a stable base for the seated dragon. The photo shows rounded feet with orange claws — leave the ends slightly open for claw attachment.
Round 9 :
(3 sc, inc) x 6 (30)
Round 10-14 :
1 sc in each st (30)
Round 15 :
(4 sc, dec) x 6 (24)
Round 16-19 :
1 sc in each st (24)
Round 20 :
(3 sc, dec) x 6 (18)
Round 21 :
(2 sc, dec) x 6 (12)
Round 22 :
1 sc in each st (12)
Round 23 :
Fasten off leaving long tail for sewing to body. Stuff leg firmly and shape knee area so it sits well against the body when attached.
— Ear / Frill Spikes (Make 12 small frills) :
Round 1 :
6 sc in mr (6) - base of frill
Round 3 :
1 sc in each st (12) - change to orange at outer edge with slip stitch and sc around edge 12 sc in orange to create contrasting rim
Info :
Pin these small triangular frills around the back of the head, spacing them evenly and curving them slightly outward. The final toy shows 7-8 frills on each side; make 12-16 total and choose the best sized ones for each side.
— Horns (Make 2) :
Round 1 :
6 sc in magic ring (6)
Round 2 :
(1 sc, inc) x 3 (9)
Round 3 :
(2 sc, inc) x 3 (12)
Round 4 :
(3 sc, inc) x 3 (15)
Round 5-8 :
1 sc in each st (15)
Round 9 :
(3 sc, dec) x 3 (12)
Round 10 :
(2 sc, dec) x 3 (9)
Round 11-16 :
1 sc in each st (9) - continue straight for length; the horn is tall and slightly tapered
Round 17 :
(1 sc, dec) x 3 (6)
Round 18 :
1 sc in each st (6) - fasten off leaving long tail for sewing
Info :
Stuff lightly and shape horns so they curve slightly backward. You can insert a short piece of wire to help them hold shape. The finished toy shows tall tapered horns; extend rounds 11-16 if you want a taller horn.
— Spine / Tail Spikes (Make 10-14) :
Round 2 :
Inc around to 12
Round 3 :
1 sc in each st (12), fasten off leaving tail for sewing
Info :
Sew spikes along the back and tail with orange edging if desired. The spikes are stacked and decrease in size toward the tail tip. Use alternating black/orange ridges to match the photo's contrast.
— Tail :
Round 1 :
6 sc in magic ring (6)
Round 3 :
(1 sc, inc) x 6 (18)
Round 4-8 :
1 sc in each st (18)
Round 9 :
(1 sc, dec) x 6 (12)
Round 10-14 :
1 sc in each st (12)
Round 15 :
(1 sc, dec) x 4 (8)
Round 16-20 :
1 sc in each st (8)
Info :
Sew spine spikes along the top of tail, decreasing the spike sizes as you near the tip. The tail in the photo curls around and holds a small pumpkin; if adding a wire for poseability, insert before stuffing and be sure to wrap the wire ends around several rows of yarn to prevent poking through.
Round 21 :
Dec around to close slightly (4-6 sts), fasten off leaving long tail for sewing and shaping the curl. Stuff moderately firm.
— Wings (Make 2 full wings) :
Wing Membrane - Round 1 :
With orange yarn ch 21, sc in 2nd ch from hook and across (20)
Wing Membrane - Round 2 :
Ch1, turn, sc across (20)
Wing Membrane - Rounds 3-10 :
Ch1, turn, sc across (20)
Info :
These rows create a flat membrane which will be edged and supported by 'finger' ribs in black. Work tightly so the membrane remains crisp. You can use BLO on the last row to create a neat ridge for joining the black ribs.
Wing Ribs - Round 1 :
With black yarn join at top corner, ch1 and work 1 sc evenly around the outer edge of the orange membrane to create a border (approx 40 sc depending on shaping) (count to match)
Wing Ribs - Round 2 :
Along the membrane surface, form 5 evenly spaced ribs: ch to rib position and work a small tube: 6 sc in mr, join and pull tube to membrane, secure at base. Repeat to create 5 ribs, then sc around edge to tidy (this creates the raised black ribs seen)
Info :
Each rib acts like a finger and should be slightly stuffed or crocheted in a short tube so it holds the wing's shape. Tip of ribs are finished with a small orange picot or 3 sc joined to match the photo's decorative points.
Wing Finishing :
Work a final round of single crochet around the entire wing edge in black, adding a small orange picot every 6-8 sts to mimic the scalloped tips seen in the finished dragon. Fasten off and weave ends.
— Pumpkin Accessory :
Round 1 :
6 sc in mr with orange (6)
Round 3 :
(1 sc, inc) x 6 (18)
Round 4 :
(2 sc, inc) x 6 (24)
Round 5-6 :
1 sc in each st (24)
Round 7 :
(2 sc, dec) x 6 (18)
Round 8 :
(1 sc, dec) x 6 (12)
Round 9 :
6 dec (6) - stuff firmly then close
Info :
Use black yarn to embroider a jack-o-lantern face on the pumpkin using satin stitch and small triangles for eyes and mouth. Add a tiny brown stem on top made from 6 sc in a mini magic ring and sew to the pumpkin. Attach to tail tip with a small chain or stitch for an anchored look.
— Surface Embroidery and Scar Details :
Info :
Using stranded orange embroidery yarn, make X-shaped and star-shaped surface stitches over the head, arms and legs to mimic sewn scars. Use long straight stitches radiating from a center point and secure ends inside with weaving. The sample has dense scar clusters on forehead, shoulders and thighs. Practice on a swatch before applying to your finished toy.
Technique :
Use a tapestry needle and single strand of yarn for embroidery. For a raised 'stitch' effect, couch a chain or run several straight stitches close together. Always secure with a small knot or hidden backstitch on the inside.
— Final Assembly :
Info :
Pin the head to the body aligning the neck tube. Sew head to body with a ladder stitch using the long tails left from each piece. Sew arms to rounds 8-12 of the body sides and legs to the base so the dragon sits upright. Sew wings to the back between rounds 6-10. Attach horns and frills to the head top and sides. Sew tail securely to the back center at the base.
Info :
Weave in all ends, reinforce joints with extra stitches if this amigurumi will be handled often. Add any final embroidery and attach accessories like the pumpkin via a few sturdy stitches. Use a little fabric glue on the eye back washers for extra security if gifting to a child (note safety eye guidelines).
This spooky dragon pattern combines classic amigurumi construction with Halloween-ready details for a truly special handmade friend. Each segment — from the ribbed orange belly to the embroidered scars — is designed to add personality and depth. Sewn and stuffed carefully, the finished dragon becomes a durable, display-ready collectible perfect for gifting or seasonal decor. 🎃🧶 Happy crocheting — savor every stitch and make it your own! ✨