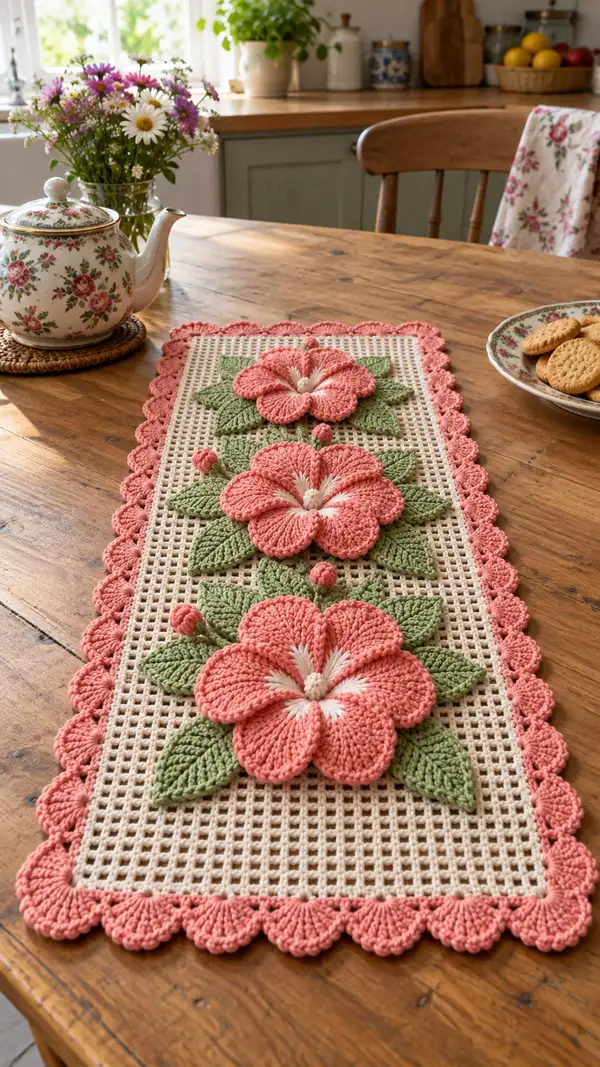
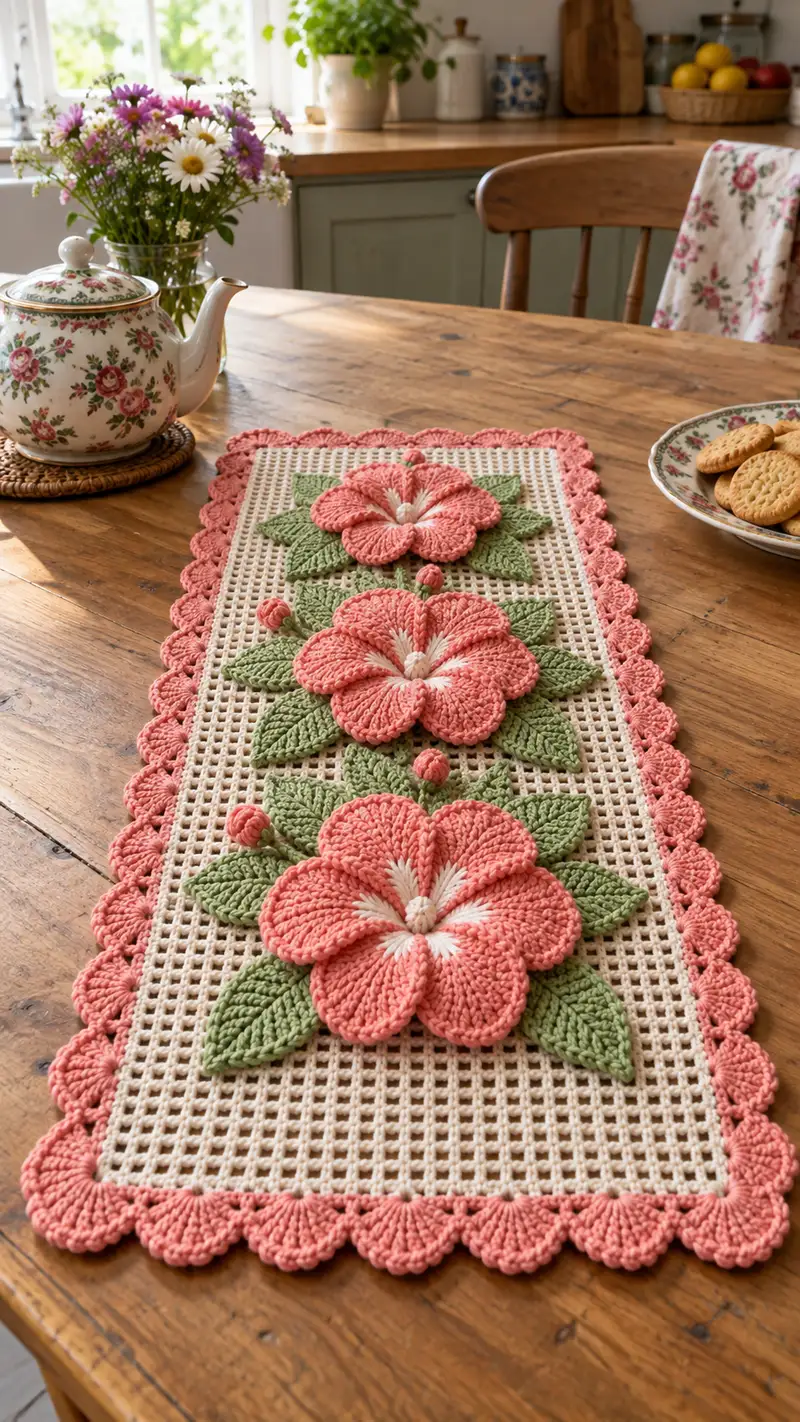
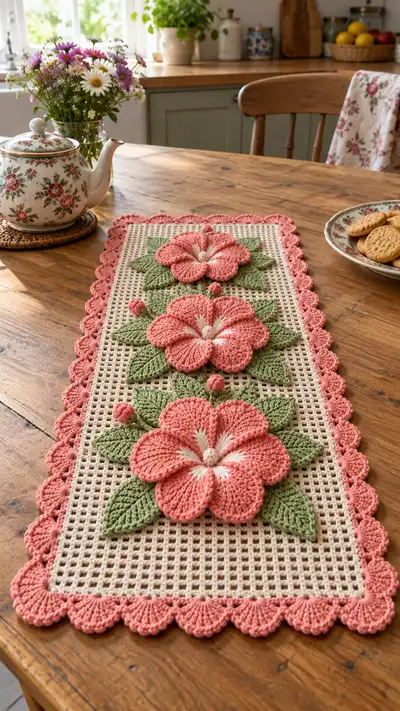
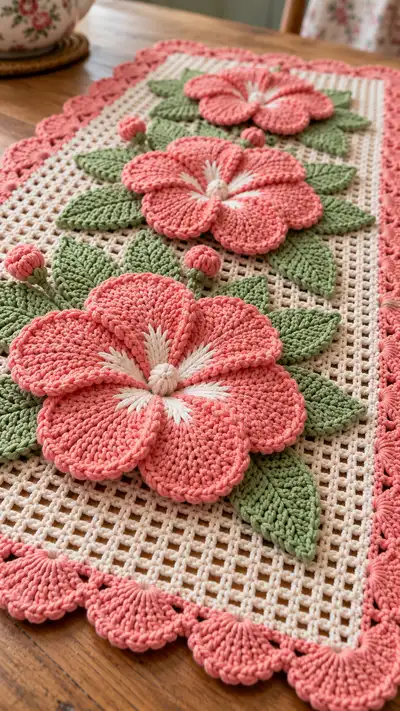
A vintage-inspired rectangular table runner featuring three dimensional coral blossoms, textured sage leaves and a delicate cream mesh background. This pattern uses worsted cotton yarn and layered applique techniques to create a richly textured centerpiece. The scalloped coral border frames the runner for a polished, handmade look — perfect for dining tables, dressers or as a seasonal accent.
Progress Tracker
0% Complete
— Materials & Gauge :
Info :
Gauge is not critical for an exact fit but affects final runner size and applique proportions. With worsted cotton and 4.0mm hook, one filet mesh block (dc + ch2 + dc) measures approximately 1cm square. Adjust hook if you want a looser or denser mesh. This pattern produces an approximate runner 30cm wide by 85cm long before blocking depending on gauge.
— Abbreviations & Techniques :
Info :
All stitches follow US terminology. Puff clusters are made by yarn over, insert, pull up long loop x3 (or as specified), yarn over pull through all loops on hook; finished puff counts as one stitch. Filet mesh uses dc and chain spaces to produce a regular grid. Work in continuous rows (do not join) unless specified; turn at the end of each row.
— Mesh Base (Main Background) :
Round 1 :
With cream yarn ch 91. This is the foundation chain for a width of 30cm (91 ch = 45 mesh spaces approx).
Round 2 :
Row 1: Dc in 4th ch from hook (counts as dc + ch1 spacing to start), *ch2, sk 2 ch, dc in next ch* across to last 3 chains, dc in last ch. End row with turning ch 3 to count as first dc of next row. (45 dc, 44 ch2 spaces)
Round 3-10 :
Work Rows 2-9: Turn, dc in top of turning ch (or first stitch), *ch2, sk next ch2 space, dc in next dc* repeat across to end, turn. Maintain 45 dc and 44 ch2 mesh spaces each row. (45 dc, 44 mesh spaces)
Info :
Keep tension even: the dc stitches create the vertical posts while the ch2 create the horizontal mesh. Use a stitch marker at the start of each row until you are comfortable with counts.
Round 11-20 :
Continue working filet mesh rows, maintaining counts. Rows 11-20 create the lower third of the runner. Check width every 6-8 rows and adjust tension if mesh begins to ripple. (45 dc, 44 mesh spaces)
Info :
Measure and decide flower placement now: mark the centre column (mesh column 23) with a removable marker; flowers will be centered on mesh columns 11, 23, and 35 from the bottom edge approximately. This helps when later attaching appliques.
Round 21-30 :
Continue filet mesh rows. At Row 26 insert a marker to indicate the bottom edge of the first flower placement and again at Row 46 for the middle flower placement (approximately). (45 dc, 44 mesh spaces)
Info :
Blocking tip: Pin the mesh as you go or block the entire panel flat before attaching appliques for the neatest results. If you block after appliques are sewn, take care to steam gently only around the base to avoid flattening petals.
Round 31-40 :
Continue filet mesh rows. These rows form the middle section that will sit under the second (middle) flower. Keep mesh consistent. (45 dc, 44 mesh spaces)
Round 41-50 :
Continue filet mesh rows for the upper third. At Row 50 place a marker to indicate top flower placement baseline. (45 dc, 44 mesh spaces)
Round 51-60 :
Complete mesh base by working Rows 51-60 continuing same mesh pattern. Fasten off leaving a long tail if you plan to join border later. The mesh panel should now be long enough to hold three flower groups spaced evenly. (45 dc, 44 mesh spaces)
Info :
If your runner is longer or shorter than desired, simply work more or fewer mesh rows in this section; each additional mesh row adds approximately 1cm to the length.
— Flower Motif (Make 3 identical large blossoms) :
Info :
Each large blossom is worked as a layered applique with a central knotted core, a white embroidered starburst centre, and five sculpted coral petals worked flat and gathered. Work 3 flowers in coral with white centre highlight and attach to mesh later. These instructions are for one flower; repeat twice.
Round 1 :
Center: With coral, make a magic ring. Work 6 sc into ring. Tighten. (6)
Round 2 :
(Inc) x 6 around = 12 sc total. Work evenly. (12)
Round 3 :
(1 sc, inc) x 6 = 18 sc. Flatten the circle gently; this will become the base for petals. (18)
Round 4 :
Sl st across next st and fasten off coral leaving a long tail for sewing, or continue without fastening for petal join. We will use this 18-st ring as the anchor point for five petal sets (approx 3 or 4 stitches per petal anchor). (18)
Info :
Mark the positions for five petals on the 18-st ring: place markers every 3 or 4 stitches to create evenly spaced petal anchors. Aim for five anchors separated by either 3-4 sc segments to evenly space petals.
Petal - Set up (Petal 1 Start) :
Attach coral yarn at anchor 1 (marker). Ch 12 (counts as turning chain plus spacer), turn. This foundation chain will create the petal length. (12 ch)
Round 5 :
Row 1 (petal edge): Sc in 2nd ch from hook and each ch across to end (11 sc). Join to the anchor sc on center ring with sl st. (11)
Round 6 :
Row 2 (petal shaping): Ch1, turn, sc in first 2 sts, hdc in next 3 sts, dc in next 3 sts, hdc in next 2 sts, sc in last st. (11)
Round 7 :
Row 3: Ch1, turn, sc in first st, (sc in next st, inc in next) across the center of the petal to add width; pattern: sc, (sc, inc), sc, hdc, dc3, hdc, (sc, inc), sc. After finishing, sl st into center ring to secure. This row increases the centre fullness. (13 total now)
Info :
For the sculpted rounded petal look, the outer edge uses dc and hdc to create the curve. Make sure you work the dc across the outermost 3 stitches to create proper fullness.
Round 8 :
Row 4 (textured ridges): Ch1, turn, work into FLO of previous row: sc across all 13 sts in FLO (13). This creates a raised ridge on the petal outer edge. Sl st to centre ring. (13)
Round 9 :
Row 5 (decorative edge): Ch1, turn, *skip 1, 3 dc in next st, skip 1, sl st in next st* across the outermost edge to form scalloped petal border. Fasten off leaving tail for weaving or keep attached depending on preference. (creates scallop detail)
Info :
Repeat Petal setup and Rows 5-9 four more times to make a total of five petals. Keep petals attached to the central ring when possible for better stability; if working separately, leave long tails and sew them onto the center later. Space petals evenly by anchoring to the markers on the ring.
Round 10 :
After all 5 petals attached: With coral, work one round of single crochet around the center ring and the bases of petals, placing 3 sc between each petal anchor to smooth the join. This round should read 30 sc approx depending on petal anchors. (approx 30)
Round 11 :
Gathering row: Ch1, sc in each st around while gently pulling the petals slightly inward to create a cupped blossom. Work a gentle cinch with a thread through the back loops of this round if you want deeper petal separation. Fasten off and weave ends. (30)
Info :
Do not over-tighten the gather; the petals should still stand away from the center slightly for a natural look. Block petals flat if necessary by pinning to a blocking board and steam lightly.
Embroidered centre :
With white (or cream accent), insert yarn needle into the center cluster and bring multiple straight stitches outward between petals to create a starburst: push 10-14 small straight stitch spokes from centre to inside petal edges, knot on the back, and trim. This forms the white sunburst detail visible in the finished piece.
Info :
Use about 6-8 lengths of white yarn folded in half to create multiple strands for a fuller starburst. Secure firmly on the back and hide knots under the center button (next step).
Round 12 :
Center knot/button: Using cream, wrap yarn around 6 ch to form a small tight rosette or make a small 6 sc disc (magic ring 6 sc, 6 inc = 12), finish and sew over the center to hide the securing stitches and create the little central button shown in the photos. Secure tightly and weave ends to the back. (6-12 depending)
Info :
Make three identical flowers. Slight variations in petal fullness are fine and give a hand-made charm. Block each flower before assembly and check placement on mesh to ensure spacing and orientation match your desired layout.
— Leaves (Make 9-12 per flower cluster) :
Info :
Leaves are worked flat in sage green. Each flower cluster in the photo has 4-5 leaves around it: two larger leaves below the blossom and 2-3 around buds. Make 9 leaves per flower set (total 27) or fewer if you prefer a simpler look.
Round 1 :
With sage green ch 18. Row 1: Sc in 2nd ch from hook and across (17 sc). This is the leaf centre foundation. (17)
Round 2 :
Row 2: Ch1, turn, sc in first 3 sts, hdc in next 5 sts, dc in next 5 sts, hdc in next 3 sts, sc in last st. (17)
Round 3 :
Row 3: Ch1, turn, sc in first 2 sts, (sc, inc) twice across the widened centre (adds 2 sts), hdc across centre, (sc, dec) to taper, sc in last 2 sts. You should have 19 sts now. (19)
Round 4 :
Row 4: Ch1, turn, work in FLO across all 19 sts: sc 19 in FLO only to create a raised central vein effect. Sl st to join at base and fasten off leaving tail for sewing. (19)
Round 5 :
Vein detail: Using contrasting sage or same colour, with a yarn needle, stitch a central vein using running stitches from base to tip and 2-3 smaller veins on each side to create realistic texture. Block lightly to set shape.
Info :
For larger leaves (the ones that sit under petals) increase initial chain to 22 and follow same shaping for a bolder scale. Make sure leaf sizes are proportionate to the flower petals when placed on mesh.
— Flower Buds & Stems (Make 6-9) :
Round 1 :
With coral, ch 6. Row 1: Sc in 2nd ch from hook and across (5 sc). Ch1, turn. (5)
Round 2 :
Row 2: Sc in each st across (5). Repeat Row 2 two more times to form a small cylinder (3 rows total). Sl st and fasten off leaving long tail to sew up and form a round bud by gathering base and sewing the open edge closed. (5)
Round 3 :
Stem: With sage green, ch 12 (or desired stem length). Work sc in 2nd ch from hook and across to create a tight stem cord (11 sc). Fasten off leaving long tail for sewing to the back of a bud then attach to mesh as a short stem. (11)
Info :
Wrap stems around a pen or cord to curl slightly before sewing on for a natural shape. Buds can be made fuller by using an extra round of sc or stuffing a pinch of fiberfill into the club before closing.
— Small Central Accents (White Starburst Centers) :
Round 1 :
With white, make 1 short chain and insert yarn needle for starburst embroidery. For each blossom, push ten short straight stitches from centre to petal bases. Tie and secure at back. These bright radial stitches mimic the centre highlight visible on each flower. (approx 10-14 spokes)
Info :
For a fuller central look, double the number of strands and stitch in two passes. Keep tension consistent so the center remains flat and neat.
— Assembly Prep & Placement :
Round 1 :
Block all appliques (flowers, leaves, buds) flat and to shape. Pin petals to desired curvature and steam lightly from a distance or wet-block with pins until dry. This ensures neat edges and good adhesion when sewn on.
Round 2 :
Place mesh base flat and mark the three flower baselines using pins or removable markers at the rows indicated in the mesh (approx at rows 26, 46, 66 if you followed 60 row base; adjust proportionally if you altered base length). Each flower centre should align with the central mesh column marker placed earlier.
Info :
Lay leaves and buds around each flower, experimenting with orientation until the cluster looks balanced. The photo shows a symmetrical placement with one larger leaf pair below each blossom and smaller leaves at the sides with buds rising slightly above the petals.
— Sewing Appliques to Mesh (Detailed) :
Round 1 :
Thread a yarn needle with coral tail from the flower centre. Starting at the back of the mesh, bring needle to front under central ring and take a small stitch through mesh and through the flower centre base, pull snug. Make 6-8 tiny stitches around the inner ring of the flower to anchor it securely to the mesh. Knot and weave tail to back. Repeat for each flower. (6-8 small anchor stitches)
Info :
Sew through the mesh grid intersections (dc posts) not just chains to ensure secure attachment. Use small, tight whip stitches hidden under petals for a neat finish.
Round 2 :
Attach leaves: Position each leaf slightly under petal edges and sew the base with sage thread through 3-4 securing stitches at the base, then add 1-2 tiny stitches near the vein to secure leaf body if needed. Hide knots behind the leaf or between mesh grids.
Round 3 :
Attach buds on short sage stems; tuck the stem under smaller leaves and sew the stem firmly at the mesh intersection. Take care the bud head sits slightly above the mesh so it reads as raised from the surface. (1-2 stitches through base and 2 stitches along stem)
Info :
Check the underside often; trim any long tails and weave them through several stitches on the back so the finished underside lies as flat as possible for table use.
— Border Scallop (Worked around mesh perimeter) :
Info :
Border is worked in coral. Work along the perimeter of the blocked mesh panel. You will work evenly spaced scallops; count mesh blocks along each edge and plan scallop repeats so they begin and end symmetrically at the corners.
Round 1 :
Attach coral at lower right corner. Work 1 sc in each dc post around the entire panel edge (work 3 sc in corner chain spaces to turn the corner smoothly). Maintain stitch count so corners do not pucker. Fasten off. (counts vary by your mesh length)
Round 2 :
Scallop round: Attach coral at seam, *ch3, 7 dc in next 3-4 dc posts (or in a single mesh block depending on spacing), ch3, sl st in next sc* Repeat around, making 1 scallop per every 3 or 4 mesh posts to form a uniform scalloped edge. At corners, work an enlarged scallop (10 dc) to maintain shape. Fasten off and weave ends. (approx 28-34 scallops depending on panel size)
Info :
To keep scallops even, work them loosely and block them pinned to uniform arc shape while drying. If your scallops are too tight and pull edge in, try a slightly larger hook for the scallop round only (for example 4.5mm).
— Final Finishing Touches :
Round 1 :
Weave in all ends on the back side using a yarn needle. Trim tails close to fabric once woven through several stitches to ensure they do not come loose. Press lightly with steam or wet block again to flatten any tension differences.
Round 2 :
Inspect surface for any loose petals or leaf tips and reinforce with discrete stitches. If you want a more secure table-use applique, add a few tiny stitches through the mesh beneath petal edges to keep extreme wear from catching edges.
Info :
For a softer look, add a few more leaves or tiny accent buds to break the regularity of the three identical clusters. Use off-white yarn for tiny seed stitches to add additional interest near centres if desired.
— Alternate Sizes & Customization Notes :
Info :
To make runner wider, add additional multiples of 2 chains to the foundation (each additional mesh column adds approx 0.5-1cm to width). To make longer, add more mesh rows before finishing. Flowers can be enlarged by increasing petal chain lengths proportionally (add 2-4 chains per petal row).
Round 1 :
Color changes: If you prefer deeper contrast, work centers in a soft pale yellow instead of cream and use a darker sage for leaves. Carrying yarn through the back of mesh is possible but not recommended; finish yarn ends and sew appliques to avoid visible floats in the open mesh.
Info :
Use a small running stitch across the back of the mesh to further secure heavy flowers if the runner will be used often. This keeps heavier appliques from snagging or pulling through the open mesh over time.
This Coral Blossom Table Runner brings a handcrafted vintage charm to any table. The raised coral blossoms and textured sage leaves add depth and interest while the cream mesh gives an airy, elegant backdrop. Each appliqued bloom is a small work of art you can place and arrange to suit your style. 🧶🌸 Enjoy making and gifting this timeless centerpiece — each stitch really does make the difference! ✨