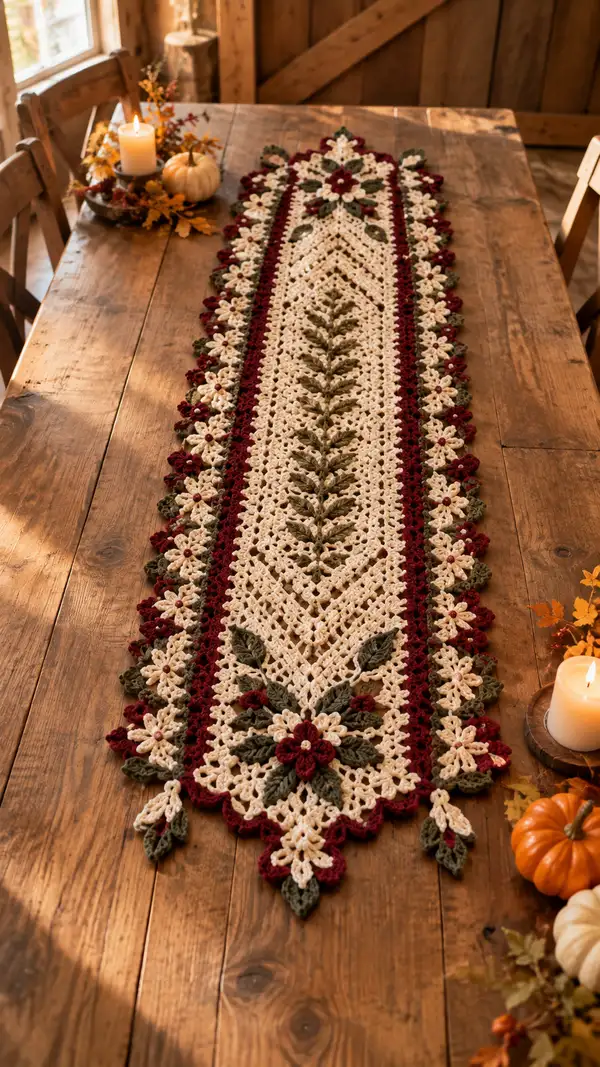
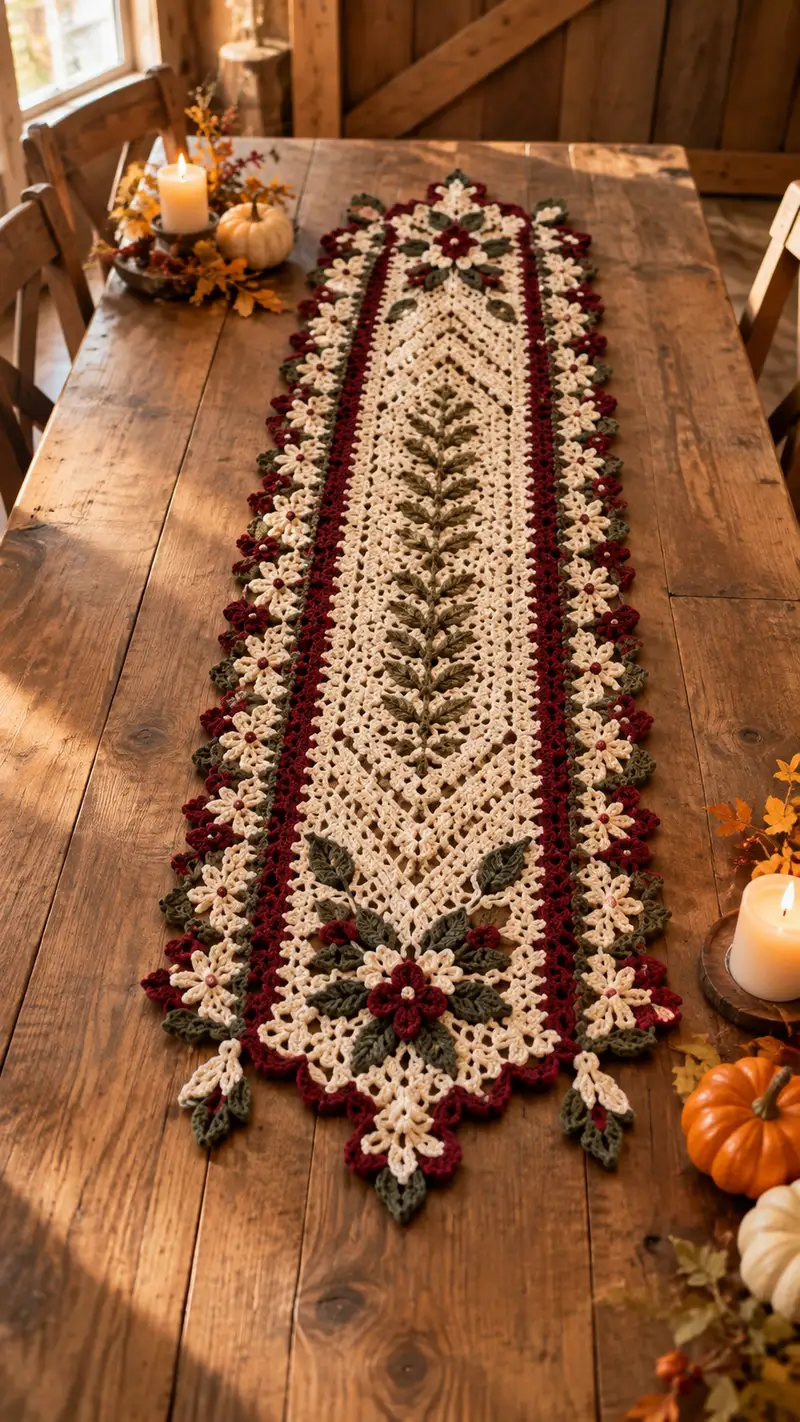
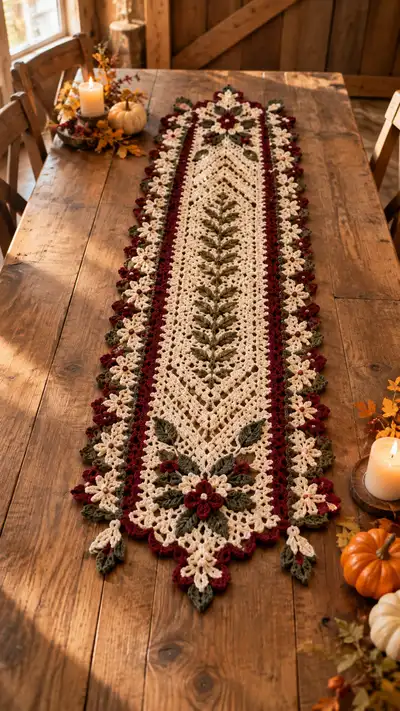
A long, elegant floral lace table runner worked in warm cream, deep burgundy and olive green. Features a central lacy diamond spine with raised leaf appliques and layered three-dimensional burgundy flowers along scalloped edges. Designed to decorate a farmhouse or autumn table setting, this runner balances openwork mesh with textured floral motifs for a vintage-inspired look.
Progress Tracker
0% Complete
— Overview :
Info :
This pattern is constructed in modular sections: a central lacy diamond panel worked lengthwise, a raised central leaf spine made from joined appliques, paired burgundy flower clusters attached to the outer edges, narrow accent bands, and a scalloped floral border finishing the runner. Work motifs flat and seam them as you go; blocking each motif before assembly is highly recommended for even joins and crisp edges.
— Center Lace Diamond Panel :
Round 1 :
Using Cream, foundation chain 101, join carefully with sl st to first ch to form a loop if you prefer working in the round; otherwise work back and forth. For this pattern we will treat each full repeat across the width as one 'round' in the round-count below (foundation width = 101 chains)
Round 2 :
Ch3 (counts as dc), *sk 2 ch, 1 dc in next ch, ch2, 1 dc in same ch* repeating across to create a spaced diamond beginning; end with dc in final ch (approx 34 dc clusters across; count depends on gauge) (Est. 34 V clusters)
Round 3 :
Ch3, turn; in each ch2 space work (dc, ch2, dc) to continue open V-stitch mesh. At chain turning points maintain symmetrical spacing to keep diamonds centered (34 V stitches)
Round 4 :
Repeat Round 3, maintaining lattice; this begins the diamond body. Ensure edges remain straight by working 2 dc in edge spaces where needed to keep stitch count even (34 V stitches)
Round 5 :
Continue Repeat: ch3, 1 dc in top of next dc, (ch2, dc) in ch2 spaces to expand diamonds. Check that the center line of V-stitches forms consistent diamond shapes (34 V stitches)
Info :
Place stitch markers at the first and last stitch of the central repeat every 6-8 rows to check alignment. Blocking will open the diamonds nicely later.
Round 6 :
Work one full even round of mesh: 1 dc in each dc, (dc, ch2, dc) in each ch2 sp. This stabilizes the panel; count remains equal to the number of V spaces across (34)
Round 7-10 :
Repeat Round 6 for four rounds (34). Maintain even tension and check that edges do not flare; if they flare, add an extra dc at outer edge every other repeat to correct width.
Round 11 :
Begin shaping diamond peaks by ch3, dc across until middle 6 V spaces, then dec line: in the central 6 V spaces work a single V every other space to begin narrowing; remaining length mirrored (est. remains approx 34 but internal patterning changes)
Round 12 :
Continue working mesh with central narrowing: where you previously worked (dc,ch2,dc) in three central spaces now work (dc, ch1, dc) to tighten center; the outer repeats remain unchanged (approx. 34)
Round 13-18 :
Work even mesh rows while gradually tightening the central diamond as directed in Round 12, checking that the central spine of closed chains forms a clean diamond line. These rows create the main length of the runner (34 across; length determined by number of repeats—work until central panel reaches desired length less about 18cm for end motifs)
Info :
Measure as you work: for an approx. 90-95cm length runner center, work 20-28 repeats of the diamond mesh depending on gauge. Adjust to fit your table length, keeping symmetry for end motifs.
Round 19 :
Start preparing for leaf spine insertion: on next row work 1 dc in edge, (dc, ch1, dc) in all ch2 spaces except for every 6th V where you'll make a taller loop (dc, ch3, dc) to provide a place to anchor leaf stems later (34)
Round 20-24 :
Even rounds: 1 dc in each dc, (dc, ch1, dc) in each ch1/2 space to maintain straightness and stabilize anchor loops. Use these rounds to finish the central mesh length until your panel reaches the center-to-end measurement where end floral cluster will be attached (34)
Info :
Begin inserting colored stitch markers into the anchor loops placed every 6 V-stitches along the center line—these will be used to join the raised leaf spine appliques in later assembly.
— Raised Leaf Spine (Make 1 long continuous spine by joining appliques) :
Round 1 :
Using Olive, start individual leaf applique. Ch6, sl st into 2nd ch from hook, sc in next, hdc in next, dc in next, hdc in next, sc in last, sl st to first ch to form small leaf base (workable as small teardrop) (approx 8 sts total around)
Round 2 :
Ch1, sc around leaf base working increases on rounded edges: sc2 in each of the 2 larger edge sts to widen (est. 12 sc)
Round 3 :
Ch2, turn; along one side work (hdc, dc, tr, dc, hdc) to create a point; sl st to the opposite side and mirror the sequence. End with sc around base to smooth (est. 20 sts)
Round 4 :
Work a decorative ridge: BLO sc around (20). This creates a subtle central vein when contrasted with the next round worked in FLO later in assembly (20)
Round 5 :
Edge shaping: ch3, picot every third sc along the edge to create a scalloped veined outline. Fasten off leaving 30cm tail for joining. Block each leaf flat and press to set shape (no stitch count change)
Info :
Make 18-22 leaf appliques depending on the runner length—each anchor loop along the central mesh accepts a leaf. Block leaves flat and allow to dry before sewing to prevent waviness.
Round 6-12 :
Repeat Rounds 1-5 to make the full set of leaves needed for your runner (Make 18-22 leaves total). Keep leaves consistent by using the same hook and tension. Each leaf approx 6-7cm long once blocked.
Info :
Sew leaves to the panel using mattress stitch through the blocked base tail. Position one leaf into each center anchor loop you placed earlier using contrasting green so the leaf sits raised above the mesh.
— Burgundy Flower Cluster Motifs (Make 24 clusters, two rows along runner) :
Round 1 :
Using Burgundy, ch5, join with sl st to form ring. Ch1, work 12 sc into ring, join (12)
Round 2 :
Ch2 (counts as hdc), *ch2, sl st in next sc* across to create foundation loops for petals; finish with sl st to base (12 loops)
Round 3 :
Attach yarn at a loop, ch2, (3 tr, ch1, sl st) into same loop to create petal; repeat in each loop to make 12 petals (12 petals)
Round 4 :
Second petal layer: join in between petals, ch1, work 1 sc, (ch3, sc) 12 times to create raised ring for smaller inner petals; fasten off and weave tail (24 small loops)
Round 5 :
Make inner contrast: using Cream small center, ch4, sl st into center of flower and sew a small cream rosette or secure a small bead. Fasten off. Each finished cluster approx 4.5-5cm across.
Info :
Make 24 clusters: 12 for each side row. Block flat gently to open petals, then sew centers or beads if you prefer a finished look. Keep petal direction consistent for uniformity when attaching to runner.
Round 6-10 :
Optional: Add small burgundy popcorn at petal bases for texture. Using Burgundy, make a 5-popcorn cluster in chosen spots and secure to back of flower before sewing to panel (no count change).
— Side Lace Bands (Make 2 mirrored strips) :
Round 1 :
Using Cream, ch33 for each side band. Join and work in rounds for a narrow lace trim. Ch3, 1 dc in same ch, *ch1, sk 1, dc in next ch* across to create airy ladder (approx 16 dc)
Round 2 :
Ch1, sc in each dc and ch1 sp around to tighten edge (approx 32 sc around)
Round 3 :
Ch3, *(dc, ch2, dc) in each ch1 sp* to create V ornamental motifs along the strip (approx 16 V-stitches)
Round 4 :
Repeat Round 3 to deepen lacy look (16 V-stitches)
Round 5 :
Ch1, sc around working 2 sc in corner sts to keep width consistent. End with even seam ready to attach to central panel (approx 32 sc)
Info :
Make 2 mirrored side bands and block them straight. When attaching to the central panel, align V-stitch rows with the mesh diamonds for a continuous lace flow.
Round 6-10 :
Optional decorative picot round: Using Cream, join and ch3, work (dc, picot, dc) in every V-space to create small scallops for the flower row to sit on. Fasten off. This gives contrast to the burgundy flower clusters when sewn on (no count change).
— Narrow Burgundy Accent Bands (Make 2) :
Round 1 :
Using Burgundy, ch15. Join and sc in each ch to form a firm narrow band (15)
Round 2 :
Ch2, hdc in each st around to create a textured rib (15)
Round 3 :
Ch1, sc in each st, sl st to join. Make two bands per side and block. These sit between center panel and outer floral border to give a rich contrast (15)
Info :
These narrow bands are intentionally dense to create a strong visual line; sew them using whip stitch to the mesh edges so they compress slightly and lie flat.
— Outer Floral Border Base (worked in rounds along entire perimeter) :
Round 1 :
Using Cream, join yarn at one long side edge, ch3, dc evenly along edge placing (dc, ch1, dc) into every ch2 or V space of the mesh to create a base scallop foundation. Count will vary but keep even placement (Est. 40-44 base scallops per long side)
Round 2 :
Ch1, sc in each dc and sc in each ch1 sp across the long edge, working 3 sc in corner points to turn neatly (Est. ~120 sc for a long side based on mesh width)
Round 3 :
Ch3, *sk 1, (3 dc, ch2, 3 dc) in next sc* repeating to make shell arches across the edge (Est. ~20 shells per long side)
Round 4 :
Ch1, sc in each dc and ch2 sp; in center of each shell attach a burgundy flower cluster using sl st through back loop only to give dimension (Est. 20 flowers)
Info :
Space flowers evenly. The count of shells depends on how many you created in Round 3; aim for symmetry on both sides. Flowers should face outward to show petal detail along table edge.
Round 5-8 :
Work additional decorative rounds: add one round of (sc, picot) along shell outer edge, then a round of (dc, ch2, dc) to finish with a scalloped floral look. Fasten off and weave ends.
— Corner & Pointed End Motifs (Make 2 end points) :
Round 1 :
Using Cream, make a wide triangular motif to form pointed runner ends. Start with ch9, join into a ring or work flat increasing rows to a triangle. Row 1 (foundation): sc in 2nd ch from hook and across (8 sc)
Round 2 :
Ch3, turn; (dc, ch1, dc) in first st to begin corner, then dc across until last st, (dc, ch1, dc) in last st to form point (10 dc total after increase)
Round 3 :
Repeat increase rows expanding each endpoint by working (dc, ch1, dc) into both ends of the row and dc across center. Continue until the triangle measures the same width as the central panel at its end point (approx 10-12 increase rows)
Round 4 :
Surface detail: join Olive and work centered vine motifs on triangular point using raised slip-stitch leaves and small burgundy flower at apex. Sew a 5-petal burgundy flower at the center; attach cream small petals around it to mimic photo (no strict stitch count)
Info :
Make two identical end-point motifs. Block each to the same size and sew into the ends of the central panel, aligning the base of the triangle to the panel edge for symmetrical point extension.
Round 5-8 :
Edge finish: work a round of scallops in burgundy then a round of small cream picots to create the layered edge that frames the pointed end. Ensure counts allow scallops to sit centered on the triangle points (approx 12 scallops per point)
— Final Decorative Edge (Scallops and Layering) :
Round 1 :
Using Burgundy, join at long side outermost loop, ch1, sc around working 3 sc in each shell valley to emphasize border (Est. ~120 sc per long side)
Round 2 :
Ch3, *5 tr in same st, sl st in 3rd tr to form pointed scallop* repeat along entire edge to form bold scallops (Est. ~40 scallops total lengthwise across both sides)
Round 3 :
Switch to Cream: ch1, sc in each tr and sl st across; in each scallop valley work a small cream flower (ch5 loop with sc cluster) to mirror central cream star blossoms visible in the photo (count matches scallops)
Round 4 :
Switch to Olive: pick out leaf tips around scallops by joining in between scallops and working (sc, hdc, dc, hdc, sc) to make small leaf points that tuck behind burgundy petals (Est. ~40 leaves)
Info :
This layered edging sequence gives the runner its signature floral silhouette. Work slowly and block sections before final assembly to ensure edges lie flat and scallops do not buckle.
Round 5-8 :
Repeat a final decorative round of small picots in cream along the very outer edge to tidy joins and hide sewn seams. Fasten off and weave all tails neatly to the wrong side.
— Assembly & Joining Motifs :
Round 1 :
Layout: Block central mesh panel flat, blocked leaves and flowers flat. Arrange leaves centered along the anchor loops. Use pins to confirm spacing and symmetry before sewing.
Round 2 :
Sew leaves: using matching olive tail, sew leaf bases to the anchor loop and stitch through the blocked base several times. Use mattress stitch for invisible joins. Each leaf should sit slightly raised—do not pull tight (no stitch math)
Round 3 :
Sew burgundy flower clusters to the shell centers along the outer border using matching burgundy tail. Attach through back loops and reinforce with 3-4 passes of yarn to secure. Add a cream bead or small center rosette to each flower if desired.
Round 4 :
Attach narrow burgundy accent bands between central mesh and outer border using whip stitch; ensure the band compresses slightly to create the pronounced contrast line visible in the photo.
Info :
Weave in ends on the back and secure with small drops of fabric glue if needed for heavy-use pieces. Block entire runner again after assembly to set final shape, pinning scallops and points precisely.
— Final Blocking & Care :
Round 1 :
Wet block or steam block depending on yarn fiber. Pin the runner flat on blocking board measuring to desired final dimensions (photo runner approx 12-15 inches wide and 80-90 inches long for dramatic table coverage; adjust to your preference). Let dry completely.
Round 2 :
Care: hand wash gently in cool water; reshape when wet. Avoid machine washing for longevity. For stiffer motifs, very light starch can be applied; test on a scrap first.
Info :
If using acrylic yarn, steaming and light spraying will set the shape well. For natural fibers, use low heat and gentle pinning to avoid stretching or warping.
The Cream And Burgundy Floral Lace Table Runner is a rewarding project that combines openwork, textured leaves, and rich floral clusters to make any table sing with seasonal charm. Each motif adds to the layered effect while remaining enjoyable and approachable to assemble. Block and finish carefully for a professional heirloom-quality look you will love displaying. 🧶🍂✨