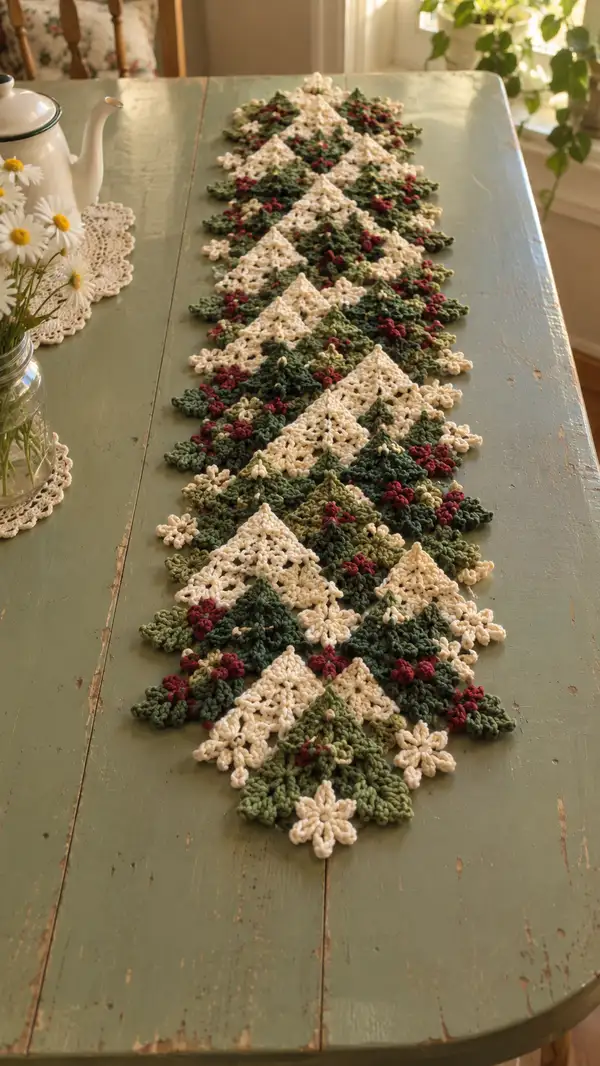
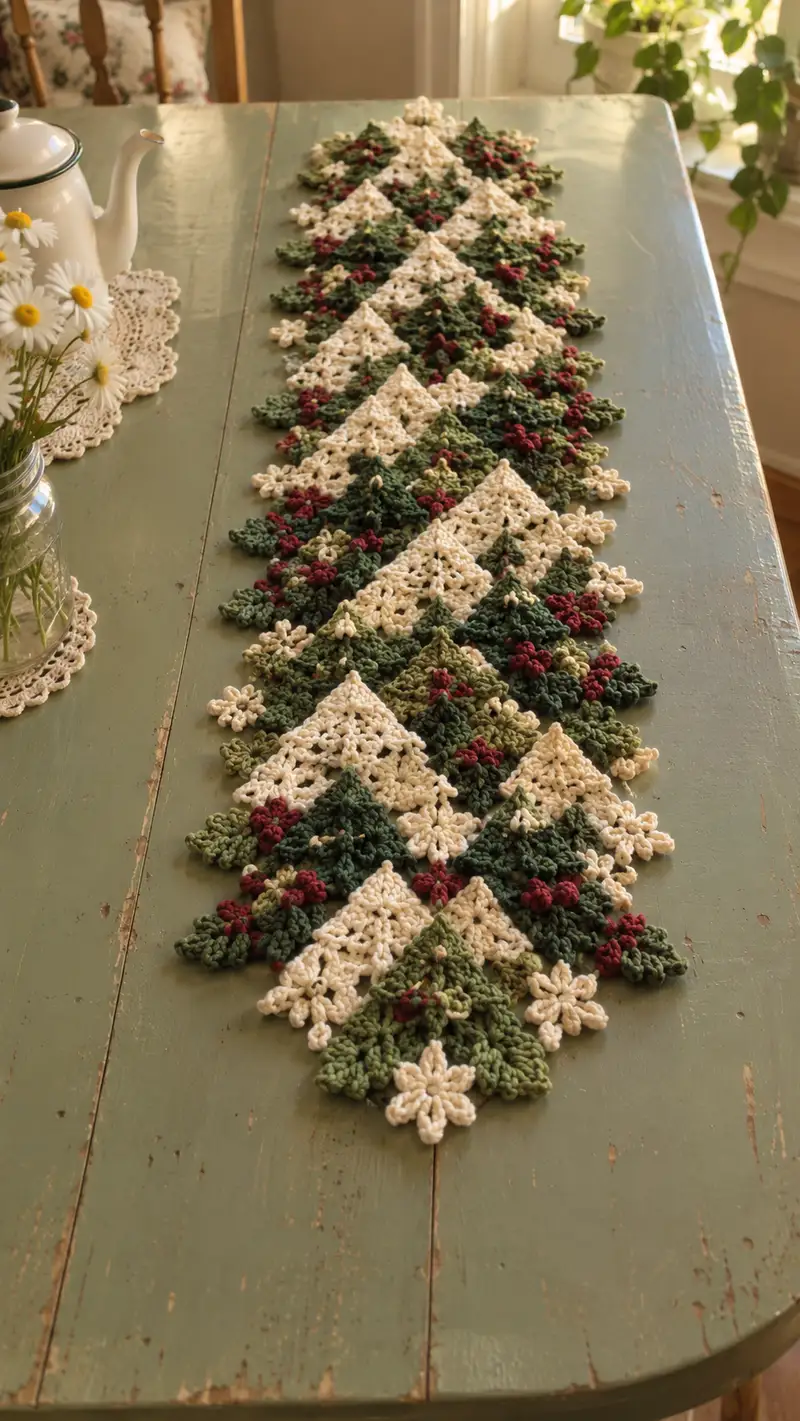
Create a timeless cream and forest green floral triangle table runner made of repeating triangular motifs, tiny blossom clusters and berry bobbles. This runner features alternating cream and green triangle motifs edged with small six‑petal flowers and deep berry accents for a vintage, cottagecore look. The pattern is modular — make it shorter or longer by adding or removing motif repeats. Detailed joining and finishing rounds ensure a flat, pretty runner that lays beautifully on a table.
Progress Tracker
0% Complete
— Pattern Overview :
Info :
This runner is worked modularly from three main element types: Large Triangle Motif (cream), Alternating Filled Triangle Motif (greens), and Small Floral/Berry Embellishments. You will make multiple copies of each motif, block them flat, then join them in alternating sequence to build the runner length. Finally work a unifying border around the assembled runner.
Info :
Gauge: Each completed triangle motif (after blocking) measures approximately 11cm (base) x 12cm (height) when worked in worsted weight cotton with 4.0mm hook. Adjust hook size if your gauge differs to keep motif size consistent between repeats.
— Stitch Techniques & Notes :
Info :
Puff Cluster (pc): Yo, insert hook, yo, pull up loop (repeat 4 times total to gather 9 loops on hook), yo and pull through all loops, ch1 to secure. This creates a small puff. Bobble (bo): Work 5 partial dc loops into same st leaving last loop on hook each time, yo and draw through all loops, ch1 to secure. Secure bobbles with tight ch1.
Info :
Whenever you change color, fasten off previous color and join new color at the start of the round/row to keep edges tidy. Weave in ends along selvedge as you go for neater joins later.
— Cream Large Triangle Motif (Make multiple) :
Round 1 :
Ch4, join with sl st to form ring. Ch3 (counts as dc), 2 dc in ring, ch1, 3 dc in ring (two 3-dc corner shells) — total 6 dc in shells (6)
Round 2 :
Turn work. Ch3 (counts as dc), 2 dc in first ch1 sp, ch1, 3 dc in same ch1 sp (corner shell), ch1, 3 dc in last ch1 sp, ch1, 3 dc in same ch1 sp — add one more corner shell at each side to expand triangle (12)
Round 3 :
Ch3, 2 dc in tip sp, ch1, 3 dc in next ch1 sp, ch1; continue across center building shells into each ch1 sp from previous row. End with 3 dc in last tip sp — total increase by 6 (18)
Round 4 :
Ch3, 2 dc in tip sp, ch1, 3 dc in each ch1 sp across, closing with 3 dc in last tip sp — (24)
Round 5 :
Repeat pattern: ch3, 2 dc in tip sp, (ch1, 3 dc in each ch1 sp) across to last sp, 3 dc in last tip sp — (30)
Info :
These early rounds establish the shell grid. Maintain consistent tension; shells should sit flat and repeat regularly. If shells twist, block motif immediately after finishing to flatten.
Round 6 :
Ch3, 2 dc in tip sp, (ch1, 3 dc in each ch1 sp) x across, 3 dc in last tip sp — (36)
Round 7 :
Ch3, 2 dc in tip sp, (ch1, 3 dc in each ch1 sp) across, 3 dc in last tip sp — (42)
Round 8 :
Ch3, 2 dc in tip sp, (ch1, 3 dc in each ch1 sp) across, 3 dc in last tip sp — (48)
Round 9 :
Ch3, 2 dc in tip sp, (ch1, 3 dc in each ch1 sp) across, 3 dc in last tip sp — (54)
Round 10 :
Ch3, 2 dc in tip sp, (ch1, 3 dc in each ch1 sp) across, 3 dc in last tip sp — (60)
Info :
At this stage you have built the main large triangle. If you prefer a smaller motif reduce to Round 8 or 9. Block each motif flat to match size before joining. Use pins to shape points and edges.
Round 11 :
Ch1, rotate to work edging row: sc evenly around all outer stitches across the base and along each slant, placing 3 sc in each tip shell to maintain point definition — count will vary but expect about (66) sc around; this round creates a tidy selvedge.
Round 12 :
Ch2, hdc in each sc around to create a slightly raised band for joining later — maintain 3 hdc in each tip shell to keep corners neat — (66)
Round 13 :
Ch1, sl st into next st and begin decorative picot clusters along both slanted edges as follows: *sc in next 2 sts, (pc) in next st, sc in next 2 sts; rep across each slant.* Keep picots evenly spaced. (approx 18 picots per slant)
Round 14 :
Ch1, sc in each st across base; on slants sc between picots to anchor them. This round secures picots and produces a delicate fringe along slanted edges — (66)
Info :
Work a contrasting small flower later into the picot spaces to mimic the cream floral accents seen in the photo. Save small loops of yarn for decorative blossoms or secure them using a separate flower motif (next section).
— Forest & Olive Filled Triangle Motif (Green Variation) :
Round 1 :
Ch4, sl st to form ring. Ch3 (counts as dc), 2 dc in ring, ch1, 3 dc in ring (two corner shells) — (6)
Round 2 :
Ch3, 2 dc in tip sp, ch1, 3 dc in same sp, ch1, 3 dc in next ch1 sp, ch1, 3 dc in same sp — (12)
Round 3 :
Ch3, 2 dc in tip, ch1, 3 dc in each ch1 sp across to last tip, 3 dc in last tip — (18)
Round 4 :
Ch3, 2 dc in tip, ch1, 3 dc in each ch1 sp across, 3 dc in last tip — (24)
Round 5 :
Ch3, 2 dc in tip, ch1, 3 dc in each ch1 sp across, 3 dc in last tip — (30)
Round 6 :
Change to Olive Green yarn now for slight color variation. Ch3, 2 dc in tip, 3 dc in each ch1 sp across, 3 dc in last tip — (36)
Round 7 :
Ch3, 2 dc in tip, (ch1, 3 dc in each ch1 sp) across, 3 dc in last tip — (42)
Round 8 :
Ch3, 2 dc in tip, (ch1, 3 dc in each ch1 sp) across, 3 dc in last tip — (48)
Round 9 :
Ch1, sc around the motif to tidy edges; place sc evenly along base and slants with 3 sc in tip shells — (~54 sc)
Round 10 :
Work a decorative cluster row along both slants: *ch2, skip next st, sc into next st; in each ch1 sp work (pc) to create increased texture across slants.* This will create textured points that read as foliage when assembled — counts vary with motif size.
Info :
Alternate the dark and olive greens between different filled triangles to create the depth evident in the photo. Block motifs to align size with cream triangles before joining.
Round 11 :
Ch1, sl st into next st and work small 6-petal flower clusters into chosen picot spaces along slants (see Flower section for pattern). Add 3 berries (burgundy bobbles) near the center of the slant using the Berry cluster instructions. Secure each small element with a couple of stitches so they do not rotate after blocking.
Round 12 :
Ch1, sc around base and slants to create a stable join edge. This final sc round provides the same number of joinable loops as cream triangles for easy pattern assembly (~54 sc).
— Small Six-Petal Flower Motif (Make many) :
Round 1 :
Using cream or ecru, ch4, sl st to first ch to form ring. Ch1.
Round 2 :
Make 6 petals into the ring as follows: *(yo, insert, pull up loop, yo, pull through two loops) repeat 3 times to create small petal cluster (or work 3 trtog partially closed to produce petal), ch1, sl st into ring*; rep x6 — you will have 6 petals surrounding center.
Round 3 :
Ch1, sc in each petal base around, sl st to join. Finish off leaving 12cm tail for sewing onto triangular motif.
Info :
These tiny flowers are decorative and small—use them to soften joins between triangles and to mimic the cluster flowers visible in the photo. Sew into picot loops across motif edges so they nestle neatly.
— Berry Bobble Cluster (Make multiples) :
Round 1 :
With burgundy yarn, insert into sl st anchor point on motif where berry will sit. Ch1.
Round 2 :
Work a small bobble: yo, insert, pull up loop, (yo, pull up loop) x4 times total to have 9 loops on hook, yo and pull through all loops, ch1 to secure — fasten off leaving short tail. This creates one tight berry bobble (1).
Round 3 :
Optional: For a cluster of three berries, repeat this bobble into adjacent picot loops or stitch anchors, making a small triangular berry cluster. Sew cluster down with a couple of stitches into the motif so it does not rotate when blocked.
Info :
Do not overfill or use stuffing in bobbles; yarn alone creates the textured berry look. Place berry clusters strategically between petal motifs and inside green motif slants to mimic photo placement.
— Mini Leaf/Accent Motif (optional small triangle) :
Round 1 :
Ch6, sl st to form a short chain loop for small leaf shell. Ch1.
Round 2 :
Work 5 sc into the loop, sl st to join to create a small rounded leaf (5)
Round 3 :
Ch1, sc around and add 2 sc increases on the highest point to create a small teardrop leaf (7)
Info :
Sew these small leaf accents near berry clusters to give the impression of holly-like sprigs in the green motifs.
— Edge Join & Assembly Method (Step-by-step join rounds) :
Info :
Arrange your blocked motifs in alternating sequence: Cream triangle, Green filled triangle, Cream, Green, continuing the zigzag seen in the photo. Align slanted edges so tips meet and bases form the runner width. Use pins to tack arrangement on blocking mat to check alignment before joining.
Round 1 :
With cream yarn, position two adjacent motifs with RS facing up. Align edges and join at base corner with sl st through both motif edge stitches: *sl st in motif A, sl st in motif B across corresponding sc or chain loops.* Continue along join edge until the slant is fully joined (counts vary with motif size; expect ~54 joins per slant).
Round 2 :
After joining adjacent pair, flip assembly and sc into the same joining loops on both motifs to create a secure, less visible seam. Work sc through both motifs for about 1-2 rows along each join for durability — (~54 sc).
Round 3 :
When joining three motifs across diagonally (cream to green to cream), stagger the joins so that the points interlock; this avoids bulky seams and reproduces the staggered diamond columns in the photo. Use slip stitch joins for the first pass, then secure with sc back through for the second pass.
Info :
Place small flowers and berry clusters onto motifs before joining them if you prefer those decorations to sit underneath the seam. Alternatively, add them after joining if they should overlay the seam edges for a more dimensional look.
Round 4 :
Continue joining motifs row by row, always matching picot and sc loops for uniformity. When joining along base edges, add an extra sl st at each tip shell to keep triangular points sharp. The runner will grow in length as pairs and rows are connected.
Round 5 :
When the full runner length is assembled, check for any stray gaps. Work a narrow whip stitch or sc into shallow gaps from the RS using cotton thread to prevent looseness.
— Border and Final Edging (worked after full assembly) :
Round 1 :
With cream yarn, join at any point along the outer edge. Ch1, sc evenly around entire assembled runner, placing 3 sc in strong tip shells to preserve triangular points. Work sc into join seams and between picots to create a unified edge — total stitches will vary depending on runner length (expect ~360-480 sc for a runner of 8-10 motif repeats).
Round 2 :
Ch2, hdc in each sc around to form a raised band. Place hdc 3 in tip shells to keep points crisp. (same count)
Round 3 :
Ch1, *sc in next 2 sts, (pc) in next st, sc in next 2 sts, sl st in next st; rep from * around to form decorative clustered picot scallops. This creates the tiny daisy-like border that echoes interior blossoms.
Round 4 :
Ch1, sl st into each st and into each picot to flatten and secure scallops; where three motifs come together at a corner, add a small 6-petal flower sewn over the joint to reinforce it.
Round 5 :
Optional: Work one final round of tiny sc picots in contrasting color (olive or burgundy) at intervals to add subtle color flecks along the edge. Pick every 10th sc to place a tiny picot for a repeated rhythm.
Info :
When changing colors in the border, join and fasten off with tidy tails. Weave ends along the back of the border into the nearest join rows for invisibility. Blocking the fully joined runner after finishing the border will make the scallops sit neatly and the runner will lie flat.
— Finishing, Blocking & Care :
Info :
Gently wash the finished runner by hand in lukewarm water with a mild detergent. Press out excess water and pin to blocking surface to exact final shape, taking care to pin each point and scallop evenly. Allow to dry completely before removing pins.
Info :
Starch lightly if you want a crisper finish for table display. Store flat or rolled to avoid creasing; avoid hanging which can stretch joins over time. Spot clean stains with a damp cloth and mild soap to preserve color and fiber integrity.
Info :
Adjust sizing: To lengthen the runner add additional motif repeats in the central column. To shorten, reduce repeats symmetrically so the runner ends with a full motif at each tip. Keep the motif order consistent so the pattern's visual rhythm remains balanced.
This Cream and Forest Green Floral Triangle Table Runner brings classic cottage charm to any table with its layered triangle motifs, delicate blossoms and tiny berry accents. Each motif combines to make a handcrafted centerpiece full of texture and personality. The modular design makes it easy to adapt to any table length and to personalize with different greens and accent colors. Grab your favorite cotton yarn and enjoy the relaxing rhythm of crocheting repeating motifs into a beautiful finished runner! 🧶🌿