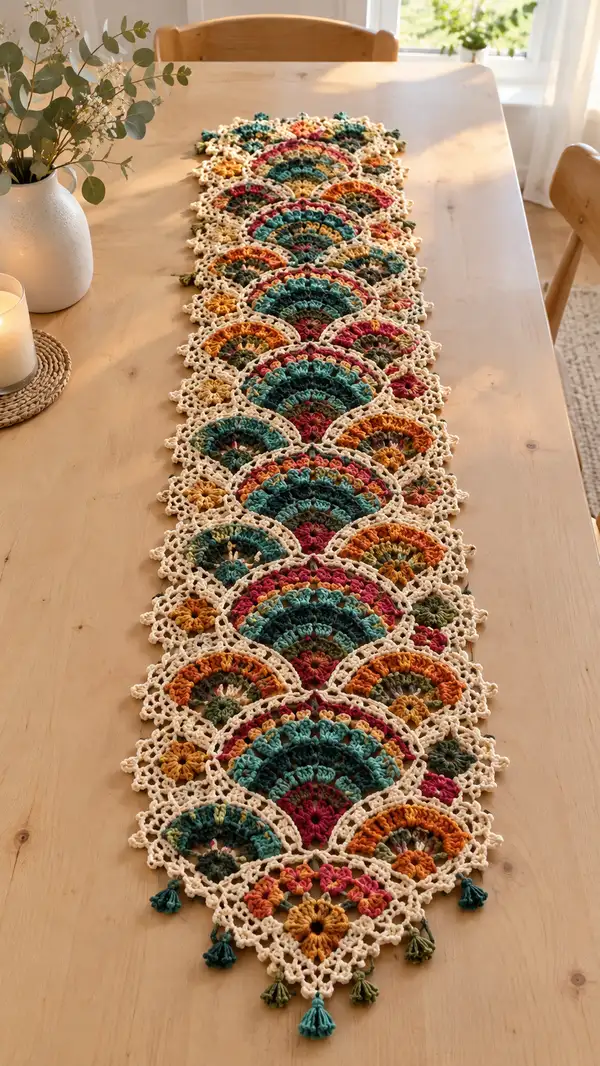
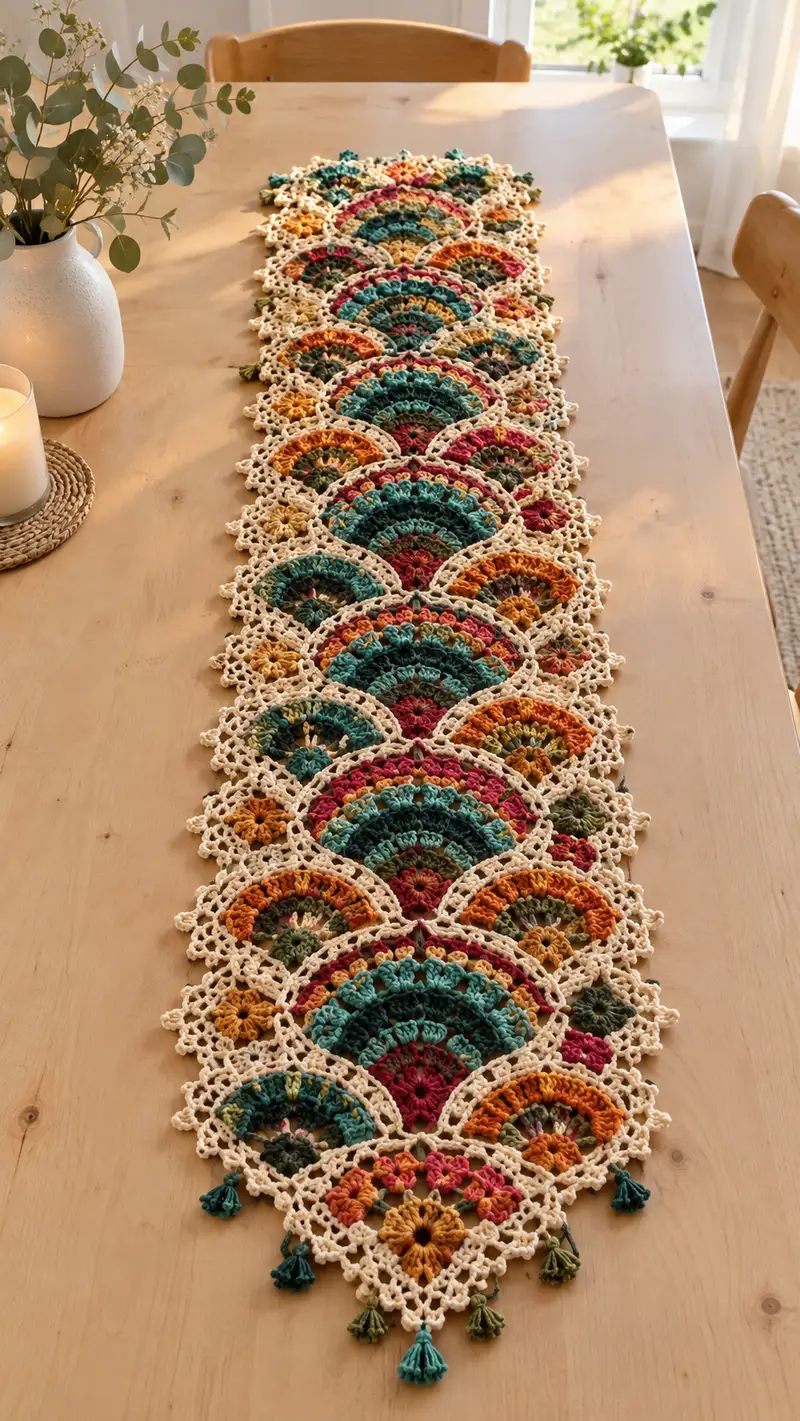
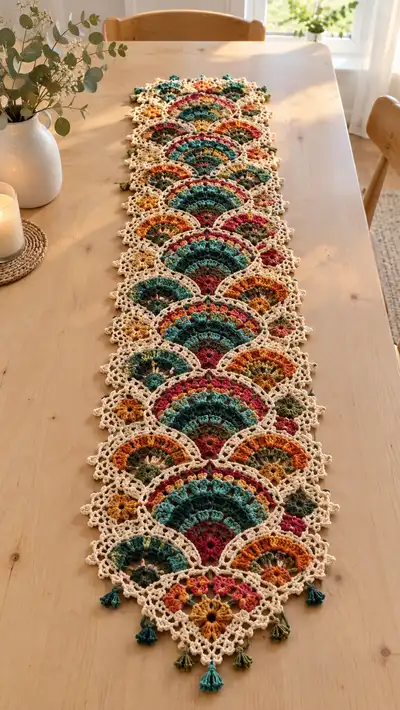
This elegant table runner features overlapping fan/mandala motifs in teal, rust, mustard and olive set off by a lacy cream join and picot edging. The runner is constructed from repeated colorful mandala fans joined with a neutral lace ground and finished with tiny tassels at the points. The layered shells and openwork create a light, airy texture perfect for dining tables, sideboards or as a decorative hallway runner.
Progress Tracker
0% Complete
— Notes & Gauge :
Info :
Runner in photo measures approximately 8-10 inches (20-25 cm) wide and about 44-50 inches (112-127 cm) long using the quantities listed. Adjust number of motifs to lengthen or shorten. Gauge is not critical for lace runner but use a hook that gives neat stitches and good drape; block motifs flat before joining for best results.
Info :
Colors in my sample: Accent 1 = Teal, Accent 2 = Rust, Accent 3 = Mustard, Accent 4 = Olive, Join/Edging = Warm Cream. Throughout the pattern we'll refer to these by name.
— Abbreviations & Stitches Used (quick reference) :
Info :
Refer to the abbreviations list above for short forms. Key stitches: fan cluster = 5 dc cluster worked in same stitch or sp, shell = 5 dc in one sp, picot = ch3 sl st into first ch, V-stitch = (dc, ch1, dc) in same sp. The pattern uses shells, clusters, V-stitches, chain loops and picots to create the lace.
— Mandala Fan Motif (Make 12-14 large motifs depending on desired length) :
Info :
Each large fan motif is worked in rounds from the center outward. Colors change frequently to create the striped fan. Make the number of full motifs needed for your runner length (photo shows 11 large fans with interleaved smaller units; pattern gives counts so you can expand or reduce).
Round 1 :
With Accent 2 (Rust), make a magic ring. Ch1, work 8 sc into MR. Tighten ring. (8 sc)
Round 2 :
Change to Accent 4 (Olive). (Inc) x8 — work (1 sc, inc) around. (12 sc)
Round 3 :
Change to Accent 1 (Teal). (2 sc, inc) x4 then (1 sc, inc) x4 — to create subtle off-center shaping: [this balances the fan arc]. Work (2 sc, inc) x4 = (12) then (1 sc, inc) x4 adds 8 — total 20 sc. For even spacing across the next shell rounds, slip-stitch to start so counts line up. (20 sc)
Info :
Why irregular increases? These early rounds shape the small center so the following shell rows sit as arcs rather than perfect circles. If you prefer simple growth, you can instead do (2 sc, inc) x6 for 24 stitches; adjust following round repeats accordingly.
Round 4 :
Change to Accent 3 (Mustard). (3 sc, inc) x5 = (20 +5 =25) — work evenly to reach 25 sc total. (25 sc)
Round 5 :
Change to Accent 1 (Teal). (4 sc, inc) x5 = (25 +5 =30). (30 sc)
Round 6 :
Change to Accent 2 (Rust). (5 sc, inc) x5 = (30 +5 =35). (35 sc)
Info :
Begin to form visible shell groups next. The motif is still relatively small; use stitch marker to mark Round 1 beginning so color changes meet neatly.
Round 7 :
With Accent 1 (Teal) ch3 (counts as dc), *sk 2 sc, shell of 5 dc in next sc, ch2* repeat around until you have 7 shells total. Join with sl st to top of starting ch3. (7 shells)
Round 8 :
Change to Accent 4 (Olive). Sl st to center of a shell. Ch3, (2 dc, ch2, 3 dc) in same shell center to make a double shell cluster, *sk to next shell center*, (3 dc, ch2, 3 dc) in each shell center to create 7 larger shell clusters. Join. (7 double-shell clusters)
Info :
At this stage the motif resembles a small floral disk with 7 raised shell clusters. The shell count (7) is intentionally prime-shaped to create an overlapping scallop when motifs are joined in rows; do not change shell count unless you re-calculate the join spacing.
Round 9 :
Change to Accent 3 (Mustard). Sl st to ch2-sp between cluster groups. *(ch4, sc) into the ch2 space between shell clusters, ch2* around to create chain arches. You will make 7 chain arches. Join with sl st. (7 arch spaces)
Round 10 :
Change to Accent 2 (Rust). Work into each chain arch: (sc, ch3, 5 dc cluster, ch3, sc) into the chain arch to create a fan petal. Repeat for each arch: 7 fan petals. Sl st to join. (7 fan petals)
Round 11 :
Change to Accent 1 (Teal). In each fan petal work: sl st to center, ch3, (2 dc, ch1, 2 dc) in center, ch2, (5 dc cluster) across top of petal—this round emphasizes a raised shell ridge. After completing all 7 fan petals, join. (7 raised fan segments)
Round 12 :
Change to Accent 4 (Olive). Working in the outer edges only: Into each top of 5-dc area work (sc, ch3, sc) to make 7 small picot arches. This creates scallop points for the later cream join. Join. (7 scallop points)
Info :
At the end of Round 12 fasten off Accent yarn and weave in short tails or carry if you prefer. Block motif flat to shape arcs evenly before proceeding to the neutral join rounds — blocking ensures all motifs sit the same size when joined.
Round 13 :
With Join Color (Cream), join with sl st to the base of any scallop point. Ch1, sc evenly across the top of the fan, working 2 sc into each ch3 space and 1 sc into each sc around to create a neat neutral border. Aim for 28-30 sc around the outer edge (this number will vary slightly if you made different increase choices earlier). (approx 30 sc)
Round 14 :
Ch4 (counts as tr + ch1), *sk 1 sc, tr in next sc, ch1* repeat around to form airy tr-lace arches. Join. (approx 14 tr arches)
Round 15 :
Sl st to nearest ch1 space. *In each ch1 space work (sc, ch5, sc)* to create long chain loops. Repeat around — you will make as many chain loops as there are tr arches (approx 14). Join. (approx 14 chain loops)
Info :
These chain loops form the neutral lace ground that will be used to connect adjacent motifs. Count loops carefully — consistent counts make the joining process symmetrical and predictable.
Round 16 :
Sl st into each chain loop and work a picot-edge: *(sc, ch3, sl st in first ch) into each chain loop*, finishing each loop with a delicate picot. This rounds out the lacy join edge. Fasten off and weave in ends. Block motif again, pinning picots open for a clean look. (approx 14 picots)
Info :
Make as many of these large fan mandalas as required: the photo runner uses 11–12 full fans with smaller intermediary fans between them. To create a runner with dramatic overlapping fans, make a set of full fans and a set of smaller fans as described next.
— Small Fan Unit (Make 10–12) :
Info :
The small fan units nestle in the gaps between large fans to form the repeating scalloped pattern. They are worked exactly like the large fan but with fewer rounds and a smaller shell count (5 shells instead of 7).
Round 1 :
With Accent 3 (Mustard), mr, ch1, 6 sc into MR. (6 sc)
Round 2 :
Change to Accent 2 (Rust). (Inc) x6 = 12 sc. (12 sc)
Round 3 :
Change to Accent 4 (Olive). (1 sc, inc) x6 = 18 sc. (18 sc)
Round 4 :
Change to Accent 1 (Teal). (2 sc, inc) x6 = 24 sc. (24 sc)
Round 5 :
Change to Accent 3 (Mustard). Ch3 (counts as dc), *sk 2 sc, shell 5 dc in next sc, ch2* — repeat to make 5 shells. Join. (5 shells)
Round 6 :
Accent 2 (Rust): Work small fan petals: into each ch2-sp work (sc, ch3, 5 dc cluster, ch3, sc). Repeat for 5 petals. Join. (5 small petals)
Round 7 :
Change to Join Color (Cream). Sl st to base, then work sc evenly around the outer edge, making 18-20 sc to form a neat border. Join. (approx 20 sc)
Round 8 :
Ch3, *sk 1 sc, tr in next sc, ch1* repeat to make 9 tr arches. Join. Fasten off and weave ends; block small fans flat. (9 tr arches)
Info :
Make enough small fans to fit between large fans in a staggered layout. The sample uses a repeating pattern: large fan, row of three small fans tucked into the top, repeated down the runner. You may adjust counts based on your desired runner geometry.
— Alternate Quarter Motif (Edge Fillers) :
Info :
To achieve pointed ends at the runner tips, make quarter motifs based on the small fan but stop at the cream join round to produce a triangular motif. Work Rounds 1–5 of the Small Fan, then join to cream and finish with a single picot point. Make 2 per end (or 1 central tip depending on length).
— Joining Motifs into Runner :
Info :
Blocking note: Before joining, block all motifs flat. The join round was worked in cream on each motif to produce matching loop spaces — we will use these loop spaces and picot points to connect motifs with a neutral lace net. Pin motifs on blocking mat in final layout so you know where each loop lines up.
Join Row 1 :
Lay out a row of full fans with their cream chain-loop edges facing adjacent fans. Using cream yarn on a 3.5 mm hook, pick up one motif at the chain loop and the adjacent motif at the corresponding chain loop: insert hook through both ch-loop spaces, pull up a loop, ch3 and sc to secure. Work across each pair of adjacent motifs joining matching loops with sc + ch3 mesh to form the first neutral connector row. Repeat across entire row. Make sure you keep the tension even so the join lies flat. (Number of joins = number of loop pairs between adjacent motifs)
Info :
Work with pinned motifs to prevent shifting. The join should create an airy lattice that reads as cream netting between the colorful fans. If you prefer invisible seams, join motifs with mattress stitch using a yarn needle — however, crochet joins yield the open lace look shown in the photograph.
Join Row 2 :
After completing the first join row, rotate the assembly and work a second join row behind the first using ch5 loops between the sc joins: in each sc join, ch5, sk to next sc join, sl st into that sc join. This creates a diamond lattice. Repeat across the runner. Fasten off and weave in ends. Block again to settle the joins. (Number of ch5 loops = number of sc joins minus 1 per crossing)
Info :
When joining small fans between large fans, align the small fan cream picot points to the small open arches on the large fans. Join by inserting hook through both motifs’ picot/ch-space, sl st, then ch3 and sc to secure. For stability, make 2–3 small joins per small fan to the surrounding large fans.
Join Row 3 (Edge Fill & Stabilize) :
With cream yarn, along the outer lateral edges work a chain-loop scallop: attach in base of a picot, *(ch6, sl st to base of next picot)* repeating to create elongated loops all along the runner edges. This gives the delicate openwork fringe that floats between fans. Join Row 3 secures the edge and provides points for the final picot edging. Fasten off and weave ends. (Loops = number of outer picots)
Info :
At this point the motifs are joined in a stable, lacy net. Block the entire runner again using moderate steam or wet blocking for cotton yarn until perfectly flat — pin picots open and allow to dry fully for best result.
— Final Edging Rounds (Cream) :
Round 1 :
With cream, sc evenly around the entire runner edge, placing 2 sc in tight concave points and 1 sc along straight chain loops. Aim to create a smooth base for picot edging. (sc count varies by runner width)
Round 2 :
Ch4, *sk 1 sc, tr in next sc, ch1* repeat around to create balanced tr arches along the edge. Join. (tr arches = approx half the sc count)
Round 3 :
In each ch1 space work (sc, ch3, picot, ch1, sc) where picot = ch3 sl st into first ch. This produces a delicate string of tiny loops and picots along the runner edge. Join and fasten off. Weave in ends. (picot count = tr arches)
Info :
If your yarn is a little stretchy, use a slightly smaller hook for the edging to keep the runner from stretching out. Blocking after the edging will re-open the lace but keep overall dimensions stable.
— Tassels & End Points :
Info :
Tassels are optional but give a finished handmade look. Use 8–12 wraps of Accent colors for each tassel. The photo shows alternating tassel colors corresponding to the accent colors in the row below.
Tassel 1 (Make 10–12) :
Cut a small template of 2.5 inches (6.5 cm). Wrap Accent 1 (Teal) around template 8–12 times. Slide yarn bundle off, tie at top with a yarn scrap, fold in half and secure with another short piece of yarn about 0.5 inches from the top to form the head. Trim the bottom evenly. Attach tassels to the runner by threading the top loop through a picot point and pulling the tassel body through the loop, forming a lark’s head knot. Trim ends evenly. (approx 10–12 tassels depending on runner tips)
Info :
Alternate tassel colors to echo the stripe sequence beneath. Secure knots with a dab of fabric glue for extra durability if the runner will be handled often.
— Optional: Additional Decorative Rows (Extra Open Lace) :
Round 1 :
With cream, in any large chain loop between motifs you can optionally add a decorative V-stitch row for more texture: into each large chain loop work (dc, ch1, dc) then sl st to next loop. Repeat across runner for an additional airy layer. Fasten off and weave ends. (V-stitch count = number of large loops)
Round 2 :
To create a beaded or bobble edge for more texture, in select chain loops work an elongated bobble: (yarn over, insert, draw up loop x5, yarn over and pull through all loops) — careful: bobble stitches vary by yarn and may use more yardage. Place bobbles evenly for a consistent finish. (bobble count = number of selected loops)
Info :
These optional rows allow you to personalize the density of the lace. Keep symmetry in mind when adding decorative rows so the runner reads balanced and intentional.
— Finishing :
Info :
Weave in all loose ends with a yarn needle, stitching tails into the backs of stitches and trimming close. Re-block the runner one last time on a flat surface, pinning edges and picots open. Allow to dry fully. Ironing on low with a damp cloth may be used to further even out the lace (test a small scrap first to avoid shine on cotton yarn).
Care :
Hand wash the runner in cool water using a mild detergent for cotton. Reshape while damp and air dry flat. Avoid tumble drying which can distort lace shape.
Info :
Pattern variations: Use fingering or sport yarn and a smaller hook to make a finer, more delicate runner. Use bulkier yarn and a larger hook for a chunky statement runner — be mindful of yardage adjustments.
This fan-lace table runner brings a burst of autumnal color and endless texture to your home. The layered fans and delicate cream ground create a sophisticated, handmade centerpiece that looks stunning on any table. Each motif is a small celebration of yarn and stitchwork — perfect for using favorite scraps and experimenting with color. Whether you make it as a gift or for your own home, you’ll enjoy the rhythmic repetition and beautiful finish. 🧶✨