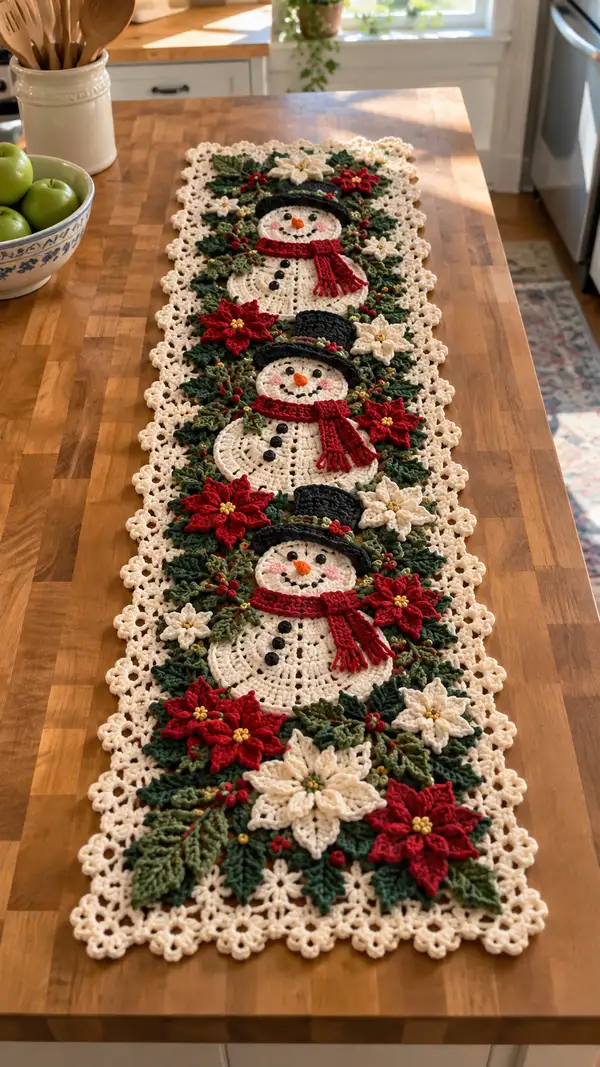
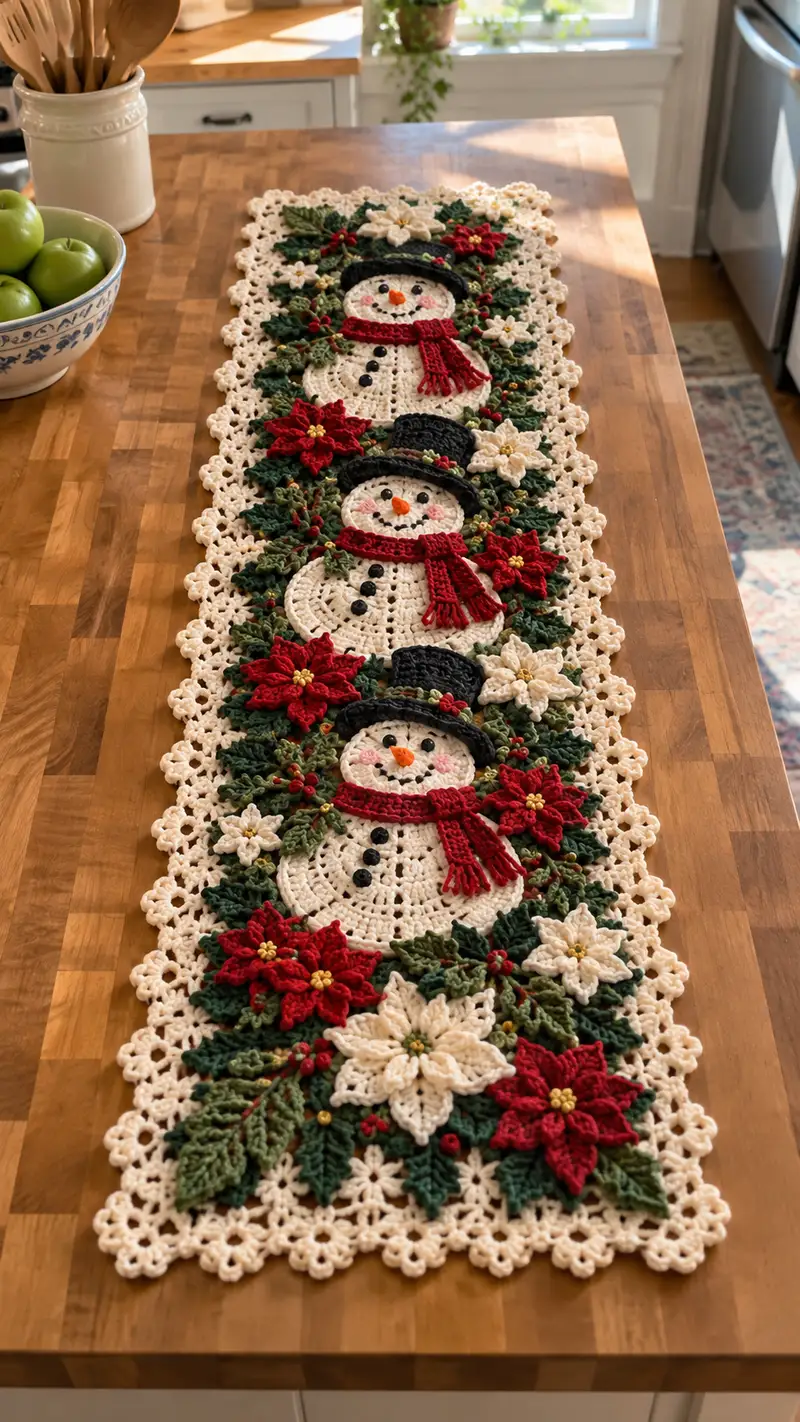
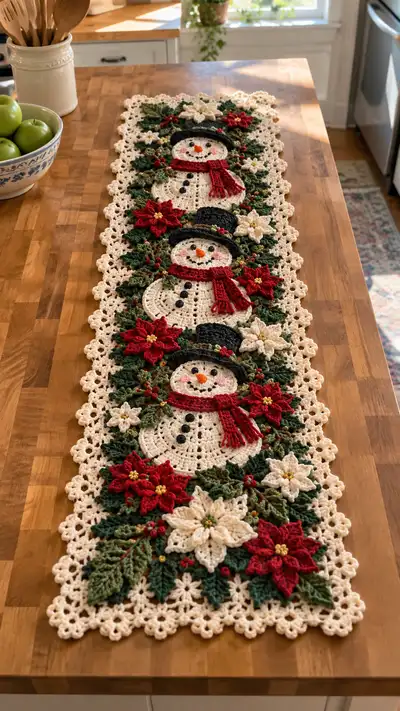
Create a festive cream and red table runner featuring three adorable snowmen surrounded by layered poinsettias and holly leaves. This richly textured runner uses appliqued motifs, raised petals, and an elegant lacy cream border to frame the design. Perfect for holiday centerpieces, the pattern includes step-by-step motif instructions, assembly tips, and finishing notes for a professional result. Ideal as a heirloom holiday accent or a heartfelt handmade gift.
Progress Tracker
0% Complete
— Overview :
Info :
This pattern is worked as multiple appliqued motifs: three snowmen (each composed of a head and body circle), three hats, three scarves, multiple poinsettia flowers (large and small), leaves and holly berry motifs, plus a lacy cream border that frames the entire runner. Work motifs flat and block them lightly before assembly. All rounds are worked in continuous rounds unless specified. Use a stitch marker to mark the first stitch of each round.
Info :
Gauge is not critical for this decorative runner, but maintain consistent tension so that motifs sit flat and join neatly. The finished runner in the photo measures approximately 12 inches wide and 42-48 inches long depending on spacing; adjust motif spacing if you want a longer or shorter runner.
— Snowman Head (Make 3) :
Round 1 :
6 sc in magic ring (6)
Round 3 :
(1 sc, 1 inc) x 6 (18)
Round 4 :
(2 sc, 1 inc) x 6 (24)
Round 5 :
(3 sc, 1 inc) x 6 (30)
Round 6 :
(4 sc, 1 inc) x 6 (36)
Info :
Switch to cream yarn if you started with a similar color and ensure your last stitch is snug. Keep tension even to create a smooth flat circle for the face.
Round 7 :
(5 sc, 1 inc) x 6 (42)
Round 8 :
(6 sc, 1 inc) x 6 (48)
Round 9 :
1 sc in each st (48)
Round 10 :
1 sc in each st (48)
Round 11 :
1 sc in each st BLO (48)
Info :
Working the BLO in round 11 creates a slight ridge that helps the face sit above the body seam. Keep the work flat and check for cupping; if cupping occurs, block flat before proceeding.
Round 12 :
1 sc in each st (48)
Round 13 :
1 sc in each st (48)
Info :
Place safety eyes between rounds 13 and 14. For a similar look to the image, space eyes about 10-12 stitches apart (count across the row). Mark positions with removable stitch markers or pins. If embroidering eyes, mark the center points with a contrast yarn tail.
Round 14 :
(7 sc, 1 inc) x 6 (54)
Round 15 :
1 sc in each st (54)
Round 16 :
1 sc in each st (54)
Info :
Optional blush: surface crochet a light pink yarn in small loops or use fabric-safe chalk to add cheek color after assembly. If adding a carrot nose, use orange yarn to embroider the nose starting at round 14 center between eyes.
Round 17 :
(7 sc, 1 dec) x 6 (48)
Round 18 :
(6 sc, 1 dec) x 6 (42)
Round 19 :
(5 sc, 1 dec) x 6 (36)
Info :
Begin shaping the underside of the head where it will attach to the body. Keep the piece flat — only light tension is required, as this will be sewn onto the body circle later.
Round 20 :
(4 sc, 1 dec) x 6 (30)
Round 21 :
(3 sc, 1 dec) x 6 (24)
Round 22 :
(2 sc, 1 dec) x 6 (18)
Round 23 :
(1 sc, 1 dec) x 6 (12)
Info :
Fasten off leaving a long tail for sewing to the body circle. Weave tail through remaining 6 stitches and pull tight, hiding tail end on back of motif. Block lightly flat with pins if necessary.
— Snowman Body (Make 3) :
Round 1 :
6 sc in magic ring (6)
Round 3 :
(1 sc, 1 inc) x 6 (18)
Round 4 :
(2 sc, 1 inc) x 6 (24)
Round 5 :
(3 sc, 1 inc) x 6 (30)
Round 6 :
(4 sc, 1 inc) x 6 (36)
Round 7 :
(5 sc, 1 inc) x 6 (42)
Round 8 :
(6 sc, 1 inc) x 6 (48)
Info :
This body circle is larger than the head; increase to create a proportion similar to the photo. Keep rounds smooth and flat. Consider using a slightly looser tension here to allow the head to sit comfortably above.
Round 9 :
(7 sc, 1 inc) x 6 (54)
Round 10 :
(8 sc, 1 inc) x 6 (60)
Round 11-18 :
1 sc in each st (60)
Info :
Rounds 11-18 form the main body disc. After round 14, mark vertical center line for button placement and where the head will be sewn. Buttons in the image are placed along the center from round 15 downwards; mark positions early to ensure symmetry.
Round 19 :
(8 sc, 1 dec) x 6 (54)
Round 20 :
(7 sc, 1 dec) x 6 (48)
Round 21 :
(6 sc, 1 dec) x 6 (42)
Round 22 :
(5 sc, 1 dec) x 6 (36)
Info :
Finish shaping bottom edge with a decorative picot round to match the lacy theme; use a cream contrast to create a subtle ruffle. Leave long tail for sewing if attaching head and other appliques by hand.
Round 23 :
1 sc in each st (36)
Round 24 :
(1 sc, picot) x 36 around edge (36 picots)
Info :
Picot: ch3, sl st in first ch of chain to create a small decorative point. Adjust spacing if you prefer a smoother edge. Fasten off leaving long tail for assembly.
— Snowman Face Details (Make 3) :
Round 1 :
Info : Eye placement - Use 8mm black beads or safety eyes. Attach between rounds 13 and 14 of the head, spaced 10-12 stitches apart depending on desired expression.
Round 2 :
Embroider mouth: using black yarn, create five small French knots or chain-stitched dots in a slight smile centered under nose area (roughly across round 15). Space evenly across three to five stitches.
Round 3 :
Carrot nose: embroider a short triangular nose with orange yarn or crochet a small cone: mr, 3 sc in mr, sl st to join, fasten off, leaving tail to sew on. Sew nose centered between eyes on round 14.
Info :
For a small 3D carrot nose: after making the little cone, stuff with a small fiberfill nub and press flat to the face. Secure with a few stitches on the underside to prevent flipping.
— Snowman Hat (Make 3) :
Round 1 :
With black yarn: 6 sc in magic ring (6)
Round 3 :
(1 sc, 1 inc) x 6 (18)
Round 4 :
(2 sc, 1 inc) x 6 (24)
Round 5 :
1 sc in each st (24)
Round 6 :
1 sc in each st (24)
Info :
Rounds 1-6 form the hat top. Use tight tension to create a structured brim base. If you prefer a taller hat, add two or three more even rounds here before forming the brim.
Round 7 :
FLO: 1 sc in each st (24)
Round 8 :
(3 sc, 1 inc) x 6 (30)
Round 9 :
1 sc in each st (30)
Round 10 :
Switch to black or darker shade for brim detail. 1 hdc in each st around (30)
Round 11 :
0-Decoration : Add a small green holly leaf cluster by sewing green leaves along one side of hat brim or crocheting 3 small leaves and sewing them on. Add a few red bead berries in the center.
Round 12 :
Fasten off leaving long tail to sew hat to head. Position hat so brim slightly overlaps head round 12-13 to match photo.
— Snowman Scarf (Make 3) :
Round 1 :
With red yarn ch 26 (or length desired to wrap neck and show ends)
Round 2 :
Row 1: sc in 2nd ch from hook and in each ch across (25)
Round 3-6 :
Ch1, turn, 1 sc in each st across (25)
Info :
For a textured scarf like the photo, alternate a row of BLO sc and a row of sc to create ribbing. Adjust width to taste; a 25-st width will create a narrow scarf that sits nicely on the applique.
Round 7 :
Fringe: Fasten off leaving longish ends. Create fringe by cutting 6 strands of yarn 3 inches long, fold in half, pull fold through edge and pull ends through loop. Make fringe at both ends spaced every 3-4 stitches.
Round 8 :
Attach scarf around neck: position between head and body, sew ends to backside of body circle with slip stitch or whip stitch so scarf looks wrapped and one end drapes down at an angle.
— Large Poinsettia Flower (Make 6 - 3 red, 3 cream) :
Round 1 :
With chosen color (red or cream): 6 sc in magic ring (6)
Round 3 :
(1 sc, 1 inc) x 6 (18)
Round 4 :
1 sc in each st (18)
Round 5 :
Info : Start petal rounds. The following will create 8 petals; divide 18 sts into 8 sections by working petals over 2 or 3 stitches depending on spacing.
Round 6 :
*ch3, 2 tr in next st, ch3, sl st in same st; sl st in next st* rep around creating 8 petal bases (8 petals)
Round 7 :
For each petal: (in petal base) sl st, ch1, sc, hdc, 3 dc, hdc, sc, sl st across petal to form full petal. Fasten off petals and weave ends.
Round 8 :
Block petals flat, then stack a second smaller layer of petals: using 6 sc in mr, 6 inc (12), (1 sc, inc)x6 (18), form 8 small petals using the same petal stitch pattern but working over fewer stitches to make a smaller layer.
Round 9 :
Sew smaller layer centered on larger layer with small gather stitches. Add gold beads or French-knot centers with yellow yarn to mimic the beaded centers in the image.
Info :
The image shows layered petals with a slightly cupped shape. To cup a petal, block with pins pulling petal tips slightly upwards. Secure layers with a small hidden stitch in the center to maintain shape.
— Small Poinsettia / Star Flower (Make 8 - cream) :
Round 1 :
6 sc in magic ring (6)
Round 3 :
(1 sc, 1 inc) x 6 (18)
Round 4 :
Make 6 petals: *ch3, sl st in 3rd ch from hook, sl st in next st* repeat across to form small star points. Fasten off and add tiny yellow bead centers.
Info :
These small flowers act as filler blossoms. Work them tight and small and sew them into clusters around the large poinsettias and the snowmen.
— Leaf (Large - Make 12) :
Round 1 :
With forest green: ch 12
Round 2 :
Row 1: sc in 2nd ch from hook, sc in next 4 sts, hdc in next 2 sts, dc in next 2 sts, hdc in next 2 sts, sc in last (approximately shaping tip)
Round 3 :
Turn and work down opposite side: sc across matching stitches to base. Fasten off leaving long tail for sewing.
Round 4 :
Info : Use BLO on body rounds to add raised vein: with right side facing, use a contrasting or same green and work fpdc down the center stitch line to create a raised central vein. This gives the leaf a realistic dimensional look like the photo.
Round 5 :
Shape leaf by gently blocking and pinning tip up for a slight curve. Make a variety of sizes by changing chain foundation or by making smaller leaves with ch 8-10.
— Holly Triple Leaf (Make 9 clusters) :
Round 1 :
Make 3 small leaves as in Leaf section but shorter (ch8). Arrange in a fan of three and sew together at base; add three small red popcorn berries or beads to center.
Info :
Berry popcorn: with red yarn work 5 dc in next st, remove hook and pull loop through to front, insert hook through top loop and pull yarn through to secure, forming a popcorn bump. Fasten off and glue or sew a small bead for added realism if desired.
— Small Red Berry (Make many) :
Round 1 :
With red yarn: ch2, 6 sc in 2nd ch from hook, sl st to join (6)
Round 2 :
Fasten off leaving tail and sew as little bead clusters of three where shown in photo. Alternatively use red seed beads and sew them in clusters for a polished look.
Info :
Make multiple berries to scatter around leaves and to form small three-berry clusters that embellish the arrangement between poinsettias and around hats and scarves.
— Runner Background Grid (Create base strips to join motifs) :
Round 1 :
With cream yarn: ch 200 or length needed to create two long base strips that will run beneath the motif line. Row 1: 1 sc in 2nd ch from hook and across (199)
Round 2-6 :
Ch1, turn, 1 sc in each st across for 5 rows to create a firm base strip approximately 1.25 inches wide. Make two strips (top and bottom) equal length to anchor motifs.
Info :
These strips will be used to sew and join the snowman and flower motifs, keeping them aligned in a straight central band. Adjust ch length depending on desired runner length and spacing between motif groups. Block strips flat.
— Lacy Side Border Motif (Make many) :
Round 1 :
With cream yarn: ch5, sl st to first ch to form ring, ch3 (counts as dc), work 11 dc into ring, sl st to top of ch3 (12 dc)
Round 2 :
Chain 4, sl st into next st around every third stitch to create looped scallops around the circle forming small flower-like clusters. Continue around to create even lace pieces.
Round 3 :
Join motifs together as you go using sl st between scallops, or leave separate to sew onto the edge later. Make enough to frame both long sides of the runner; the picture shows dense scallops tightly joined to form a continuous border.
Info :
Work these lacy motifs consistently to make a neat edge. Blocking each lacy element and joining them on a blocking board with pins ensures an even pattern before final attachment.
— Assembly Preparation :
Info :
Block all motifs flat. Lay out your two cream base strips parallel on a flat surface with about 8-9 inches between them (or desired width). Position snowman bodies evenly spaced along the centre of the strips: three bodies stacked vertically with roughly 3-4 inches between each pair. Pin in place, then pin all flowers and leaves around the snowmen to mimic the photo composition before sewing.
Info :
Arrange large red poinsettias alternating with cream star flowers, cluster leaves under the flowers and tuck holly clusters near hats and scarves. This planning stage is crucial for a balanced composition and will save time when sewing pieces permanently.
— Joining Motifs to Base :
Round 1 :
Info : Using cream yarn and tapestry needle, sew body discs to base strips by whipstitching through the picot round on body and through the base strip fabric. Use a long tail and double thread to ensure secure hold.
Round 2 :
Sew head disc over top of body at appropriate marked position using ladder stitch for an invisible seam. Ensure heads are centered and slightly overlapping body edge for a natural appearance.
Round 3 :
Attach hats and scarves last so you can position them around where the head meets the body. Sew hat brim onto head round 12-13 to anchor hat in place. Sew scarf ends behind body and tack at two points to hold drape.
Info :
For a more crochet-look join, use join-as-you-go slip stitch around applique edges into the base strips to secure motifs with visible crochet joining that blends with the lacy aesthetic.
— Attaching Poinsettias and Leaves :
Round 1 :
Position large poinsettias around each snowman as in the photo and sew centers to base with small stitches through the body fabric. Sew layered petals with a few anchoring stitches to stop shifting during use.
Round 2 :
Sew leaves tucked under poinsettia petals by passing yarn through the back of the leaf and the base fabric, pulling snug so leaves sit naturally beneath petals. Add small berry clusters at strategic points.
Info :
Use beads or tiny buttons in flower centers. Sew through bead and then through central motif to anchor bead tightly. Use a double thread and tie off with invisible knots on the backside.
— Final Lacy Border Attachment :
Round 1 :
Lay out lacy side motifs along runner edges and join by slip stitching through loops to create a continuous scalloped trim. Stitch the trim to the base by working a round of sl st through the back loops of the scallop and into the base fabric to secure.
Round 2 :
For the short ends, create a mirrored set of lacy motifs and join them into a corner block using sl st and sewing to make a neat 90-degree corner that matches the long side trim.
Info :
Blocking assembled runner after attachment will open lace and settle all seams into place for a professional finish. Use rust-proof pins and a damp cloth if needed to set shape.
— Finishing Touches :
Round 1 :
Sew on any extra beads or buttons for decorative centers and snowman buttons. Weave in all ends by threading tails through the back side of the base and tying small secure knots, then weaving into a few stitches and trimming close.
Round 2 :
Inspect both sides of the runner for loose stitches and reinforce any sections that feel flimsy. Press lightly with a cloth if necessary to flatten and secure shapes.
Info :
For safe table use, avoid glue or heavy beads that could scratch surfaces. Place a thin felt pad under the runner if using on delicate wood to protect finish.
— Optional Variations :
Round 1 :
Color variation: make poinsettias in pinks or whites for a softer palette. Substitute metallic gold yarn for center beadwork for a richer holiday shimmer.
Round 2 :
Scale variation: use DK yarn and a smaller hook to make a narrower runner; alternatively use bulky yarn and larger hook to create a chunky, oversized table runner.
Round 3 :
Edge variation: replace picot edging on body discs with a scalloped shell round to change the runner tone for a more Victorian style.
Info :
If you want more snowmen, repeat the central motif spacing additions and extend base strips accordingly. Ensure symmetrical placement for a balanced final piece.
This Cream and Red Snowman Poinsettia Table Runner brings seasonal charm and vintage elegance to any table. The layered poinsettias and cheerful snowmen combine texture and color for a stunning centerpiece. Every stitch you make adds personality and warmth, and the finished runner will be a treasured holiday accent. I hope you enjoy the slow, joyful process and proudly display your handmade creation this season! 🎄🧶