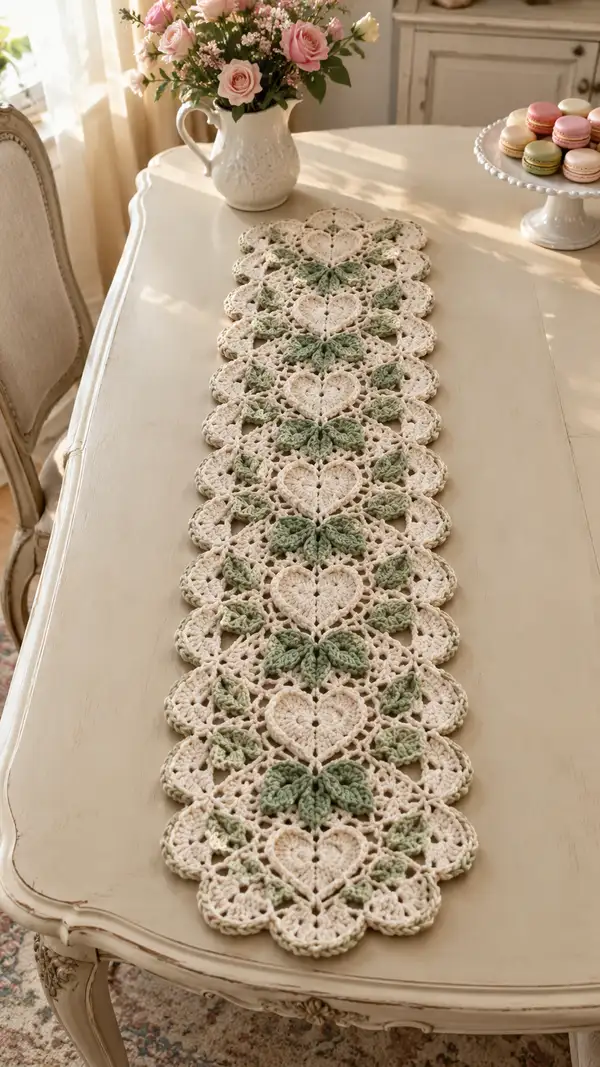
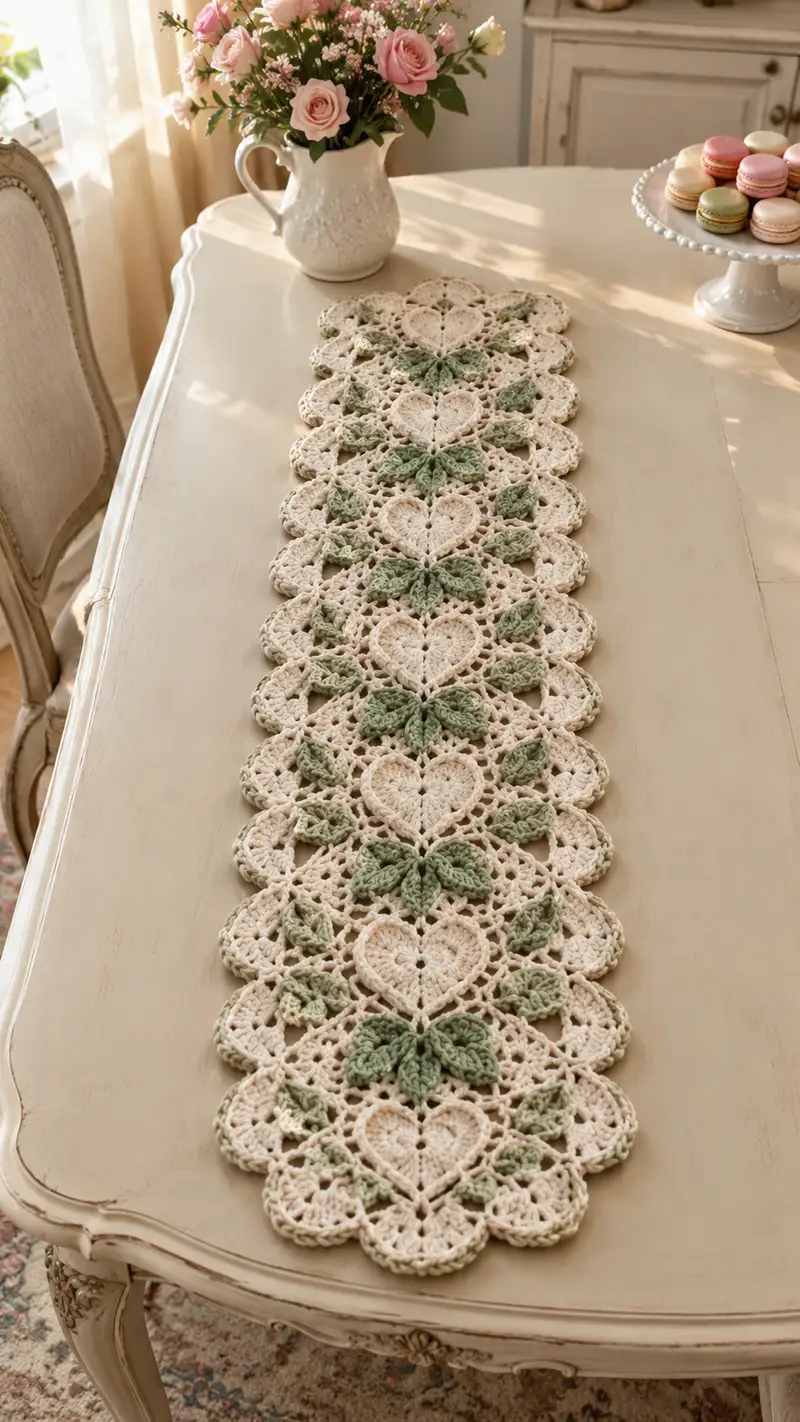
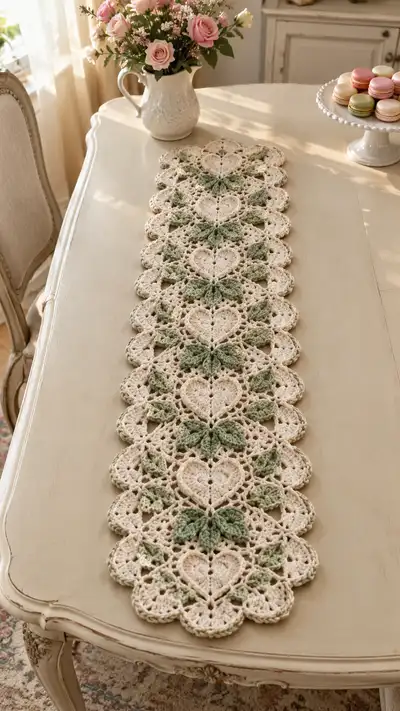
Create a romantic cream-and-sage table runner made from heart-and-leaf crochet motifs joined into a delicate scalloped runner. This pattern features layered heart centers, raised sage leaves, open lace connectors and a scalloped border for a vintage-inspired look. Perfect for dresser or dining table accents, it uses two complementary colors and simple motif-joining techniques to make an elegant, repeatable runner.
Progress Tracker
0% Complete
— Project Overview :
Info :
This runner is constructed from repeat heart motifs (Heart Motif) and raised leaf motifs (Leaf Cluster) joined together with small connector motifs (Lace Connector). The sample runner uses 8 heart motifs end-to-end with mirror joining to create one long runner approximately 44-48in (112-122cm) long and 11-13in (28-33cm) wide. Adjust repeat count to change length. Work each motif individually and join using join-as-you-go rounds and slip-stitch seams described below.
Info :
Gauge: One Heart Motif (complete) measures roughly 5.5in (14cm) across at the widest point when worked with worsted weight yarn and a 4.0mm hook. If your motifs differ, block to size or change hook accordingly. Always wash and block motifs before final joining to even out lacework.
— Heart Motif :
Round 1 :
With Cream, make magic ring, ch2 (counts as first dc), 11 dc in ring, pull ring closed, join with sl st to top of ch2 (12)
Round 2 :
Ch3, dc in same st, 2 dc in each dc around, join with sl st to top of ch3 (24)
Round 3 :
Ch1, sc in same st, (ch3, sk next dc, sc in next dc) around to end, join with sl st to first sc (12 ch3 loops)
Info :
Round 3 creates a ring of 12 chain-3 loops which will serve as anchor points for heart lobes. Keep tension loose to allow easy stitch placement in later rounds.
Round 4 :
Working into first ch3 loop: (sc, hdc, 3 dc, hdc, sc) in loop, sl st into next loop, (sc, hdc, 3 dc, hdc, sc) in next loop; repeat around completing 6 motif petals—end with sl st to first sc (6 petal shells)
Round 5 :
Ch1, sc into base of first shell, ch2, (sc into top dc of next shell, ch2) around to create connecting arches between shells; join with sl st to first sc (6 ch2 arches)
Info :
These initial shells form the rounded lobes of the heart. The next rounds will reshape two adjacent shells into the top lobes and elongate the lower shells into the point of the heart.
Round 6 :
Change to Cream held slightly looser if needed. Ch3, dc2tog across first two dc of first shell top to form smoother curvature, then 3 dc in center dc of shell, dc2tog across last two dc; sl st to next ch2 arch and repeat pattern for the 3 pairs of shells that form two lobes and the lower central point sequence (work carefully to maintain (approx) 36 dc overall)
Round 7 :
Ch1, sc in same st, [ch4, sc around the arc formed between shells] 6 times, join with sl st to first sc (6 ch4 arches)
Round 8 :
Work into each ch4 arch: (sc, hdc, 5 dc, hdc, sc) to form expanded petal shapes; join with sl st to first sc (6 expanded petals) (approx 60 sts total)
Info :
At this stage the motif is becoming heart-like; two adjacent expanded petals will be shaped toward the top lobes. Maintain counts: each petal shell should have the same number of stitches; if not, frog back to last matching round and correct tension or missed stitch.
Round 9 :
Ch1, sc in same st, ch6, sk 10 sts across center petal to create the split for heart indent, sc into base on opposite side, ch6, sc to complete split; continue sc around petals placing ch6 splits at symmetric locations to form the heart indent and side openings (6 ch6 spaces) (maintain overall 60-72 stitches depending on spacing)
Round 10 :
Work into each petal area placing (sc, hdc, 7 dc, hdc, sc) around petals; into each ch6 space work: (sc, ch3, 3 dc, ch3, sc) to create a lacy V shape in the heart indent; join with sl st to first sc (approx 84 sts)
Round 11 :
Ch1, sc in same st, (ch5, sc) across each of the 6 larger arches to start lace body behind the heart; join with sl st to first sc (6 ch5 loops)
Info :
Place a stitch marker in the top center of the motif (between the two top lobes) to help orient the motif when joining leaves later. This marker will represent Round 11 top center point.
Round 12 :
Into each ch5 loop: (sc, hdc, 9 dc, hdc, sc) to build a broad lacy scallop around the heart center (approx 120 sts)
Round 13 :
Ch2, dc in next 9 sts, ch2, sk 2 dc, repeat across to form a delicate lacy chain-spaced ring; join with sl st to top of ch2 (repeat equals approx 18 ch2 spaces)
Round 14 :
Work (sc, ch3, picot, ch3, sc) into each ch2 space to create tiny picot points across ring, join with sl st (creamy picot ring adds vintage texture)
Info :
If you prefer a flatter motif center, skip the picot and instead do (sc, ch3, sc) in each space. Picots produce a more decorative, dimensional edge best for dressy runners.
Round 15 :
Ch1, sc in same st, ch10, sc into base of adjacent picot to create larger openwork spaces for joining; repeat around to make 6 ch10 loops (provides points for future join)
Round 16 :
In each ch10 loop: (sc, hdc, 11 dc, hdc, sc) to widen the motif and prepare scalloped outer edge (approx 180 sts)
Round 17 :
Ch3, dc in each st across until half-shell, ch3, dc in next half-shell, adjusting counts so the two top lobes remain slightly higher than the lower edge; join with sl st (maintain symmetry) (approx 180 sts)
Round 18 :
Work (sc in top of next dc, ch4) around to form 18 ch4 loops evenly spaced; join with sl st to first sc
Info :
These ch4 loops will receive the scalloped outer edge that creates the rosette-like background and scalloped runner border. Count loops carefully to ensure consistent edging.
Round 19 :
Into each ch4 loop: (sc, hdc, 7 dc, hdc, sc) to create chunky scallops; join with sl st (18 scallops) (approx 216 sts)
Round 20 :
Ch1, sc in same st, (ch6, sc) around to create joining arches at scallop peaks; join with sl st to first sc (18 ch6 arches)
Info :
Finish Heart Motif by weaving ends through back of motifs. Leave long tail if you plan to join motifs immediately with join-as-you-go method. Do not fasten off if you will make the first join round from this motif.
Round 21 :
Optional finishing round before leaf placement: With Cream, work (sc, ch2, sc) into each ch6 arch to firm up outer edge; join with sl st (18 small arches)
Round 22 :
Switch to Sage for contrast. Ch1, sc in same st, (ch4, sc) in each small arch to produce clear attachment points for Leaf Clusters; join with sl st (18 ch4 loops)
Round 23 :
Info :
Change to Sage green yarn for the Leaf Cluster attachment. Carry unused cream inside or weave in later. Work next round with slightly tighter tension to help leaves sit on top of cream background.
Round 24 :
In every third ch4 loop around the upper half of the heart (the two top lobes area and two lower-side lobes): create a Leaf Cluster as follows: join Sage into loop, ch1, sc, ch3, (work 5 tr cluster: (yo, insert, pull up loop) x5, complete cluster together) forming a raised 5-tr petal, ch3, sc to finish. Make 6 Leaf Clusters positioned symmetrically across the top and sides.
Info :
Leaf clusters are worked on top of the cream scallops; they should sit raised and slightly overlapping the scallop edge. Space them evenly: two near the top lobes, two on either side, and two forming the base of the heart. Use stitch markers to mark attachment loops if needed.
Round 25 :
After placing leaf clusters, work a decorative single crochet round around entire motif in Sage: sc in each st and sc in top of each leaf cluster base to secure, join with sl st (final count approx 230-250 sts depending on clusters)
Round 26 :
Ch2, dc around alternating stitches to create a solid ring framing the motif; at leaf clusters work (dc, ch2, dc) to allow leaf texture to breathe. Join with sl st (maintain pattern symmetry)
Round 27 :
Ch1, sc in same st, (sc in next 4 sts, picot) around to define scalloped edge; join with sl st and fasten off leaving 12in tail for joining to adjacent motifs if using join-as-you-go method
Info :
Block heart motif flat with leaf clusters arranged atop the scallops so the top lobes form a distinct heart silhouette. Blocking will open lace and make joins easier and more attractive.
— Leaf Cluster (worked separately or in place) :
Round 1 :
With Sage, ch4, join with sl st to form ring, ch1, 6 sc in ring, join (6)
Round 2 :
Ch3, 2 dc in same st, (3 dc in next st) x5, join with sl st to top of ch3 (18)
Round 3 :
Ch1, sc in same st, ch2, sc in next st, ch2, repeat around to make 6 ch2 loops; join (6 ch2)
Info :
Round 3 forms the base loops for shaping three-lobed leaf segments. These small clusters can be made separately and sewn on, or crocheted directly onto the heart motif in the specified ch4 anchor loops.
Round 4 :
Work into each ch2 loop: (sc, hdc, 5 dc, hdc, sc) to create three raised lobes (each leaf cluster contains three lobes when folded) (approx 48 sts)
Round 5 :
Ch1, sc around each lobe joining peaks with sl st as needed, then shape into an elongated leaf by working (sc, (dc, tr) in center sts, dc) along the center vein; fasten off leaving tail for sewing (leaf approx 2.0-2.5in long)
Info :
If creating as a separate piece, lightly block each leaf flat and steam into a curve so that when sewn to the heart motif the leaf arches naturally. Use a small whip stitch to secure each leaf at three anchor points.
Round 6 :
Optional highlight round: Switch to lighter Sage and do a slip stitch outline around each lobe to accent veins; fasten off and weave tails.
Info :
Make 3 leaf clusters per heart motif in the sample arrangement (6 leaf clusters around each heart when alternate small side leaves are included). Leaves add bulk—work lightly and space them to avoid crowding the lace.
— Small Lace Connector Motif (for between hearts) :
Round 1 :
With Cream, ch6, join into ring with sl st, ch3, 11 dc in ring, join (12)
Round 2 :
Ch1, sc in same st, (ch4, sc in next dc) around to create 12 ch4 loops, join (12 loops)
Round 3 :
Into each ch4 loop: (sc, hdc, 5 dc, hdc, sc) creating small scallops; join, fasten off but leave long tail for sewing to adjacent hearts (approx 72 sts)
Info :
These small connectors tuck into the scallop valleys of adjacent hearts and help maintain even spacing and stable joining lines. Make as many as needed depending on runner layout.
Round 4 :
Optional decorative round: With Sage, sl st around each scallop peak to create subtle color echoes between hearts; fasten off.
— Join-As-You-Go Joining Rounds (Joining motifs in a row) :
Info :
We recommend joining motifs in a straight row lengthwise. Join-as-you-go method: finish Heart Motif Round 21 or Round 25 leaving final cream round unfastened. When working the final cream joining round on Motif B, join into motifs A and B by replacing sl st joins with sl st through both motifs at corresponding scallop peaks. Use the 12in tail from motif A to reinforce joins afterward.
Round 1 :
Place Motif A (already blocked) with RS up. Start final joining round on Motif B: ch1, sc in same st, sc in next 3 sts, when you reach a ch6 arch that corresponds to Motif A scallop, sc through both Motif B and Motif A’s corresponding st (through third round of Motif A) to lock motifs together; continue working Motif B joining to Motif A at 6 evenly spaced points along the edge. When joining to a second neighbor on the other side, follow the same process.
Round 2 :
After joining Motif B to A, continue working around Motif B to join to the next motif C as needed. Always align top centers (use stitch markers) so hearts read in the same orientation down the runner. At join points, use sc through both motifs or sl st for a less visible seam depending on preference.
Info :
When joining motifs in a long strip, work left-to-right or right-to-left consistently. Joining at three points along each side provides stability; for more secure assembly join at 6 points per side (every ch6 arch). Keep tension neutral to avoid puckering.
Round 3 :
Once two motifs are joined, reinforce connections by sewing remaining long tails with tapestry needle along the backside using mattress stitch. Weave tails through several stitches to conceal and secure the seam.
Round 4 :
Info :
For the sample runner, join eight heart motifs in a single long row, adding Lace Connector motifs between heart scallops along alternating sides so the outer scalloped edge remains continuous and visually balanced.
— Row Construction & Layout Notes :
Info :
Layout pattern for sample runner: Row of hearts lengthwise: Heart-Connector-Heart-Connector etc. Alternate orientation of leaf clusters every other heart to create a mirrored flow of sage leaves down the center of the runner. Pin motifs to blocking board in final layout before permanent joining to ensure uniform spacing.
Info :
Number of motifs: For sample 8 hearts + 7 connectors (one between each heart), plus small edge fillers at each narrow end to complete scallops. Modify counts as desired for custom table length.
— Full Scalloped Border & Finishing Rounds :
Round 1 :
With Cream, work one continuous round around entire assembled runner edge: sc evenly around outer scallops placing (sc, ch3, sc) in each scallop valley to create uniform loop anchors (work slowly to maintain spacing) (This is worked as one long continuous round; counts vary by runner size)
Round 2 :
Ch3, dc in next 4 sts, ch3, sl st into top of next scallop peak; repeat around so each scallop becomes a shallow shell of 5 dc with ch3 bridges (creates soft rounded edge)
Info :
If you prefer a firmer border, use hdc in place of dc for the edge shells. For a delicate look, use dc but work with a slightly smaller 3.5mm hook for this round only.
Round 3 :
Switch to Sage for a final contrasting scallop crest. Into each shell: (sc, hdc, 3 dc, hdc, sc) forming raised caps across each scallop; join with sl st to next shell top and continue. Fasten off and weave in ends thoroughly.
Round 4 :
Optional picot highlight: With Cream, work a round of (sc, ch3, sl st into first ch) across each scallop tip to make crisp picot accents; fasten off and weave ends.
Info :
After finishing border, wet-block runner or steam-block carefully on a blocking mat to set scallops and even out joins. Pin each scallop so outer edge is symmetrical. Allow to dry completely before unpinning.
— Alternative Edging for a Narrower Runner :
Round 1 :
Work (sc, ch4, sc) in each scallop valley around runner to create small picot loops; join with sl st and fasten off (creates a lighter, airy edge)
Round 2 :
Optional: In Sage, sl st around each loop to accent; fasten off and weave in ends.
Info :
Choose edging based on desired visual weight: heavier dc shells read more formal, small picot rails are casual and delicate. Either option should use consistent tension for uniform scallops.
— Final Finishing & Weaving Ends :
Info :
Weave all ends on the WS using a tapestry needle. Work tails through at least 6-8 stitches and then back through another 4-6 stitches before trimming flush. Secure any weak joins with a few hidden mattress stitches along seams between motifs.
Info :
Block entire runner flat. For a crisp finish, lightly mist with starch or fabric spray and press gently with a warm iron through a damp cloth (test on scrap first). This helps maintain scallop edges and gives an elegant drape on the table.
Info :
Care instructions: Hand wash gently in cool water and reshape while wet. Do not wring; block flat. Machine washing may distort the lace and scallops unless placed inside a mesh bag and dried flat immediately.
Completing this Cream and Sage Heart Motif Table Runner is a truly rewarding project — the delicate hearts and raised sage leaves come together to create a romantic centerpiece that feels timeless and handmade. Each motif is a little meditative joy to crochet, and joining them into a long scalloped runner is wonderfully satisfying. Pin, block, and finish with care, and you’ll have a piece that graces your table for seasons to come. 🧶🌿