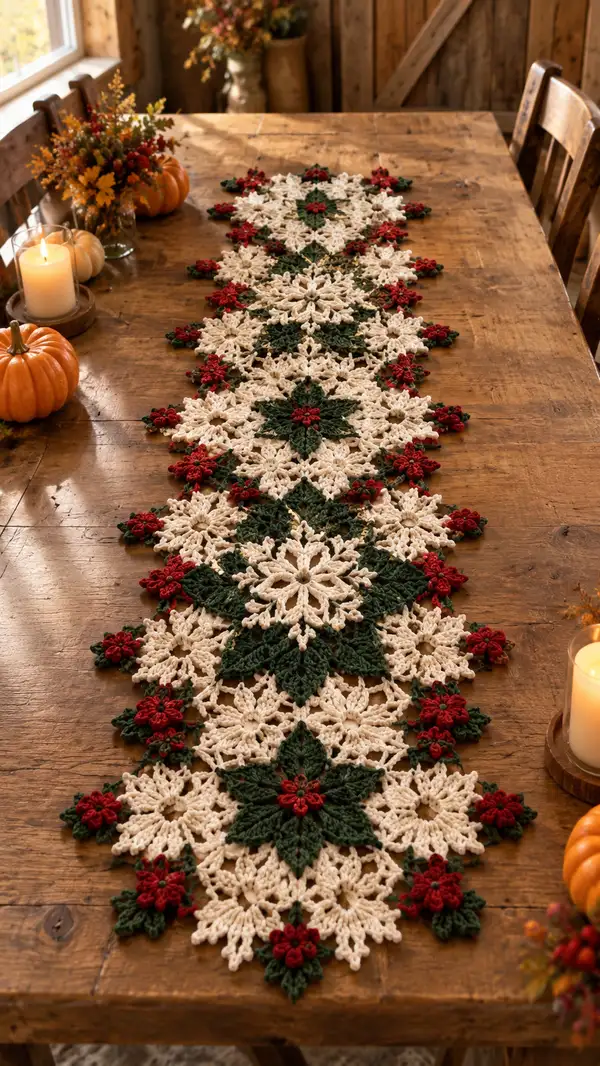
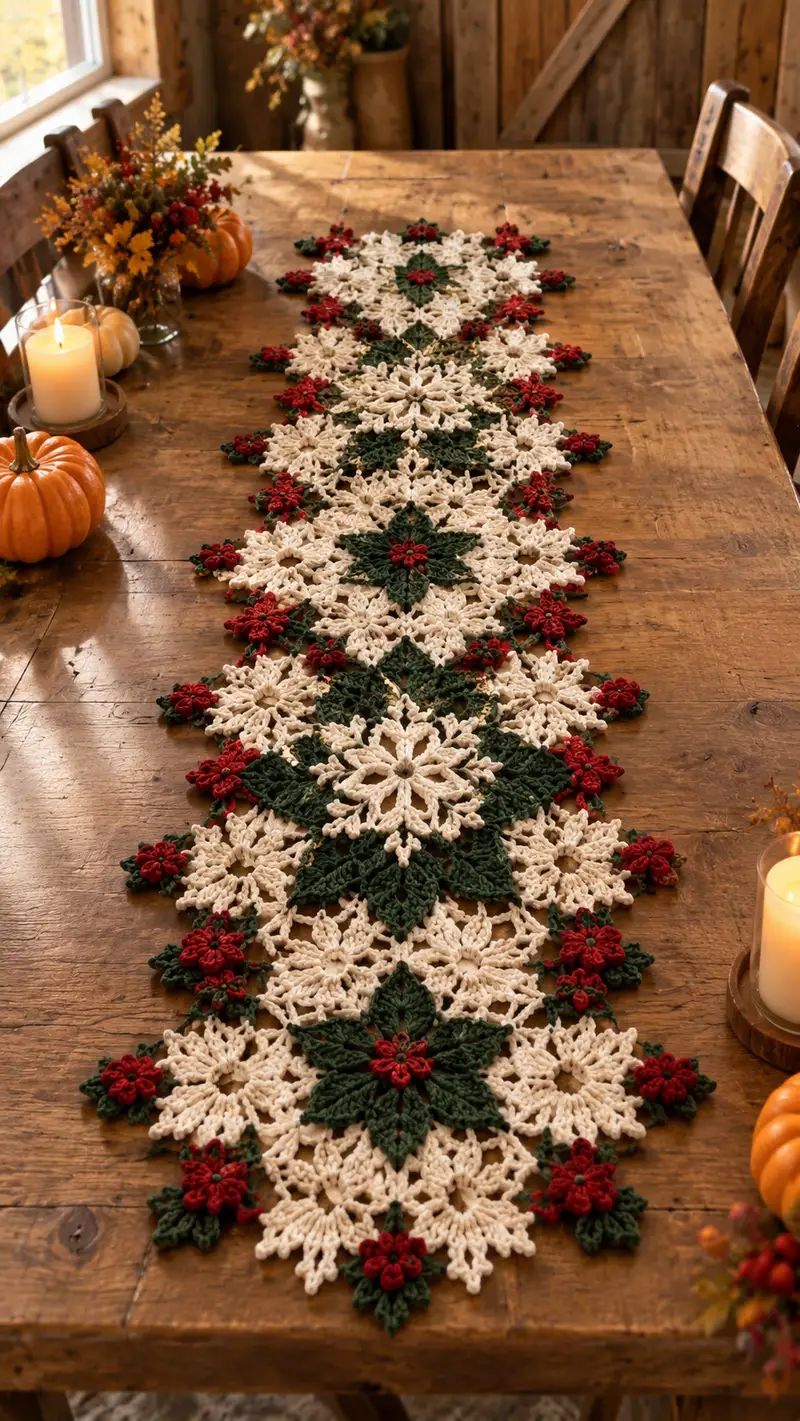
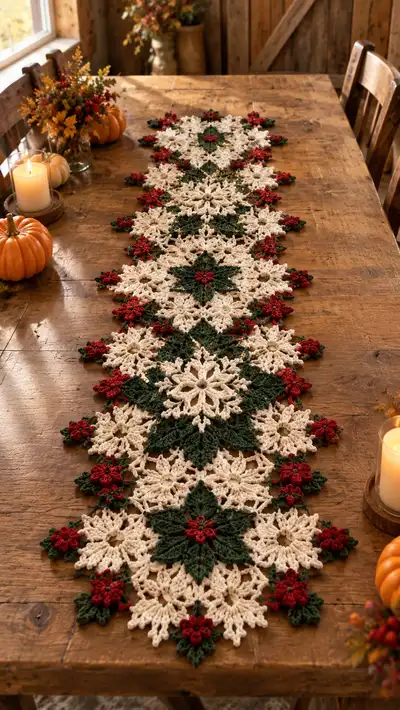
A festive table runner composed of interlocking snowflake and poinsettia-style motifs in cream, forest green and burgundy. This elegant runner features large star-like snowflakes, deep green layered stars, and tiny burgundy blossoms that sit between motifs for a rich holiday look. The modular design makes it easy to adjust length and create a custom centerpiece for any table.
Progress Tracker
0% Complete
— Overview & Construction :
Info :
This runner is constructed from three primary motif types: Large Snowflake Motif (cream primary, forest green star center), Small Snowflake/Spacer Motif (cream), and Poinsettia Rosette (burgundy) which acts as connector accents. Additional Leaf Connectors in forest green are used to fill gaps and complete the lace edge. All motifs are worked flat and joined using a join-as-you-go (JAYG) technique described in detail in the Joining section. Adjust number of motifs to match your table length—this sample runner uses 8 large motifs connected in a linear arrangement with small motif spacers in between.
Info :
Gauge is not critical for this project; however, consistent tension yields the best joins. Blocking motifs before joining will help them lay flat and line up accurately. Work with a smaller hook for decorative detail rounds if you want crisper, denser points.
— Large Snowflake Motif (Make 8) :
Round 1 :
Make magic ring. Ch 1, 8 sc in ring. Pull ring closed. (8)
Round 2 :
Inc in each st around (2 sc in each st). (16)
Round 3 :
(1 sc, inc) x8. (24)
Round 4 :
(2 sc, inc) x8. (32)
Info :
These first rounds create a tight central disk that will anchor later star points. Keep stitches even and place a stitch marker at the beginning of each round for counting accuracy.
Round 5 :
(3 sc, inc) x8. (40)
Round 6 :
1 sc in each st around. (40)
Round 7 :
(4 sc, inc) x8. (48)
Round 8 :
1 sc in each st around. (48)
Info :
Rounds 6-8 form a broader disk and set the anchor points for the eight star arms. At the end of Round 8, lay your piece flat and mark every 6th stitch with a removable marker; these marks indicate the base of each star arm (8 markers total).
Round 9 :
*Ch 6, sc in next marked stitch; rep from * around to create 8 loops (8 ch-loops). This round creates 8 evenly spaced chain loops for point anchors. (8 loops)
Info :
When creating chain loops, keep the tension even so loops are the same size. These loops act as the foundation for building tall star points with puff or cluster stitches.
Round 10 :
Work petals into each chain loop: Into each ch-6 loop work: (sc, ch1, (puff)3 times, ch1, sc) — treat each petal as a single unit. After completing a petal in each loop you will have 8 raised petals. (8 petals)
Info :
Puff stitch (puff) in this pattern = yarn over, insert hook, pull up loop, yarn over and pull through 2 loops on hook — repeat 3 times to gather, yarn over and pull through all loops, ch1 to close puff. Make puffs consistent in height; use the same tension and yarn-over count each time.
Round 11 :
Ch 3 (counts as dc), *(2 dc into base of petal, ch 2, 2 dc) into center between petals; sl st into top of next petal; rep from * around to create eight tall arches. Finish with sl st to beginning ch-3. (16 dc clusters with 8 ch-2 spaces)
Round 12 :
Working behind the arches: in each ch-2 space (created in Round 11) work (sc, ch3, sc) to form decorative picot-like loops — this creates 8 decorative loops. (8 sc + 8 ch-3 loops)
Info :
Round 12 is decorative and does not change the number of anchor points. Keep the sc stitches consistent; these small sc anchors will secure next rounds of surface star stitches.
Round 13 :
Change to Forest Green yarn. Join with sl st to any sc anchor. Ch 2 (counts as hdc), work around the motif to create the central star layer: *(hdc, ch2, hdc) into the top of each petal (8 points). Repeat around creating 8 green star points. (16 hdc anchors with 8 ch-2 points)
Info :
Change color at the end of the round by fastening off cream and joining green with a tail long enough to weave in later. Carry tails to inside of motif or weave in before further assembly.
Round 14 :
Into each green ch-2 space work a 5-dc fan to deepen the star point: (dc, dc, dc, dc, dc) into each ch-2 space, sl st into next sc base between points. This gives eight broad green petals. (40 dc across 8 fans)
Round 15 :
Working in the tops of the fans: ch 1, sc evenly around across all 40 dc (40 sc). This evens the edge and prepares for the cream lace overlay. (40)
Info :
Take a moment to block this motif flat before adding the outer cream points—blocking helps the green star lay flat and ensures accurate placement of the outer snowflake points.
Round 16 :
Change to Cream yarn. Join with sl st into any sc. Ch 4 (counts as tr), *skip 3 sc, (tr, ch 2, tr) into next sc (this creates a V-tr group), ch 3, sc into next sc (between green points); rep from * around to create eight tall cream arches that will become snowflake arms. Work carefully to keep symmetry. (8 V-tr groups, 8 ch-3 picot anchors)
Round 17 :
Into each ch-3 space: (ch 5, sc into base of ch-3) to form decorative loops; rep around. You will have 8 decorative loops. (8 loops)
Round 18 :
*Into each V-tr group work: (ch2, (puff)4, ch2, sl st into top of V) to build tall puff segments forming snowflake arms; rep around. There are 8 puffed arms. (8 arms)
Info :
Puff repeats here use four presses per puff; ensure you pull loops to consistent height so each arm looks identical. If puffs are too loose, reduce to 3-puff clusters and adjust tension.
Round 19 :
Ch 1, sc evenly across around base of each puff and into the spaces between arms: work 3 sc between each arm to create an open lacy ring: (24 sc). (24)
Round 20 :
(1 sc, ch 3, skip 2 sc, sc) x24 to produce small chain arches around motif; finish with sl st to first sc. (24 arches)
Info :
This round creates the delicate lacework that makes the snowflake appear airy. When counting arches, aim for clean, identical ch-3 spaces for consistent shaping.
Round 21 :
*In each ch-3 arch work: (sc, hdc, 3 dc, hdc, sc) into arch to form a shell—repeat around to create 24 shells. This rounds the tips and creates more substance. (24 shells)
Round 22 :
Sl st to top of each shell and ch 4, sl st into top of next shell to create small picot join points around the rim—repeat to end. (24 ch-4 picots)
Info :
If you prefer more open lace, omit the shell round and instead work single dc clusters into arches. The shell provides stability when joining motifs later.
Round 23 :
Sc evenly across entire rim to tidy and provide anchors for joining: 1 sc in each shell top and picot, estimating 48 sc total. (48)
Round 24 :
Ch 2, *sc into next 2 sc, ch 5, sc into next 2 sc; rep around to create 8 larger loop spaces for next decorative edging. (8 ch-5 loops plus base scs)
Round 25 :
Into each ch-5 loop work: (sc, ch2, (puff)3, ch2, sc) to create delicate points. Repeat around (8 points). (8 points)
Round 26 :
Finish with 1 round of sc around everything to tidy: sc evenly across all outer points and join with sl st. Estimate 56 sc. (56)
Info :
Fasten off and weave in ends. Block motif flat. Each completed Large Snowflake motif is approximately 11-12 inches in diameter when using worsted yarn and 4.0 mm hook—measure yours after blocking to ensure consistent size across motifs.
— Medium Snowflake Spacer Motif (Make 10-14) :
Round 1 :
Make magic ring. Ch 1, 6 sc in ring. (6)
Round 2 :
Inc in each st (12).
Round 3 :
(1 sc, inc) x6. (18)
Round 4 :
(2 sc, inc) x6. (24)
Info :
This smaller spacer motif gives airy contrast and fills the negative spaces between large snowflakes. Keep it slightly smaller than the large motif by limiting later rounds and using fewer puff clusters.
Round 5 :
Change to Cream if working any color change. 1 sc in each st around. (24)
Round 6 :
*Ch 5, sc into next sc; rep around to create 6 chain loops. (6 loops)
Round 7 :
Into each ch-5 loop work: (sc, ch 2, (puff)2, ch2, sc). Repeat around to create 6 raised petals. (6 petals)
Round 8 :
Ch 1, sc evenly around across petals and base (24 sc). (24)
Round 9 :
*(sc, ch 3, sc) into each petal top; rep around for 6 small arches. Secure with sl st. (6 arches)
Info :
Fasten off, weave in ends, and block light. These motifs will be used as alternating anchors between large motifs and for filling the runner edge.
— Small Poinsettia Rosette (Make 20-24) :
Round 1 :
Make magic ring. Ch 1, 6 sc in ring. Pull tight. (6)
Round 2 :
Inc in each stitch around. (12)
Round 3 :
*Ch 3, sl st into next st to create 6 small ch-loops; rep around. (6 loops)
Round 4 :
In each ch-3 loop work (sc, hdc, 3 dc, hdc, sc) to form a petite 6-petal rosette. (6 petals)
Info :
Work these in Burgundy for the distinctive tiny flower accent you see between motifs. Use a slightly smaller hook (3.5mm) if you prefer tighter petals. Fasten off and leave long tail for sewing if not joining as-you-go.
— Leaf Connector Motif (Make 24-30) :
Round 1 :
With Forest Green: ch 6, sl st to first ch to form a small loop. (6)
Round 2 :
Ch 1, work 12 sc evenly around loop. (12)
Round 3 :
*(sc, hdc, dc, hdc, sc) into each sc around to form little leaf lobes—work 4 lobes evenly spaced giving 20 textured stitches total. (20)
Info :
These small leaves act both as decorative filler and practical join points at motif corners. Make several and block lightly so they flatten and seat nicely between motifs.
— Detailed Joining (Join-As-You-Go Method) :
Info :
We recommend joining motifs while working the last round of each motif using the JAYG technique. This uses sl st, sc, or single dc joins into adjacent finished motifs rather than sewing later. JAYG gives a seamless front and cleaner back than sewing once all motifs are complete.
Joining Step 1 :
Prepare two motifs to join: lay them flat with right sides up, aligning outer picots or ch loops. At the final round of the motif (for example Round 24 of the Large Snowflake), when you come to a designated joining picot, do the following: work sc into your motif, then insert hook into the joining picot of the adjacent motif and sl st to join. Continue to finish your current round pattern and repeat for each joining point. This will create a direct sl st join visible as small connectors between motifs.
Info :
When joining one motif to two or three existing motifs, make sure you connect the correct picots in order. Pin motifs first to test placement before joining. If a motif needs a small leaf or burgundy rosette to fill a corner, insert the leaf or rosette during these joins for a flush, built-in finish.
Joining Step 2 :
For triple junctions where three motifs meet (as in the runner centerline), join in the sequence: join motif A to B at two points, then join motif C to those same two points so three picots are connected cleanly. Use a sl st or a small sc depending on desired firmness. For a more decorative join, work a small sc cluster of 3 sc into the three adjacent picots and finish with a sl st into central join—this creates a tiny rosette-like center.
Info :
When joining green star points to cream outer points, keep joins subtle. Green yarn will create a darker connector; if you prefer invisible joins, use cream for the join stitches even if used in the green motif. Keep tails short and weave into the adjoining motif to hide them.
Joining Step 3 :
Attach small burgundy rosettes at junctions: either sew them on after all JAYG joins are complete or incorporate them into the final join by crocheting them into the gap (work rosette Round 1 and 2, then when forming ch-3 loops use the ch-1 to join into adjacent motif picots). The sewn method is easier for beginners; the integrated method is cleaner but requires careful counting.
Info :
For best edge symmetry, always join motifs so that repeated elements (points, petals) line up along the runner's centerline. Use pins to ensure motifs don't rotate during joining. We recommend laying out the entire runner on a blocking board before any permanent joins.
— Edging & Final Top Rounds (After Joining) :
Round 1 :
With Cream yarn and working around the fully assembled runner perimeter: join with sl st to any outer picot. Ch 1, sc evenly around all outer points and between joins. Estimate approximate total based on runner width; for an 8-motif runner plan ~240-320 sc (measure your runner and count anchor points). (Estimate 240-320 sc)
Info :
If your stitch count is different due to differing motif sizes, don't worry. Work one sc per visible anchor point to create a tidy rim. Mark each corner of the runner to keep counting consistent and avoid accidental increases.
Round 2 :
*(sc, ch 3, sc) into every 6th sc to create small arches along the edge—this forms a delicate scalloped edge. Repeat around. (Number of arches approx 40-60 depending on runner size)
Round 3 :
Into each ch-3 arch work a mini-shell: (sc, hdc, 3 dc, hdc, sc). Repeat around to produce a refined scallop. (same number as arches)
Info :
Optional: Work one more round of edging in green into each shell top to echo the central green star color. Example: sl st into shell top, ch 1, 6 sc around top, sl st into next shell, repeat. This adds a subtle colored border.
Round 4 :
Finish with one round of sl st around to tidy. Fasten off and weave in all ends. Block the entire runner to set shape and flatten joins.
Info :
Blocking is essential—pin motifs carefully at points and spray lightly with water or steam to set. Allow to dry completely before removing pins. Blocking evens out motif shape and improves join appearance significantly.
— Alternative Shorter Runner Variation :
Info :
To make a smaller runner or centerpiece, use 4–5 Large Snowflake motifs with corresponding spacer motifs and rosettes. Adjust leaf connector counts accordingly and follow the same joining and edging directions.
— Technical Notes & Extended Tips :
Info :
If you prefer a denser, less open runner, substitute dc for some shell stitches or omit ch-3 spaces in edging. If you want a more delicate lace look, use a 3.5mm hook and lighter fingering yarn and scale down counts proportionally. Always do one test motif to confirm size before committing to the full number.
Info :
Ensure all motifs are blocked to identical size before final joining. Slight differences in motif diameter will create ripples in the runner; blocking and consistent tension prevent this. When joining, work slowly and pin motifs in place; it is much easier to correct a join before it is secured.
Completing this table runner is so satisfying—each motif clicks into place and the layered colors create a rich festive look! The combination of cream snowflakes, forest green stars, and burgundy rosettes gives an heirloom-quality centerpiece that brightens any holiday table. Pin, block, and finish with a tidy edge to show off all your careful stitching. 🧶🎄 Enjoy the glow it brings to your gatherings and be proud of the handcrafted charm you added to your home! ✨