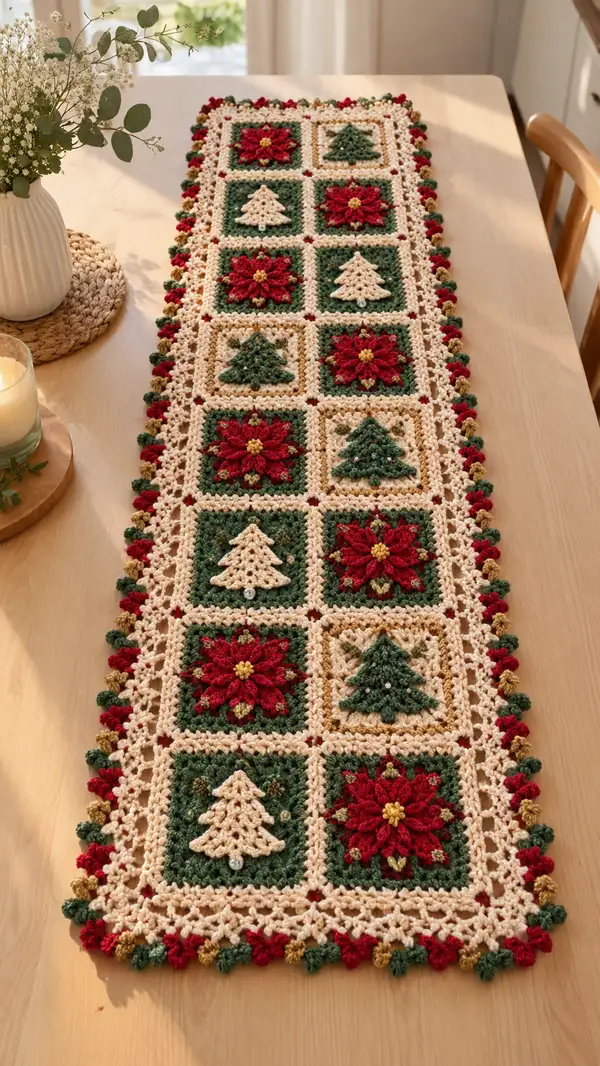
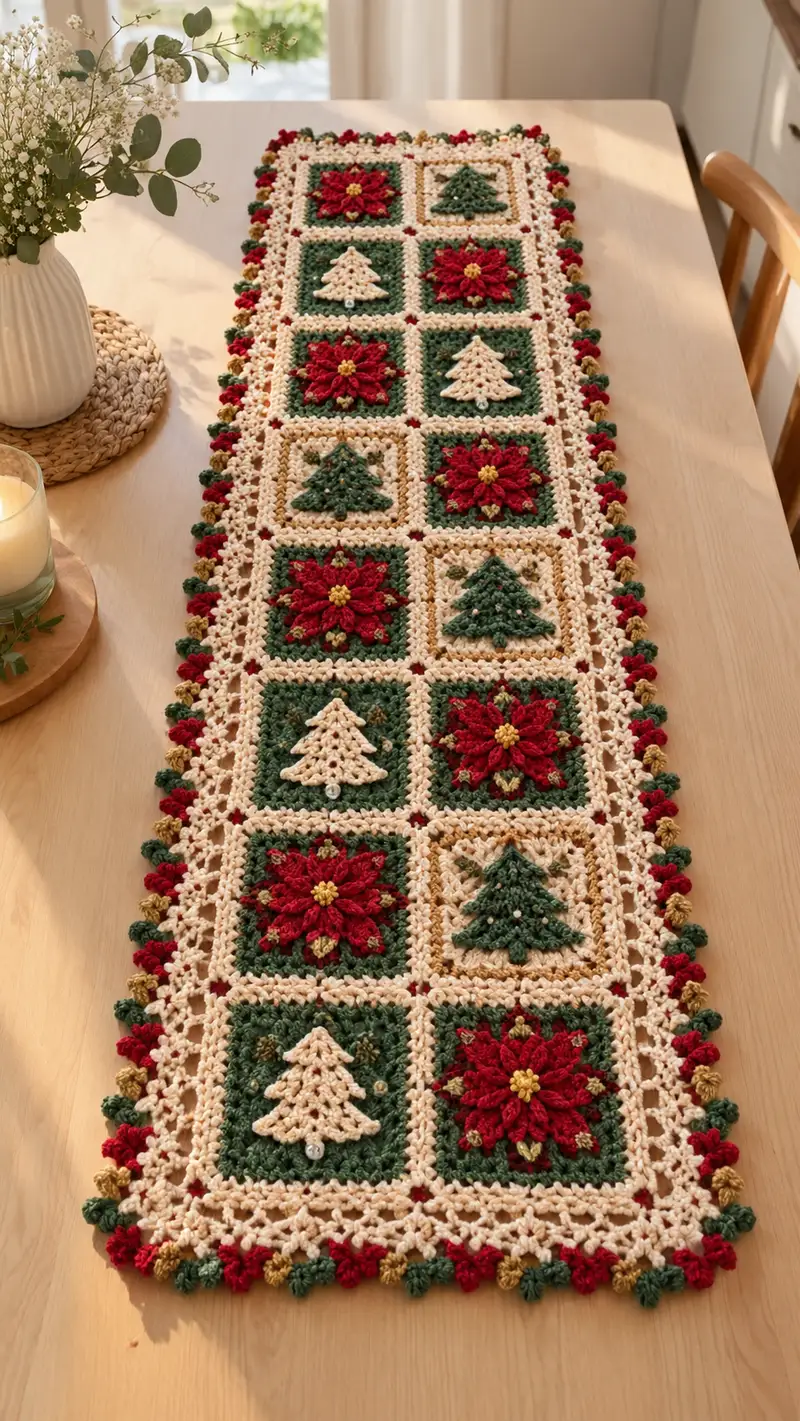
Create a festive, hand-crocheted table runner featuring alternating poinsettia and Christmas tree motif squares framed in warm cream, deep green and antique gold. This runner is constructed from joined squares with a lacy cream border and playful bobble edging in red, green and gold for a classic holiday look. The pattern includes detailed square construction, layered applique petals and trees, join-as-you-go assembly and an ornate finishing edge — perfect for holiday tables or seasonal gift making.
Progress Tracker
0% Complete
— Notes & Gauge :
Info :
All instructions are given in US terms. Work tightly but not so tight that joining is impossible. Each finished motif square measures approximately 5.5" (14 cm) before blocking. The assembled runner measures approximately 13" x 54" (33 x 137 cm) depending on gauge and blocking.
Info :
Gauge: One motif square (after blocking) = ~5.5" square. If your squares are larger or smaller, adjust hook size accordingly. Use stitch markers at each corner ch-2 space in motif rounds for accurate joining.
— Poinsettia Square (Make 6) :
Round 1 :
With deep green (BG) yarn, ch 4, sl st to form a ring (or magic ring alternative). Ch3 (counts as first dc), work 2 dc into ring, ch2, (3 dc into ring, ch2) x 3, join with sl st to top ch3. (4 corner clusters; 12 dc, 4 ch-2 corner sps)
Round 2 :
Sl st into first ch-2 sp, ch3, (2 dc, ch2, 3 dc) in same ch-2 sp, *in next ch-2 sp (3 dc, ch2, 3 dc)*, rep from * around, join with sl st to top ch3. (4 corner clusters; expands corners evenly)
Round 3 :
Ch1, sc in same st, *ch3, sk to next corner ch-2 sp, sc into space between clusters (this forms a large mesh)*, rep around so you have sc at each corner and ch-3 spaces on sides. Join with sl st. (creates a lacy grid; counts: 4 sc corners + 4 ch-3 sides)
Round 4 :
Change to warm cream (CR) yarn. Info: Carry BG yarn up inside if preferred; weave end later. Ch3, dc into same st, *work 3 dc into each ch-3 side space forming side clusters; in each corner work (3 dc, ch2, 3 dc)*, join with sl st. (This round smooths square outline; aim for 12 dc per side including corners)
Round 5 :
Ch1, sc in same st, *ch3, sc in the middle dc group on each side to form even mesh*, rep around and join. Info: Keep tension consistent to maintain a flat square.
Round 6 :
With CR, ch3, dc in same st, (dc in each st across side groups), in corners (3 dc, ch2, 3 dc). Join. (Square base reinforced; typical total stitch count per side ~12 dc; overall visual width increasing slightly)
Round 7 :
Change to BG (deep green). Ch1, sc into next stitch, *1 sc in each dc across sides and 3 sc in corner ch-2 spaces*, join. Info: This round forms a neat inner border for the poinsettia petals to sit on.
Round 8 :
Ch3, dc in same st and around inserting 1 dc in each sc across each side; in corners (3 dc, ch2, 3 dc). Join. (Square base complete — this creates the flat bed for applique petals)
Info :
Before adding the flower, use a tapestry needle to pin the center position where petals will be attached: center of the square. If you plan to add small gold leaves, keep small lengths of gold yarn ready for tufting.
Flower Round 1 (Center) :
Switch to poinsettia red (PR). Attach yarn at center with a slip stitch into the center of the square (use tapestry needle to create a small loop if needed). Ch1, 8 sc into small ring (or work 8 sc around a 4-ch loop joined). Join with sl st. (8 sc)
Flower Round 2 :
Ch2 (counts as hdc), *in next st work (hdc, ch2, hdc) — forming 8 small petals base*, rep around join with sl st. (8 petal bases with ch-2 gaps)
Flower Round 3 (Large Petals base) :
Switch to PR. Attach yarn at a petal ch-2 space, ch1, work (sc, hdc, 3 dc, hdc, sc) into ch-2 space — bobbin-style petal cluster; sl st to next ch-2 space and repeat around for 8 large petals. Fasten off and weave ends. (8 large layered petals)
Info :
Make petals slightly poufed by pulling center loops gently to raise each petal; pinch and secure with a small hidden stitch at base of petal to ensure they do not lay flat.
Flower Round 4 (Inner Accent) :
With antique gold (AG), join at center between petals, ch1, *make 8 small clusters: (sc, ch1, sc) in each petal valley*, join with sl st. These small clusters represent little gold buds around the center. Fasten off.
Flower Round 5 (Center bead) :
With AG or yellow, work 6 sc in a small loop or add a small bead sewn onto the center. Info: Sew bead securely with a few passes of yarn and needle, knot and weave ends inside the square.
Petal Highlight Rnd :
Optional: With a lighter red or blush tone, use tiny surface slip stitches across the center shaft of each petal to add dimension. Work 1 sl st from base to tip on each petal. Info: These should be sparse — do not change shape of petal.
Edge tidy Rnd :
With CR, join at any corner, ch1, sc evenly around working 3 sc in each corner ch-2 space. Join and fasten off leaving a 6" tail for join-as-you-go. Info: This sc edge prepares squares for joining and creates the cream frame seen in the photo.
— Christmas Tree Square (Make 6) :
Round 1 :
With BG (deep green) yarn, ch4, sl st to form a ring. Ch3 (counts as dc), work 2 dc into ring, ch2, (3 dc, ch2) x 3, join. (4 corner clusters; 12 dc total)
Round 2 :
Sl st into the first ch-2 sp, ch3, (2 dc, ch2, 3 dc) in same sp, *repeat in each corner* join. Info: This creates a small square similar to the poinsettia base but intended for the raised tree applique later.
Round 3 :
Change to CR (cream). Ch1, sc into same st, *ch3, sc between cluster groups along each side*, rep around and join. (creates a subtle cream lattice inside the green frame)
Round 4 :
With CR, ch3, dc around working side dc clusters and corner increases (as previous). Join. Info: This forms the cream framing row that will later match runner frame; keep stitch counts consistent on each side.
Round 5 :
Change to BG. Ch1, sc around working 1 sc in each dc and 3 sc in corner ch-2 sps. Join. This completes the flat bed for the tree applique.
Info :
Tree placement: mark the vertical center of the square; the tree base will sit approximately 3-4 rows up from the lower edge. Use pins to hold the tree pieces before sewing or crocheting them into place.
Tree Layer 1 (Bottom Tier) :
With AG (antique gold) or light cream if making a pale tree, join yarn at center lower area with sl st into the central bed. Ch4, (tr, ch1, tr) into same spot to form a small triangle base, repeat on both sides symmetrically using surface slip stitch technique to outline bottom tier. Make sure width is about 9-10 dc sts wide on base row. Fasten off.
Tree Layer 2 (Middle Tier) :
Switch to BG. Create a layered triangle above the first by crocheting directly onto the square with short rows: ch3, attach with sc at left base, then work (dc, dc, ch1, dc, dc) in short strip across forming a narrower triangle row. Continue two short rows to form tapering tiers (3 tiers total). Each tier will be worked as a separate short-row insert and secured at sides with tiny sl stitches to keep shape.
Tree Layer 3 (Top Tier) :
With BG, work a small top triangle (3 sts wide) using dc clusters attached to previous tier. Fasten off and weave ends behind the square. Info: Keep rows symmetrical and tack down the side edges with a few invisible stitches to secure tiers flat but with slight raised relief.
Trunk :
With AG, attach a tiny chain 3 at the center bottom of the tree and work 3 sc back along chain to form a small trunk. Sew a tiny bead at trunk base or embroider a small round bead ornament below the trunk (optional).
Tree Detail Rnd :
With AG, add small seed stitch French knot equivalents by making tiny bullion-like stitches (or 1 sl st bobbles) to represent ornaments. Place 3-4 across the tree in staggered positions. Info: These are purely decorative and optional — be consistent from square to square.
Edge tidy Rnd :
With CR, work 1 sc evenly around the square, 3 sc in corners, join and fasten off leaving 6" tail for joining. Info: Keep edge matches consistent with poinsettia squares to make joining simpler.
— Join-As-You-Go Instructions (Joining All Squares Into Runner) :
Info :
Layout: Arrange squares in two columns and six rows; orientation alternates so that poinsettia and tree squares alternate diagonally. Use pins to layout before joining. Join-as-you-go (JAYG) method pairs adjacent squares with slip-stitch joins into the sc border of the square made earlier. Work joins on the last round of the incoming square so no sewing is required.
Joining Row Step :
Start at top-left square. Work final sc border on top-left square leaving 6" tail. When beginning the final sc round of the square to its right, instead of working sc into all sts, sl st into corresponding sc of already-worked square on the left at each stitch along the side, working 1 sc into corner ch-2 spaces of both squares (3 sc), then continue sc on the active square. This joins two squares along a full side. Repeat to join entire column.
Joining Column Step :
Once two columns of six are joined separately (vertical joins between left and right squares in each row are made during each right-hand square's last round), join the columns across their long sides using the same JAYG method along the long vertical seam between columns at center. Info: Use stitch markers at corners to ensure seams remain aligned and that motifs line up so poinsettias and trees alternate correctly.
Info :
For each join, work gently and do not tug yarn; keeping relaxed tension preserves square shape. If any corners pull, gently frog and rejoin with slightly larger loop or larger hook for the JAYG stitches only.
— Center Mesh Border Rounds (Surrounding Whole Runner) :
Round 1 :
With CR, join at any corner ch-2 space of outermost assembled rectangle, ch1, sc in same corner, ch3, sc into corner of next square, ch3 across top edge in even intervals working sc into each corner and sc into the space between joins roughly every 5-6 sc to create ch-3 spaces along the runner perimeter. Work all around runner and join. Info: This creates the lacy openings seen between outer cream frames and the bobble edge.
Round 2 :
Ch3, dc in same st, *ch2, sk ch-3 sp, dc cluster (3 dc) into next sc position*, rep around to create alternating openwork panel. In corners work (3 dc, ch2, 3 dc). Join. Info: Keep openwork regular for border symmetry.
Round 3 :
Ch1, sc in same st, *ch3, sc in each dc cluster top across the side*. This evens out the edge and prepares for a more ornate next round. Join. Info: At this point the runner should look framed in cream with even ch-3 spaces around.
Round 4 :
Ch2, hdc in same st, work 1 hdc in each sc along sides and for corner do (2 hdc, ch2, 2 hdc) to maintain shape. Join. Info: The hdc round gives a slight ridge to attach the bobble scallop edge to without pulling edge inwards.
Round 5 :
Ch1, sc around working 3 sc in each corner ch-2 space. Join. Info: This sc foundation readies for final decorative bobble scallop. Keep stitch counts even along each long side by spacing sc evenly; note total sc count per long side for repeating bobbles.
— Bobble Scallop Edge (Final Border) :
Info :
This playful scalloped bobble repeat uses three colors in rotation: PR (red), AG (gold), and BG (green). Work bobbles evenly along each side spacing about every 5th sc for a compact scallop like photo. Use the sc foundation round stitch counts to plan bobble placement before committing.
Round 1 (Edge Bobble Repeat) :
Along the perimeter sc foundation, *skip 2 sc, in next sc work (bobble in same sc — make 5 partial double crochets leaving last loop on hook each time, then pull through all loops and ch1 to close), ch1, sk 2 sc, sl st into next sc* to create small bobble clusters. Alternate colors in sequence: PR, BG, AG, PR, BG across the entire runner so bobbles appear multicolored. Info: Each bobble equals one decorative pop; maintain consistent tension for even size.
Round 2 :
After finishing bobbles around the edge, join with sl st and fasten off. Weave in tails neatly and trim ends. Info: Weave ends into the cream foundation where possible to hide colored tails internally.
Optional Scallop Finish :
If you prefer a lace scallop instead of bobbles, use CR to work (sc, ch3, sc) in each bobble valley to create a gentle lacy scallop. Info: This produces a lighter, more delicate finish for formal settings.
— Finishing & Blocking :
Info :
Weave in all ends inside the cream borders and secure with tight knots if needed. Pin the runner to a blocking mat in the desired rectangular shape and steam-block or wet-block to even edges and flatten motifs. Allow to dry completely before use.
Info :
Optional: Sew small clear buttons or beads onto tree trunks for ornamentation using a matched thread; add a few hand-stitched gold accents on poinsettia centers if desired.
— Troubleshooting & Tips :
Info :
If one square measures differently, frog that square and rework using the same hook as neighbor squares, or adjust stitches in final border rounds to compensate. Keep consistent yarn dye lots for best color matching. Use stitch markers in each corner ch-2 space during square rounds and while joining to ensure precise alignment.
This festive table runner is a joyful mix of texture and tradition — layered poinsettia petals, tiny raised trees and a cheerful bobble edge come together to celebrate the season. Each square is a little treasure and joining them is deeply satisfying: the runner builds itself into a conversation piece. Pin, block, and embellish to make this heirloom-ready centerpiece. Happy stitching and enjoy every colorful bobble and petal! 🎄✨🧶