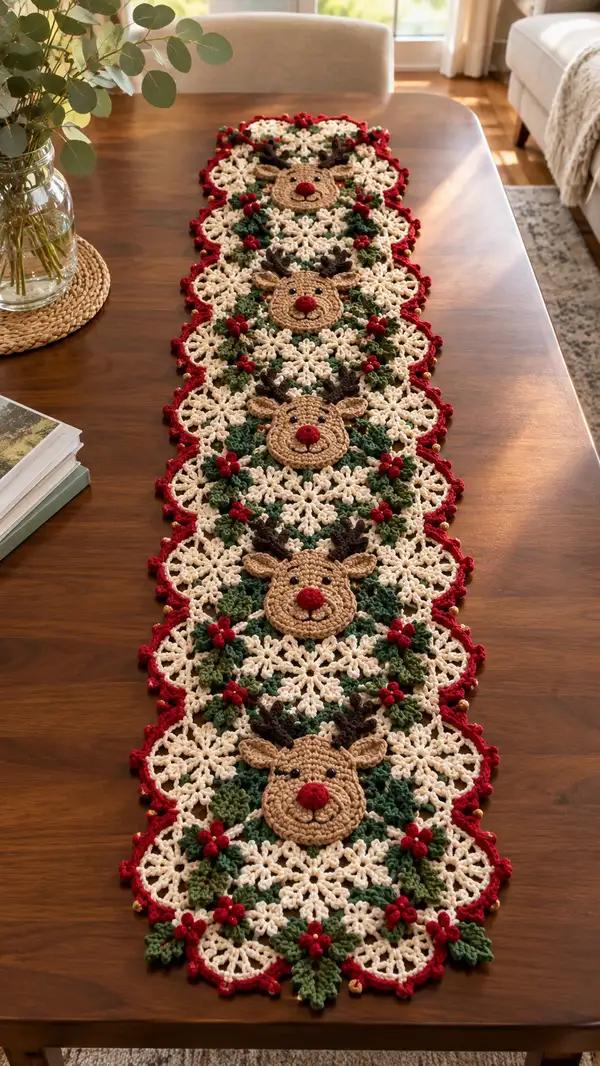
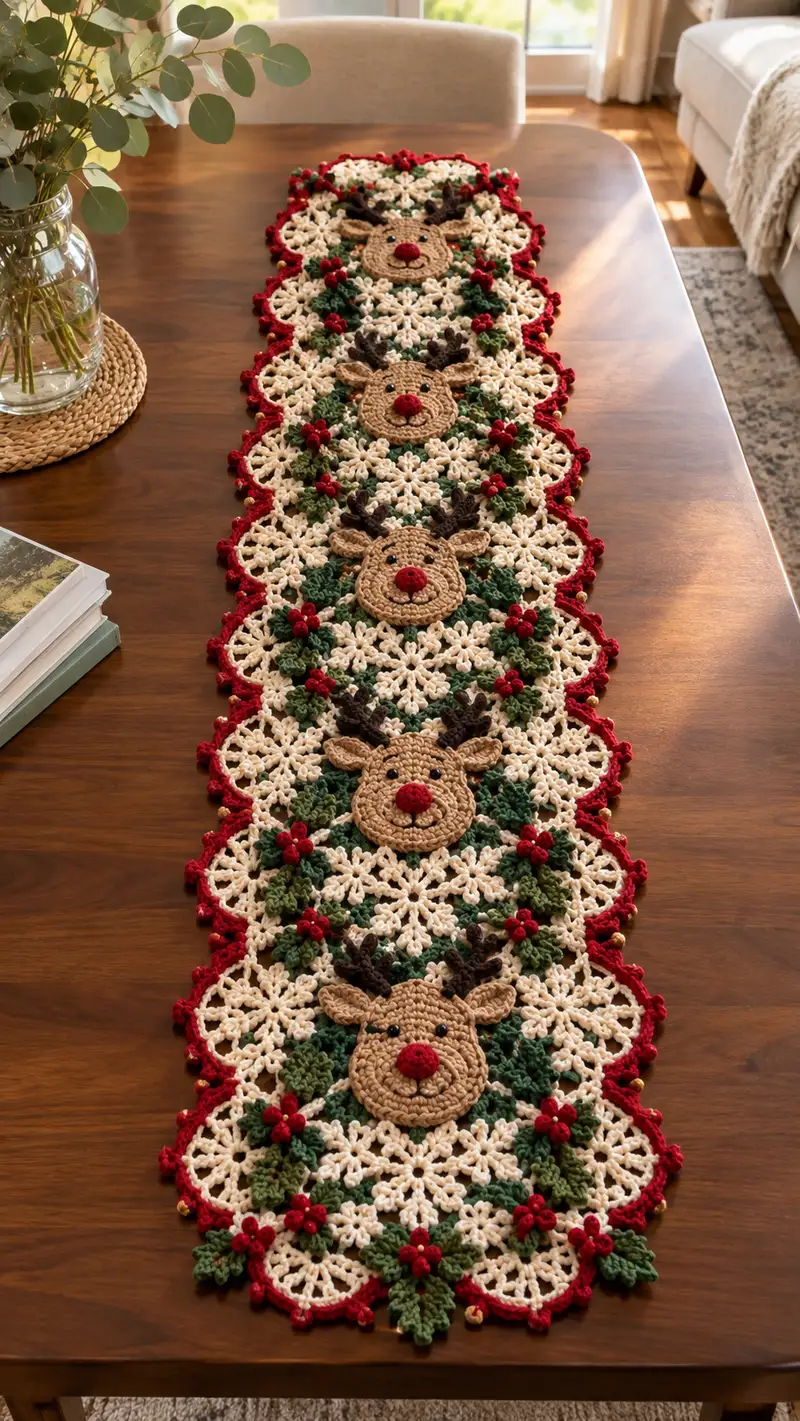
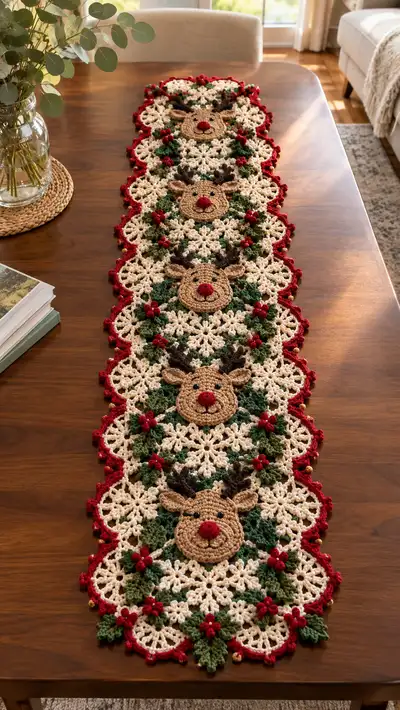
Create a festive Cream Red Reindeer Holly Table Runner featuring repeated snowflake-style motifs, three-dimensional reindeer face appliques, holly leaves and berry clusters, and a scalloped red border with tiny jingle accents. This pattern gives clear, step-by-step instructions to make each element and join-as-you-go assembly. Perfect to decorate a dining table for the holidays, the runner combines textured stitches, colorwork, and simple appliqué techniques for a charming heirloom piece.
Progress Tracker
0% Complete
— Reindeer Head (make 4 appliques) :
Round 1 :
6 sc in magic ring (6)
Round 3 :
(1 sc, 1 inc) x 6 (18)
Round 4 :
(2 sc, 1 inc) x 6 (24)
Round 5 :
(3 sc, 1 inc) x 6 (30)
Round 6 :
(4 sc, 1 inc) x 6 (36)
Round 7 :
(5 sc, 1 inc) x 6 (42)
Round 8 :
(6 sc, 1 inc) x 6 (48)
Info :
Use tan/light brown for the head rounds. Keep stitches tight to create a firm flat applique. Change to slightly smaller hook if needed for a dense fabric.
Round 9 :
(7 sc, 1 inc) x 6 (54)
Round 10 :
(8 sc, 1 inc) x 6 (60)
Round 11-16 :
1 sc in each st (60)
Info :
Rounds 11-16 create the flat face. If you prefer a slightly domed head, add a light stuffing disk at round 13-14. Eyes will be embroidered or sewn later — mark eye placement between rounds 13-14, about 10-12 sts apart, centered vertically.
Round 17 :
(8 sc, 1 dec) x 6 (54)
Round 18 :
(7 sc, 1 dec) x 6 (48)
Round 19 :
(6 sc, 1 dec) x 6 (42)
Info :
Begin slight shaping to give the applique a slightly raised cheek line. Do not overstuff — just a small amount under the nose area if you plan a plush red nose.
Round 20 :
(5 sc, 1 dec) x 6 (36)
Round 21 :
(4 sc, 1 dec) x 6 (30)
Round 22 :
(3 sc, 1 dec) x 6 (24)
Round 23 :
(2 sc, 1 dec) x 6 (18)
Round 24 :
(1 sc, 1 dec) x 6 (12)
Info :
Fasten off leaving a long tail for sewing the head to motif. If you want a flatter applique, skip rounds 17-25 and instead finish at round 16; for the slightly 3D look follow the shaping rounds above.
Round 26 :
Using yarn needle, weave tail through 6 sts and close if making a tiny dome; otherwise leave as flat circle for sewing (6)
Info :
Optional: add a round of surface slip stitch around the edge to create an outlined face. Use darker brown or same tan depending on contrast desired.
— Reindeer Nose (Make 4) :
Round 1 :
mr, 6 sc in ring (6)
Round 3 :
(1 sc, inc) x 6 (18)
Round 4 :
1 sc in each st (18)
Info :
Use festive red for nose. Add a tiny amount of stuffing at round 3-4 to make a small bobble. Finish with a whip stitch closing and leave long tail for sewing to head.
Round 5 :
(1 sc, dec) x 6 (12)
Round 7 :
Fasten off and leave tail for sewing. Secure nose to center front of reindeer head and embroider nostril highlight if desired.
— Eyes & Facial Embroidery :
Info :
Use 6mm black beads, small safety eyes, or embroidered French knots for eyes. If using safety eyes, insert them between rounds 13-14 of the head with approx 10-12 sts between. If embroidering, use 2-3 strands of black yarn and backstitch small arcs for smiles and small dots for eyes.
Round 1 :
Embroider small smile below the nose using black yarn; start with a short chain stitch arc and add small stitch detailing for cheeks if desired
Info :
Positioning note: the nose centers on round 12-14, so place eyes higher (rounds 13-14) and the smile between rounds 16-18 for balanced face proportions.
— Antlers (Make 8, 2 per head) :
Round 1 :
ch 6, 1 sc in 2nd ch from hook, 1 sc in next, hdc in next, dc in last (4) turn to work along ch opposite
Round 2 :
Work along foundation chain back: hdc, sc, sl st in base to create a short fork (4)
Round 3 :
Join to base and ch2, (hdc, dc) in next st to create a branching prong; repeat for second prong (6)
Round 4 :
1 sc around base of antler to firm (6)
Info :
Work antlers in dark brown. The antlers are worked flat and then curved by blocking or slight folding when stitching in place. Make 2 identical antlers for each head.
Round 5 :
For branching details: ch3, sl st in mid prong for tip accent, then sl st back to base (no change)
Round 6-12 :
Optional: Add small picot tips to prongs for a stylized look: ch3, sl st in 3rd ch from hook to form picot; secure and fasten off (no stitch count)
Info :
To make the antlers more dimensional, layer two small antler pieces and stitch together at the base, or add a second smaller prong by crocheting an additional short chain prong. Antlers are lightweight — minimal stuffing is not necessary.
— Ears (Make 8, 2 per head) :
Round 1 :
mr, 6 sc in ring (6)
Round 3 :
(1 sc, 1 inc) x 6 (18)
Round 4 :
1 sc in each st (18)
Round 5 :
(1 sc, 1 dec) x 6 (12)
Info :
Flatten and fasten off leaving long tail to sew to the head at round positions 6-8 on either side. Use a lighter inner ear color in round 3 if you want a two-tone ear — simply change color at the start of round 3.
— Snowflake Motif (Main motif, make as many as needed to reach runner length; each motif is square-ish) :
Round 1 :
With cream, ch6, sl st to form ring, ch3 (counts as dc), 11 dc in ring, sl st to top of ch3 (12 dc) (12)
Round 2 :
Ch1, *sc in next dc, ch5, skip next dc* repeat around to form 6 ch5 loops, sl st to first sc (36 loops/spaces created)
Round 3 :
Into each ch5 loop: (sc, hdc, 3 dc, hdc, sc) to form petal clusters (6 petals)
Info :
Each 'petal' is a cluster that will create the star-snowflake look. Maintain consistent tension to keep the motif flat. Block motifs lightly if necessary before joining.
Round 4 :
Ch1, sc into top of each petal, ch3 between petals to form 6 ch3 spaces (36 overall placement points)
Round 5 :
In each ch3 space: (2 dc, ch2, 2 dc) to deepen the star arms (12 groups)
Round 6 :
Sc evenly around the outer edges, placing (1 sc, ch3, 1 sc) in each ch2 space from previous round to form connecting arches
Round 7 :
In each ch3 arch: (3 dc, ch1, 3 dc) to create scalloped points (12 larger points)
Info :
Switch to a slightly larger hook for rounds 6-7 if you want a more lacy look. For this runner, maintain same hook so joining is easier.
Round 8 :
Sl st into center of each scalloped point then ch4, sl st into center of next scalloped point creating a chain loop border (12 loops)
Round 9 :
Work small clusters into each loop: (sc, puff, sc) — puff stitch: yo, insert, yo, pull up, yo, pull through all loops on hook (12)
Round 10 :
1 sc around each stitch to tidy edge and prepare for joining (count varies; approx 96)
Info :
Each motif will be joined along the edges later using join-as-you-go method; do not fasten off until you are ready to join motif to previously made motif or create connecting rounds as specified in the Joining section.
Round 11 :
Ch1, sc around working 2 sc in corner points to square out motif (approx 100)
Round 12 :
Slip stitch evenly into spaces where reindeer applique will be attached — mark center point and leave a 6-8 stitch gap in two opposite sides for later holly placement (no precise global count)
Info :
Block each motif gently after finishing round 12 so the star points lie flat. The reindeer head will be sewn to the center of certain motifs — see Layout for which motifs get faces.
— Holly Leaf (Make many for clusters) :
Round 1 :
With green, ch10
Round 2 :
Starting in 2nd ch from hook: sc, hdc, 2 dc, tr, 2 dc, hdc, sc (leaf shape formed, 8 stitches)
Round 3 :
Turn and sl st along bottom of leaf to base to create a slight ridge (no st count change)
Round 4 :
Ch1, sc around to tidy edge and add a few picot barbs: *sc, ch3, sl st in 3rd ch* at two outer points (no change)
Info :
Leaves are slightly cupped. Make clusters of 3-5 leaves sewn at their bases to create holly clusters. Use two shades of green randomly for a natural look.
Round 5-10 :
Optional: Add a second round of edging sc and small surface slip stitch veins (no change in stitch counts)
— Holly Berry Cluster (Make many) :
Round 1 :
With red, mr, 6 sc in ring (6)
Round 3 :
Fasten off leaving tail and make 3 small berries and stitch them together at base to form a tight cluster (no count)
Info :
Sew clusters at intersections of holly leaves, and add tiny gold seed beads in center for sparkle if desired. For a more raised berry, leave a tiny stuffing amount before closing.
— Join-As-You-Go Connecting Rounds (connect motifs in a row) :
Round 1 :
Lay two motifs right sides up. With cream yarn and starting at a corner, attach with sl st, ch1, and work 1 sc in each outer edge stitch of both motifs simultaneously to join; place extra sc in corner spaces to keep edges flat.
Round 2 :
When joining third motif, work 1 sc in next motif and sl st into previous motif's gap to lock join; continue for full row (no global stitch count)
Info :
Join the motifs so that the motifs with reindeer faces are spaced evenly (in the pictured runner there are 4 reindeer faces separated by plain motifs). Pin layout before joining. Use the join-as-you-go method for a neat continuous seam.
Round 3 :
After row is assembled, work 1 rnd sc around the entire row to even up edges and prepare for border. Work 2 sc in each corner or corner arch for a smooth transition (approx 6-8 sc per motif edge).
— Border Scallop & Picot Edge (Red) :
Info :
Switch to festive red yarn. This border creates a scalloped edge with small picots; add jingle bells to every other scallop if desired. Work directly around joined motifs after blocking.
Round 1 :
Attach red with sl st at a corner. *Ch3, 5 dc all in same stitch, ch3, sl st in same stitch* — this creates a large scallop. Work scallops evenly along edge, spacing one scallop per motif outer point (count depends on runner length)
Round 2 :
Between large scallops, make small picot bumps: *sc into scallop join, ch3, sl st in 3rd ch (picot), sc into next join* repeat all around (no global count)
Round 3 :
Embellish each scallop center with a cluster of 3 small red puff flowers: in center chain loop, (puff, sl st, puff) and finish with a small ch2 knot. Fasten off and weave ends.
Info :
To attach bells: position bell at tip of each 2nd scallop, stitch through bell loop and scallop multiple times and knot securely. Weave thread through base back into work for security.
Round 4 :
Work one final round of sl st behind scallops to flatten and secure the edge; weave in all tails.
— Decorative Puff Flowers & Clusters :
Round 1 :
With red, ch4, join to form ring. In ring: (ch3, yarn over twice, insert hook, pull up loop, yarn over, pull through two, repeat to make a 5-loop puff), repeat to make 3-4 puffs, sl st to join (3-4 puffs)
Round 2 :
Secure the puff flower by sl st, fasten off leaving tail. Use clusters of 3 puff flowers arranged in triangular groups near holly leaf bases for visual balance.
Info :
Puff stitch technique: yo 3x, insert hook into stitch, yo pull up loop, yo pull through 2 loops until five loops remain then yo and pull through all loops to complete puff. Tension is key — keep puff not too tight so they lay puffy yet neat.
— Assembly & Placement of Appliques :
Info :
Lay out the assembled motif row and determine placement for reindeer heads: center a head on every 3rd motif (or as image: 4 faces evenly spaced across runner). Pin each head to motif centers before sewing. Place antlers and ears to sit slightly above and to either side of the head so they peek over the star points.
Round 1 :
Sew heads to motif centers using mattress or whip stitch through finished tail from head round; use small neat stitches around the outer 2-3 rounds of the head for secure hold.
Round 2 :
Sew ears at head rounds 6-8 spaced approx 6-8 stitches apart on either side. Sew antlers behind ears, aligning prongs so they angle outwards naturally.
Round 3 :
Sew the red bobble nose centered on head front using long tail; secure with hidden stitches and knot; embroider smile using 2 strands black yarn with a small backstitch.
Info :
Sew holly leaf clusters around head per the image: two clusters framing the head lower sides and one cluster above between antlers. Secure each cluster by stitching through leaf bases into motif; attach berry clusters centrally and reinforce with small knot and thread weave.
— Final Finishing Rounds & Blocking :
Round 1 :
Steam block or wet block the entire assembled runner on a flat surface to shape all points evenly; pin scallops and star points to desired shape and let dry overnight.
Round 2 :
Weave in all ends on the wrong side; trim tails. Use fabric glue for added security behind nose or on bell loops if desired.
Info :
Check each attachment: tug slightly on appliques to ensure they are secured. If any piece seems loose, sew an additional round of stitches around its base. Remove blocking pins after completely dry.
— Pattern Notes & Tips :
Info :
This runner is constructed from repeating motifs joined-as-you-go and finished with a scalloped border. For consistent results, make all motifs first, block them, lay out the final design, then join. Alternately join as you go if you prefer continuous construction. Keep a consistent hook size and maintain a removable stitch marker at round starts for motifs worked in the round.
Info :
Color changes: carry unused yarn lightly on wrong side for short runs or weave in ends for longer carries. When joining motifs, work right sides up to have neat joins on right side of runner.
This Cream Red Reindeer Holly Table Runner is a festive combination of lacy snowflake motifs and playful 3D reindeer appliques — perfect for holiday tables! The mixed textures of puff stitches, scallops, and embroidered details make each section a joy to crochet. Once complete, the runner becomes an heirloom-style centerpiece that will brighten holiday gatherings and inspire warm compliments. 🎄🧶 Enjoy every stitch and the lovely sound of the jingle bells as you celebrate the season!