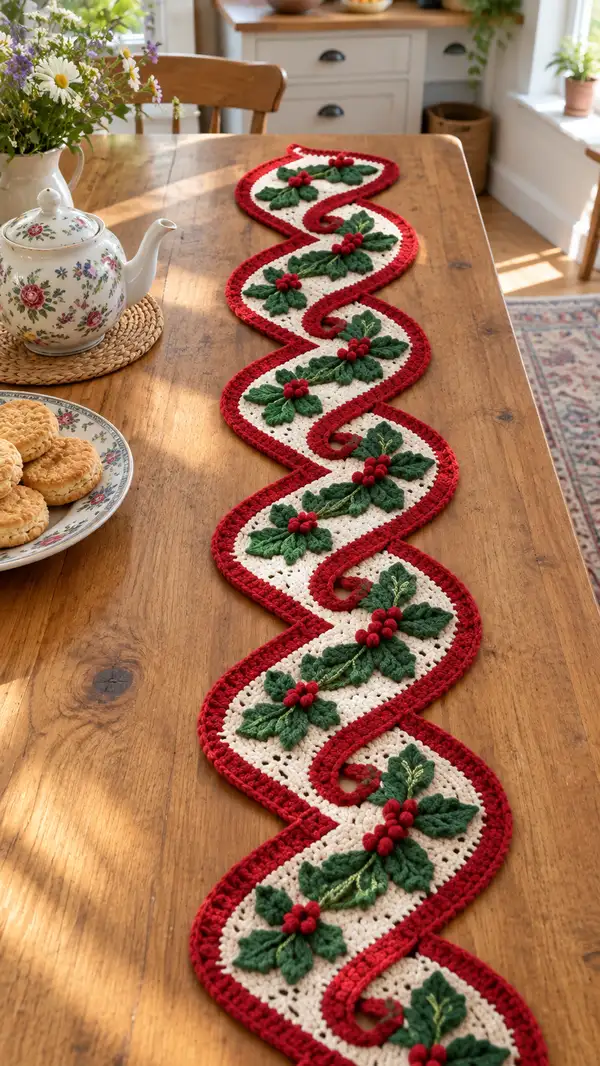
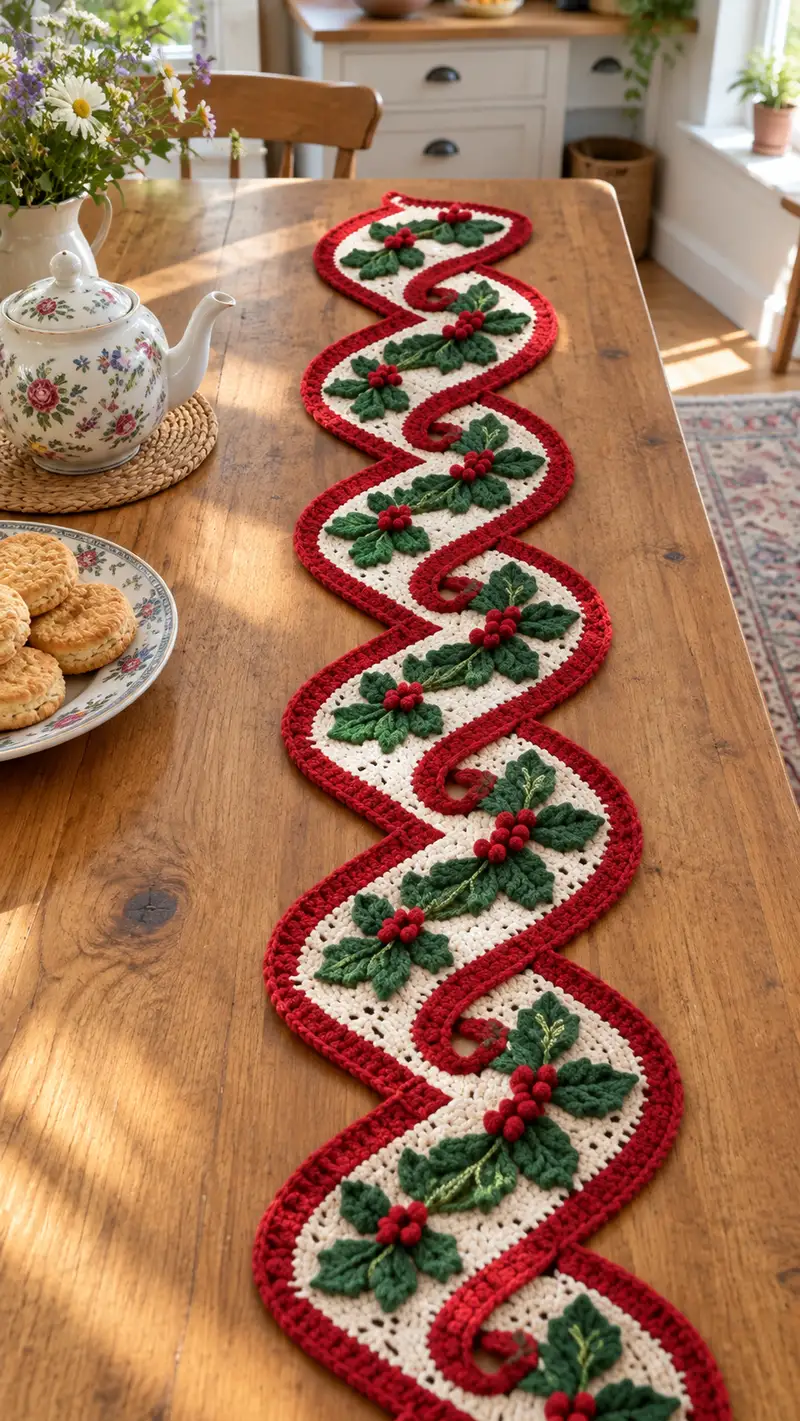
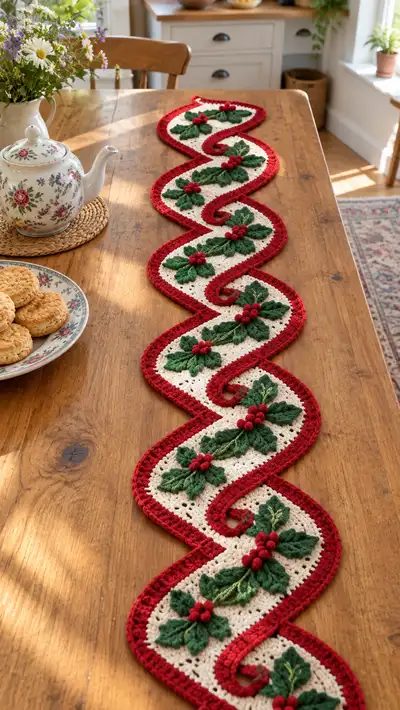
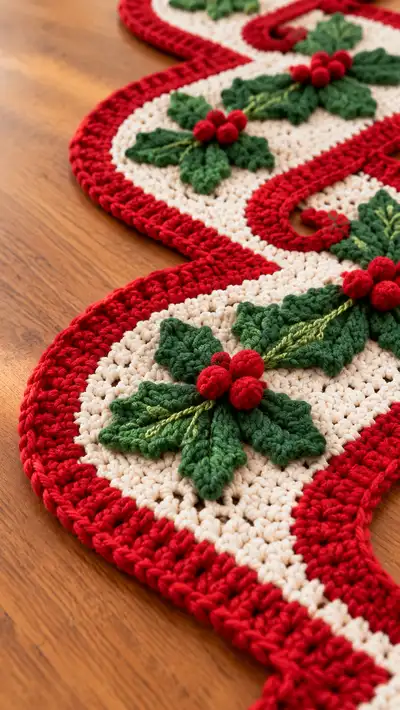
A festive, hand-crocheted Holly Swirl table runner featuring creamy lacy panels, rich red serpentine edging and dimensional holly applique9s with clustered berries. The runner is made from repeated oval modules joined into a flowing swirl, each accented with three sculpted leaves, embroidered veins and plush berries. Finished piece adds a classic holiday touch to a dining table or sideboard and is worked in sturdy worsted-weight yarn for durability. Detailed modular instructions and assembly tips included.
Progress Tracker
0% Complete
— Overview and Tips :
Info :
This runner is built from repeat oval panels (called modules) that are worked flat in joined rounds and joined to one another to create the long swirl. Work each module, block flat, then join modules by slip-stitching or whip-stitching as described later. Make a swatch and adjust hook if necessary to match fabric drape and lacy hole size.
Info :
Gauge is not critical for length but important for consistency between modules. Keep consistent tension and use the same hook throughout main panels. Use stitch markers at start of each round and when joining modules.
— Oval Module (Make 8 modules; each module forms one curve of the runner) :
Info :
Work each module in main cream color. The module is constructed as an elongated oval starting from a small ring and worked in rounds with strategic increases to create a wide central field. This pattern lists 22 rounds for one module; repeat for all modules.
Round 1 :
6 sc in magic ring. (6)
Round 2 :
Inc in each st around. (12)
Round 3 :
(1 sc, inc) x 6. (18)
Round 4 :
(2 sc, inc) x 6. (24)
Round 5 :
(3 sc, inc) x 6. (30)
Info :
From this point we begin to elongate the circle by alternating standard rounds with 'length' rounds that use chains and extra dc clusters on two opposite sides to create an oval shape. Keep a stitch marker at the start of each round.
Round 6 :
1 sc in each st around. (30)
Round 7 :
Change to a 'length' round: *(sc in next 7 sts), 3 dc in next st (creates a corner increase) - repeat from * twice more on opposite side to create two lengthening points. Then sc to end. (36)
Round 8 :
1 sc in each st around. (36)
Round 9 :
(4 sc, inc) x 6. (42)
Info :
Check your oval now. It should be noticeably longer in two opposite directions. If your oval feels too round, next length round will add more dc clusters at the ends to accent elongation.
Round 10 :
Length round: sc in next 9 sts, (3 dc, ch1, 3 dc) in the next st to form a wide corner cluster, sc across to opposite side and work same (3 dc, ch1, 3 dc) in corresponding stitch, sc to end. (48)
Round 11 :
1 sc in each st around. (48)
Round 12 :
(5 sc, inc) x 6. (54)
Info :
If you prefer a looser lacy center like the photo, use an extended dc cluster in the body rows: alternate a round of dc clusters with a round of sc for texture. The pattern here leans toward a sturdy lacy fabric that supports applique9s.
Round 13 :
Dc round: ch2 (counts as first dc), *sk1, (dc, ch1, dc) in next st (creates small V-stitch), sk1, dc in next 3 sts*; repeat from * to * around so V-stitches are evenly distributed. Finish with dc in last stitch. (54)
Round 14 :
1 sc in each st around. (54)
Round 15 :
(6 sc, inc) x 6. (60)
Info :
At this point the module size is near finished. From rounds 16-18 we will slightly taper the edges to create a natural curl where the red border will later snake between modules.
Round 16 :
1 sc in each st around. (60)
Round 17 :
(6 sc, dec) x 6. (54)
Round 18 :
1 sc in each st around. (54)
Round 19 :
(5 sc, dec) x 6. (48)
Info :
Begin smoothing edges and check overall shape frequently. Fasten off leaving a long tail for joining modules later. Weave in ends or leave tails to join later if you prefer whip-stitch assembly.
Round 20 :
Optional decorative cream outer round: 1 sc in each st BLO to create a slight ridge around module. (48)
Round 21 :
Ch1, sl st evenly around to tidy the edge if desired. (48)
Round 22 :
Fasten off. Block module to gentle oval shape matching other modules. Repeat to make total of 8 modules. Each module should measure approximately 9-10 inches long by 4-5 inches wide after blocking (this will vary slightly depending on gauge).
Info :
Blocking tip: Pin to a towel or blocking mat and lightly steam or wet-block. Ensure consistent dimensions for all modules for an even runner. Allow to dry fully before joining.
— Joining Modules into Runner (Make a swirl of 8 modules) :
Info :
You will join modules in a serpentine arrangement so that the red border will weave in an S-shape. Lay out your blocked modules in desired order before joining. The following join uses a slip-stitch seam worked in red or cream depending on desired look; slip-stitch in cream for an invisible join, or in red for a strong matched seam that will later be covered by border.
Round 1 :
Place Module A and Module B with right sides up and align ends where they meet on the long edges. Using cream yarn held together with red tail if you want, begin slip-stitching through the outermost edge stitches of both modules: insert hook through corresponding st on Module A and Module B, yo and sl st. Work sl sts evenly across the joining edge until the seam is smooth and flat. Fasten off. Repeat joins for all modules to create an undulating chain of panels. (join seam variable)
Info :
If your panels have slightly different stitch counts, distribute decreases or extra sl sts evenly to avoid puckering. Alternatively, use a whip-stitch with yarn needle for a more flexible join.
Round 2 :
Once all modules are joined into a single long strip, check the layout for the swirl shape. Adjust joins by slackening or tightening a few sl sts to make the S-shaped curves even. Press or lightly steam to relax seams.
— Inner Cream Field Finishing (worked across entire runner) :
Info :
With the joined runner laid out flat and seams facing up, we'll tidy the inside cream field with one even round of sc and prepare for the red border. Work this round in cream to maintain a uniform inner field.
Round 1 :
Attach cream yarn at any seam junction. Ch1, sc evenly around the entire runner edge, placing 2 sc in corners and at points where modules meet to prevent puckers. Keep stitch count even across repeated sections by placing identical numbers of sc in matching areas. (st count variable depending on runner length)
Info :
When counting stitches around the assembled runner, note the number of sts across the central long edges and the number around each curved end. You'll use these counts to keep border increases even so the outer trim sits flat.
— Red Border (outer bold serpentine edge) :
Info :
The red border is worked in continuous rounds that follow the curves of the joined modules. Work the red border in two or three rows depending on the desired width; the photo shows two rows of thick red double-height stitches. The inner red line is sculpted into an alternating S-curve that nests into the cream inner field; we will create this by building a second red line (cord) and then slip-stitching it onto the surface in a flowing spiral before finishing the outer edge.
Round 1 :
Attach red yarn at a seam junction on the outer edge. Ch1, sc evenly around outer edge, working 2 sc in each place where the runner needs fullness (curved outer points). Work all around. (st count varies)
Round 2 :
Ch2, dc in each st around to create a raised rope-like outer edge. At corners, work (2 dc, ch1, 2 dc) to maintain a rounded shape. (st count varies)
Info :
To create the inner serpentine cord that snakes through the runner, make a long red crocheted cord (foundation chain) the length of the runner plus allowances for curves. This cord will be sewn or slip-stitched onto the cream surface in an S-pattern and anchored by the outer border.
Round 3 :
Make the serpentine cord: ch the number of chains equal to runner length in inches multiplied by 2 (e.g., for a 60" runner chain 120). Work the cord: in 3rd ch from hook, *sc, sc, hdc* across to make a rope of uniform height. Fasten off leaving long tail. Bend this rope into an S-shape on the runner surface and pin in place. Adjust spacing so the cord sits centered between module seams.
Round 4 :
Sew or slip-stitch the cord into place using matching red yarn: insert hook through cord and the cream field beneath in a thin invisible stitch and tack the cord down at approximately every 8-10 stitches (or every 1/2 inch) to hold the S-shape. Curve the inner tails of the cord into little spirals at the narrow inner points by coiling and sewing the coil in place to mimic the spiral seen in the photo. Fasten off securely.
Info :
When you sew the cord into place, leave the outer red border unjoined at first so you can lift the cord slightly and tuck the cord ends under the border for a neat finish. The outer border will hide the seam and anchor the cord permanently.
Round 5 :
Once cord is attached, return to the outer border and work one final round of sc in red around the edge, working around cord ends and closing the gap: sc in each st around, and where cord meets border, work sc tightly over cord to anchor it. At the narrow inner points, work 3 sc into the coil to secure. Fasten off and weave in ends. (st count varies)
— Holly Leaf (Make 21 leaves; 3 leaves per module cluster) :
Info :
Leaves are worked in forest green using a textured, elongated stitch to create veined, sculptural leaves. Each leaf uses 10 rounds/rows and finishes about 2.25-2.75 inches long when worked in worsted yarn with a 4.5 mm hook.
Round 1 :
Ch8, sc in 2nd ch from hook and in next 4 ch, 3 sc in last ch (turn to work on opposite side), sc in next 4 ch, sl st to first sc. (14)
Round 2 :
Ch1, sc in next 3 sts, hdc in next 2 sts, dc in next 2 sts, (tr, dc, tr) in middle top stitch to create a pointed tip, dc in next 2 sts, hdc in next 2 sts, sc in next 3 sts. Sl st to join. (14)
Info :
Leaf shaping is done by working taller stitches towards the tip and shorter stitches toward the base. Keep the tension slightly loose for the taller stitches so the leaf sits flat and not distorted.
Round 3 :
Ch1, work 1 sc in each of the first 3 sts, 1 hdc in next 2 sts, 1 dc in next 2 sts, (2 tr) in tip st, dc in next 2 sts, hdc in next 2 sts, sc in next 3 sts. Sl st to join. (16)
Round 4 :
Ch1, BLO: sc in each st around to create a defined ridge (16)
Round 5 :
Ch1, FLO: sc in each st to add a raised texture on the face of the leaf (16)
Round 6 :
Ch1, dec at base on each side to narrow slightly: (sc2tog at base), sc across until 2 sts from tip, sc2tog toward tip, sl st to join. (14)
Round 7 :
Ch1, sc in each st around. (14)
Round 8 :
Ch1, work one round of tiny picot edge for a serrated look: *sc in next st, ch3, sl st in 3rd ch from hook to form picot*, repeat around spaced every 2-3 sts (approx 6-8 picots). Sl st to join. (14)
Round 9 :
Fasten off leaving a tail for sewing. Block lightly if desired, pinning into a gently curved leaf shape so veins are defined. Repeat to make 21 leaves (3 per module x 7 modules). Adjust the total number of leaves to match the number of modules you made.
Info :
For a more sculpted leaf, add a small amount of starch when blocking. Alternatively, work the leaves using a 4.0mm hook for slightly smaller, denser leaves.
— Holly Berry (Make 21 clusters of 3; each berry approx 8-10 mm) :
Info :
Berries are worked as tiny puff or bobble balls in red. Each berry is worked with a small bobble stitch then stuffed lightly and closed. The pattern below creates a plump 6-stitch bobble berry.
Round 1 :
With red yarn, make magic ring. 6 sc in ring. (6)
Round 2 :
(bobble: yo, insert hook, pull up loop, yo, pull through 2 loops) repeat 3 times in same stitch to make a cluster, yo and pull through all loops, ch1 to close) x 6 to form a clustered round of mini bobbles — alternatively, work 2 rounds of sc for a tiny ball. (6 large bobble clusters or 12 sc)
Round 3 :
Fasten off leaving a long tail. Stuff lightly with a small amount of fiberfill, then use tail to close opening and secure shape. Make 3 berries per cluster and sew them into a small triangular grouping on top of the leaf assembly. Repeat for each module cluster.
Info :
To simplify, you can do 3 sc rounds and then gather to make a berry instead of knocking out a bobble stitch. The bobble gives a more sculpted appearance similar to the photo.
— Embroidered Veins and Accent Stitching :
Info :
Use bright green or gold embroidery yarn for veins. Thread a blunt tapestry needle and make 2-3 long straight stitches from base to near the tip of each leaf to mimic the photo. Add small side veins by making tiny diagonal stitches branching from the center vein. Keep stitches flat and on the surface only; do not pass through to the front if you want subtle texture.
Round 1 :
Start at the base of leaf with a small knot or anchoring stitch at the underside. Bring needle up through base, run a split-stitch or chain-stitch lengthwise up the center to create a continuous vein. Anchor at tip with a tiny knot or secure tail by weaving under a few leaf stitches. Repeat for each leaf.
Info :
Use a contrasting color (pale green or gold) for a subtle highlight as in the photo. The color and stitch type are adjustable to your taste; metallic threads create a festive shimmer.
— Applique9 Assembly (Attach leaves and berries to runner) :
Info :
Each module receives one holly cluster composed of 3 leaves, 3 berries, and center embroidered veins. Arrange leaves in a star or fan pattern: two leaves angled outward and one slightly overlapping on top. Pin into place before sewing.
Round 1 :
Position three leaves in a triangular cluster at the center of each module's oval. The leaves should be evenly spaced and sit flat on the cream background. Pin each leaf so the base meets at a common center. Using matching green yarn and a yarn needle, sew each leaf down along its base with small whip stitches. Bring your needle through the cream field and the leaf base several times to anchor it securely. Repeat for all three leaves.
Round 2 :
Sew three berries in a small triangular cluster directly over where the leaf bases meet. Sew each berry thoroughly with the long tail used to close the berry; sew through the cream field a few times for stability. Add a dab of fabric glue to the underside if desired for extra security. Repeat for each module cluster.
Info :
Check that each cluster lies flat and that the red cord does not obscure the berries. If necessary, trim or adjust berry placement slightly so the berries sit prominently at the cluster center as in the photo.
— Final Finishing Rounds and Surface Detail :
Round 1 :
Once all applique9s are attached, inspect edges and reinforcement points. Work a final round of sl st in red along the inside of the outer red border to tidy and secure any cord ends. Make small adjustments to the outer border by adding a couple sc or dc where needed for balance. Fasten off and weave in all tails. Carefully snip any stray fibers.
Info :
Optional: Work a final decorative picot row in red along the very outer edge (ch3, sl st into first ch to make picot) to echo the look of petals. This is fully optional based on the desired finish in the image.
Round 2 :
Steam-block final assembled runner lightly to set shape. Pin the runner into a slight S-wave if needed so the border sits smoothly. Allow to cool and dry for best finish.
Info :
Care instructions: Hand wash gently in cool water and lay flat to dry to maintain shape; avoid machine washing which can distort the applique9s and corded border.
This Holly Swirl Table Runner brings an elegant festive touch to any table, combining dimensional holly applique9s with a flowing red border that frames the lacy cream panels beautifully. The modular construction makes it easy to customize length, and the textured leaves and plump berries add charming, handcrafted detail. Whether you gift it or keep it for holiday dinners, each stitch celebrates a cozy, handmade season. 🧶🎄✨