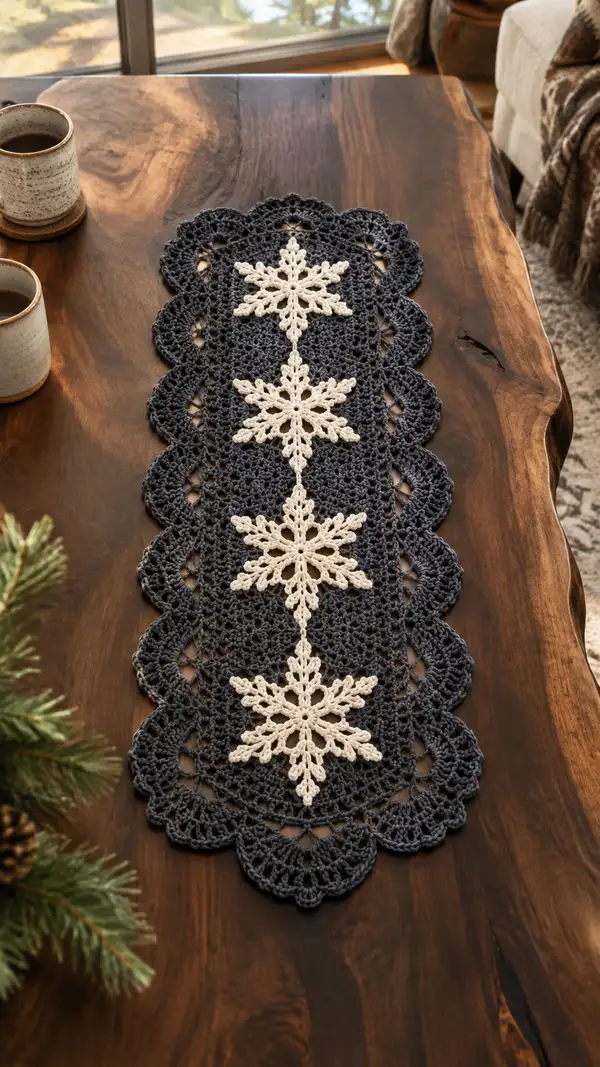
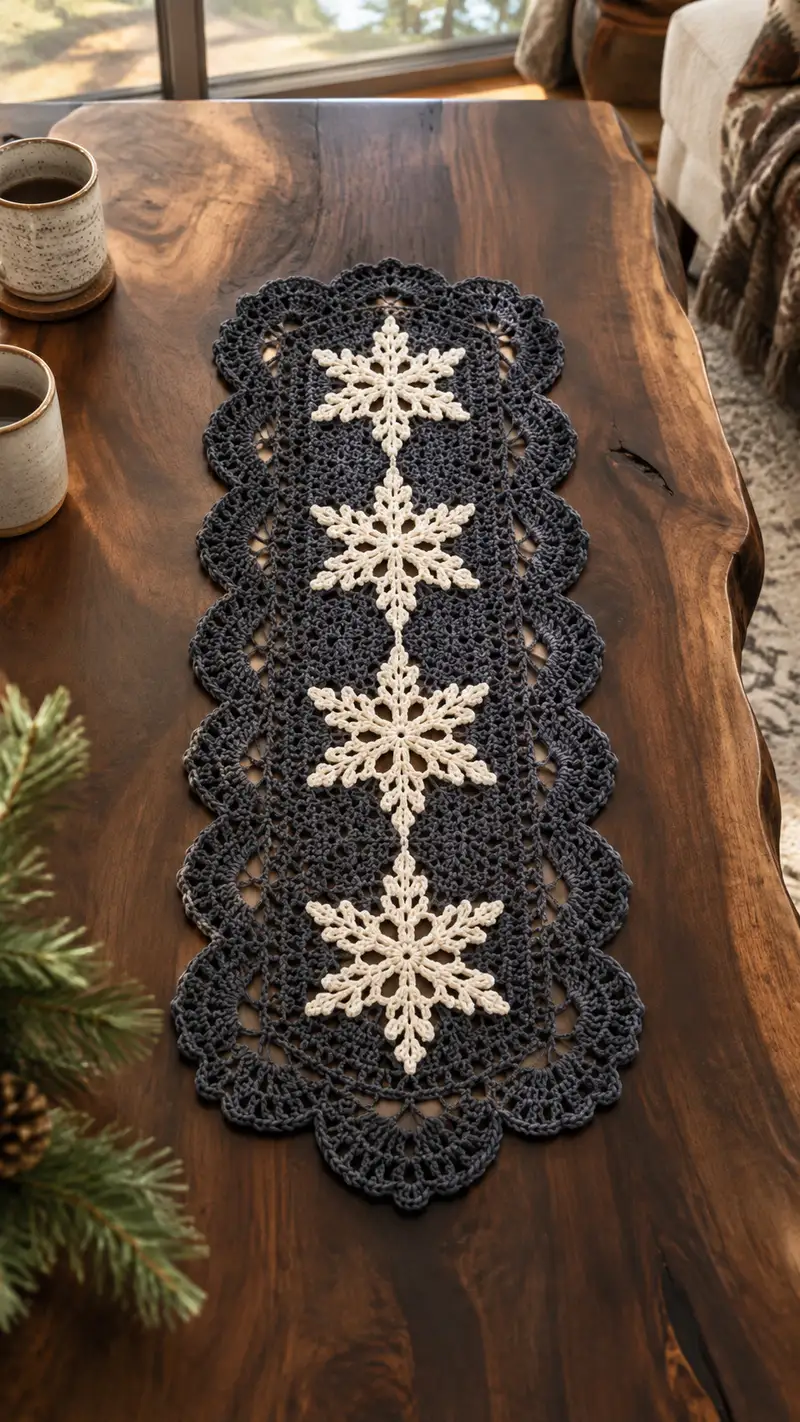
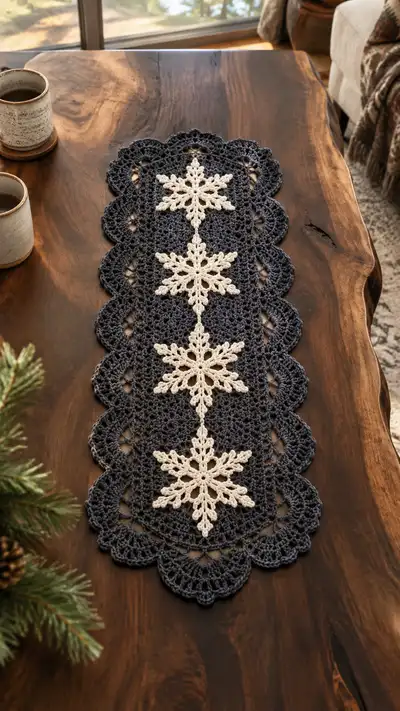
Create an elegant winter table runner featuring cream snowflake motifs set on a deep navy lace background. This pattern uses simple motif construction, lace shell rows and a scalloped border to produce a refined, festive runner that lays beautifully on an entry table or mantel. The contrasting cream snowflakes stitched onto the navy field provide a classic, cozy look perfect for seasonal decor or gifting.
Progress Tracker
0% Complete
— Snowflake Motif (make 4) :
Round 1 :
Make a magic ring. Ch3 (counts as dc), (dc, ch3) × 7 - 8 dc clusters and 8 ch3 spaces in total. Pull ring closed and join with sl st to top of ch3 (8 dc, 8 ch3 sps)
Round 2 :
Ch1, sc in same st, *ch5, sc in next ch3 sp; rep from * around, ending with ch5, join with sl st to first sc (8 sc and 8 ch5 loops)
Info :
Use cream yarn for snowflake motifs. Keep loops even; stretch each ch5 loop flat with fingers before next round to make consistent petals.
Round 3 :
Work into each ch5 loop: *(sc, hdc, 3 dc, hdc, sc) in ch5 loop; sl st into next sc on center ring; rep ×8 (8 petals; total of 8×9 stitches in petals plus center sl sts)
Round 4 :
Ch4 (counts as tr), *(sk 2 dc of petal, tr, ch3, tr) in the center of each petal; sl st to top of ch4 to join. Rep around to form lace points (8 main tr points and 8 ch3 picot arms)
Info :
Adjust tension to keep points sharp; if you want firmer points, use the 3.5mm hook for this round only.
Round 5 :
Ch1, *sc into base of tr point, ch6, sc into next petal base between petals; rep around creating 8 ch6 loops; join with sl st (8 ch6 loops)
Round 6 :
In each ch6 loop work: (sc, hdc, 5 dc, hdc, sc) to make elongated point. Sl st to join. (8 star points; each point contains 9 sts)
Info :
Count petals as points. After this round the motif core is completed — block flat now to set shape before continuing or joining. Use rust-proof pins to pin each point equally wide and flat.
Round 7 :
Switch to lace edging round in cream: ch3 (counts as dc), dc in next 3 sts, *ch3, sk 1, dc cluster (3 dc) across the tip area to create decorative lacy joins between points; rep ×8 around, join (approx 48 dc including joins)
Round 8 :
Ch1, sc in each dc across, and work 3-sc picot at each outermost point (sc, ch3, sl st into first sc of the 3-sc) around to create fine points; join with sl st (approx 48 sc)
Info :
Fasten off leaving a 30-40cm tail for sewing. Weave tail loosely back into the motif until assembly so you can use it to sew motifs to runner without additional yarn color joins if preferred.
Round 9 :
Optional: If you want a slightly more open snowflake center, rejoin and work ch7 loops between main petals and sl st; this adds height. If used, aim for uniform loops (8 ch7 loops)
Info :
Make 4 identical snowflake motifs. Block each motif flat and allow to dry completely. Label them top-to-bottom (1-4) to help placement during assembly.
— Central Connector & Motif Joining :
Round 1 :
With navy yarn, decide whether you want to sew motifs on top of an existing runner or join motifs as you build the runner. We will construct a central connector chain to line up motifs vertically. Start with ch7, join with sl st to form a small ring. (creates initial ring)
Round 2 :
Ch2 (counts as hdc), work 16 hdc into ring evenly; join with sl st to first hdc (16 hdc)
Info :
This small connector forms the anchor between snowflakes. You will make three long connector strips (between four snowflakes there are three inter-motif connectors) of the length specified below to space motifs evenly.
Round 3 :
Ch1, sc in each st around (16 sc). Sl st to join. Fasten off and weave in ends or keep tail for later joining. Make three of these connector rings for spacing, or chain multiple rings joined by a chain ladder for desired spacing.
Info :
Spacing recommendation: Allow 12–14 cm (4.5–5.5 in) between centers of adjacent snowflakes for the look in the photo. Adjust connector chain length and number of shell rows in the runner body accordingly.
— Runner Body (central navy panel) :
Foundation :
Using navy yarn and 4.0mm hook, make a foundation chain of 128 chains (this yields a narrow runner width suited to small console/coffee tables). This chain is the base for shell rows that form the rectangular panel between scalloped edges.
Info :
Measure your table and adjust foundation chain to widen or narrow the runner. For a wider runner add shell multiples in groups of 6 stitches (add 6 chains for each additional shell).
Round 1 :
Row 1: Ch3 (counts as dc), dc in 4th ch from hook and in each ch across. Turn. (126 dc)
Round 2 :
Ch1, sc in first st, *skip 2 dc, (5 dc in next dc) shell, skip 2 dc, sc in next dc; rep across ending with sc in last dc; turn. (Shells across; number of shells = 126/6 = 21 shells)
Info :
Work the shell pattern so shells line up vertically from row to row. Use stitch markers to mark the center of the foundation so you can later align and sew snowflakes to the exact center.
Round 3 :
Ch3, dc in each dc across and in the top of each sc (work into spaces as necessary), maintaining even tension (126 dc)
Round 4 :
Ch1, sc in first st, *skip 2 dc, (5 dc in next dc), skip 2 dc, sc in next dc; rep across. (21 shells)
Round 5 :
Ch3, dc in each dc across. (126 dc)
Info :
Repeat Rounds 2-5 until the central panel reaches the desired spacing length between snowflake centers. For the sample runner, work shell rows until panel measures approximately 10-12 cm between motif centers when measured along the center line. Expect to work 6-10 repeats depending on your tension and final spacing.
Round 6-25 :
Repeat Rounds 2-5 (shell row repeat) for a total of 10 repeats (this will produce a central strip long enough to accommodate three connector regions between four motifs). Maintain stitch counts: 126 dc on even plain rows and 21 shells on shell rows.
Info :
Place markers at the center of the runner panel at the locations where each snowflake will be positioned (calculate even spacing along the length: divide total length into quarters to center motifs). Use pins to temporarily place blocked snowflakes to confirm spacing before sewing.
Round 26 :
Ch1, sc evenly around the entire rectangular panel: work 1 sc in each dc and 3 sc in each shell valley (to soften edges). This creates a tidy edge for joining the scalloped border. (approx 128 sc plus extra in shell valleys)
Info :
Fasten off leaving a long tail if you prefer to seam on the scalloped border later. Keep piece flat and do not over-stretch when pinning for blocking.
— Scalloped Border (make 2 long sides and 2 short ends as continuous rounds) :
Round 1 :
Rejoin navy at a corner. Ch1, sc evenly along edge to first shell valley. (Work approximations: aim for an even distribution; approx 32 sc along each long side corner-to-corner)
Round 2 :
*In same space: (sc, ch3, 3 dc, ch3, sc) to form a scallop; skip 3 sc, slip to next sc; rep across long side creating a scallop every 6-7 sc. Make 10 scallops per long side approx. Continue onto short end and create 5 scallops there. Join around entire rectangle for continuous border.
Info :
When creating scallops, keep the scallop width consistent. Place pins at each outer scallop edge during blocking to maintain symmetry. If your stitch counts differ slightly, adjust the number of skipped sc between scallops to space them evenly.
Round 3 :
Ch1, work 3 sc into center of each scallop to reinforce, then *ch5, sl st into center of next scallop, rep across. This creates a decorative openwork row that visually frames the shells from the inside.
Round 4 :
Ch3, dc across the body of each scallop tip, working 7 dc across each scallop tip to make a fuller rounded edge; join. (Approx 7 dc per scallop)
Info :
Repeat Rounds 2-4 for an additional layered scallop if you want a thicker border like in the photo (two-tier scallop). The photo shows a wide scallop with internal lace, so work 2 passes for similar depth.
Round 5 :
Optional decorative picot edge: Ch1, sc in first dc, *dc, ch3, sl st into ch3 to create picots across outer scallop points; rep around to form tiny rounded points at the outermost crest of each scallop. Sl st and fasten off.
Info :
If your runner is narrower or wider, change the number of scallops by adjusting the foundation chain (increase/decrease by shell multiples). Keep scallops aligned with shell rows for a coherent motif flow.
— Snowflake Placement & Sewing :
Info :
Lay the blocked central navy panel flat on a table. Using the previously measured center line and motif spacing markings, position the 4 blocked snowflake motifs evenly down the middle. Use plenty of pins to hold each motif in place and check for even spacing before sewing.
Step :
Use the long tail from each cream motif or matching navy to sew motifs to panel with a mattress stitch or whip stitch through the back loops of the navy shell row only, catching the motif center ring (not the delicate outer points) to avoid distorting points. Sew at 8 evenly spaced points around the motif ring; tie off and weave ends securely.
Info :
For a flush look like the photo, catch the motif at the back of each petal near the base so the snowflake sits slightly raised above the background, creating visual dimension. Avoid sewing through outer points to preserve shape.
Step :
For extra security, work a few small slip-stitch joins in navy from motif inner ring to the runner center line for each motif, spaced at top and bottom. This keeps motifs centered during laundering and handling.
— Decorative Center Spine (optional chain-lace between snowflakes) :
Round 1 :
With cream or navy, create a decorative vertical chain-lace down the center by joining yarn to the central ring area between two motifs. Ch7, sl st into the center ring of next motif to create a small ornamental connector. Repeat between each motif using matching or contrasting color to achieve the pictured vertical decorative spine.
Info :
This thin vertical chain is decorative only and should be sewn or tacked at intervals so it does not snag. The photo shows cream spine linking snowflakes vertically; use cream if you prefer that visual line.
— Final Joining & Finishing Touches :
Step :
Weave in all remaining tails using a tapestry needle. Turn runner over and tie a small knot inside the lace at the seam points; trim tails close but leave a short tail tucked in for future repair if necessary.
Info :
When joining snowflakes, ensure the decorative spine is not tighter than the fabric—it should rest gently on the surface. If spine pulls, remove and re-sew with slightly longer chain lengths.
Round 1 :
Press/block entire runner: pin flat on blocking mat, stretch gently so scallops are evenly spaced. Pin each scallop point in place using rust-proof pins. For the snowflakes, pin each point with a single pin near the tip to retain sharpness.
Round 2 :
Spritz lightly with water or use a light starch for crisp points; allow to dry completely. Remove pins and reshape if necessary.
Info :
For long-term use, consider placing a non-slip runner pad underneath to protect the lace and keep the runner from shifting on wood furniture.
— Notes on Gauge, Adjustments and Variations :
Info :
Gauge is not critical for overall function but will affect finished size and number of shells. If your stitch size is larger, reduce foundation chain by multiples of 6. If smaller, add shells in multiples of 6. Use a swatch of 10 shells × 6 rows to estimate final width per shell before committing to full runner.
Info :
To change scale, use fingering or sport weight yarn with a smaller hook for a delicate runner, or use bulky yarn with larger hooks for a chunky table accent. Snowflake detail will change dramatically with yarn weight — consider switching to 3.5mm hook for more defined snowflake points when using heavier yarn.
Info :
Care instructions: hand wash cold and lay flat or machine wash on gentle cycle in a mesh bag; reshape while damp. Avoid tumble drying to maintain lace shape and crispness of snowflake points.
Finishing this runner feels like wrapping your table in winter elegance — every cream snowflake and navy scallop comes together into a cozy, handmade statement. The pattern balances lace and structure so it looks seasonal yet timeless. I love how blocking reveals crisp points that catch the light and make the runner truly special. 🧶✨ Lay it down, step back, and enjoy the calm handmade beauty it brings to your home. ❄️