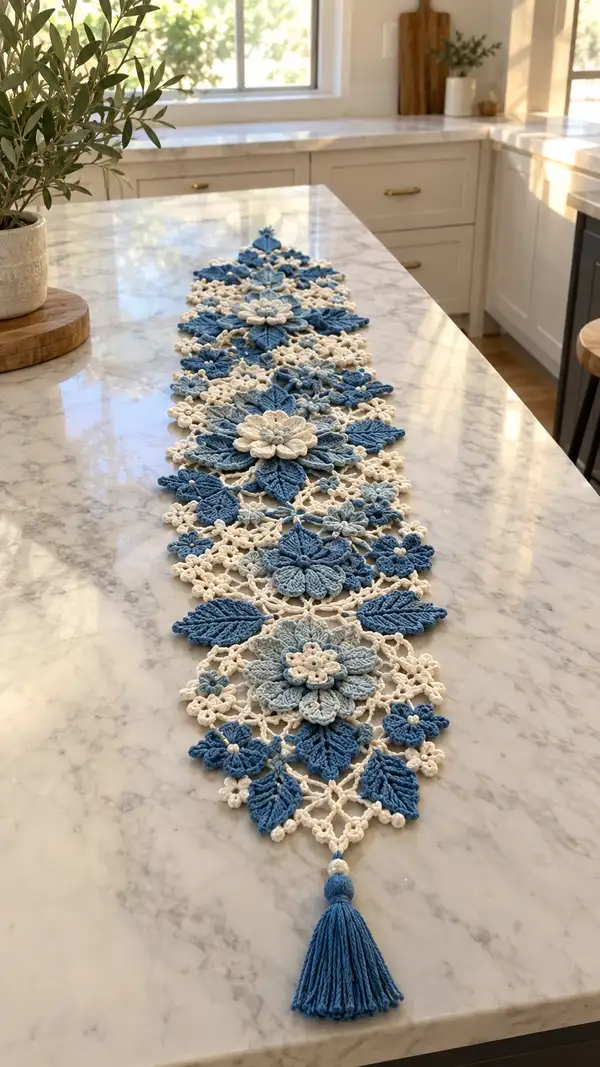
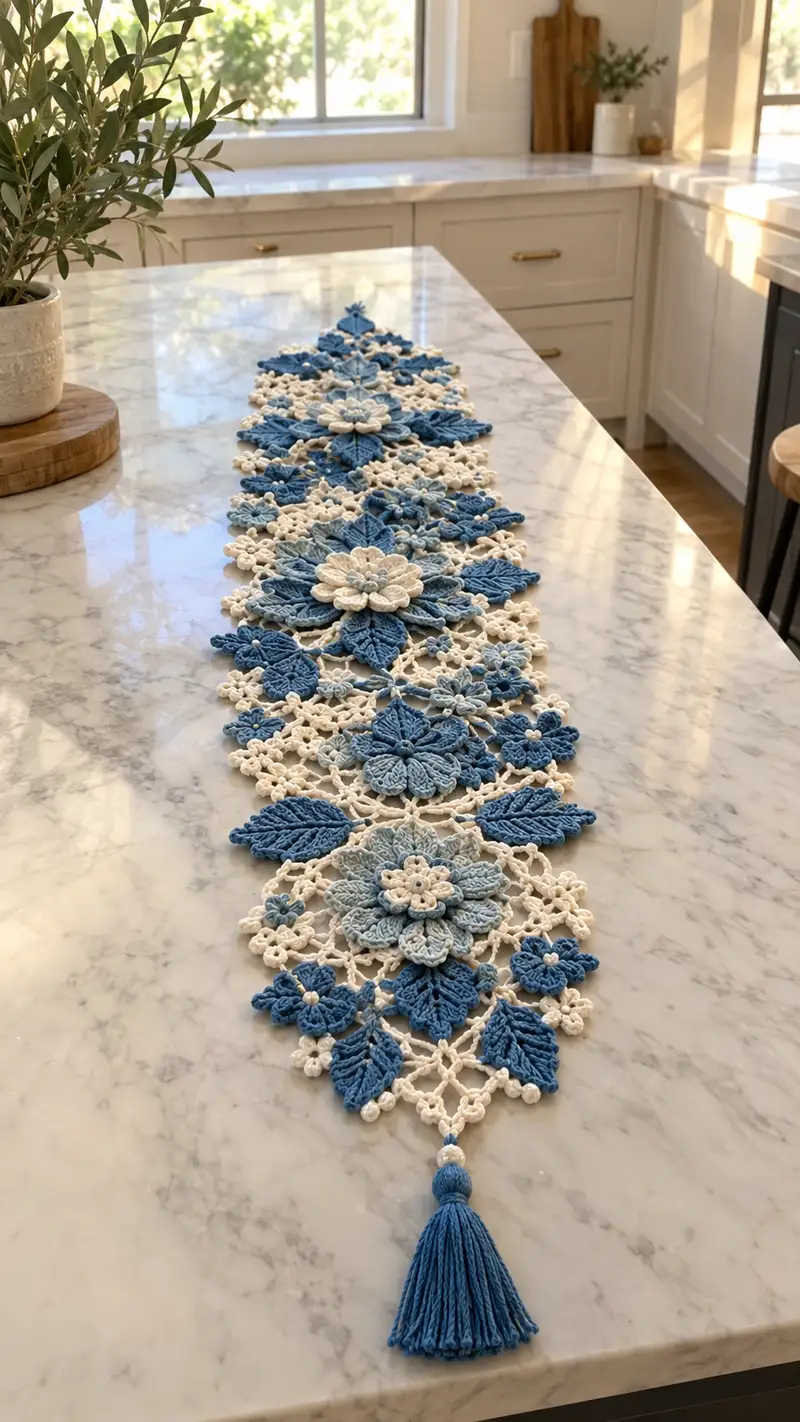
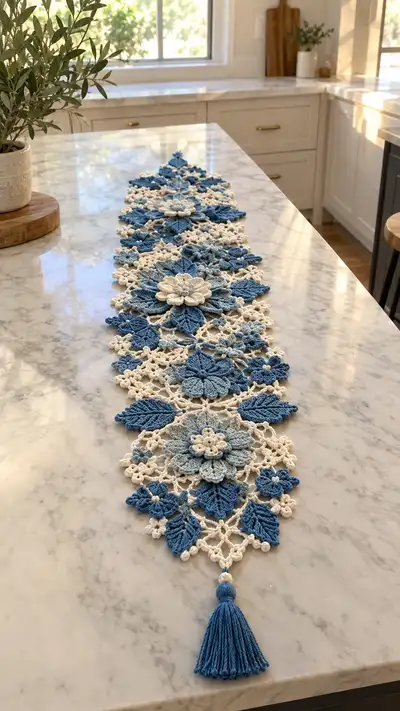
Create a stunning, heirloom-quality lace table runner composed of layered floral motifs, sculpted leaves, and delicate connecting mesh. This pattern uses two complementary blues and a creamy white to produce dimensional flowers and leaves that sit beautifully on a counter or dining table. Worked in motif units and joined-as-you-go, the runner finishes with a decorative tassel for a refined, finished look.
Progress Tracker
0% Complete
— Notes & Gauge :
Info :
This pattern is worked from motif units. Gauge is not critical but creates consistent motif size. Using worsted weight cotton and a 3.5mm hook the large flower motif measures approximately 12-13cm (4.5-5in) across when blocked. If your motif is larger or smaller, adjust hook to achieve desired scale.
Info :
Work tightly on base rounds to keep mesh neat. Use slightly smaller hook for puff petals and a slightly larger hook for airy connecting chains if you prefer an open lace look. Block all motifs flat before joining for best results.
— Large Layered Flower Motif (Make 6) :
Round 1 :
Make a magic ring, ch1, 6 sc into ring. Pull tight (6)
Round 2 :
Inc in each st around (12)
Round 3 :
(1 sc, inc) x6 (18)
Round 4 :
(2 sc, inc) x6 (24)
Round 5 :
1 sc in each st around (24)
Info :
Use deep blue for rounds 1-12 of this motif if making it like the photo. Fasten and weave color tail toward center for later applique if changing colors.
Round 6 :
(3 sc, inc) x6 (30)
Round 7 :
1 sc in each st around (30)
Round 8 :
*Ch3, skip 1 st, sc in next st* repeat around to form 15 chain-spaces; sl st to first sc to join (15 ch3-spaces)
Info :
These ch-spaces form the base for layered petals. Count carefully; there should be 15 petal bases evenly spaced.
Round 9 :
*In each ch3-space: (sc, ch2, 7-dc cluster, ch2, sc)*; sl st to join (15 petals)
Round 10 :
1 sc in top of each petal cluster and in each sc between petals (45 sc total approximately — maintain visual balance)
Round 11 :
Working in BLO of current round: *(sc, ch1, puff5, ch1, sc) in next petal top* around to create raised secondary petals (15 raised petals)
Info :
Puff5 = yarn over, insert hook into stitch, yarn over and pull up loop; repeat 5 times total so 6 loops on hook, yarn over and pull through all loops; ch1 to secure. Use consistent tension for uniform puff height.
Round 12 :
Rotate motif slightly; work small sc rounds around puff petals: *ch2, sc around base between puffs* to stabilize (approx 45 sts positioned to form a ring)
Round 13 :
Switch to Light Blue (Info: change to light blue now) - 1 sc in each st around (45)
Round 14 :
Form secondary petals: *in each 3rd st: (sc, ch2, 5-dc cluster, ch2, sc)* around creating 15 medium petals positioned between large ones
Round 15 :
1 sc in each st around to secure medium petals (approx 60 sc — counts will vary slightly by cluster width)
Info :
If you prefer a three-tone center, change back to Cream for a tiny raised center next. Optionally stitch a small bead onto the very center for visual pop; attach with yarn tail and secure with a few stitches.
Round 16 :
Switch to Cream for top center. In round: *sc3tog over each petal pair to slightly gather the center, ch1 between groups*; this forms a small cupped center (15 gathers)
Round 17 :
In each gather: ch2, work 6 sc into chain-space to form a tiny central cup; sl st to next gather (15 tiny cup petals)
Round 18 :
Finishing round: sc around entire motif edge following natural shape, working 2 sc in deeper spaces to keep flat shape. Fasten off leaving long tail for sewing (approx 90-100 sc total distributed)
Info :
Block each large flower flat and pin petals into natural 3D shape. Do not flatten puff petals completely; allow slight lift. Make 6 of these motifs for the runner center row.
— Medium Rosette Motif (Make 8) :
Round 1 :
mr, ch1, 6 sc in ring (6)
Round 2 :
Inc in each st (12)
Round 3 :
(1 sc, inc) x6 (18)
Round 4 :
*ch4, sl st in next st* around to create 9 ch4-spaces; sl st to first (9 spaces)
Info :
These ch4-spaces create decorative rings for petals. Place centers opposite large motif petals for harmonious join layout.
Round 5 :
In each ch4-space: (sc, ch2, 5-dc cluster, ch2, sc) — 9 medium petals
Round 6 :
1 sc in each st and around petal bases to form a compact rosette (approx 54 sc around)
Round 7 :
Working FLO: *(sc, ch1, puff3, ch1, sc)* into each top of previous petals to add slight texture (9 puff petals)
Round 8 :
Sc around entire rosette, adding picots in alternating spaces for a delicate edge (approx 60 sts). Fasten off leaving long tail for joining.
Info :
Make 8 medium rosettes. These are used between large flowers and small flowers to create alternating rhythm in the runner strip.
— Small Blossom Cluster (Make 12) :
Round 1 :
Ch 5, join with sl st to form small ring, ch1, 8 sc into ring (8)
Round 2 :
*(sc, ch2) in each stitch around* sl st to join forming 8 ch2-spaces
Round 3 :
In each ch2-space work (sl st, puff3, sl st) to create tiny clustered blossoms (8 small clusters)
Round 4 :
Sc around forming small rounded disk; add bead or single sc in center of each puff for contrast. Fasten off leaving long tail for joining.
Info :
These tiny blossoms fill gaps and create the airy lace that sits around larger motifs. Make 12 or more depending on layout choice.
— Sculpted Leaf Motif (Make 18) :
Round 1 :
Ch6, sc in 2nd ch from hook, hdc, dc, tr, dc, hdc, sc to form a tapered leaf on chain (8 stitches total along chain)
Round 2 :
Working along opposite side of chain: sc in base, hdc in next, dc in next 2, (tr, dtr) in tip to create point, dc in next 2, hdc, sc; sl st to base to join (leaf shape)
Round 3 :
BLO around leaf base: *(ch2, sc) across base spaces* to create a sturdy seam for attaching (approx 10 sc)
Round 4 :
In cream color (Info: Change to cream for veins if using two-tones) work central vein: *fpdc over two stitches along one side and bpdc on the other side* to sculpt the leaf surface.
Info :
Leaves are worked in deep blue primarily and highlighted with cream veins. Make 18 leaves for spacing between motifs; you can increase count to fill wider runners.
— Connector Lace Mesh (Join-as-you-go) :
Info :
The lace mesh is made as you join motifs. For each motif placement, you will use chains and small crochet bridges to connect to adjacent motif anchors (typically at specific petal tips and outer picot points). This section outlines the standard bridge repeat used across the runner.
Bridge Pattern Start :
At designated anchor point on first motif, attach cream yarn with sl st, ch8, sc in anchor point of adjacent motif, sl st back into next anchor to create an 8-chain bridge. Repeat for all anchor pairs between motifs as per layout diagram.
Info :
Standard bridge: ch8, sc in target anchor, ch3, sc in next target anchor creates a diamond shape when repeated. Use stitch markers to mark anchor points before joining to keep spacing consistent.
Bridge Repeat :
ch8, sl st into motif A picot, ch3, sl st into motif B picot, ch8, sl st into next motif A picot forming diamond; continue around to form open net. For a more open mesh use ch10; for tighter use ch6.
Info :
Always tension the joining chains gently to avoid pulling the motifs out of shape. Pin motifs in place before joining for best results. Join rows one motif at a time following center alignment.
— Joining Sequence (Layout & Assembly) :
Info :
Layout: Runner is composed of one central column of alternating large flower, medium rosette, large flower, medium rosette, etc. Small blossoms and leaves are placed along either side and connected with lace mesh. Pin all motifs in final arrangement on blocking board before join-as-you-go connections.
Join Step 1 :
Block and dry all motifs. Place two adjacent motifs (e.g., large flower and medium rosette). Identify corresponding anchor points (outermost petal tips or picot points). With cream yarn attached to motif A, sc into anchor, ch8, sl st into anchor on motif B; continue around following Bridge Pattern Start to create four bridge connections per adjacent pair (or more depending on motif spacing).
Info :
Use temporary pins and blocking wires to hold motifs flat while joining. For aesthetic balance, connect each large flower to two adjacent small motifs and two leaves per side.
Join Step 2 :
When joining three or more motifs at a single nexus (example: two small blossoms join to a medium rosette), work ch5 loops into each existing ch loop and sl st into each neighbor so the mesh forms a small star; repeat across runner.
Info :
If a join appears twisted, gently re-block the two motifs and re-attach the bridge with slightly different tension. Keep uniform chain length across entire runner.
— Border & Edge Motifs :
Edge Round 1 :
With cream yarn, around outer exposed edges of the assembled runner work: *sc evenly along edge, add picot (ch3 sl st to base) every 6 sc* to create a delicate edged frame. Keep counts even so runner lies flat (typical count depends on assembled width; aim for consistent spacing).
Info :
Edge stabilization: If the assembled runner pulls at joins, work a second round of sc in BLO to create a firm frame before picot round.
Edge Round 2 :
Optional decorative scallop: *5 dc in one st, sl st in next 2 sc* repeat around to create scalloped border. If scallops are too large, reduce to 3 dc clusters for a subtler edge.
Info :
Work the final border with the runner pinned flat. Use matching tension as the motif joins to avoid warps. Weave in ends neatly on the backside where possible.
— Tassel & End Finishing (Make 2) :
Round 1 :
To make a full tassel approximately 10-12cm long, wind deep blue yarn around a 10-12cm cardboard 60-80 times depending on desired fullness. Tie top loop with a short yarn tail and remove from card.
Round 2 :
Wrap the head tightly with additional yarn 8-10 times to form the tidy head; secure tail and weave inside tassel body. Trim ends evenly.
Round 3 :
Attach a single cream bead over the knot and secure with cream yarn by passing yarn through bead hole and anchoring to center of the final runner point. Make two tassels and attach to both ends of runner.
Info :
Alternatively make looped tassels or braid yarn for a tassel-top cord. Keep tassel weight light so runner lays flat.
— Finishing Touches :
Info :
Weave in all long tails to the back and secure with several small stitches. Trim any uneven edges and lightly steam-block the entire runner on low heat (if yarn is cotton, pin to shape and damp-block) to settle joins and relax the lace.
Info :
Optional: Add small clear craft glue dots on internal bridge knots to secure joins for pieces that will be laundered frequently. Always test glue on a scrap first to ensure no discoloration.
Info :
Care: Hand wash gently in cool water with mild detergent, reshape and lay flat to dry. Iron on low with a cloth if necessary to maintain crisp lace.
Finishing this runner is so rewarding — the layered petals, sculpted leaves, and soft lace bridges create a beautiful centerpiece that elevates any table. Each motif is like a small work of art, and joining them together feels like composing a garden in yarn. I hope you enjoy blocking, joining, and placing your finished runner proudly on your table. Happy stitching and share a photo when you’re done! 🌿🧶