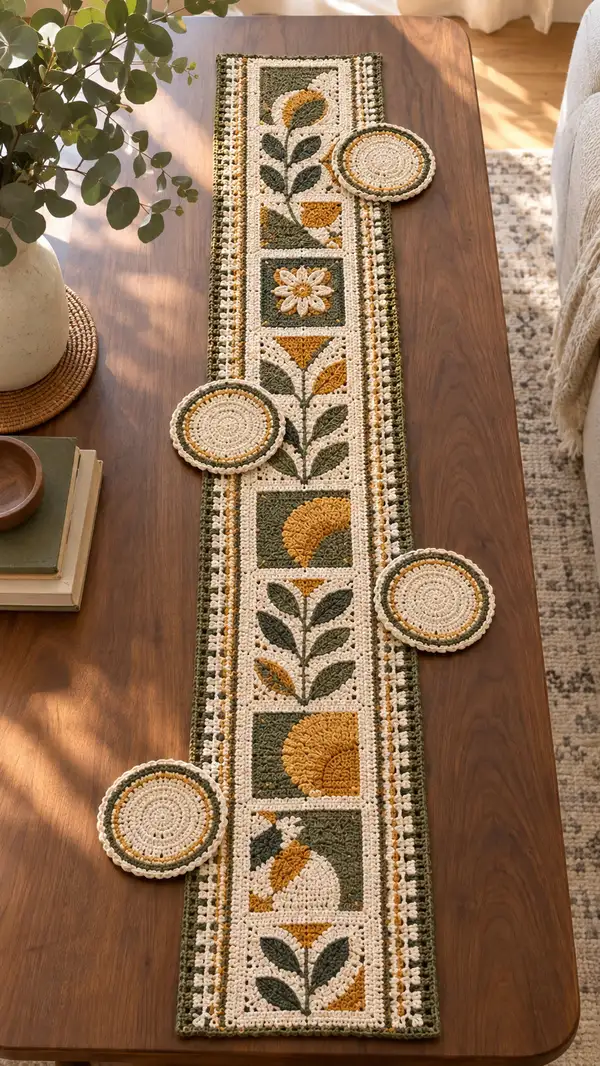
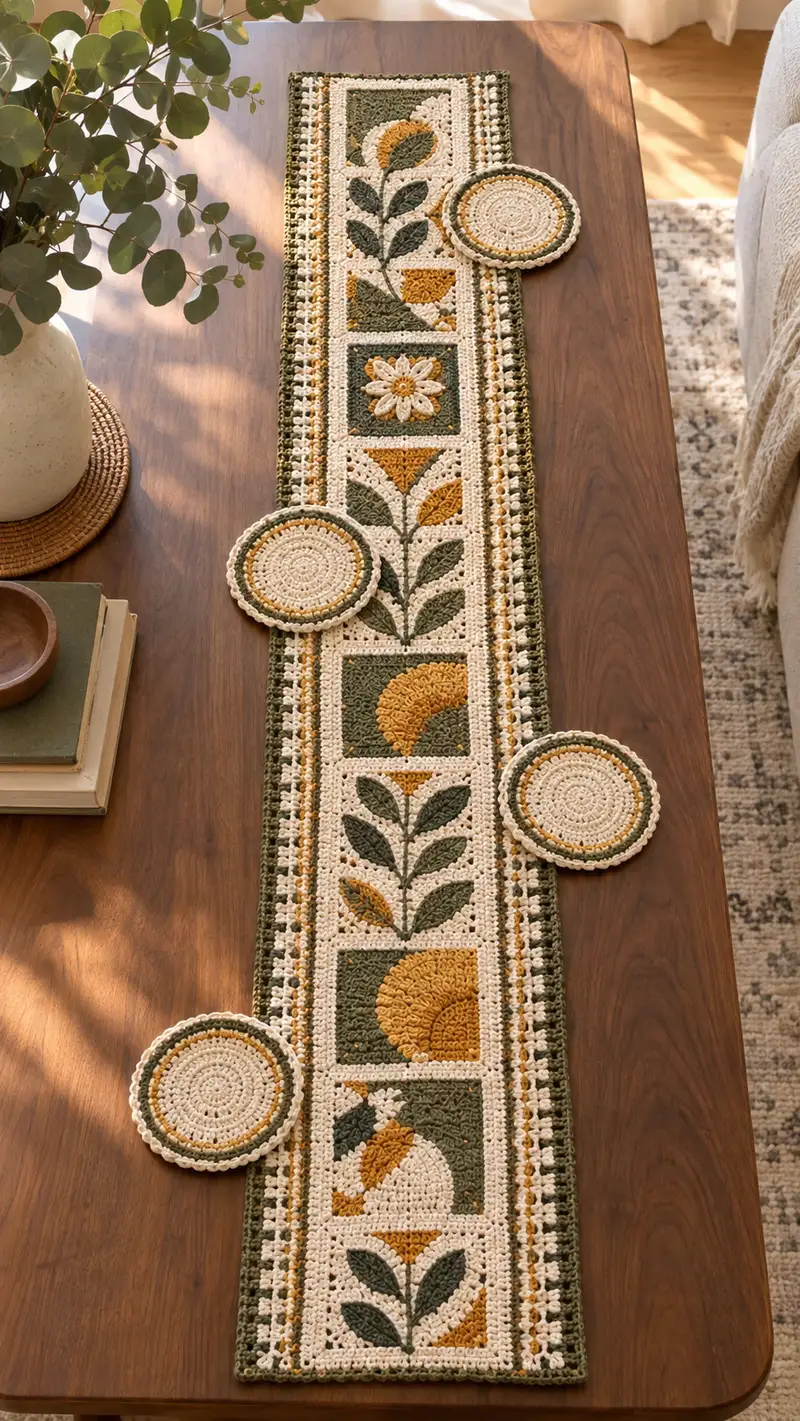
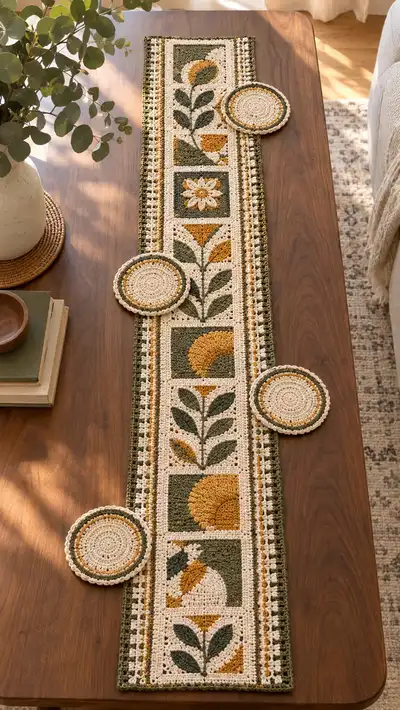
Create a long, vintage-inspired table runner featuring framed floral motif squares in cream, olive green and golden mustard. This pattern includes textured leaves, flower appliqu�9s, semicircle motifs and a coordinated set of round coasters. Clear step-by-step instructions walk you through making motif panels, joining them with decorative sashing, and working a layered scalloped border for a polished finish.
Progress Tracker
0% Complete
— Finished Size & Gauge :
Info :
Finished runner measures approximately 10" wide x 56" long when made with the listed yarn and 4.0mm hook. Gauge for a framed motif square (from corner to corner) should be 10cm (4") square. Adjust yarn/hook to match gauge.
— Overview & Construction :
Info :
This runner is constructed from 6 framed motif squares worked flat and joined end-to-end with narrow sashing. Each motif square contains a textured design (stem, flower or semicircle). You will make motif base panels, add appliqu�9 elements (leaves, petals, textured semicircles), then assemble panels and work the border. Coasters are worked separately with concentric rounds.
— Abbreviations & Technique Notes :
Info :
Use tight gauge for clear texture. For color changes, change on last yarn-over of the stitch before the new color stitch so the new color is pulled through to start the next stitch cleanly. We recommend carrying unused yarn behind work for small floats (max 5-6 sts) or fastening off and rejoining for longer distances. Block squares before joining for a neat finish.
— Framed Motif Square (Make 6) :
Round 1 :
Ch 4, join in first ch to form ring, ch1 does not count as st. Work 12 sc into ring. (12)
Round 2 :
Inc in each st around (2 sc in each) (24)
Round 3 :
(1 sc, inc) x 12 (36)
Round 4 :
(2 sc, inc) x 12 (48)
Info :
These first 4 rounds create a small circular center which will increase to a square-ish panel by later rounds. Keep stitches evenly spaced and do not over-tighten increases; they will be balanced by later shaping rounds.
Round 5 :
1 sc in each st around (48)
Round 6 :
1 sc in each st around (48)
Round 7 :
(6 sc, inc) x 6 (54)
Round 8 :
1 sc in each st around (54)
Info :
At this stage the panel is nearing the diameter needed; subsequent rounds will square the shape by adding strategic corner increases and BLO texture rows to form the frame. If you prefer, you can lightly press the panel to help it square.
Round 9 :
Work 14 sc, ch4, sk 4 sts, 1 sc in each of next 8 sts, ch4, sk4, 1 sc in each of next 8 sts, ch4, sk4, 1 sc in each of next 8 sts (54)
Round 10 :
1 sc in each sc and 3 sc in each ch-4 corner sp to begin forming corners (total 60)
Round 11 :
1 sc around maintaining 3 sc in corner spaces to square further (60)
Round 12 :
1 sc in next 4 sts, ch3, sk 3, 1 sc in next 10, ch3, sk3, 1 sc in next 10, ch3, sk3, 1 sc in next 10, 1 sc in remaining sts (60)
Info :
By rounds 9-12 you are creating the framed window for your motif. Corner chain spaces keep corners open for a nice rectangular/square frame. Count carefully to ensure even placement of corner spaces. This will be the canvas for appliqu�9s.
Round 13 :
1 sc in each st and 3 sc in each ch-3 corner (72)
Round 14 :
1 sc around (72)
Round 15 :
Change to Cream (frame color) if not already. 1 sc in each st BLO for 2 rounds to create a subtle ridge: Round15 1 sc in each st BLO (72)
Round 16 :
1 sc in each st BLO (72)
Info :
This BLO band forms the inner frame ridge. Use stitch markers to note the center of each side so the appliqu�9s (stem or semicircle) are centered later. Mark RS and WS so the runner orientation remains consistent.
Round 17 :
1 sc in each st around (72)
Round 18 :
Work 1 sc in next 5 sts, ch3, sk3, 1 sc in next 10, ch3, sk3, 1 sc in next 10, ch3, sk3, 1 sc in next 10, 1 sc in remaining sts (72)
Round 19 :
1 sc in each st and 3 sc in each ch-3 corner (84)
Info :
Now you have a framed square of approximately 4" (10cm). If making a different number of motifs, change counts proportionally. This framed square is the base for surface embroidery or appliqu�9 elements worked on top or sewn in later.
Round 20 :
1 sc around (84)
Round 21 :
Change to background color (Cream) if needed. 1 sc in each st (84)
Round 22 :
Work 2 rounds of hdc evenly to build slightly raised frame: Round22 1 hdc in each st (84)
Round 23 :
1 hdc in each st (84)
Info :
From round 24 onward you'll create the central motif by working into surface loops or sewing appliqu�9s. Decide which motif (stem, flower, semicircle) you will do on each square. The pattern repeats 3 motif types across the runner.
— Stem & Leaf Panel (worked on 2 of the framed squares) :
Info :
This section describes surface-worked stem with leaves worked as flat appliqu�9 pieces sewn onto the framed square. Work leaves separately and stitch to panel. Leaf counts and shaping are given below.
Leaf 1 (Make 6 leaves per panel) Round 1 :
With Olive: MR, ch1, 6 sc in ring (6)
Round 2 :
(1 sc, inc) x 3 (9)
Round 3 :
(2 sc, inc) x 3 (12)
Round 4 :
(3 sc, inc) x 3 (15)
Round 5 :
Work 2 rows 1 sc in each st to create an elongated leaf: Round5 1 sc in each st (15)
Round 6 :
1 sc in each st (15)
Round 7 :
Shape tip: (1 sc, dec) x 5 (10)
Round 8 :
Dec x5 (5) Fasten off leaving long tail for sewing
Info :
Sew leaf edges flat with yarn needle to create a slightly cupped shape. Make leaves mirror-image for balanced placement on stem by rotating before sewing. Make 6 leaves per stem panel and position as shown in photo: three leaves on each side along a central stalk.
Stem (worked directly on panel) Round 1 :
With Olive: On RS of framed panel, find center vertical line. From bottom third of panel: attach yarn with sl st, ch1, sc in same sp, ch2, sc in next sp to begin a chain-like stalk up the panel (work 18 sc spaced with ch1 spaces to reach top third). Fasten off.
Info :
Round 2 :
Using tapestry sewing or surface crochet, whip stitch or surface sc along the ch-chain stalk to build a raised stem. Use mattress stitch feel: insert needle under each stitch, pull snug to create defined raised line. Place leaves symmetrically and sew their bases to stem with whip stitch using tail yarn.
Placement Info :
Space leaf pairs approximately 12-14 sts apart vertically (measure against panel counts). Pin leaves in place before sewing, ensuring the top leaf ends about 6-8 sts from the top frame edge.
— Flower Panel (Make 2) :
Info :
Flower formed of a textured center and layered petals appliqu�9 sewn to the framed panel. Work center as a short round of popcorns, then petal ring worked separately and sewn on.
Center Round 1 :
With Golden Mustard: MR, ch1, 8 sc in ring (8)
Round 2 :
Inc in each st (16)
Round 3 :
(2 sc, inc) x 5 then 1 sc in remaining sts (21)
Round 4 :
Popcorn round: *dc4 in next st, remove hook, reinsert into first dc of that group, pull loop through to close popcorn, sl st into next st* rep around to create 7 popcorn clusters. Fasten off center leaving long tail for sewing.
Petal Round 1 (Make 8 petals) :
With Cream: MR, ch1, 6 sc in ring (6)
Petal Round 2 :
(1 hdc, 1 dc, 1 hdc) all in same st forming a petal to give height. Sl st to next st, repeat to make 8 petals. Fasten off leaving tail to sew petals around center.
Info :
Sew center to panel first in the center of the framed square (approx center of panel). Then arrange petals around center overlapping slightly. Secure petals with small stitches through petal bases and center edge. Adjust petal orientation to create a flower slightly raised from the background.
— Textured Semicircle Panel (Make 2) :
Info :
This motif fills a lower-left or lower-right quadrant of the framed panel: a textured semicircle of Golden Mustard with a dense popcorn-like stitch creating a sunburst texture. Work semicircle separately and sew into square window.
Semicircle Round 1 :
With Golden Mustard: MR, ch1, 10 sc in ring (10)
Round 3 :
(1 sc, inc) x 10 (30)
Round 4 :
Work only half of round 3 on either side to make a semicircle: In foundation round, join to form a flat semicircle by working 15 sc across the curve edge and then turning to work back across for a second row of 15 sc (15)
Round 5 :
Popcorn round: *dc5 in next st, remove hook, reinsert into first dc of that group, pull loop through to close popcorn, sl st in next st* across 15 sts to create dense textured surface. Fasten off leaving long tail for sewing into panel corner.
Info :
Sew semicircle into corner quadrant of framed panel aligning curvature with inner frame ridge. Tack several points along the straight flat edge so the semicircle sits flush inside the frame. If needed, stretch framed window slightly to better accept semicircle shape before final sewing.
— Finishing Framed Squares :
Round 1 :
After sewing appliqu�9s, work 1 sc around the framed inner edge to tidy: 1 sc in each st around, placing 3 sc in corner spaces to maintain square (total variable; expect ~84 sts). Fasten off and weave ends.
Info :
Round 2 :
Block each square lightly to square dimensions (use pins and steam or wet blocking). Ensure each square measures approx 4" by 4" (10cm square). Allow to dry fully before joining.
— Joining Squares with Sashing (Join-as-You-Go Option) :
Info :
You will join six motif squares end-to-end using narrow sashing strips and join-as-you-go slip stitch method or whip stitch. The runner in photo is 6 motifs long arranged as Stem, Semicircle, Flower, Stem, Semicircle, Flower repeating colors.
Sashing Strip Round 1 :
With Cream: ch 6, sc in 2nd ch from hook and across (5 sc). Work 1 sc in side of each motif square: attach strip to first square by slip-stitching along the edge spacing evenly; repeat to connect to next square. When sashing reaches full length, fasten off.
Join Method A (Join-as-you-go with sl st) :
On RS of square A, align square B. Insert hook through corresponding st on square A and then through loop of square B and sl st to join. Continue sl st across edge, working 3 sl st in corner ch-3 spaces to maintain a neat corner. Repeat for each seam.
Join Method B (Whip Stitch) :
With matching yarn and tapestry needle, hold squares RS together and whip stitch through corresponding loops by inserting needle under both loops of the stitch on each square and pulling snug. Make stitches 2-3mm apart for secure join.
Info :
When joining many squares, work on a flat surface and pin each seam before sewing to ensure alignment. Keep seam tension even: too tight pulls squares out of shape, too loose creates gaps.
— Long Decorative Center Panel (Optional Banding) :
Round 1 :
After joining all six motif squares, measure runner length. With Olive: work a narrow band along each long side by attaching yarn at one corner and working 1 row of sc evenly along the side edge (approx 6-8 sts per motif side, total depends on joined edge). Fasten off and repeat on opposite side.
Round 2 :
Change to Cream: work 1 row of hdc in each st for subtle raised detail. Fasten off.
Info :
These bands create the olive stripes seen in the photo that bookend the motif columns. They also provide a base for the multiple-row border to attach to later.
— Main Border (Work around entire joined runner) :
Round 1 :
With Cream: Attach yarn to one corner, ch1, work 1 sc evenly around runner edge working 3 sc in each corner ch-3 space. Count sts to ensure even borders; aim for continuous even spacing. (Varies - expect approx 320-360 sts total around edge)
Round 2 :
1 sc in each st around (same count as previous round)
Round 3 :
Change to Olive: 1 sc in each st BLO to create a framed ridge (same count)
Round 4 :
Change to Golden Mustard: *ch2, sk1, sc in next st* repeat around to create a dotted accent row. Work sl st to join last repeat. Fasten off.
Info :
Accent rows of different colors create the layered stripe effect. Carry colors up the edge neatly or change yarns and weave in ends. Use small bobbins to manage color changes cleanly.
Round 5 :
With Cream: 1 sc in each st for 2 rounds to create a firm base for scalloped edge (2 rounds)
Round 6 :
1 sc in each st (same count)
Round 7 :
Scallop round: *sk 1, 7 dc in next st, sk 1, sl st in next st* repeat around to form scallops. Place 7 dc in evenly spaced points along the long edges and 7 dc clusters centered on corners for continuity. Fasten off.
Info :
Try the scallop on a sample to ensure it lays flat. If scallops ripple, reduce to 6 dc per scallop or add an extra sc between scallops. For a tighter scallop, use smaller hook for final round.
— Decorative Raised Bead Row (Optional Detail) :
Round 1 :
With Olive: Attach yarn at long edge, ch1, *sc in next 4 sts, bobble in next st* repeat across long edges. Bobble: (dc5 in same st, drop loop, insert hook in first dc, pull loop through to close bobble, sl st next st). Fasten off.
Info :
This beaded row mimics the alternating raised dots in the photo. Keep bobbles small and evenly spaced. If desired, substitute popcorn stitch for bobbles.
— Coasters (Make 4) :
Round 1 :
With Cream: MR, ch1, 8 sc in ring (8)
Round 3 :
(1 sc, inc) x 8 (24)
Round 4 :
1 sc in each st around (24)
Round 5 :
Change to Olive: 1 sc around (24)
Round 6 :
Change to Golden Mustard: 1 sc around (24)
Round 7 :
Change to Cream: *sc2tog, 3 sc* repeat around to start slight scallop texture (24)
Round 8 :
Round of reverse single crochet (crab stitch) in Cream to create a firm decorative edge: 1 rev sc in each st around (24)
Round 9 :
Optional scallop: *sk 1, 5 dc in next st, sk1, sl st* repeat around to make subtle scallops. Fasten off and weave ends.
Info :
Coasters echo runner colors and edging motifs. Work coaster rounds tightly so they lay flat. If coasters curl, block them or add an extra round of sc to flatten.
— Alternative Join & Border Variation (If you prefer a wider border) :
Round 1 :
After joining squares, work a two-row filet lattice in Cream: *dc, ch2, sk2* across long edges to create airy linear stripes, then work 2 rows sc to stabilize before scalloped edge.
Info :
This gives the runner a lighter, lacy look suitable for spring tables. Remember to block gently after this more open border to keep it flat.
— Weaving & Finishing :
Info :
Weave in all tails thoroughly, following the direction of stitches and passing the tail under 6-8 stitches before trimming. After weaving, steam block or wet block the whole runner to smooth seams and set scallops. Press with a towel between runner and iron if steaming directly to avoid flattening raised textures.
Info :
Optional: Attach felt pads to underside of scallop points to protect tabletop. If runner will be washed, use gentle cycle and reshape while damp; always air dry flat.
Completing this runner brings together small framed motifs into an elegant, cohesive table statement. I love how the textured elements create subtle depth while the color palette feels warm and timeless. Display it on a dining table or console to add handmade charm and cozy detail to your home. 🧶🌼 Whether you make a single runner or a set with coasters, each piece feels like a special little artwork. Happy crocheting and enjoy every stitch! 🎨