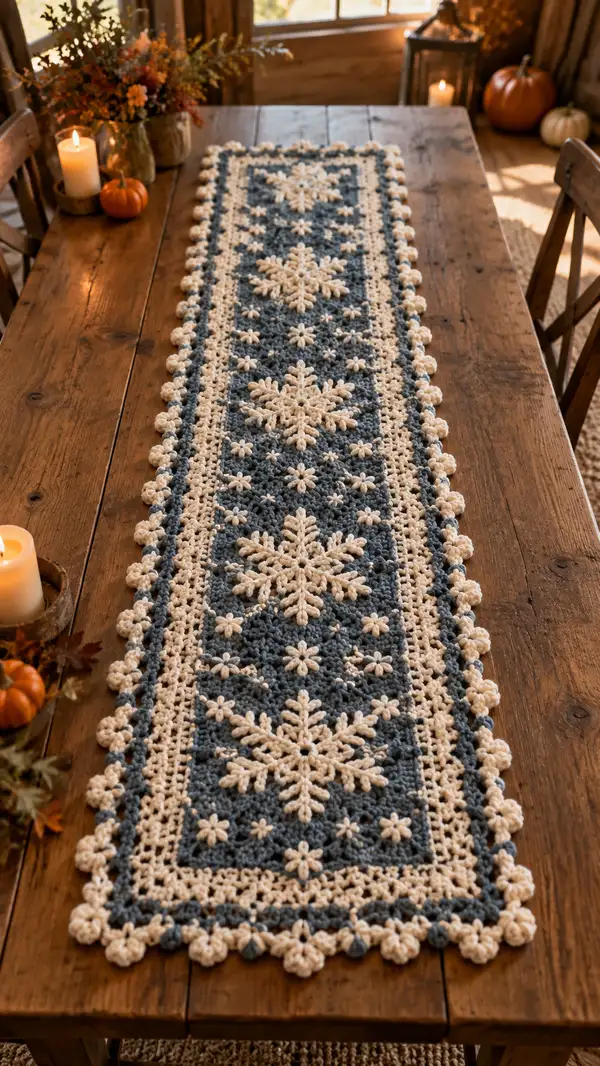
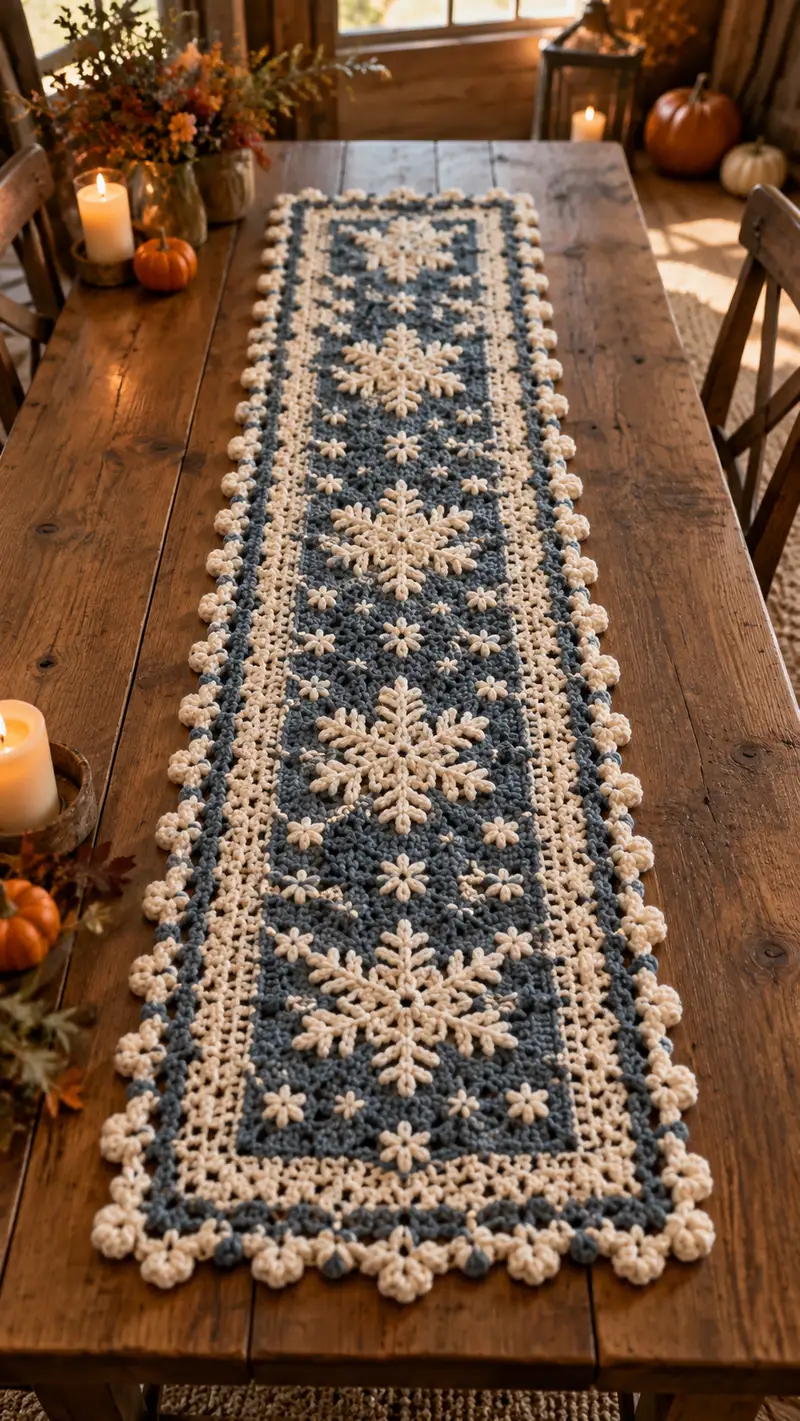
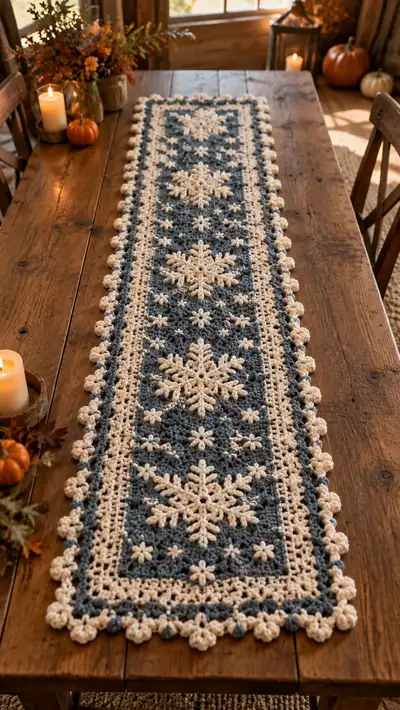
A long, elegant table runner featuring raised cream snowflakes on a slate-blue textured background with a charming bobble edge. This pattern recreates the layered, dimensional snowflake motifs and stacked star clusters seen in the photo, plus a decorative bobble/puff border. Worked in separate motifs and joined into a long rectangular runner, it is perfect for seasonal centerpieces or winter table decor.
Progress Tracker
0% Complete
— Overview :
Info :
This pattern is modular: you will make (3) large Snowflake Motifs in cream, (many) Small Daisy/Star Motifs in cream to fill gaps, and a long Slate Blue Background Panel worked in rows. After motifs are blocked, you will applique and/or stitch motifs onto the panel, then work a cream frame and a bobble scallop edge around the whole runner. Measurements listed are approximate; feel free to lengthen or shorten by adding background rows or snowflake repeats.
Finished Size :
Approximately 60" long x 10.5" wide (152 cm x 27 cm). To change size, add/subtract background rows or additional repeat modules.
— Snowflake Motif (Make 3) :
Info :
Work Snowflake entirely in cream yarn. Use 4.0mm or 5.0mm hook depending on tension; the sample is worked with 5.0mm to match background. Block each motif flat before joining. This snowflake is worked in rounds with puff clusters, chain-spoke arms and rounded tips for a dimensional appearance. Each round's stitch count is verified below.
Round 1 :
Magic ring, ch1, 8 sc into magic ring. Pull tight. (8)
Round 2 :
Inc in each st around (work 2 sc in each st). (16)
Round 3 :
(1 sc, inc) x 8 (24)
Round 4 :
(2 sc, inc) x 8 (32)
Round 5 :
1 sc in each st around (32)
Info :
These first rounds create a stable center for the snowflake 'hub'. Keep tension even; do not over-tighten the magic ring as it needs to lie flat.
Round 6 :
Ch3 (counts as tr), *skip 3 sts, dc in next st, ch3, sl st in same st; rep from * around to create 8 chain-spoke anchor points. After final repeat, join with sl st to top of ch3. (8 spokes)
Round 7 :
Work into each spoke anchor: sl st into base, ch2, (3 dc, ch1, 3 dc) into ch-3 loop, ch2, sl st to next anchor. This creates 8 petal-like clusters around the center. (space-based repeat)
Round 8 :
Ch1, sc in same stitch, *ch4, sc in top of next petal center (the space between petal clusters); rep around to create airy spaces for arm placement. (8 sc + 8 ch-4 loops)
Info :
Round 8 establishes the spots where each snowflake arm will begin. Count your ch-loops to confirm 8 even anchor points.
Round 9 :
Work each arm separately: join yarn at one ch-4 loop, ch1, sc in loop, ch2, make 5 elongated puffs along the arm: *yarn over, insert hook, pull up loop (do this 5 times in same spot) until 11 loops on hook, yarn over and draw through all loops, ch1 to close puff; ch2, sc in same loop to anchor; ch3 to reach next anchor. Repeat for each arm. (Arms formed - no global stitch count change)
Round 10 :
Turn each puff cluster into a segmented arm tip: working into each puff group, sc around the base, then ch4, sl st to create small tip loops; after finishing all arms, join. (visual shaping round)
Round 11 :
Ch1, sc in each base stitch around center and in small tip loops to tidy edges; where arms meet center, add an extra sc to fill gaps. (approx 40-44 sc depending on placement)
Info :
Use stitch markers to mark the base of each arm so that subsequent decorative rounds align evenly. Adjust counts slightly if necessary to keep arms evenly spaced.
Round 12 :
Form decorative raised ridges along arms: fpdc around the arm base stitches to create definition; work sc across center round between arms. (texture round; same approximate stitch count)
Round 13 :
Make secondary arm branches: at midpoint of each arm, attach yarn, ch1, sc, then make 3 small cluster picots outward: (ch3, 3 dc in same stitch, sl st back) x 3 along the arm, then sc to rejoin to main arm base. Repeat for each of 8 arms. (creases and tiny branches added)
Round 14 :
Ch1, sc evenly around full motif, working into base of all picot clusters and arm tips; ensure smoothed edges. (approx 56-64 sc depending on clusters)
Info :
At this point your snowflake will be quite dimensional. Block flat by pinning points and gently misting so it will lay even when appliqued. Do not over-stretch which may widen center.
Round 15 :
Decorative puff round: *into each space between arms, make a 3-loop puff (yarn over, insert hook, pull up loop 3 times, yarn over and draw through all loops), ch2, sl st into next space; rep around to create ring of puffs. (8 puffs)
Round 16 :
Ch1, sc around joining puff bases to tidy edges; where puffs occur, place 2 sc to stabilize. (approx 72 sc)
Round 17 :
Work tiny raised veins on each arm: using surface slip stitches and small sc clusters, create 3 short lines radiating down each arm from tip to center. These are worked as surface embellishment; no global stitch count change.
Round 18 :
Edge finishing round: ch1, sc around entire motif, working 3 sc in each arm tip for rounded points and 2 sc in center arches to maintain circular shape. After completing round, fasten off and weave in ends. (final edge tidy)
Info :
After Round 18, block motif carefully. Repeat to make 3 identical Snowflake Motifs. If making more than 3, space them equally along the background panel later. Use blocking pins to flatten arm points and ensure all three motifs match in diameter.
— Small Daisy/Star Motif (Make many for filler) :
Round 1 :
Magic ring, ch1, 6 sc into ring. (6)
Round 2 :
(1 sc, inc) x 3 (9)
Round 3 :
Ch3, *(sc, ch3) into next st; rep around to form small 6 ch-loops, join with sl st. (6 loops)
Round 4 :
Into each ch-3 loop: (5 dc, sl st into base) to make petals. Join and fasten off. Make as many as needed to fill spaces (the sample uses 18 small daisies scattered between large snowflakes).
Info :
These small motifs are quick and can be stitched to the panel as you work, or made in a batch and appliqued later. Make extras in cream for a dense look or reduce number for a more airy design.
— Slate Blue Background Panel (Work 1 long rectangle) :
Info :
Work the background as a series of repeating row patterns to create a textured field for appliqued motifs. The sample runner is made by creating a central strip that will receive three large snowflakes spaced evenly. The central field is 82 foundation chains to achieve a finished width of approximately 10.5" using 5.0mm hook and worsted yarn. Adjust width by adding multiples of 6 chains plus 2 for edge turning if you want a different finished width.
Foundation Row :
Ch82 (or desired width multiple plus 2), sc in 2nd ch from hook and across to end, turn. (81 sc)
Row 1 :
Ch3 (counts as dc), dc in each st across, turn. (81 dc)
Row 2 :
Ch1, sc in first st, *ch2, skip 1 st, sc in next st; rep across to create airy mesh; end with sc in last st. Turn. (approx pattern-based)
Row 3 :
Ch3, dc in each ch-space and st across, turn. This fills the mesh to produce a subtle texture. (81 dc equivalent)
Row 4 :
Ch1, sc across in each st, placing sc in top of dc and in ch-2 spaces for a stable row. Turn. (81 sc)
Info :
These first 4 rows form one textured repeat. The sample uses alternating textured repeats to produce a dense field that supports motifs without sagging. Use a stitch marker at row ends to keep track of repeats for length planning.
Row 5-8 :
Repeat Rows 1-4 (one textured repeat). (Each 4-row repeat maintains width: 81 sts)
Info :
Plan placement of three snowflake motifs: divide your final panel length into three equal zones with spacing between motifs of approximately 3" to 4". The sample places a snowflake at the center of each zone, with small daisy motifs filling spaces around them.
Row 9-32 :
Continue working textured repeats (Rows 1-4) until you reach the first motif anchor row. The sample works 32 rows before anchoring the first snowflake; adjust this number to space motifs evenly depending on your target length. (panel row count variable)
Info :
At the row where a snowflake will be centered, mark the center stitch with a removable stitch marker. The snowflake center should align roughly to the central column of the panel; use counting to center exactly (center stitch = 41st stitch on ch82 foundation).
Row 33 :
Work the textured repeat but slow down and leave long tails in the center area where you will attach the snowflake. This makes applique easier. Continue textured repeats until you have placed all three snowflakes along the panel requiring approximately 96 total rows for a 60" runner in the sample. Exact row number will vary with gauge.
Info :
If you prefer, you may crochet three separate square/rectangular panels to receive motifs and seam them together; the sample is made as one continuous long strip to avoid seams.
Row 34-96 :
Continue textured repeat until panel reaches final desired length with space for 3 snowflakes and filler daisies between them. Fasten off after final row and weave in ends. Block the panel flat before appliqueing motifs to ensure alignment. (panel complete)
— Applique and Placement :
Info :
Position the three blocked Snowflake Motifs evenly along the central axis of the background panel. Use pins to place motifs then baste using long, loose whip stitches with cream yarn. After basting and confirming placement, stitch more securely with invisible ladder stitch or small whip stitches along the motif base. Use additional small Daisy motifs to fill spaces between arms and along outer areas for consistent visual rhythm.
Step :
Place the center of the first snowflake over the first marked center stitch around Row 32-34 area. Temporarily pin through the arms in 8 places to hold while you stitch. Repeat for second and third snowflakes.
Info :
Make sure to anchor the motif through the central hub first (securing it to the main panel), then tack each arm tip with 2-3 small stitches to prevent lifting. If your yarn is fuzzy, use smaller stitches to hide join threads.
— Cream Frame Rows (Add contrast frame) :
Round 1 :
Join cream yarn at one corner. Ch1, sc evenly along panel edge working 1 sc in the side of each row across the long edge and 1 sc in each end row across the short width to create a neat framed edge all around. Continue around to start point; join with sl st. (count: approx 2x panel perimeter stitches)
Round 2 :
Ch2 (counts as hdc), *dc in next st, hdc in next; rep around to create a slightly raised frame. Join with sl st. (texture built)
Info :
The cream frame gives a defined border that visually separates the slate field from the bobble scallop edge. If you want a double frame, add an extra sc or hdc round before bobble edge.
— Bobble Scallop Edge (Final edge, cream - working around entire runner) :
Round 1 :
With cream yarn, attach at any corner. Ch1, sc in first 3 sts to create a neat corner base, *ch3, skip 2 sts, (popcorn) in next st: make 5 dc in same st, remove hook, insert hook through first dc, pull loop through to close popcorn, ch3, skip 2 sts, sc in next 3 sts; rep around to form bobble shells along long edges and short ends. Join with sl st. (bobble shells spaced along perimeter)
Info :
Popcorn or bobble can vary depending on personal preference: 5 dc pop = large bobble, 3 dc pop = medium bobble. The sample uses 5-dc bobbles for a pronounced scallop finish.
Round 2 :
Ch1, sc around, placing 3 sc across the base where the popcorns meet to lock them in place and 1 sc in each plain st to tidy. Join with sl st and fasten off. Weave in ends. (edge secured)
Round 3 :
Optional: Work a decorative picot trim between bobbles: join yarn behind popcorns, ch5, sl st at base to make small loops that accentuate scallops. Work around and join. Fasten off and weave in ends.
Info :
Block the completed runner again after edging to straighten scallops. If needed, apply gentle starch or spray starch to bobble edge to keep scallops upright for a display table runner.
— Finishing Touches :
Info :
Weave in all ends on the wrong side of the runner using tapestry needle. Trim any stray fibers. If your runner will see heavy use, consider adding a thin fabric backing to protect crochet stitches and the tabletop surface; sew backing to the reverse side with matching thread.
Info :
For storing, fold gently or roll with acid-free tissue paper. If used as a centerpiece, occasionally reblock the runner to maintain straight edges and crisp snowflake shapes.
Finishing this runner is so satisfying — the raised cream snowflakes pop against the slate blue field and the bobble edge gives it a hand-finished, vintage look. The modular construction lets you work on small sections at a time and assemble with confidence. Display it proudly through winter months or give it as a heartfelt, handmade gift. 🧶❄️🌿