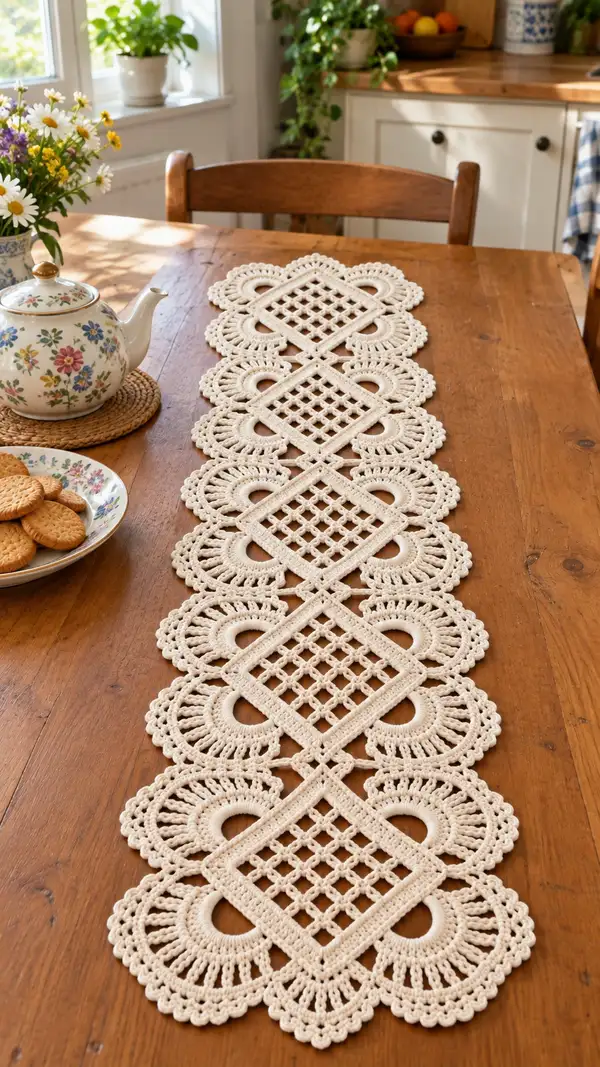
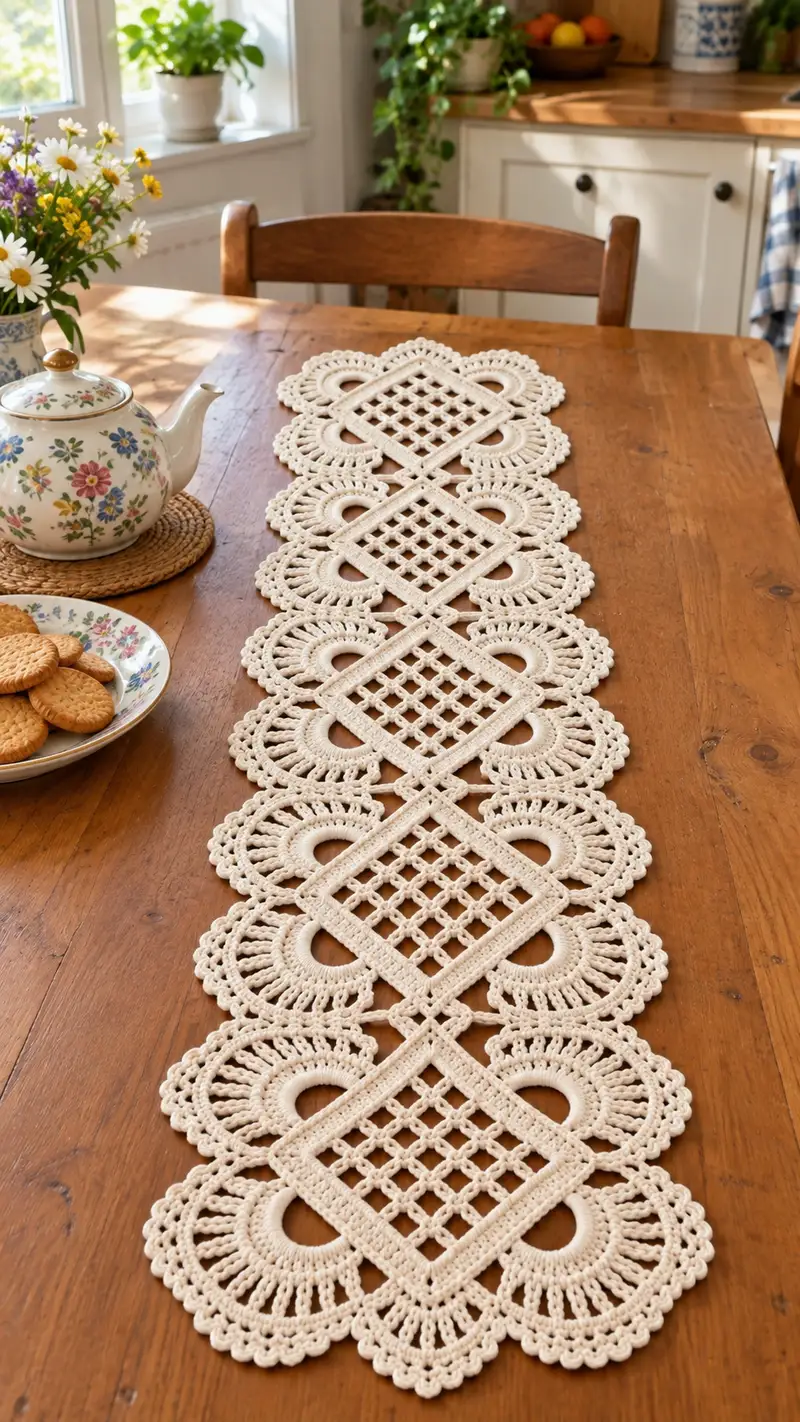
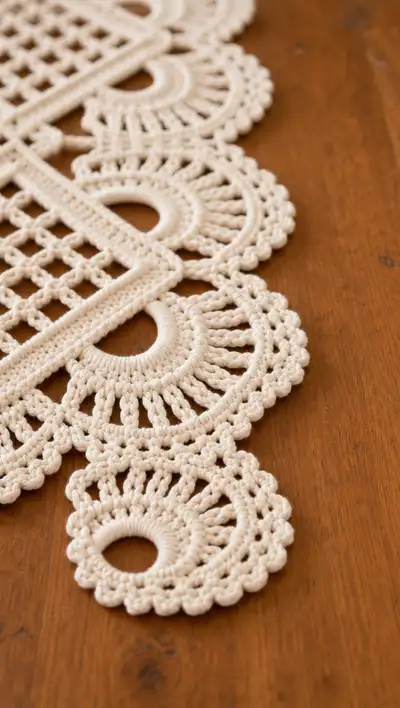
A delicate, vintage-inspired lace table runner worked in a soft natural cream. This pattern combines circular fan motifs and diamond lattice squares linked by narrow bars to create a long, scalloped runner perfect for a dining table or sideboard. The finished piece has openwork mesh centers, raised rope-like borders, and a refined scalloped edge.
Progress Tracker
0% Complete
— Small Wrapped Ring (foundation for each fan) :
Round 1 :
Make a 6 cm wrapped ring: use a split ring or adjustable ring (or a 2-3 cm rigid ring if preferred). If using yarn wrapped method: ch 10, join with sl st to form a small ring (10 ch ring) (ring)
Round 2 :
Work 18 sc evenly around the ring (18)
Round 3 :
1 sc in each st (18)
Round 4 :
(1 sc, inc) x 6 then 6 sc (24) — work increases evenly to transform circle to slightly larger base
Info :
For a tightly wrapped center, use a smaller hook for Rounds 1–3 and change to main hook for spokes. Secure tail from wrapped ring neatly on WS.
Round 5 :
(2 sc, inc) x 6 (30)
Round 6 :
1 sc in each st (30)
Round 7 :
(3 sc, inc) x 6 (36)
Round 8 :
1 sc in each st (36)
Info :
This small wrapped ring will sit inside the fan's inner arch; maintain even tension so the ring lies flat and does not cup.
— Fan (half-circle) motif (make two for each diamond side) :
Round 1 :
Join to the wrapped ring at the top with sl st, ch 2 (counts as first hdc), work 1 hdc in next st, (ch 2, skip 2 sc, 1 hdc in next st) around to form 12 ch-2 arches (12 arches)
Round 2 :
In each ch-2 arch: (sc, ch 2, 5 dc, ch 2, sc) — creates a fan petal; join with sl st at the end (12 fan petals)
Round 3 :
Work a round of 2 sc in each fan base to firm up: (2 sc in first sc of petal, 1 sc in each dc across petal, 2 sc in last sc) around producing approximately 72 sc (approx 72)
Round 4 :
(ch 1, sl st into next 2 sts, ch 4, skip 2 sts, sl st) repeat around to create vertical connecting loops; aim for 36 chain loops
Round 5 :
In each ch-4 loop: work (1 sc, ch 6, 1 sc) to create elongated open spokes, spacing evenly (36 spokes)
Info :
Adjust ch counts in Rounds 4–5 to control spoke length. For a taller arch, add 2 chains to spokeloops.
Round 6 :
Work a round of 1 hdc in each sc and 3 hdc across each ch-6 loop to create thick spokes (count ~150 hdc total depending on adjustments)
Round 7 :
(2 hdc, 1 dc, 2 hdc) in top of each spoke to form a rounded fan tip; sl st to join (12 fan peaks)
Round 8 :
1 sc in each st around to smooth edges (approx 160 sc)
Round 9 :
(ch 1, skip 2, sc) across curved outer edge to create small picot anchors; around 60 sc anchors (60)
Info :
Keep the fan tension even so outer scallops are uniform; place a stitch marker at the junction point for joining later.
Round 10 :
In each anchor: (sc, ch 3, sc) to create visible scalloped edge loops (60 scallop loops)
Round 11 :
Work (sl st, ch 3, 3 dc, ch 3, sl st) into each scallop loop, anchoring to previous round with a sl st between scallops to form shell picots (60 shells)
Round 12 :
Finish fan with a firm round of sc around every stitch, placing 2 sc in each shell apex to create a slightly raised scalloped rim (approx 180 sc)
Round 13 :
Optional decorative round: (ch 2, sl st into ch-3 space) all around to create uniform loops for joining (60)
Info :
Fasten off leaving long tail for slip-join or whip-stitch joining. Make sure fans are mirror images where needed so inner arcs face the diamonds.
— Small Outer Round Motif (complete circular scallop used at the runner ends) :
Round 1 :
Ch 8 and join with sl st to form a small ring (8 ch ring)
Round 2 :
Work 12 sc into ring (12)
Round 3 :
Inc around: (1 sc, inc) x 6 (18)
Round 4 :
(2 sc, inc) x 6 (24)
Round 5 :
1 sc in each st (24)
Round 6 :
(ch 3, skip 1, sc) repeat to form 12 small arches (12 arches)
Round 7 :
In each arch: (5 dc, ch 2, sl st) to form miniature shells (12)
Round 8 :
Finish with sc around, placing 2 sc at each shell apex (approx 36 sc). Fasten off and weave tail.
Info :
These small round motifs are used as terminal scallops at each runner end and at places where the large fans meet the runner edge.
— Diamond Lattice Square Motif :
Round 1 :
Ch 6, join with sl st to form a small loop (6 ch ring)
Round 2 :
Work 12 sc into ring (12)
Round 3 :
(1 sc, inc) x 6 (18)
Round 4 :
(2 sc, inc) x 6 (24)
Round 5 :
(3 sc, inc) x 6 (30)
Round 6 :
1 sc in each st (30) — prepare for square shaping
Round 7 :
Change to forming a square: ch 1, sc in next 6 sts, ch 6, skip 6, sc in next 6, ch 6, skip 6, sc in next 6 to create four corner ch-6 loops (30 sc + 4 ch loops)
Round 8 :
Work around corners: in each ch-6 loop work (sc, ch 6, sc) to form corner chains and build bridge edges (4 corner bridges)
Round 9 :
On each bridge: (sc, ch 3, sc) across every 3 ch to produce 2 chain meshes per bridge (count ~38 sc + mesh chains)
Info :
At this stage your motif should begin to square up. Pin lightly to a square template if you prefer exact measurement before working the lattice.
Round 10 :
Start lattice: On each straight edge work (sc, ch 5, sc) repeated to create long ch-5 mesh loops; work same on opposite edges (approx 16 loops across each side)
Round 11 :
On second row of lattice: sl st into each ch-5 loop and ch 3, then (ch 2, sl st) across to make diagonal net; continue across so mesh forms diamond openings approximately 1 cm square (diagonal net row)
Round 12 :
Work 2 more mesh rows to thicken lattice: in each ch-5 loop work (sc, ch 5, sc) to stabilize and create a raised lattice edge (repeat both sides)
Round 13 :
Edge the square: 1 sc in each st around adding 3 sc in each corner loop to keep square form (total stitch count varies by lattice size; expected ~120 sc)
Round 14 :
Work a decorative raised rope around square by working 2 rows of hdc in BLO to form a defined border (row 1 BLO hdc, row 2 BLO hdc) (approx 120 hdc)
Info :
The lattice should lay flat; if it ruffles, block it and adjust mesh chain counts. The rope border creates a raised channel perfect for slip-joining fans and bars later.
Round 15 :
On each side of the square work (sc, ch 3, sc, ch 3) evenly spaced to create docking points for connecting bars (aim for 8 docking points per side)
Round 16 :
Reinforce docking points by adding 1 sc in each ch-3 loop, then 2 sc on corner docking loops (approx 200 sc total)
Round 17 :
Optional small scallop round: (ch 3, 3 dc, ch 3, sl st) into every other docking point to form decorative protrusions on each side (approx 32 small scallops)
Round 18 :
Finish square by working 1 sc in each st around to tidy edges; fasten off leaving long tail for joining (final edge count ~220)
Info :
This diamond square is the central structural element of the runner. Make as many repeats as desired for length — the photographed runner shows five diamond squares alternating with circular fan clusters.
— Narrow Connecting Bar (joiner) :
Round 1 :
Ch 40 (or to the desired length between motifs), sc in 2nd ch from hook and across (39 sc)
Round 2 :
Ch 1, turn, sc in each st BLO to create a raised rib (39 sc)
Round 3 :
Ch 1, turn, sc in each st (39 sc) — repeat for 6 rows total to create a sturdy 6-row bar (6 x 39)
Info :
Bars are worked flat and then slip-stitched or whip-stitched to rope border docking points on diamonds and to fan anchors. Adjust ch count to fit distance between motif docking points exactly.
Round 4 :
Optional reinforcement round: sc around the perimeter of the bar to give an even edge (approx 80 sc around)
Round 5 :
Fasten off leaving tails for sewing. Make as many bars as there are joins between diamonds and fan groups (two bars per diamond in pictured layout)
— Joining Fans to Diamonds (slip-join and whip-stitch method) :
Info :
Lay your diamonds and fans on blocking surface in final layout. Fans sit with their straight inner arc adjacent to diamond sides; align rope borders and docking loops to match spacing.
Round 1 :
Use long tail from diamond border: align fan inner loops to diamond docking points and slip-stitch through corresponding loops (approx 12–16 slip stitches per side depending on docking points)
Round 2 :
After slip-joining initial points, reinforce joins with a ladder stitch using a yarn needle, sewing through rope border and fan base evenly for strength (stitch every 3 loops)
Info :
When joining two motifs, sew first through the back loops of the rope border on the diamond and through the WS foundation of the fan to hide the joining seam.
Round 3 :
Attach connecting bars by slip-stitching bars' ends into the docking points left on diamonds and fans. For a cleaner finish, whip-stitch bars to docking points from WS to RS.
— Long Runner Assembly Sequence (layout and repeat) :
Round 1 :
Layout sequence: small outer round motif, fan pair, diamond square, fan pair, small outer round motif — this cluster repeats to desired length. Photographed runner uses alternating clusters across length forming an interlaced chain.
Round 2 :
Assemble center line of diamonds first: join diamonds end-to-end via narrow bars using slip-stitch at docking loops and reinforce with needle stitches (repeat until you have desired number of diamonds)
Round 3 :
Attach fan pairs to the left and right sides of each diamond by matching fan inner arcs to diamond side docking points and joining as described earlier (do both sides before proceeding)
Round 4 :
Place small outer round motifs at each seam where two fans meet externally to form scalloped terminations; sew with invisible ladder stitch.
Info :
Keep checking that the runner lies flat as you join motifs. Pin and block motifs in place, joining in short sections and allowing pinned joins to dry if wet-blocking for best results.
— Decorative Raised Rope Joins (creates the diagonal X shapes seen crossing diamonds) :
Round 1 :
From rope border tail on a diamond corner, work a chain of ch 24 to reach the corresponding opposite diamond corner, then sl st into corner rope loop; repeat for the opposite diagonal to form an X (24 ch each diagonal)
Round 2 :
Work over each diagonal chain with hdc in each ch to create a visible raised band (24 hdc per diagonal). Fasten off and sew ends securely into rope borders.
Info :
These X bands stabilize and visually link the squares; tension on these bands will pull diamonds into a crisp shape — make sure chains reach without stretching.
— Scalloped Edge / Final Border (worked continuously around runner) :
Round 1 :
With RS facing, join yarn at a convenient corner. Work 1 sc in each outer edge stitch around entire runner, placing 3 sc in each outermost scallop apex to maintain shape (work slowly around length; total stitches vary greatly)
Round 2 :
Ch 1, 1 hdc in each st BLO (this creates a slightly raised border ridge for a sewn look) — continue for full perimeter
Round 3 :
Begin scallop repeat: *skip 2 sts, in next st work (sc, ch 3, 5 dc, ch 3, sc), skip 2 sts, sl st* — repeat around aligning scallops with motif outer shells (scallops formed)
Info :
Count scallops to ensure symmetry across both long sides — if edge seems too full, reduce 5 dc to 3 dc in shells on one pass and test. Place stitch marker at midpoint of runner to check matching counts.
Round 4 :
Work a finishing picot round: into each shell apex work (sc, picot, sc) where picot = ch 3, sl st into first ch to create tiny points. This yields the delicate tiny beads visible on the edge.
Round 5 :
Optional final stabilization: slip-stitch around with a slightly stiffer thread or 2-ply cotton to crisp the border. Fasten off and weave in all ends thoroughly.
Round 6 :
Block runner to final dimension: pin to a flat board matching desired measurements, spray lightly with water or steam and allow to dry fully before unpinning.
Info :
Blocking is crucial to open the lattice, set scallops, and create the smooth, flat runner shown. Use rust-proof pins and allow ample drying time.
— Finishing Details and Tips :
Round 1 :
Weave in tails: use tapestry needle to weave tails through several rounds of stitches within rope borders to hide them. Trim close.
Round 2 :
Starch or fabric stiffener (optional): lightly apply to entire runner for a crisp look on tables. Test on a scrap first.
Round 3 :
Care: handwash cold and lay flat to dry to preserve shape. Re-block if necessary after each washing to maintain edge crispness.
Info :
For longer runners, repeat the diamond-and-fan sequence to extend as needed. Count motif repeats carefully when calculating yarn requirements.
This elegant lace runner brings timeless charm to any table, combining airy lattice with bold fan motifs for a refined centerpiece. Each modular motif joins to create a long, scalloped runner you can customize in length and color. The careful finishing and blocking deliver a crisp, heirloom-quality piece you'll be proud to display. 🧶✨ Give it as a thoughtful handmade gift or keep it to beautify your own home. Happy stitching! 🌿