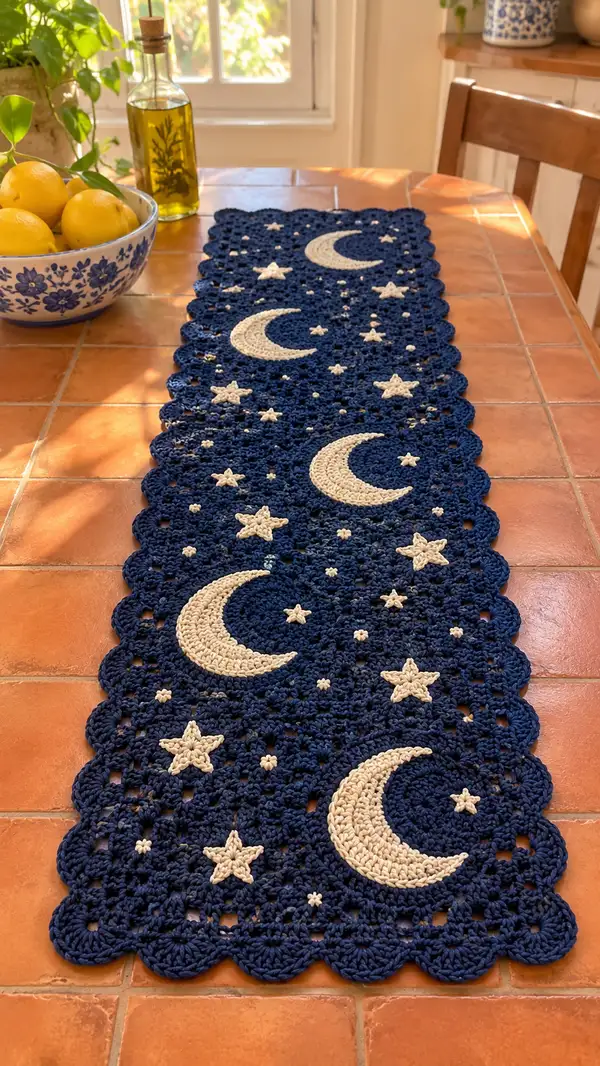
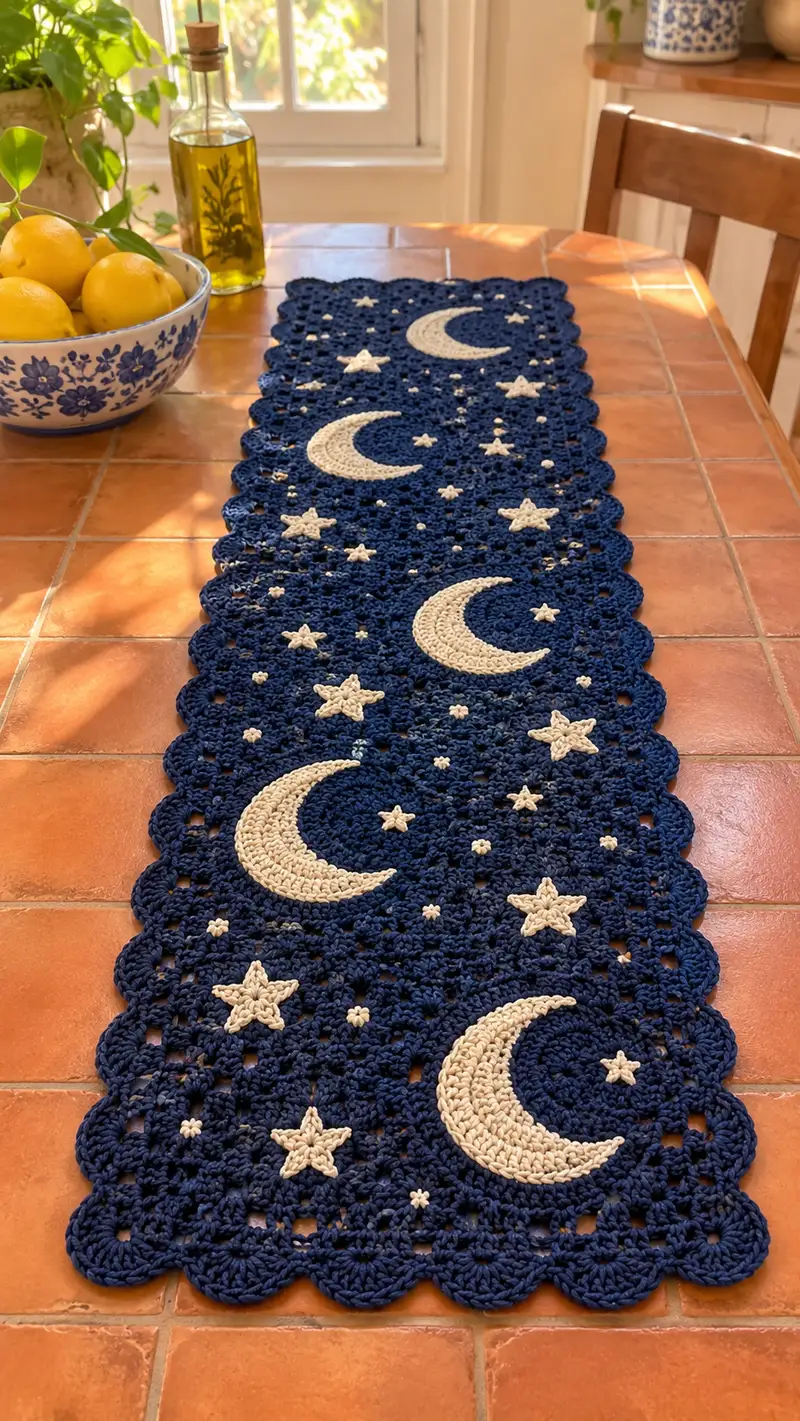
Create a dreamy midnight-blue table runner dotted with crescent moons and stars. This pattern combines lacy cluster motifs and applique moons and stars in contrasting cream for an elegant celestial accent. The runner is worked motif-by-motif and joined as you go, then finished with a scalloped border for a polished look. Perfect for dining tables, dressers, or seasonal display.
Progress Tracker
0% Complete
— Overview :
Info :
This runner is made from modular lacy motifs worked in midnight navy, joined-as-you-go into one long strip, then finished with a scalloped border. Crescent moon and star appliques are worked separately in cream and sewn into position. The sample measures approximately 12" wide x 48" long (30cm x 122cm) using worsted cotton; adjust number of motifs to change length.
Info :
Gauge (unblocked): In motif rounds 1-12, 12 motifs across measures approximately 12" wide. Blocking will open the lace; block to match measurements.
— Main Motif (Make 12–18 depending on desired length) :
Round 1 :
6 sc in magic ring (6)
Round 2 :
Inc in each st around (12)
Round 3 :
(1 sc, inc) x 6 (18)
Round 4 :
(2 sc, inc) x 6 (24)
Round 5 :
(3 sc, inc) x 6 (30)
Round 6 :
(4 sc, inc) x 6 (36)
Round 7 :
(5 sc, inc) x 6 (42)
Round 8 :
(6 sc, inc) x 6 (48)
Info :
After Round 8 you will have a flat round with 48 stitches. Use this as the stable center for the motif. Place a stitch marker at the beginning of each round to avoid counting errors.
Round 9 :
Ch3 (counts as dc), *skip 1 st, dc in next st, ch1, skip 1 st, (3 dc, ch2, 3 dc) in next st (corner), repeat from * around to make 12 corner-like clusters; join with sl st to top of ch3. (12 clusters/shell positions, approximate stitch equivalents vary by cluster)
Round 10 :
Ch3, (2 dc, ch1, 3 dc) in each ch2 corner sp around, between corners work dc in the ch1 spaces to keep shell spacing even; join with sl st. (This round re-centers counts around 12 main cluster groups)
Info :
If you prefer a firmer fabric for appliques later, switch to BLO for this round to create a slight ridge that will help placement of sewn pieces.
Round 11 :
Ch2 (counts as hdc), hdc in each dc and ch1 space around working (3 hdc) into each corner cluster top to expand motif square gently; join with sl st. (maintain 12 major repeats)
Round 12 :
Ch1, sc in each st around, placing (sc, ch3, sc) in each corner to form square corner loops for joining (st counts depend on tension; aim for 12 corner loops/spaces)
Info :
At the end of Round 12 your motif will be a soft-square lacy panel with 12 repeating arches and corner ch3 spaces. Block motifs flat now for best joins and consistent sizing.
Round 13 :
Ch4 (counts as tr), *skip next sc, (3 tr in next arch), ch2, 3 tr in same arch (reverse shell) to make scallop points, skip next sc, tr in next st; repeat from * around; join. This creates pronounced curving scallops that will form the internal lacy grid. (repeat 12 scallop sets)
Round 14 :
Ch2, hdc in each st and ch spaces around, making (hdc, ch3, hdc) in each corner loop. This evens the round and prepares the motif for joining.
Info :
Work last few rounds loosely if you plan to block more aggressively. Blocking will smooth scallops and help motifs sit flush when joined.
Round 15 :
Ch1, sc in each st around, into each scallop shell work (sc, ch1, sc) to keep spacing regular; join. Fasten off and leave long tail for sewing if not joining-as-you-go. (This completes one motif)
Info :
Make the number of motifs required for your runner length. Sample uses 12 motifs in a single column (12 motifs long). You can make 6 motifs for a shorter runner or 18 for a longer one.
— Joining Motifs (Join-As-You-Go Method) :
Info :
Work the first motif fully and block it. For the second motif, stop at Round 12 and join to the first motif on Round 13 by aligning corner ch3 spaces and slip-stitching through corresponding ch3 corner loops on the first motif while crocheting the second motif's corner sequence. This avoids bulky seams and creates an almost invisible join.
Round J1 :
On motif two, ch3 and work into corner ch3 space, sl st through corresponding corner ch3 on motif one, then complete corner shell (3 tr, ch2, 3 tr) as shown in Round 13. Continue around, joining along any sides that touch previously worked motifs with sl st through corresponding ch1/ch2 spaces as you reach them.
Info :
When joining along a full side, match the number of scallop arches and slip stitch into the opposite motif's chain spaces at equal intervals (for 12-repeat motifs, each side will have roughly 3 arches to match). Pin motifs first if alignment is tricky.
Round J2 :
When joining the third and subsequent motifs in a single column, join each new motif to the previous one in the same manner on Round 13 (shell round) so your runner is created as one long strip as you go. For a two-wide layout, join second column motifs to first column at the same rounds.
Info :
Maintain consistent orientation of motifs (right side up) so the crescent placement later lines up correctly. Count stitches and marks carefully to keep motif spacing even.
— Crescent Moon Applique (Make 3 large, 2 medium, 2 small) :
Info :
We construct crescents by making an oval/rounded disc and removing a crescent-shaped inner curve through controlled decreases and shaping. Use cream yarn and smaller hook (3.5mm) for neat edges.
Round 1 :
With cream, make mr, ch1, 8 sc in ring (8)
Round 3 :
(1 sc, inc) x 8 (24)
Round 4 :
(2 sc, inc) x 8 (32)
Round 5 :
(3 sc, inc) x 8 (40)
Info :
Rounds 1-5 create a round disc. To begin shaping the crescent, we will create an offset round and then remove part of the disc by working short rows and selective decreases to form the inner curve.
Round 6 :
Ch2, hdc in next 20 sts, ch3, hdc in remaining 20 sts, do not join; turn to work back across the ch3 as a raised ridge. This creates a small oval opening. (counts approximate; adjust to make a slight elliptic shape)
Round 7 :
Working back along the width edge, hdc dec once at the inner edge: hdc in first 10 sts, (hdc dec) x2, hdc in remaining sts to reduce inner curve depth. Turn. (reduces inner curve by 2 sts)
Round 8 :
Sc around the entire outer edge of the oval, working (sc, ch1) into the ch3 opening and sc evenly along outer curve. When you reach the section that will become the crescent inner cutout, work sc3tog (or 3 sc together) to pull this section inward, creating an inner indentation. Repeat this occasional sc3tog placement every 6–8 sts along the planned inner curve to sculpt the crescent. Fasten off long tail for sewing.
Info :
For a larger crescent (as in the runner photo) make additional increase rounds 5–7 before beginning shaping, and deepen inner curve by more decreases in Rounds 7–8. For smaller crescents, stop increases at Round 4 and shallowly decrease inner curve.
Round 9 :
Optional: With contrasting navy, work 1 round of sc around the outer edge to tack the outer curve and create a defined border; fasten off and weave in ends. This step is optional but helps the moons sit smoothly on the navy motif.
Info :
Block crescents very gently with pins on a flat surface to refine the crescent shape before sewing. Use a small spray of water if working with cotton to set the shape.
— Detailed Crescent Shaping (Alternative precise round-by-round for large moon) :
Round 1 :
mr, ch1, 10 sc in mr (10)
Round 2 :
Inc in each st around (20)
Round 3 :
(1 sc, inc) x10 (30)
Round 4 :
(2 sc, inc) x10 (40)
Round 5 :
(3 sc, inc) x10 (50)
Round 6 :
Ch3, dc in next 22 sts, ch4, dc in remaining 22 sts; do not join. This creates a long oval. (counts approximate by design)
Round 7 :
Working along the long side opposite the ch4, dc dec twice evenly spaced to pull the inner curve in: work dc in next 10 sts, (dc dec) x2, dc in remaining sts. Turn and finish the short-row shaping with sc across the ch4 space to close the inner arc.
Round 8 :
Sc around entire shape, placing (sc2tog) sets along inner arc every 4 stitches until the inner crescent is formed. Finish off and leave long tail for sewing.
Info :
Save your first crescent as the sizing guide for the medium and small moons: reduce initial increases by 2–4 stitches per increase round to make proportionally smaller crescents.
— Five-Point Star Applique (Make 8–10 large, 10–15 small) :
Info :
These five-point stars are worked in rounds with short point extensions. Use the 3.5mm hook for clean points. Large stars measure approximately 2" across; small stars about 1".
Round 1 :
mr, ch1, 10 sc in mr; join with sl st (10)
Round 2 :
Ch3, (2 dc in next st, ch2, skip 1) x5, join with sl st to create 5 ch2 loops around the center (5 point bases)
Round 3 :
*Into each ch2 loop: (sc, hdc, dc, tr, dc, hdc, sc) - this forms a tapered point; repeat from * around for 5 points; join and fasten off. Weave in tail near center to flatten.
Info :
Adjust the point height by adding or removing the tr in the center of each point. Small stars can omit the tr for a petite look (sc, hdc, dc, dc, hdc, sc).
Round 4 :
Optional tiny raised dots: with cream, ch2, 5 sc in 2nd ch from hook (small puff), sl st to close and fasten off. Sew as scattered star dots between bigger stars and moons for a starlit effect.
— Tiny Puff Star Dot (Make many) :
Round 1 :
With cream, ch2, 6 sc in 2nd ch from hook, pull tight, sl st to close, fasten off. These tiny dots work as star speckles across the runner.
Info :
Work a handful of these (30-60) to fill the negative space between larger appliques. They are quick and add handcrafted charm.
— Placement & Layout :
Info :
Before sewing, arrange motifs laid out in a single long column (sample shows 12 motifs). Place three large crescents spaced evenly along the center column: one near each end and one centrally. Position medium and small crescent moons offset to one side of the central moons to create a flowing composition. Scatter large stars clustering around each crescent and fill gaps with small star puffs.
Info :
Use pins to temporarily hold appliques in place across the motifs. Step back and check spacing before sewing; symmetry left-to-right creates an ordered look, while slight shifts create a more organic, star-drifted aesthetic.
— Sewing Appliques to Runner :
Round S1 :
With cream yarn and a blunt yarn needle, sew each applique onto motifs using small whip stitches around the outer edge. For moons, sew through the navy motif and the applique edge every 6–8 stitches to secure flat. Weave thread through the backing of the crescent to avoid visible stitches on the front face where possible.
Info :
For the large crescent: start sewing at the narrow tip and work toward the wider curve, pulling gently to conform to the motif’s scallops. Add a few interior tacking stitches across the hollow of the moon to anchor it flat on the lacy background.
Round S2 :
Sew five-point stars by stitching at the center and then through three outer points to keep them slightly raised from the background for dimension. Tiny puff dots can be sewn with a single long stitch through their centers to secure them with minimal bulk on the reverse.
Info :
Weave all tails to the back and knot securely. Trim ends and, if desired, put a dot of fabric glue on knots for long-term durability on a table runner that will be handled frequently.
— Scalloped Edge Border (Worked after motifs are joined and appliqued) :
Info :
With main midnight navy, pick up along one long edge and work scallop rounds in the round around entire runner edge. The scallop edge mirrors the motif arcs and gives a finished antique look.
Round B1 :
Attach navy yarn with sl st to any corner ch3. Ch1, sc evenly along the side working 1 sc in each motif ch1/ch2 space; place (3 sc) in corner ch3 spaces; continue around including short ends. Keep sc spacing even; approximate sc count will vary by motif quantity. Join.
Round B2 :
Ch3 (counts as dc), *skip next sc, (5 dc) in next sc to form a large scallop, skip next sc, dc in next sc; repeat from * along side; in corners work (7 dc) across corner and continue around; join. This creates large scallops that echo motif curves.
Round B3 :
Ch1, sc in each dc around, placing (sc, ch3, sc) at the apex of each scallop if you wish a pronounced picot-like separation between scallops; join and fasten off, weave in ends.
Info :
Adjust scallop size by changing the number of dc per scallop: 3–5 dc yields medium scallop; 7 dc yields an oversized scallop. Keep corner scallops larger to maintain shape when runner is laid flat.
Round B4 :
Optional second decorative round: With cream, slip-stitch in every 2nd dc across outer edge to highlight scallops. This adds a delicate contrast line; work neatly and fasten off.
Info :
Blocking after the border is essential. Pin scallops into an even arc with consistent spacing and lightly steam or spray to set shape. Let dry completely before removing pins.
— Finishing Touches & Care :
Info :
Weave in all tails on the wrong side using a yarn needle. If the runner will be used in a dining area, consider applying a small amount of textile stabilizer to the underside of appliques to prevent fretting from flatware. Hand wash cotton runners gently in cool water and lay flat to dry to maintain shape and color.
Round F1 :
Final blocking: lay runner flat, pin corners and scallops to exact shape and measure diagonals to ensure squareness. Allow to dry fully. Trim any visible short ends on the backside for a clean finish.
Info :
Store runner rolled rather than folded to avoid deep creases. Consider making matching napkin rings or placemats using individual motifs leftover from the runner for a coordinated table set.
This celestial table runner brings a little night-sky magic into your home. Each motif and applique comes together to create a rhythmic, handcrafted statement that's functional and beautiful. Enjoy the process of joining motifs and stitching tiny stars—each stitch adds personality and charm. 🌙⭐️🧶 Whether for evening dinners or a cozy corner table, this runner will make your space feel uniquely yours. Happy stitching and enjoy your starry table display! ✨