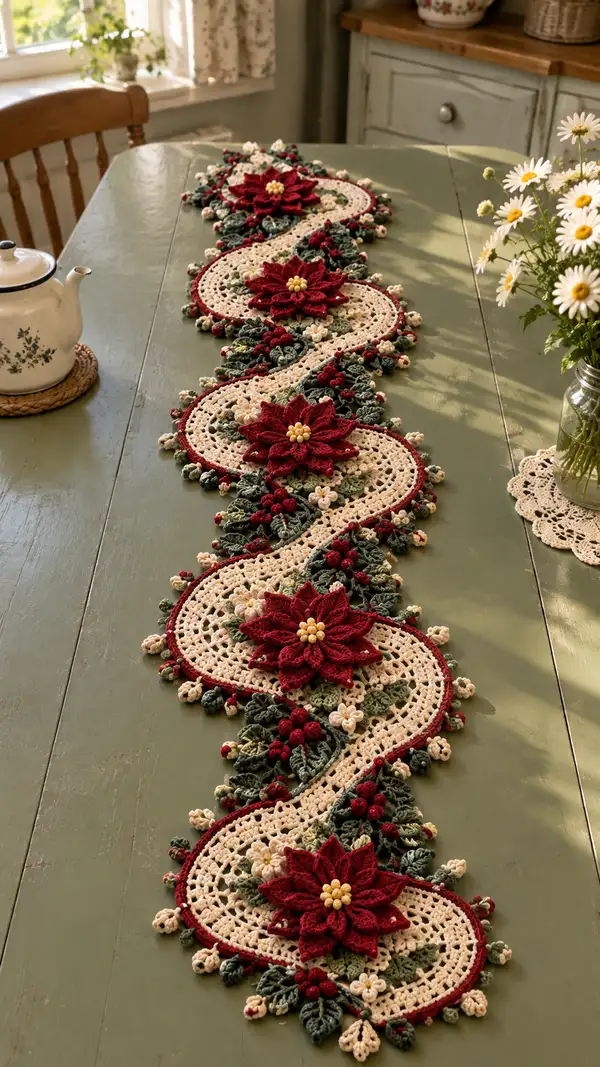
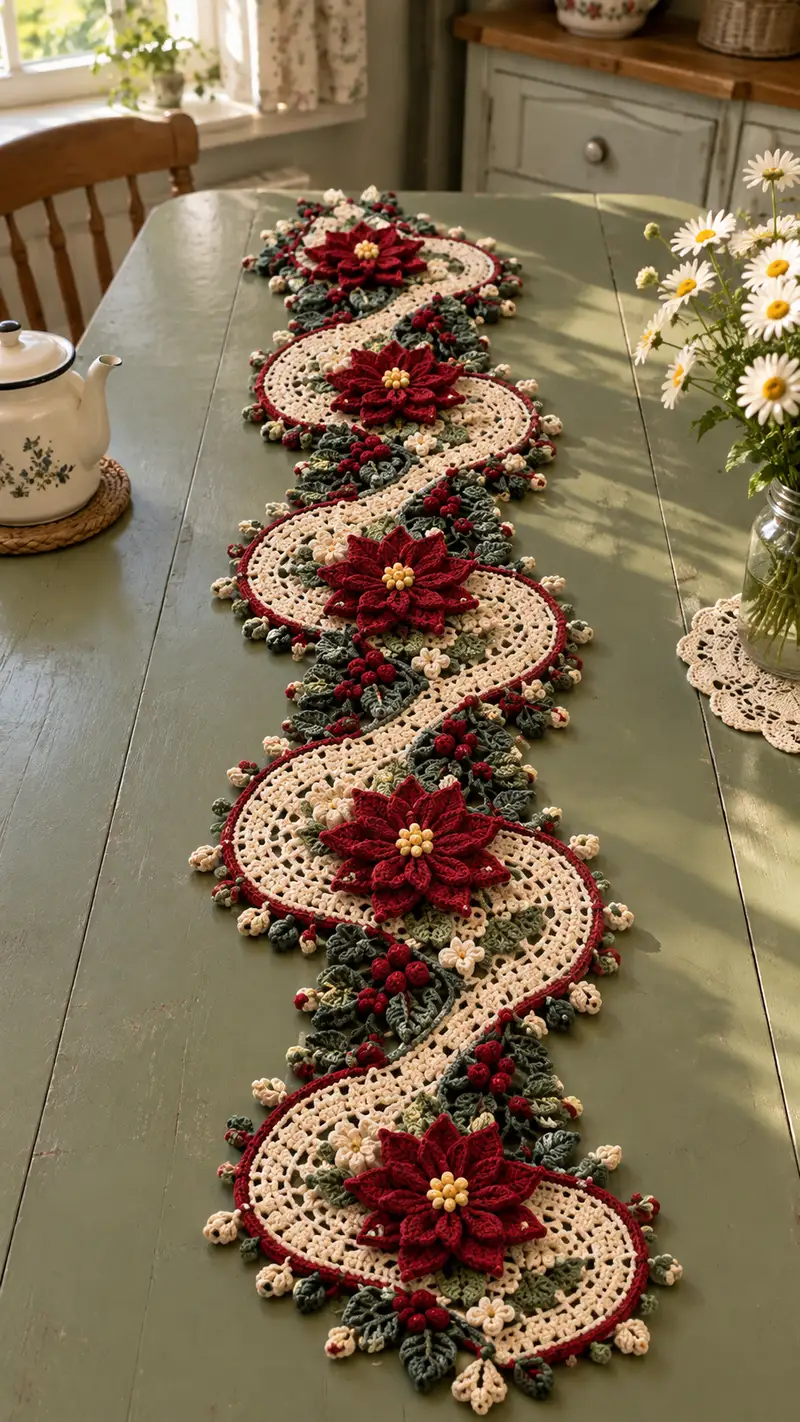
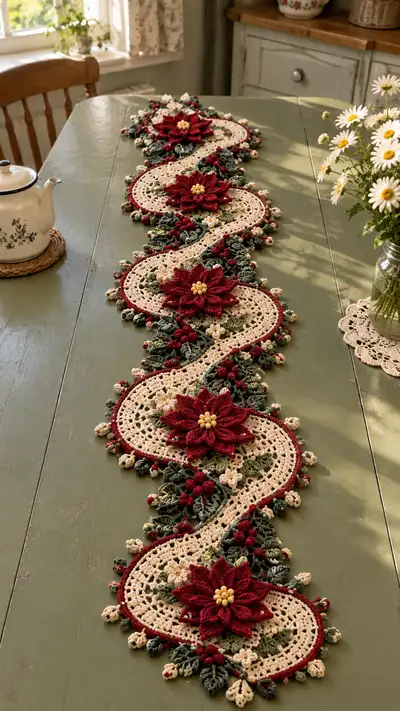
A vintage-inspired lace table runner adorned with layered crimson poinsettias, leafy greens and cream lacy ovals. This elegant runner features three large dimensional poinsettias with beaded centers, scattered clusters of berries and delicate picot edging. The flowing S-shaped composition and rich holiday colors create a warm, handcrafted centerpiece for dining tables or sideboards.
Progress Tracker
0% Complete
— Main Oval Base (make 5 identical oval motifs; these form the cream lace panels) :
Round 1 :
mr, 8 sc in magic ring (8)
Round 2 :
inc in each st around (16)
Round 3 :
(1 sc, inc) x 8 (24)
Round 4 :
(2 sc, inc) x 8 (32)
Round 5 :
(3 sc, inc) x 8 (40)
Round 6 :
(4 sc, inc) x 8 (48)
Round 7 :
(5 sc, inc) x 8 (56)
Info :
These first 7 rounds form a sturdy circular base. To begin the oval shaping, we will add increases less frequently and begin building longer sides by working chains and spaces on later rounds. Keep stitches even and count carefully.
Round 8 :
1 sc in each st (56)
Round 9 :
(8 sc, inc) x 6 + 8 sc at ends to create elongated shape (64)
Round 10 :
1 sc in each st (64)
Round 11 :
(9 sc, inc) x 6 + 10 sc distributed along sides (72)
Round 12 :
1 sc in each st (72)
Round 13 :
(10 sc, inc) x 6 + 12 sc distributed along sides (80)
Info :
At Round 9-13 we're increasing only at the ends of the oval to lengthen the sides. If you prefer a wider oval, work one extra increase repeat evenly across the round to add 8 more stitches (adjust subsequent rounds accordingly).
Round 14 :
1 sc in each st (80)
Round 15 :
Change to cream lace color if not already in it. ch4 (counts as tr), *sk 2, 4 dc cluster into next sp across body to create lacy mesh; repeat across, ending with tr into starting ch-space. Turn if needed to keep curvature (80)
Round 16 :
1 sc in each st and in each chain (80)
Round 17 :
*ch3, sk 2 sc, sc in next st; rep across to create openwork rows (80)
Info :
Round 15-17 change the fabric from solid to lacy. Keep stitch count consistent by placing clusters evenly in the same stitch positions as the underlying sc round. Use stitch markers at each end of the oval to mark the turning points (the 'tips' of the oval).
Round 18 :
1 sc in each st (80)
Round 19 :
(3 sc, ch2, skip 2) around to form airy lace chain arcs along body (80 arcs)
Round 20 :
In each ch2-arc: (sc, hdc, 3 dc, hdc, sc) to form small fan motifs around oval (80 small fans)
Info :
Work Round 19 anchors the lacy arcs that will become the decorative inner net. Keep tension consistent so fans sit flat. If stitches tighten, use a slightly larger hook for these decorative rounds only.
Round 21 :
1 sc around working in BLO to create a defined ridge at the lace edge (80)
Round 22 :
*(ch3, sl st to next fan center) x across to form connecting picot loops across the interior edge (80)
Round 23 :
1 sc around (80)
Round 24 :
Along long sides of oval only: *(ch5, sl st to next ch-space) to create elongated chain scallops (approx 20 scallops per long side, total 40)
Round 25 :
In each long-chain scallop: sc, hdc, 5 dc, hdc, sc (40 large fans) placed evenly on long sides only; maintain 80 sts overall by working two fans into equivalent pairs of stitches at the rounded ends
Info :
Round 24-25 form the decorative long-side fans where the foliage and flowers will be attached later using join-as-you-go or sewing. Mark the centres where the poinsettia will later sit: place markers approximately at opposite midpoints of the two long sides to help align floral elements.
Round 26 :
1 sc in each st (80)
Round 27 :
BLO: *(sc in next 3, picot (ch3, sl st in top of last sc)) repeat to create small picot trim all the way around (80)
Round 28 :
1 sc around to tidy picots and secure edge; sl st to join and fasten off leaving 8-10" tail for joining to adjacent oval (80)
Info :
Make five identical oval motifs. Block each oval flat, pinning gently to shape the elongated sides and flatten fans. Use steam blocking or wet block depending on yarn. Allow to dry thoroughly before proceeding to decoration and joining.
— Poinsettia Flower (make 3 large poinsettias — layered petals) :
Info :
Each poinsettia is built in layers: a small center petal round, middle petal layer, and large outer petal layer. Each petal is worked individually in arcs and then joined to form a circular flower. Use crimson yarn for petals and pale gold/yellow beads for centers. Work petals around a small base disc.
Round 1 :
Make a small center disc in crimson: mr, 6 sc in mag ring (6)
Round 2 :
Inc in each st (12)
Round 3 :
(1 sc, inc) x 6 (18)
Round 4 :
Fasten off crimson, change to pale yellow/gold yarn for bead button: ch5, sl st to center to form small loop of 5 ch; make 6 loops around center and sew beads in place. Fasten off and weave ends (18)
Info :
Center bead cluster: use 6-9 small round beads sewn tightly in a circular cluster. Stitch through the center disc multiple times to secure beads; hide thread tails behind disc.
Round 5 :
Attach crimson yarn to disc edge for first petal round. Ch3 (counts as dc), *ch2, 2 dc in next st, ch2, sl st in next center st — this forms 6 small loops for the inner decorative ring (18)
Round 6 :
In each ch2-loop: (sc, hdc, 3 dc, hdc, sc) to form 6 inner rounded petals. Fasten off and weave ends (6 petals)
Round 7 :
Info :
Inner petals add volume. Keep these slightly flat to support the larger petals. Pin each petal outward while sewing to shape them evenly.
Round 8 :
For middle petal layer: Attach crimson at back of disc between inner petals. *Ch6, sl st to base to make 6 loops (6 ch-loops)
Round 9 :
In each ch6-loop: (sc, hdc, 7 dc, hdc, sc) — make tall rounded petals. After completing each petal, fold petal in half lengthwise and sc through back edge to create a raised petal ridge. Repeat for 6 petals (6 raised petals)
Round 10 :
Work a decorative reverse single crochet (crab stitch) around the base of the petal ring to stabilize petal seam (36 sc around base)
Info :
Folding petals and seaming them along the back creates the dimensional, pointed structure characteristic of poinsettia petals. Pin and steam lightly if your yarn accepts steam to set the shape.
Round 11 :
Outer petal layer: Attach crimson yarn at a point halfway between two middle petals. Ch8; *sl st to base to make 6 long loops (6 ch8-loops)
Round 12 :
In each ch8-loop: (sc, hdc, 11 dc, hdc, sc) — create deep elongated petals. After completing each, fold petal lengthwise and seaming with 3 sc along the fold to create a strong ridge; repeat for 6 outer petals (6 large raised petals)
Round 13 :
Between outer petals, work small decorative picot edging: *(sc in petal base edge, ch3, sl st back in same st) x around outer edge to create tiny points (36 picots)
Round 14 :
Fasten off leaving generous tail for sewing flower to oval base. Weave tails through the back, making a small felted disc of stitches to add stability when sewing (no new stitches counted)
Info :
Finish each poinsettia by sewing the center bead cluster onto the center disc. Use the long tail to attach flower to the oval base with small, even stitches through the oval fans (secure tightly but avoid pulling the oval into a pucker).
— Poinsettia Petal Accent Rounds (detailed breakdown of each petal row - repeat 3 times for each flower) :
Round 1 :
Petal foundation row for inner petal (per petal): ch3, 2 dc, ch2, 2 dc, sl st to base (counts as one petal)
Round 2 :
In petal loop: sc, hdc, 3 dc, hdc, sc — finish and fasten off (1 petal)
Round 3 :
Repeat Make 6 inner petals around center (total petals after round complete = 6)
Round 4 :
Info :
Make sure each inner petal sits halfway between the upcoming middle petals; this allows layered alignment and prevents overlap issues when assembling the larger petals.
Round 5 :
Middle petal foundation: ch6, sl st to base; make 6 loops (6)
Round 6 :
In each ch6-loop work: sc, hdc, 7 dc, hdc, sc. Fold and seam along back with 3 sc to raise. Repeat for 6 middle petals (6 raised petals)
Round 7 :
Outer petal foundation: ch8, sl st to base; make 6 loops (6)
Round 8 :
In each ch8-loop work: sc, hdc, 11 dc, hdc, sc. Fold and seam with 4 sc down length to create pointed outer petals (6 large raised petals)
Info :
To create sharper points on petals, use dtr or extended treble for the last 2-4 center stitches of each petal. If your yarn is stiff, press gently with steam while pinned to retain points.
— Flower Center (bead assembly & finishing) :
Round 1 :
Thread 7 pale yellow beads onto small length of sewing thread. Arrange beads in a tight circle and stitch through center disc multiple times to secure. Tie off on the back and bury ends (no sc count)
Round 2 :
Reinforce bead cluster with a round of small sc in pale yellow around the disc if desired: attach pale yellow yarn and work 12 sc around the disc to form a small beaded button (12)
Info :
Sew beads tightly and secure with the knitting or beading thread first, then tack bead cluster to the crimson disc with yarn tail for extra strength. Use three passes through beads for longevity.
— Leaves (make 40 assorted leaves; small, medium, large) :
Small Leaf Round 1 :
Using forest green: ch6, sc in 2nd ch from hook, hdc, 3 dc across, hdc, sc in last ch; turn to work along opposite edge: sc, hdc, 3 dc, hdc, sl st to join (approx 10 sts)
Small Leaf Round 2 :
In same green: sc around leaf edge working 10 sc per side, then 3 sc across base to form pointed petiole; fasten off (approx 26)
Info :
Small leaves add texture and fill spaces between petals and berries. Gently cup them by folding slightly along center and tack-stitch with a few thread stitches under the leaf to maintain shape.
Medium Leaf Round 1 :
ch8, sc in 2nd ch, hdc, 5 dc across, hdc, sc; return along opposite side with sc, hdc, 5 dc, hdc, sl st to join (approx 14 sts)
Medium Leaf Round 2 :
Work BLO: sc around to create a visible center ridge; then embroider center vein with contrasting olive yarn using running stitch (approx 36)
Large Leaf Round 1 :
ch10, sc in 2nd ch, hdc, 7 dc across, hdc, sc; return along opposite side making symmetric stitches (approx 18)
Large Leaf Round 2 :
Work 1 sc around, then create three sub-veins by sewing 3 lines of running stitch with moss green yarn; pinch slightly and tack at base (approx 44)
Info :
Mix small, medium and large leaves around the oval fans. Leaves are attached with a few invisible stitches through the base; cluster them in natural groupings of 3-7 leaves depending on space.
— Small Cream Blossoms (make many; used as filler) :
Round 1 :
Using cream: mr, 5 sc in ring (5)
Round 2 :
Do not join: *ch3, sl st in next st to form 5 tiny petals (works as a 5-petal flower)
Round 3 :
Fasten off leaving tail for sewing; sew to oval base between leaves and berry clusters as fillers
Info :
Make 30-40 of these small blossoms. They are lightweight and perfect for filling negative space and softening transitions between greens and crimson petals.
— Berry Bubbles (make clustered bobbles in crimson) :
Round 1 :
For one berry bobble: with crimson yarn, ch2, in 2nd ch from hook make 6 hdc (6)
Round 2 :
Make a bobble: *yarn over, insert in same st, pull up loop, repeat 4 times total to create a 5-loop cluster; yarn over and draw through all loops, ch1 to lock (1 bobble)
Round 3 :
Fasten off and leave long tail; stuff with a tiny bit of fiberfill if you want plumper berries (no count)
Info :
Make many berries in groups of 3-7. Vary sizes by using 4-6 loops when making the bobble stitch to create small and medium berries for a natural look. Sew berries into clusters with green stems or directly to leaves.
— Joining Motifs & Arrangement (join-as-you-go between oval motifs) :
Info :
Arrange five oval motifs in S-curve formation as shown in the photo. Work two ovals joined at the fan/lace edges using join-as-you-go slip-stitch or whip stitch. Use the cream base for seam points and reinforce with additional sc across connection areas to prevent gaping.
Round 1 :
Lay two ovals adjacent so long-side fans align. With yarn tail from one oval, work sl st into corresponding fan picot of other oval every 2-3 sts along fan edge to create a firm seam (approx 12-18 sl st per join depending on size)
Round 2 :
After sl st join, work a round of sc across the seam on the front side to hide joining tails: in each join do 2 sc in join spot to flatten seam (count will vary; aim for even tension)
Info :
Make 4 joins to create S-shaped runner from five ovals: join centers of alternating sides so the layout flows into an S. Pin heavily while joining to maintain graceful curve and matching fan points.
Round 3 :
Where two ovals meet and a poinsettia sits across the join, do NOT fully close join — leave a small opening to sew flower stems and leaves through both sides for increased stability (approx 3-4 sts left open)
Round 4 :
Once all ovals are joined, work a unifying round in cream around entire runner: sc across all outer edges including seam edges, adding 1 sc extra into each join point to smooth transitions (total stitch count variable; maintain consistent edge)
Info :
When performing join-as-you-go for delicate lace, prefer slip stitches so the seam is flexible. Where more stability is required (center of runner), reinforce with hidden whipstitch on the underside.
— Attaching Poinsettias, Leaves, Blossoms and Berries :
Round 1 :
Position each large poinsettia over the marked fan midpoint of its oval. Using the long tail from poinsettia fasten-off, sew through the base of the flower and through the oval base fans along at least 8 evenly spaced stitches for a secure hold (8 attachment stitches per flower)
Round 2 :
Arrange medium and large leaves in layered clusters radiating from each poinsettia: typically 3 large + 2 medium + 3 small leaves per poinsettia. Tack leaves in place with invisible stitches at their base (6-8 stitches per leaf cluster)
Round 3 :
Sew small cream blossoms into gaps between leaf clusters using short tails; place 3-5 blossoms per floral cluster. Add berry clusters of 3-6 bobbles strategically along leaf veins and near the poinsettia base. Secure with multiple passes.
Info :
Gradually assemble by adding a few elements at a time: attach the flower, then tack large leaves, then medium/small leaves and finally blossoms and berries. This layering keeps the composition balanced and prevents over-grouping in one area.
Round 4 :
Use small back-stitches in green yarn to secure leaf bases to the oval fans so leaves appear to grow from the lace edge. Hide tails beneath leaf backs and secure them thoroughly.
Round 5 :
Where berries and blossoms cross stitches of the oval, pass the long tail through both the embellishment and the oval fan, then back through and knot on the underside. Trim tails close and weave in ends.
— Outer Edge and Scalloped Picot Finishing (final border) :
Round 1 :
With crimson yarn for contrast trim: Attach at one tip. *sc in each stitch along the long sides and ends; where you want contrasting piping, work a second row of sc in crimson over the sc foundation (st count mirrors cream edge)
Round 2 :
Work picot scallop: *(1 sc, ch3, sl st into top of sc) repeat across long edges and around all fans to create small red picot points. Fasten off and weave in ends.
Info :
The crimson piping provides a crisp silhouette and echoes the poinsettia color. If you prefer a subtler look, use deep green or cream instead. Make sure picots are evenly spaced by counting fan anchors before beginning.
Round 3 :
Final finishing: steam-block the entire runner pinned to the desired curve, ensuring each poinsettia and leaf lays flat and natural. Allow to dry fully before use.
Info :
Check underside seams for loose tails. Reinforce sewn-in embellishments especially where beads and bobbles are attached. For table use, consider a thin non-slip pad underneath runner to keep it from sliding on lacquered tables.
— Optional: Extra Decorative Details and Tips :
Info :
- To add depth, lightly tea-dye or brush edges of outer petals with diluted brown fabric paint and heat set carefully. - If making smaller runner, use DK yarn and a 3.25mm hook and scale down motif count. - For safer, child-friendly version replace beads with embroidered French knot centers in pale yellow.
Info :
- Keep an even stitch count across rounds to ensure motifs match for joining; if you add decorative stitches, adapt counts for symmetric joins. - Always pin and block motifs prior to joining to achieve consistent shape and accurate seam alignment.
This elegant runner brings a classic holiday look to your table with layered poinsettias, lush leaves and delicate cream lace. Each motif is a small work of art, combining openwork with dimensional sewing for an heirloom-quality centerpiece. The process of making it is slow, meditative and utterly rewarding — every stitch builds a little more charm. 🧶🌺 Display proudly or give as a treasured handmade gift! 🎁