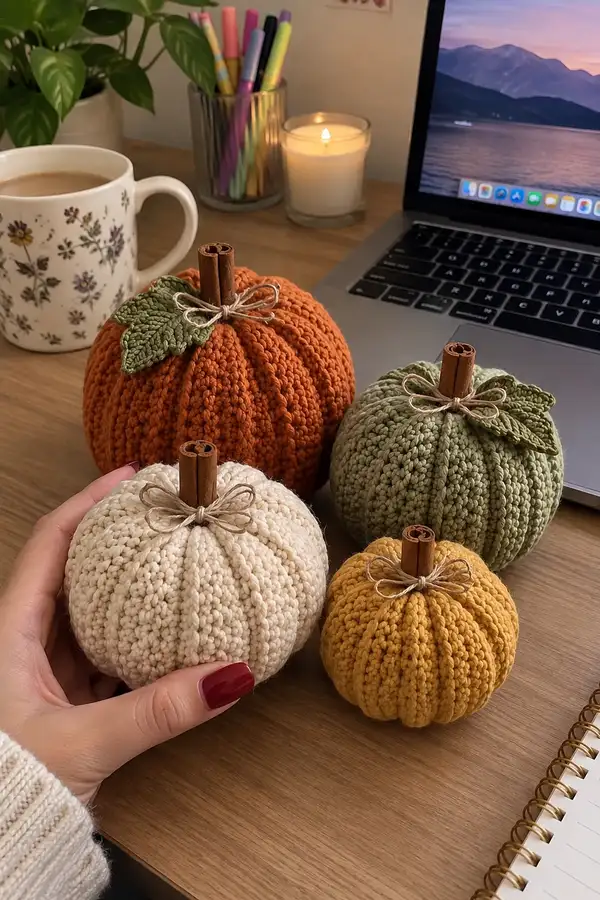
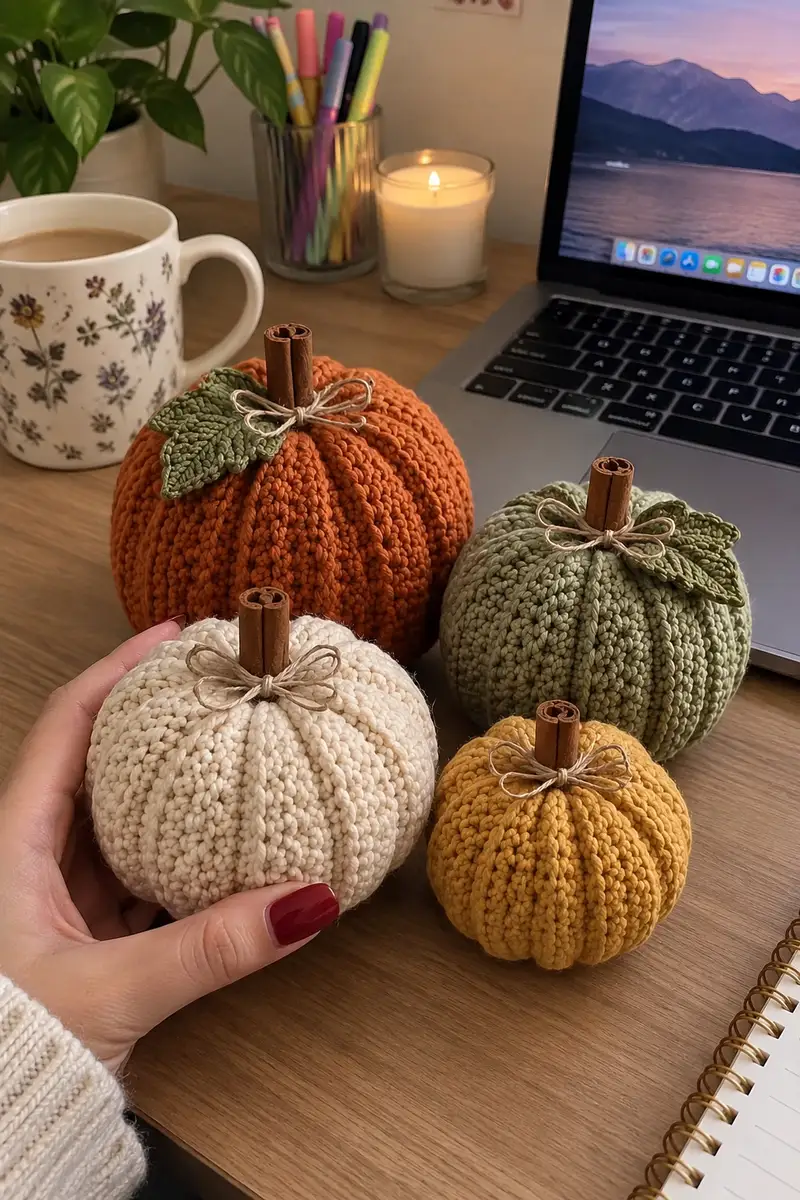
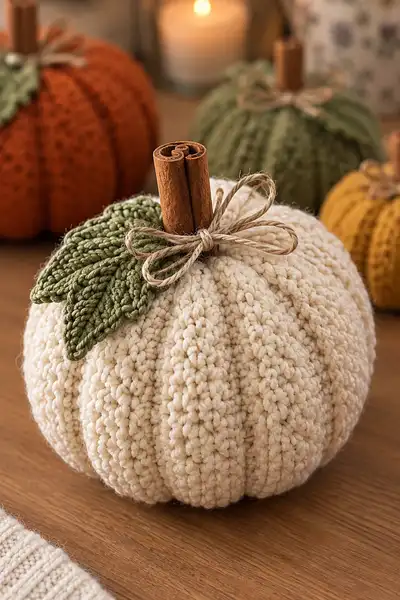
Make a cozy set of tactile ribbed pumpkins—perfect for fall decor, mantel displays, or a warm handmade gift. This pattern shows four sizes with deep vertical ribs, a cinnamon-stick stem (or crocheted stem alternative), and textured leaves. It uses simple rounds, strategic decreases, and a final channeling technique to create the classic pumpkin segments seen in the photos. Ideal for a comfy afternoon of crocheting and quick, satisfying results.
Progress Tracker
0% Complete
— Pattern Notes :
Info :
This pattern covers four pumpkin sizes: Large (display pumpkin), Medium, Small, and Mini. All pumpkins are worked in continuous rounds (spiral) unless noted. Use a stitch marker to mark the first stitch of each round. The classic ribbed look is achieved by stitching vertical channels after the pumpkin is stuffed, then tightening them to define segments. You can use actual cinnamon sticks for stems as in the images or crochet stems for a yarn-only option.
Info :
Tension: Work slightly tighter than gauge for amigurumi so stuffing doesn’t show through. If your stitches look loose, drop down one hook size. If fabric is too stiff, go up one size.
— Large Pumpkin (Orange) :
Round 3 :
(1 sc, inc) x 6 (18)
Round 4 :
(2 sc, inc) x 6 (24)
Round 5 :
(3 sc, inc) x 6 (30)
Round 6 :
(4 sc, inc) x 6 (36)
Round 7 :
(5 sc, inc) x 6 (42)
Round 8 :
(6 sc, inc) x 6 (48)
Round 9 :
(7 sc, inc) x 6 (54)
Round 10 :
(8 sc, inc) x 6 (60)
Info :
By Round 10 you'll have 60 sts. This circumference produces a large, display-style pumpkin similar to the orange one pictured. If you prefer a slightly smaller large pumpkin, stop increasing at 54 sts (Round 9).
Round 11-16 :
1 sc in each st (60)
Info :
Work 6 even rounds to build the height of the pumpkin. Use these rounds to shape the midsection. For a taller pumpkin add more even rounds here (up to 10).
Round 17 :
(8 sc, dec) x 6 (54)
Round 18 :
(7 sc, dec) x 6 (48)
Info :
Begin light stuffing as you start to decrease. Stuff the pumpkin firmly enough to maintain roundness but soft enough to let ribs be formed later. Distribute filling evenly with small handfuls.
Round 19 :
(6 sc, dec) x 6 (42)
Round 20 :
(5 sc, dec) x 6 (36)
Round 21 :
(4 sc, dec) x 6 (30)
Round 22 :
(3 sc, dec) x 6 (24)
Info :
Stuff more firmly here to fill the lower belly. Note: if your stuffing shows through stitches, tighten your tension or add a thin fabric lining inside before finishing.
Round 23 :
(2 sc, dec) x 6 (18)
Round 24 :
(1 sc, dec) x 6 (12)
Info :
Fasten off leaving a long tail (about 16-20 inches) for closing and for use in creating the top channeling. Use the tail to sew the opening closed with mattress or whip stitch, then weave tail through the top center for ribbing and securing the stem.
Round 26 :
Optional: If you prefer a less closed base, leave a slightly larger opening and close with an invisible stitch after attaching the ribs. Otherwise finish as above.
— Large Pumpkin Ribbing & Finish :
Info :
Ribbing Method A (Preferred in photos): Create 8 or 10 vertical ribs by threading a long piece of yarn through the top center and pulling to the bottom, repeating equally spaced around the pumpkin and tightening to form segments. Method B: Use fpdc columns when working rounds to produce raised ridges (explained below). Photos show deep, even channels best achieved by the threading method for plush pumpkins.
Step 1 :
Cut 8 lengths (for 8 ribs) of yarn approximately 50-60 inches each. Thread through a large yarn needle (blunt tapestry needle).
Step 2 :
Starting at the top center, insert needle through to the bottom center, pulling yarn to create one channel. Tie or secure at top with a slip knot but do not trim. Repeat pulling the next yarn 1/8th around the top so that all channels are evenly spaced around the pumpkin. Alternatively, mark stitch positions at top with pins before threading.
Info :
Spacing tip: With 60 stitches circumference and 8 ribs, place a marker every 7 or 8 stitches around; with 10 ribs place a marker every 6 stitches. This keeps ribs evenly spaced.
Step 3 :
After threading all ribs from top to bottom, tighten each yarn gently and tie off at the top with a secure knot. You can knot yarns in pairs for a decorative look or tie all together and bury the knot under the stem.
Info :
To create deeper channels, tighten the yarn and use a small dab of fabric glue at the bottom center inside the pumpkin to hold the yarn securely while letting knot remain discrete.
Step 4 :
Insert cinnamon sticks (2-3) into the top center. Wrap twine around base of sticks and tie a bow. For a yarn stem alternative: Crochet Stem (see below) and sew into top center before or after tightening ribs.
— Crochet Stem (optional) :
Round 1 :
2 ch, 4 sc in 2nd ch from hook (4)
Round 2 :
(1 sc, inc) x 2 (6)
Round 3-6 :
1 sc in each st (6)
Info :
Fold lightly and sew bottom of stem into the top opening so the stem sits snugly. If using cinnamon sticks, you can insert them into the yarn a little and secure with twine or glue.
— Medium Pumpkin (Olive Green) :
Round 3 :
(1 sc, inc) x 6 (18)
Round 4 :
(2 sc, inc) x 6 (24)
Round 5 :
(3 sc, inc) x 6 (30)
Round 6 :
(4 sc, inc) x 6 (36)
Round 7 :
(5 sc, inc) x 6 (42)
Info :
Stop increasing at Round 7 to create a smaller circumference (42 sts) for the medium pumpkin.
Round 8-13 :
1 sc in each st (42)
Round 14 :
(5 sc, dec) x 6 (36)
Round 15 :
(4 sc, dec) x 6 (30)
Info :
Stuff moderately as you decrease. Aim for a slightly squishy, full shape—less stuffing than the large pumpkin so the medium feels proportional.
Round 16 :
(3 sc, dec) x 6 (24)
Round 17 :
(2 sc, dec) x 6 (18)
Round 18 :
(1 sc, dec) x 6 (12)
Info :
Finish as for the large pumpkin: leave long tail for closing and ribbing. For medium pumpkin use 8 ribs (8 yarn lengths) spaced every 5 stitches for even segments.
— Small Pumpkin (Mustard Yellow) :
Round 3 :
(1 sc, inc) x 6 (18)
Round 4 :
(2 sc, inc) x 6 (24)
Round 5 :
(3 sc, inc) x 6 (30)
Round 6-9 :
1 sc in each st (30)
Round 10 :
(3 sc, dec) x 6 (24)
Round 11 :
(2 sc, dec) x 6 (18)
Round 12 :
(1 sc, dec) x 6 (12)
Info :
For the small pumpkin use 6 ribs. With 30 sts circumference and 6 ribs, space rib markers every 5 stitches for balanced segments. Use a 40-inch yarn tail per rib for easier handling.
— Mini Pumpkin (Cream) :
Round 3 :
(1 sc, inc) x 6 (18)
Round 4 :
(2 sc, inc) x 6 (24)
Round 5-7 :
1 sc in each st (24)
Round 8 :
(2 sc, dec) x 6 (18)
Round 9 :
(1 sc, dec) x 6 (12)
Info :
Mini pumpkins use 6 ribs and only 24 sts circumference—space ribs every 4 stitches if using 6 ribs to keep them even and rounded.
— Leaves (Make 1-2 per pumpkin) :
Round 1 :
Ch 7, sc in 2nd ch from hook, hdc in next, dc in next 2, hdc in next, sc in last (6 sts worked across chain)
Round 2 :
Turn: ch1, sc in first, hdc in next, dc in next 2, hdc in next, sc in last. (6)
Round 3 :
Ch1, sc in first, (sc, ch2, sc) in the tip stitch to form a pointed tip, continue working symmetrical stitches down the other side: hdc, dc, hdc, sc (create leaf shape)
Round 4 :
Edge: sl st around leaf edge adding picot points: (ch2, sl st) at tip and every other dc to create natural serration. Fasten off and leave long tail for sewing.
Info :
Alternative leaf (photo-like): Work a longer leaf by chaining 10 and using pairs of hdc/dc to create a more elongated shape. Block lightly with steam to shape veins if desired.
— Leaf Vein Embroidery :
Step 1 :
Thread a length of contrast yarn through a yarn needle and stitch a central vein: start at stem side of leaf, come up at center, stitch to tip and back with a running stitch, then secure at base. Repeat smaller veins branching off center.
Info :
Use a slightly darker green for veins for a subtle realistic look. Keep stitches small to avoid puckering the leaf.
— Alternative Ribbing Method (FPDC Columns) :
Info :
If you prefer to create ribs while crocheting instead of afterwards, work post stitches in designated columns to form raised ridges. This method requires planning the ridge placement while working rounds. For a 60-st pumpkin with 8 ribs, set up fpdc at every 7th stitch to create 8 raised ridges.
Round A1 (for FPDC setup) :
Work 1 sc in each st until you reach the stitch designated for a ridge (st 7). Replace that sc with 1 fpdc. Continue: 6 sc, 1 fpdc, repeat across (60 sts total, with 8 fpdc stitches forming columns).
Round A2-A6 :
Continue working even rounds: when you reach a fpdc stitch, work fpdc around the post of the stitch from the round below to extend the column. All other stitches are sc. This builds upright ribs as you progress.
Info :
FPDC ribs create a permanently raised ridge. After finishing and stuffing, you may still want to tighten the ribs slightly with yarn threading to deepen the segment lines for a classic pumpkin look.
— Assembly & Decoration :
Info :
Arrange the leaves at the top near the stem; tack each leaf down with a few small whip stitches so they sit flat and natural. Add a twine bow around the stem for a rustic finish like the sample photo.
Step 1 :
Position cinnamon sticks into the top center of each pumpkin. For safety and stability, push the cinnamon stick through a few strands of yarn at the top so it nestles in place and secure with glue or by wrapping twine tightly around the base of the sticks.
Step 2 :
Sew leaves beside the stem, overlapping slightly so they look natural. Use small, hidden stitches into the upper rounds so the leaf base is invisible from the outside.
Info :
Optional decorative extras: sew on buttons, beads, or a small fabric tag. Use dried moss or a bit of raffia for an extra rustic look around the stem.
— Finishing Touches :
Step 1 :
Weave in all loose yarn tails through several stitches and trim close to the work. If you used cinnamon sticks, consider applying a dot of glue to the underside where it meets yarn for extra hold.
Info :
If pumpkins will be handled frequently or given to young children, substitute cinnamon sticks for crocheted stems and do not use beads or small glues that can come loose.
Step 2 :
Place pumpkins on display, grouping different sizes together for a balanced seasonal vignette, or use a single large pumpkin as a centerpiece.
— Troubleshooting & Tips :
Info :
If your final pumpkin looks too squat or too tall, adjust the number of even rounds in the middle section: more rounds = taller pumpkin; fewer rounds = squat pumpkin. For less pronounced ribs use thinner yarn or fewer ribs; for deeper ribs use thicker yarn and tighter knotting when threading the channels.
Info :
Keep a scrap of yarn and a small sample of your chosen stitch to test rib spacing before threading the pumpkin: count stitches per segment and measure so ribs will be evenly placed.
Info :
For a grouped set like the photo, use a consistent palette (earth tones) and vary sizes by stopping increases earlier or later. The pattern above gives precise stitch counts for each size so you can reproduce the set exactly.
These pumpkins are a cozy, tactile addition to any fall vignette—rich colors, ridged texture, and cinnamon-stick stems bring a warm, handmade touch to your home. Each pumpkin is quick to make and delightful to gift or display. Gather yarn, a cup of tea, and enjoy stitching these seasonal accents! 🎃🧶