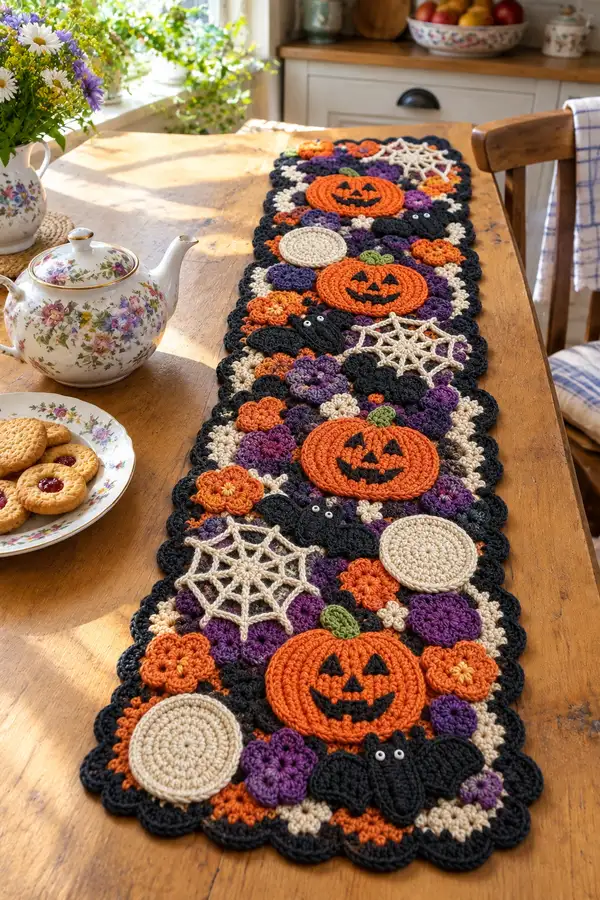
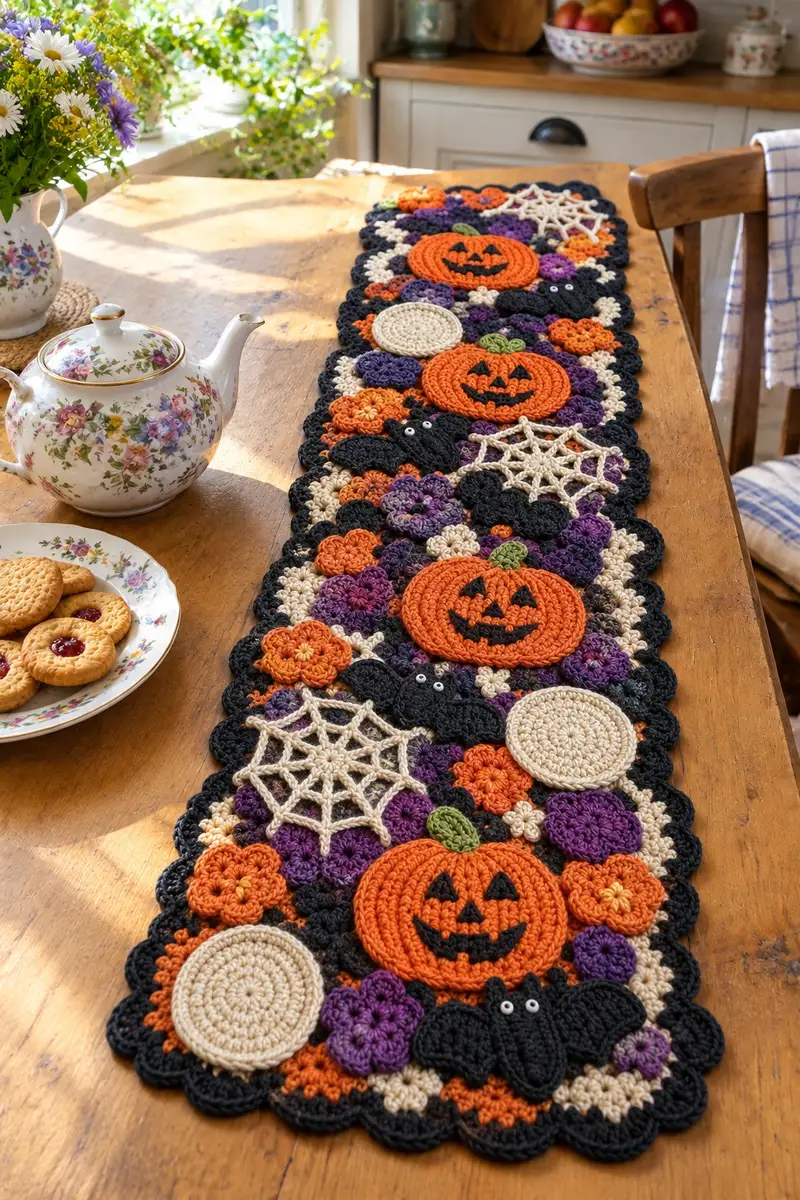
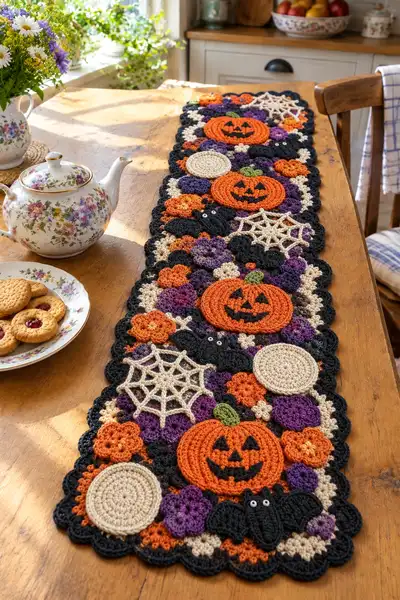
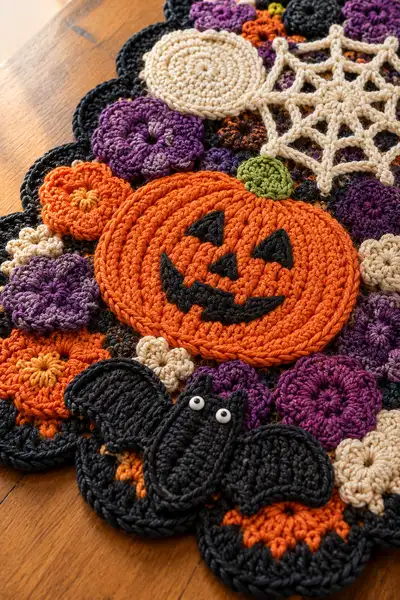
Create a festive Halloween table runner full of layered crochet motifs — smiling jack-o-lanterns, playful bats, lacy spiderwebs and clustered flower rosettes. This pattern uses small motifs assembled into a long runner with a scalloped border and rich autumnal colors. Perfect for seasonal decorating, it combines texture, applique and clever joining techniques for a handmade centerpiece.
Progress Tracker
0% Complete
— Overview :
Info :
This pattern is built from individual motifs: pumpkin discs (main focal motifs), cream round discs, purple and orange flower rosettes, bats, and spiderweb appliques. Motifs are crocheted flat in the round and assembled on a background of joined clusters to form the table runner. Use worsted weight yarn and a 4.0mm hook for the look in the photo. Maintain consistent tension and block motifs before joining for best results.
— Pumpkin Motif (Make 3) :
Round 1 :
6 sc in magic ring (6)
Round 3 :
(1 sc, inc) x 6 (18)
Round 4 :
(2 sc, inc) x 6 (24)
Round 5 :
(3 sc, inc) x 6 (30)
Round 6 :
(4 sc, inc) x 6 (36)
Round 7 :
(5 sc, inc) x 6 (42)
Round 8 :
(6 sc, inc) x 6 (48)
Info :
At this stage the motif is a flat disc about 7.5-8cm across with worsted yarn and 4.0mm hook. To create the pumpkin ribbing later we will use surface slip stitches and BLO rounds — place a marker at the start of round 9.
Round 9 :
1 sc in each st (48)
Round 10 :
1 sc in each st (48)
Round 11 :
1 sc in each st (48)
Round 12 :
1 sc in each st (48)
Info :
Begin surface ribbing: working from the front, we will add curved ridges that mimic pumpkin segments. Use contrasting slightly heavier tension for surface slip stitch rows and mark the centre line of each segment placement (typically 6 segments).
Round 13 :
Work 1 sc in each st BLO (48). This creates a subtle ridge around the disc edge (48)
Round 14 :
Surface slip stitch rib row: With RS facing, attach yarn at the center and work surface sl st in lines from center outward to edge to create 6 evenly spaced ribs. Work 6 ribs, spacing them approximately 8 stitches apart at the outer round. Do not change base stitch count.
Info :
To make 6 ribs: imagine the disc divided into 6 wedges. Starting at centre, pull up a loop, ch1 to secure, then surface sl st outwards along the seam lines; fasten off and weave ends on WS. Repeat for each rib. Keep ribs evenly spaced by counting stitches from the marker.
Round 15 :
(6 sc, dec) x 6 (42)
Round 16 :
(5 sc, dec) x 6 (36)
Round 17 :
(4 sc, dec) x 6 (30)
Info :
These decreases give the pumpkin a very slight dome at the center so the ribs look raised. Stuffing is not used — this motif is flat — but a little steam-blocking will help shape it. Fasten off leaving a tail for sewing to the background later.
Round 18 :
1 sl st around edge to tidy, fasten off (30)
Pumpkin Face Applique - Eyes & Mouth (Make 3 sets) :
Round 1 :
With black yarn, ch2, 3 sc into 2nd ch from hook, turn: 3 sc (3) - small triangle eye base
Round 2 :
Inc in first st, sc in next, inc in last (5) - shape triangle
Round 3 :
Sc across, shape point with a sl st and fasten off. Make two for eyes per pumpkin (5)
Round 4 :
Mouth: ch6, sc in 2nd ch from hook and across (5), turn sc across for two rows to make a short curved mouth (5)
Info :
Sew applique eyes and mouth to pumpkin disc following the ribs to centre for natural alignment. Use small stitches and hide tails on WS. You can also embroider the face if preferred.
— Pumpkin Stem (Make 3) :
Round 1 :
With green yarn, ch2, 5 sc in 2nd ch from hook (5)
Round 2 :
1 sc in each st BLO (5)
Round 3 :
(1 sc, inc) x 2, 1 sc (7)
Round 4 :
1 sc in each st (7)
Info :
Fasten off leaving long tail to sew stem to top center of pumpkin. Sew securely and use stuffing sparingly or none — stems should be slightly raised but not bulky.
— Cream Round Disc Motif (Make 4) :
Round 1 :
6 sc in magic ring (6)
Round 3 :
(1 sc, inc) x 6 (18)
Round 4 :
(2 sc, inc) x 6 (24)
Round 5 :
1 sc in each st (24)
Round 6 :
1 sl st around to tidy. Fasten off (24)
Info :
These discs act as neutral filler surfaces and also as bases for spiderweb appliques. Block flat before laying into the runner assembly.
— Purple & Orange Rosette Flower (Multiple sizes) :
Small Flower - Make many :
Round 1 :
6 sc in magic ring (6)
Round 2 :
Ch2, *(3 dc, ch2, sl st) in same st for petal; sl st into next st; rep from * 6 petals (6 petals)
Info :
Yarn-over loops used for petals create a raised petal. Fasten off and leave a long tail for sewing. Make clusters of these in purple, orange and cream.
Medium Flower - Make several :
Round 1 :
6 sc in magic ring (6)
Round 2 :
Ch2, *(5 dc, ch2, sl st) in same st; sl st next st; rep around for 6 petals (6 petals)
Round 3 :
1 sc into each petal base around to tidy. Fasten off leaving tail (36)
Info :
Varying petal sizes and colors creates depth — combine violet purple, variegated plums, and bright orange to echo the photos.
— Bat Motif (Make 3) :
Bat Body - central oval :
Round 1 :
6 sc in magic ring (6)
Round 2 :
Inc in each st around (12)
Round 3 :
(1 sc, inc) x 6 (18)
Round 4 :
1 sc in each st (18)
Round 5 :
Dec evenly to shape oval: (1 sc, dec) x 6 (12)
Info :
Fasten off and leave long tail for sewing. This central body is then flanked by two identical wing pieces sewn on either side to create the bat silhouette.
Bat Wing (Make 6 for 3 bats, two wings each) :
Round 1 :
Ch6, sc in 2nd ch from hook and next 3 ch (4), 3 sc in last ch, rotate and sc along opposite side of chain to the starting point making an oval (approx 10)
Round 2 :
1 sc in each st around, placing an extra sc at outer curve for wing scallop (10)
Round 3 :
Work edge scallops: *sl st, ch3, 3 dc in next st, sl st* around outer curve to create 3 fan scallops; finish with sc to join to body (counts vary by wing size)
Round 4 :
Fasten off leaving tail. Sew wings to body with the wing scallops facing outwards. Add two small white bead or embroidered eyes on body.
Info :
Sew wings slightly overlapping pumpkin edges where appropriate so the bat looks tucked into the clusters. For machine-safe pieces, embroider eyes instead of using beads for child-safe items.
— Spiderweb Applique (Make 3) :
Round 1 :
6 sc in magic ring (6)
Round 2 :
Ch3 (counts as tr), *tr in next st; rep around (6)
Round 3 :
Ch8 and sl st back into the same tr to form a long spoke; *ch8 and sl st into next tr; rep around to form 6 spokes, sl st to join
Round 4 :
With RS facing and using yarn in cream, attach at one spoke and ch6, sl st into spoke 2 spaces outwards to build radial connectors: *sc in ch6 space, ch6, sl st into next spoke; rep forming hexagonal web pattern
Info :
These webs are intentionally lacy. Keep tension slightly loose so the web lays flat and flexible. Block and pin into shape after finishing to open out spokes.
Round 5 :
Work small decorative picots on outer ring: *ch3, sl st into next space; rep to form a tiny scalloped outer edge. Fasten off and weave ends.
— Background Cluster Module (Make many — creates the runner base) :
Round 1 :
6 sc in magic ring (6)
Round 3 :
(1 sc, inc) x 6 (18)
Round 4 :
(2 sc, inc) x 6 (24)
Round 5 :
1 sc in each st (24)
Round 6 :
Change to black yarn. 1 sc in each st BLO to create a defined edge ridge (24)
Info :
These cluster modules are the filler background. Make many (approximately 40-50 modules depending on runner length). You will join them with slip-stitch joins and mattress stitch to create the dense patchwork seen in the photos.
Round 7 :
Work a decorative scallop edge to each module: *skip 1 st, 5 dc in next st, skip 1 st, sl st in next; rep around for a scalloped motif edge (approx 6-8 scallops depending on spacing)
Info :
Block modules flat and pin scallops straight to ensure consistent joins. Alternate colors for depth: clusters in black, cream, purple and orange are interspersed in the runner photo.
— Joining & Assembling Motifs into Runner Base :
Info :
Lay out all motifs on a flat surface in the desired runner layout. Use the photo as a guide: pumpkins spaced evenly along the center line, cream discs and spiderwebs staggered between them, clusters filling gaps and bats tucked near pumpkins. Pin in place before sewing.
Step 1 :
Join modules using slip-stitch join method: with RS facing, place two module edges together and work through both loops, sl st through corresponding stitches to join. Work gently to avoid puckering and check alignment frequently.
Step 2 :
Sew focal motifs (pumpkins, discs, webs) onto the joined background using mattress stitch or whip stitch. Start at the center and work outwards; for pumpkins align central ribs with seams of joined clusters so they sit naturally.
Info :
When sewing pumpkin faces, embroider mouth and eyes before attaching a pumpkin to the background if desired. Applique small pieces first, then apply the whole pumpkin motif for better control and neatness.
— Scalloped Border (Work around entire runner after assembly) :
Round 1 :
With black yarn, join at any outer edge st and work 1 sc evenly around the whole runner edge, working through both layers where seams meet (work approx 2 sc per scallop point area - final count will depend on runner length)
Round 2 :
*Ch1, skip 1 st, 7 dc in next st, skip 1 st, sl st in next st; rep around to form scallop fans (scallop width based on spacing), adjust to fit corners and curves
Round 3 :
Work a second row of scallops if desired: sl st to center of each fan then ch1, 5 dc in fan centre, sl st to secure. Fasten off and weave ends.
Info :
Because the runner is long, work the scallop border in stages, aligning the fans to match the scallops of the underlying modules for a smooth, continuous edge. Block again after border is finished to shape the edge.
— Final Decorative Details & Finishing Touches :
Info :
Sew black appliques (bats) partially overlapping pumpkins and clusters to tuck them into the composition. Add small white sewn or bead eyes on bats and embroider any additional highlights on pumpkin faces for expression. Weave all tails neatly on WS and trim close.
Extra Embroidery :
Using black yarn and a blunt yarn needle, work satin stitch over the small mouth and eye shapes to create smooth filled faces. For raised features, use a couple of rows of surface slip stitch around the shape edges prior to embroidery.
Blocking :
Lightly steam or wet-block the finished runner on a flat surface, pinning scallops and motifs into perfect shape. Allow to dry fully before trimming any stray fibres.
Info :
Runner length: the photographed runner measures approximately 90-110cm long depending on spacing. You can lengthen by adding extra background cluster modules and repeating the motif sequence. Keep motif counts and spacing consistent when extending.
— Notes on Customization and Color Changes :
Info :
Change colors on any motif lines to suit your palette: swap purple for teal for a different look or use autumnal browns for a more rustic tone. When changing colors mid-round, carry the unused yarn on the WS or weave in tails securely. For multi-colored petals, change color at start of petal ch2.
Info :
To make a shorter runner, simply reduce number of cluster modules and repeat pattern of motifs until you reach desired length. To make a table centre mat instead, choose fewer central modules and work border scallops closely around a smaller composition.
This Halloween runner is a joyful mix of texture, color and seasonal charm that transforms any table into a festive centerpiece. The layered motifs — smiling pumpkins, bats and lacy spiderwebs — combine to make a playful, hand-crafted statement. Enjoy the mindful rhythm of crocheting small repeatable motifs and watching them come together into one long, eye-catching piece. 🎃🕸️ Make one for every table this season and delight guests with your handmade centerpiece!