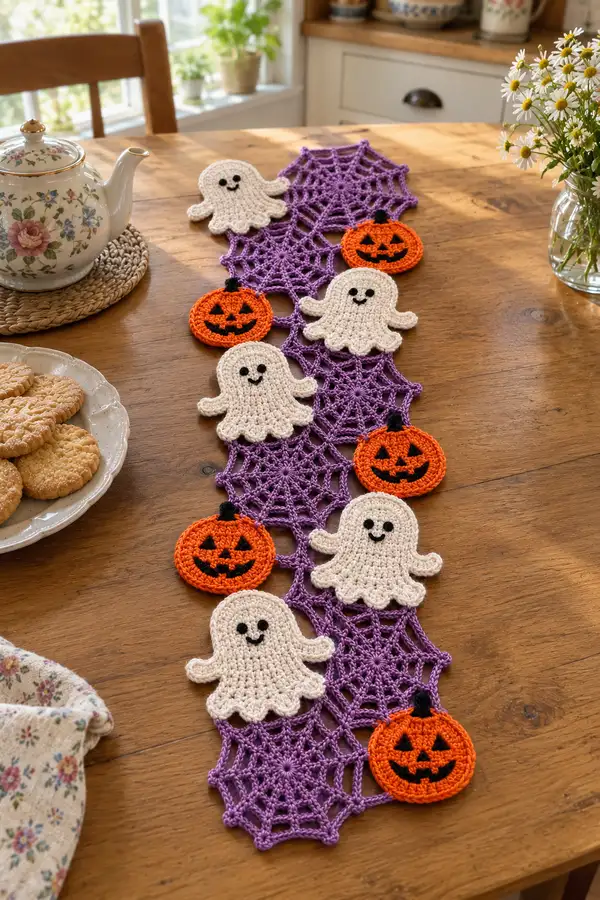
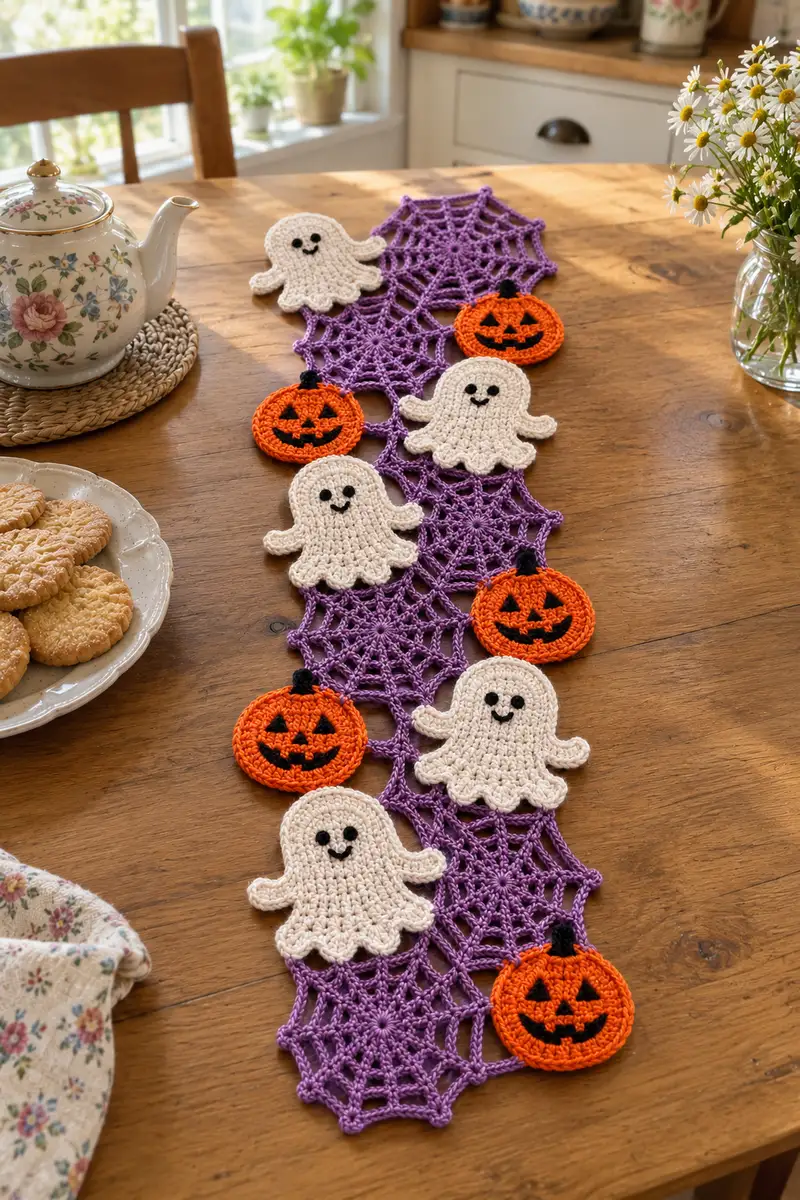
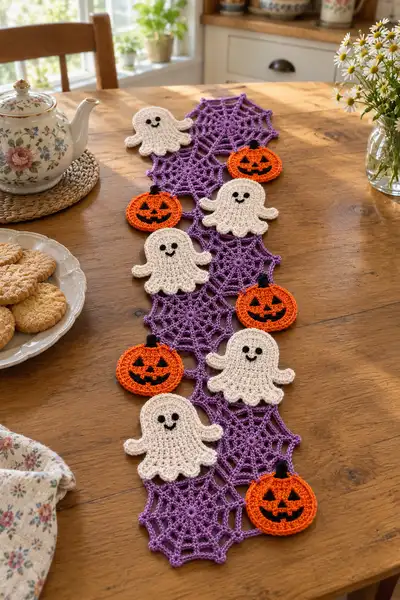
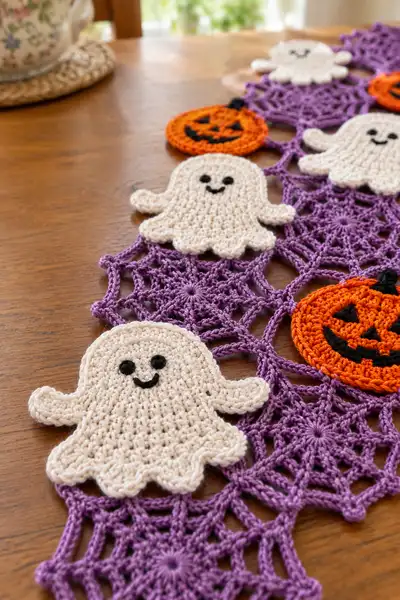
A playful Halloween table runner featuring linked purple spiderweb motifs adorned with smiling cream ghosts and bright orange jack-o-lanterns. This decorative runner lies flat on a table and shows whimsical scalloped ghost edges and embroidered pumpkin faces for a charming seasonal display. The pattern uses simple motifs joined together, making it perfect for those who enjoy motif work and small appliques. Clear instructions guide you through motif construction, appliques, assembly and finishing details.
Progress Tracker
0% Complete
— Materials & Gauge :
Info :
Use worsted weight cotton yarn for crisp stitch definition and good blocking. Gauge is not critical for motif-based runners, but ensure spiderweb motifs measure approximately 9-10 cm (3.5-4 in) across when finished using a 4.0mm hook, so the overall runner density matches photos.
— Notes :
Info :
Work in continuous rounds for motifs unless noted; join rounds with sl st as directed. For neat joins, block each motif lightly before assembly and weave in ends securely. All stitch counts provided include the final total for the round in parentheses.
— Spiderweb Motif (Make 7-10 or as needed) :
Round 1 :
6 sc in magic ring (6)
Round 3 :
(1 sc, 1 inc) x 6 (18)
Round 4 :
(2 sc, 1 inc) x 6 (24)
Round 5 :
(3 sc, 1 inc) x 6 (30)
Info :
Keep rounds 1-5 worked tightly to create a solid center from which the web rays will radiate. Place a stitch marker at the start of each round to track beginning.
Round 6 :
*ch 3 (counts as tr), tr in next st, ch 4, sl st in next st* around to create 6 spokes. Join with sl st to top of starting ch-3 (36 tr and ch sps counted as 36 spacing points)
Round 7 :
Working into chain spaces: sl st to first ch-4 sp, *ch 5, (dc, ch 2, dc) in same ch-4 sp, ch 3, sl st in next ch-4 sp* repeat around (6 shells with connecting ch-3 spaces) (6 shells + ch-5 loops)
Info :
This round builds the first ring of the web. Use a slightly looser tension in chains to allow the web to open and lay flat. Block this round as needed to maintain flatness.
Round 8 :
In each ch-5 loop: *(sc, hdc, 3 dc, hdc, sc), ch 5, sl st into next ch-3 space* around (6 full fans with ch-5 connecting loops) (approx 48 sts excluding ch loops)
Round 9 :
Ch 1, sl st to center of first fan, *ch 7, sl st in center of next fan* around forming longer connecting loops between fans (6 long loops)
Info :
These elongated chain loops form the web's outer rays. Keep them even; use blocking pins to maintain symmetry before continuing with outer rounds.
Round 10 :
Work into each ch-7 loop: sl st, ch 3 (counts as dc), 11 dc, sl st in same loop to make a scalloped ring (12 dc per loop) (6 scallops)
Round 11 :
Into each scallop: *(sc, hdc, 8 dc, hdc, sc) across each scallop; sl st into base between scallops* around (6 scalloped petals, approx 60 sts)
Info :
If you prefer a more lacy look, substitute 8 dc with 6 dc in Round 11. Blocking at this stage really helps the web shape hold when joined with others.
Round 12 :
Ch 1, sc evenly around the entire outer edge working (sc in each dc, 2 sc in ch spaces as needed) to neaten edge (approx 72 sc)
Round 13 :
*ch 6, sl st in every 12th sc around* to create connecting arches (6 arches total)
Round 14 :
Working from back: in each ch-6 arch work (sl st, ch 3, 3 tr, ch 3, sl st) to form slender arches that will be joining points (6 arches)
Info :
Final decorative arms are optional; you can leave outer edge with simple sc if you prefer a subtler runner texture. Make the number of spiderweb motifs to suit your table length—this pattern photo uses 7 spiderwebs linked.
Round 15 :
Sc around final edge to tighten and finish neat joins (approx 72 sc). Fasten off and weave ends. Block flat and repeat to make required quantity (7-9 recommended for runner in photo).
— Ghost Applique (Make 6) :
Round 1 :
6 sc in magic ring using cream yarn (6)
Round 3 :
(1 sc, 1 inc) x 6 (18)
Round 4 :
(2 sc, 1 inc) x 6 (24)
Info :
These rounds establish a rounded head for the ghost. Keep tension even so facial embroidery will sit flat later. Mark the top center of the motif for later alignment of arms and face.
Round 5 :
1 sc in each st (24)
Round 6 :
(3 sc, 1 inc) x 6 (30)
Round 7 :
1 sc in each st (30)
Round 8 :
(4 sc, 1 inc) x 6 (36)
Info :
From rounds 6-8 you create width for the body. The ghost is worked longer than wide; after increases, continue in even rounds to build height rather than increasing further.
Round 9-12 :
1 sc in each st for 4 rounds (36)
Round 13 :
BLO 1 sc in each st to create a subtle ridge (36)
Info :
The BLO round helps visually separate the head from the body and gives a base for sewing on the arms. Begin planning arm placement at this stage; arms will be stitched into rounds 11-14 area.
Round 14 :
1 sc in each st (36)
Round 15 :
*(4 sc, dec) x 6 (30)
Round 16 :
1 sc in each st (30)
Info :
Now form the scalloped lower edge that becomes the ghost’s wavy hem. The scallops are worked as small shells and chain loops; plan scallop spacing evenly across the lower edge.
Round 17 :
*ch 3, skip 2 sc, sl st in next st* across to create 10 small arches around lower edge (10 arches)
Round 18 :
In each ch-3 arch work (sl st, ch 2, 5 dc, ch 2, sl st) forming 10 small scallops around hem (10 scallops)
Round 19 :
Sc around entire ghost motif including scallops (approx 40 sc) to neaten edge; fasten off leaving long tail for sewing
Info :
Sew small arms separately or make them from extension of motif: For separate arms, make 12 ch, sc back across to form a small curved arm, then sew into round 11-13 area on each side. Make two for each ghost and attach before final sewing to runner.
Round 20 :
Embroider face using black yarn and tapestry needle: stitch two filled french knots or small circles for eyes and an arched smiling mouth. Make sure placement is symmetrical — eyes approx 6-8 sts apart on round 8-9 region.
— Ghost Arm (Make 12 for 6 ghosts) :
Round 1 :
Ch 6, sc in 2nd ch from hook and across (5 sc)
Round 2 :
Ch 1, turn, 1 sc in each st across (5)
Round 3 :
Ch 1, 1 sc in first 2 sts, 1 hdc in next st, 2 sc in last st, finish with sl st to round end to round the tip (6)
Info :
Fold arm slightly and sew into ghost between rounds 11-13, leaving a small curve so the arms look raised. Make sure both arms are mirrored when attaching.
— Pumpkin Applique (Make 4) :
Round 1 :
6 sc in magic ring with orange yarn (6)
Round 3 :
(1 sc, 1 inc) x 6 (18)
Round 4 :
(2 sc, 1 inc) x 6 (24)
Info :
These rounds create a flat round pumpkin base. For a slightly oval pumpkin, add one extra increase cluster on one side at R4 to bias shape, then balance later rounds accordingly.
Round 5 :
1 sc in each st around (24)
Round 6 :
(3 sc, 1 inc) x 6 (30)
Round 7 :
1 sc in each st (30)
Round 8 :
Change to BLO: 1 sc BLO in each st (30) to create a slight ridge for pumpkin segments
Info :
Switching to BLO gives a visual segment line; you can embroider vertical ribbing later with back stitch in black for classic jack-o-lantern texture.
Round 9 :
Ch 1, sc around to neaten edge (30)
Round 10 :
Using black yarn embroider face: two triangle eyes (approx 3-4 sts wide each), triangular nose and curved smiling mouth. Secure ends on the back and weave in.
Round 11 :
With black or dark green, make a small stem: ch 4, 6 sc back across then sl st to base. Fasten off and sew stem to top center of pumpkin. Secure well with several passes then weave ends to back.
— Pumpkin Ribbing & Detail :
Round 1 :
Using tapestry needle and black yarn, stitch 5 evenly spaced lines from top to bottom following curvature to create ribs. Use simple backstitch or surface slip stitch for clean edge.
Info :
Keep stitches slightly raised to mimic pumpkin ribs; do not pull too tightly or the pumpkin will warp. Practice stitch pressure on scrap yarn before embroidering pumpkins.
— Optional Small Connecting Loops (Make many) :
Round 1 :
Ch 6, sl st to form ring and fasten off. These small simple rings will be used to join triangles of the web and attach appliques without bulky seams.
Info :
Make as many little connector loops as needed to join spiderweb edges and to place ghosts/pumpkins; they allow tidy, flexible connections that drape well across the table.
— Joining Spiderweb Motifs into Runner :
Info :
Lay out spiderwebs in staggered row as in photos: join webs by aligning outer arches (Round 13-14 arches) and slip stitching together through corresponding ch loops. Pin motifs and leave spacing for appliques: alternate motifs with small overlap points where appliques will sit.
Round 1 :
Place two spiderweb motifs right sides together at matching outer arches. With purple yarn and hook, sl st through both ch-6 arches at five even points to join; repeat until a long chain is formed (joining points dependent on motifs count)
Round 2 :
After joining motifs into a chain, on the back side of the runner sc along the inner seam to stabilize joins: 1 sc in each st around seam line (approx 8-12 sc per join area)
Info :
When joining, keep joins loose enough to allow slight drape but even enough to avoid big gaps. Use blocking and pins to align the runner before adding appliques.
Round 3 :
Determine applique positions: lay out ghosts on alternating spiderwebs and pumpkins in between as in picture—ghosts centered over web centers with arms pointing outward, pumpkins placed near web edges. Pin in place.
Round 4 :
Sew_appliques: use whip stitch from back of runner through applique edge and web arches to anchor. Make small hidden stitches so front remains neat. Sew each ghost with stitches around body edge (approx 10-12 stitches per ghost). Pumpkins are sewn at three points (top and two sides) to hold flat.
Info :
Attach appliques before final edging so they are incorporated into edge finishing for a neater look. Use matching thread color for invisible seams on front.
Round 5 :
Reinforce joins and applique edges by going around entire runner with 1 round sc in purple, working through both web edges and applique edges where they overlap to create unified surface (approx continuous sc across entire runner)
Round 6 :
Optional: add a decorative picot edge by working *(sc, ch 3, sl st in tip)* every 6 sts along boundary to give a finished lacy look (picots approx 24-30 per side depending on runner length)
Info :
If runner will be laundered, use secure knots and weave ends at least 5 cm/2 in into stitches. Cotton yarn handles washing well on gentle cycle; reshape and block while damp.
— Alternative Edging Variation (for heavier look) :
Round 1 :
With a 4.0mm hook in purple, join at any seam and *ch 1, sc in next 4 sts, ch 3, skip 2 sts*, repeat around to create airy but structured border (adjust counts by runner length)
Round 2 :
Into each ch-3 loop work (sc, hdc, 3 dc, hdc, sc) to create scalloped edging for a decorative finish
Info :
This heavier border helps the runner hold its shape on the table and frames the spooky motifs nicely. Consider a single row of contrasting black sc for extra definition before scallops.
— Finishing Touches :
Round 1 :
Weave in all ends with yarn needle, trimming close. Lightly steam-block runner flat and pin scallops/web points to dry for crisp finish.
Round 2 :
Check applique security: add small tack stitches at additional points if any piece lifts. Add felt or cork dots under heavy spots when used under teapot to protect wood surfaces.
Info :
Store runner folded gently in acid-free tissue to avoid crushing scalloped edges. If folding creates creases, lightly steam and reshape.
This Dancing Ghosts and Pumpkins Table Runner is a delightful seasonal project that brings festive charm and handcrafted personality to your table. The combination of lacy spiderwebs with cute ghost and pumpkin appliques creates a playful yet elegant look that’s perfect for Halloween entertaining. As you join each motif and stitch on each smiling face, the runner comes alive with whimsical details that are so satisfying to make. 🧶👻 Add your own color twists or stretch the runner length — this design is wonderfully flexible. Happy stitching and enjoy showing off your spooky handmade creation! 🎃