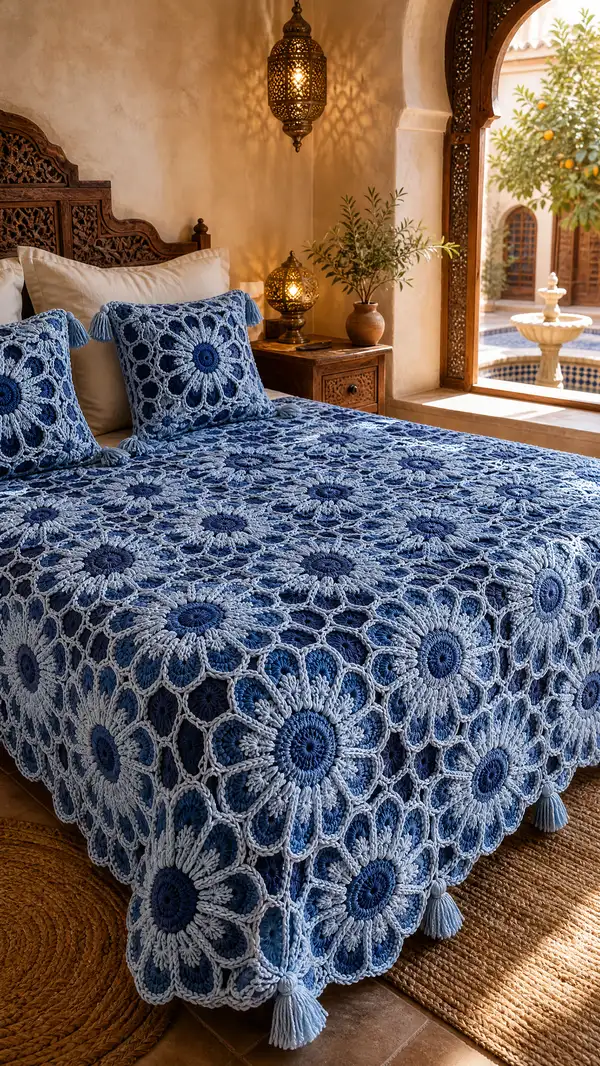
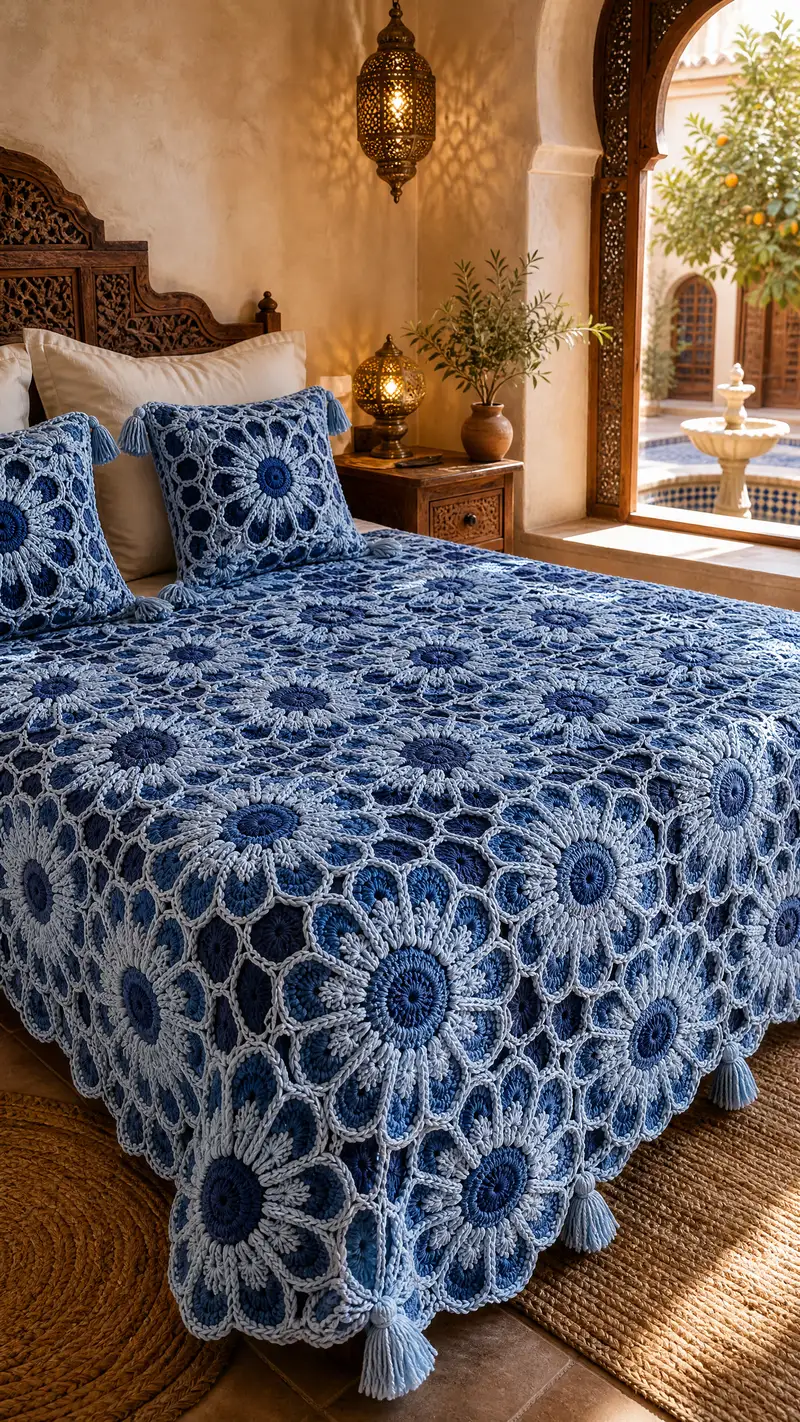
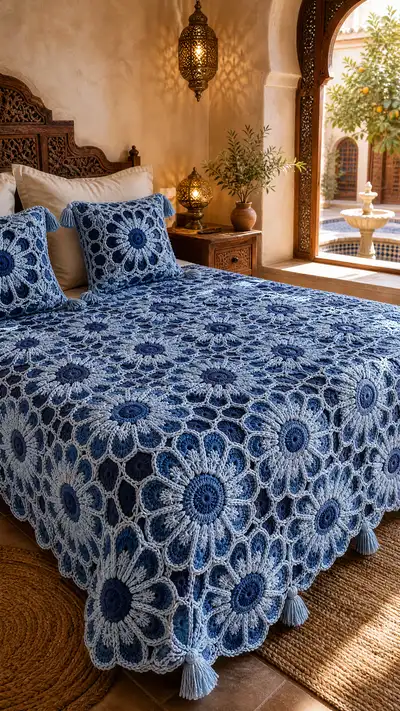
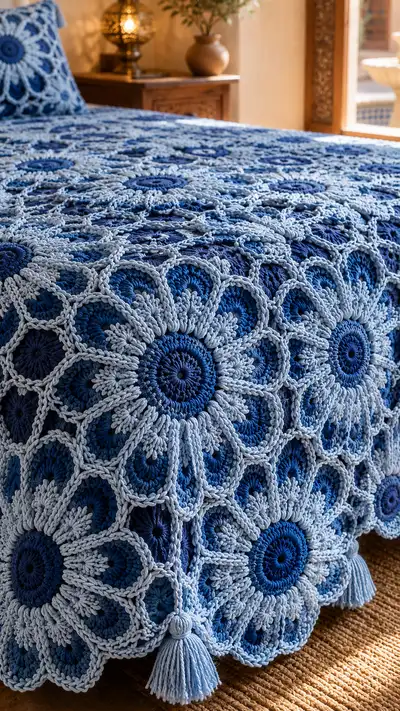
A sumptuous denim-inspired floral granny bedspread worked from modular flower motifs joined with a lacy chain mesh and finished with tasselled corners. This pattern recreates the layered petal texture, two-tone denim colorwork, and openwork joining shown in the photos. Detailed motif construction, join-as-you-go methods, and a full edge border ensure a beautiful, drapeable bedspread for a double/queen bed.
Progress Tracker
0% Complete
— Overview :
Info :
This bedspread is modular: make individual floral motifs, join them with a lacy chain round as you go, then work a scalloped border and attach tassels. Each motif is worked in three main colors (center, petal, outer join). The motif is built in 20+ rounds to create a firm center, layered puff petals, and an open outer ring. Plan layout (number motifs across and down) to fit your bed: sample layout in these instructions yields a generous double/queen when using the specified yarn and hooks.
Info :
Gauge: One completed motif measures approximately 12.5 cm / 5 in across from petal tip to tip after light blocking (this gauge depends on yarn and hook). Adjust hook if necessary to match motif size. The sample bedspread in photos uses motifs that block to ~13 cm (5.1 in).
— Motif (Make many) :
Round 1 :
Using dark navy, 6 sc in magic ring (6)
Round 3 :
(1 sc, 1 inc) x 6 (18)
Round 4 :
(2 sc, 1 inc) x 6 (24)
Round 5 :
(3 sc, 1 inc) x 6 (30)
Info :
Keep tension slightly firmer in the dark navy center rounds so the center sits proud and doesn't stretch when petals are added. Use a slightly smaller hook (4.5mm) for rounds 1-5 if you prefer a tighter center.
Round 6 :
(4 sc, 1 inc) x 6 (36)
Round 7 :
(5 sc, 1 inc) x 6 (42)
Round 8 :
(6 sc, 1 inc) x 6 (48)
Info :
At the end of Round 8 you have 48 stitches: these will be grouped into 12 petal positions of 4 base stitches each. Place markers in rounds 1 and at every 4th stitch boundary if helpful to realign before petal work.
Round 9 :
Change to medium denim. 1 sc in each st around (48)
Round 10 :
1 sc in each st (48)
Info :
These two rounds in medium denim form the petal base. If you want a deeper center ring, add another even round before starting petal loops. Carry your dark navy tail to the back and weave in later.
Round 11 :
*1 sc in next 3 sts, ch5, skip next st* repeat 12 times (48 base stitches remain, plus 12 ch-loops)
Info :
Round 11 creates 12 chain-5 loops that become the foundation for petals. Count loops to confirm 12; mark the first loop to keep count. The stitch repeats still place one stitch per base st, so stitch count remains 48.
Round 12 :
Work petals into each ch5 loop: *sl st into ch5 loop, ch2, (puff stitch 3 times across loop: (yo, insert hook in loop, pull up loop) x3, yarn over and pull through all loops to create one puff cluster), ch2, sl st into same loop* repeat 12 times (petal rows anchored into loops)
Info :
Puff stitch technique: yarn over, insert hook, pull up loop (do not complete), repeat required times, yarn over and pull through all loops on hook, ch1 to close puff if desired. Each petal uses a 3-puff cluster for a full, raised petal. Practice a sample petal to tune tension before working motifs in quantity.
Round 13 :
Switch to light denim. Working around petals: *ch3, sl st at base between petals into the nearest base sc (creating arches that wrap petals), ch3, sc in top of next petal cluster* repeat 12 times forming a ring of arches (stitch count remains visually 12 arch points)
Info :
This round sets up the outer decorative mesh. Keep chain arches loose but consistent so they will join easily to neighboring motifs. If you want a denser outer ring, substitute ch3 for ch4.
Round 14 :
*Into each ch3 arch: (sc, ch2, 3 dc centered over the petal tip, ch2, sc)* repeat 12 times; sl st to join end
Info :
Round 14 builds petal tip pops and provides anchor points for join-as-you-go. When working the 3 dc cluster, work them into the arch so the petal tips are emphasized; count 12 clusters total.
Round 15 :
*ch6, skip to next arch base and sl st; repeat 12 times creating 12 long chain-spokes that will form the honeycomb mesh (this is decorative - stitch counts are chain loops only)*
Info :
Round 15 is the start of the open mesh. These long chain loops are where you will perform join-as-you-go connections in subsequent rounds. Keep chains consistent length. Count 12 chain spokes per motif.
Round 16 :
In light denim, working into each ch6 loop: sl st, ch2, (hdc, dc, tr, dc, hdc) across the chain loop, sl st to base - repeat 12 times creating petal-lattice arches
Info :
Work clusters so they sit slightly above the petals, forming a delicate scalloped petal top. Keep tension even and let clusters breathe; this layer creates the visual lace that becomes the join grid.
Round 17 :
*sl st to peak of a lattice arch, ch5, sl st in peak of adjacent motif (when joining as-you-go) OR ch5, sl st back at same peak if working a single motif (12 arches remain)*
Info :
Round 17 is critical for joining motifs: if you are working the first motif you will make ch5 loops; if you are working the second or subsequent motif and positioned it next to an existing motif, you will sl st into the corresponding peak of the adjacent motif to join them. Use blocking pins to hold motifs in place when joining to keep edges flat.
Round 18 :
After forming the ch5 loops or joining points, work *sc in each ch5 loop base, ch3 between joined points* around to tidy the junctions and form hex-like openings between motifs (visual count: 12 junctions)
Info :
This tidy round normalizes the look of the joins and completes the honeycomb mesh — when many motifs are joined, the light denim forms the lattice that frames each medium-blue petal cluster.
Round 19-20 :
Work two rounds of sc in light denim around the outermost stitch row to stabilize the motif and prepare for final join round. Maintain 12 principal repeats as you fill in gaps. Fasten off and weave ends. Block motif flat.
Info :
Blocking tip: wet-block or steam-block each motif to the same diameter. Pin outer edges gently in a symmetrical round to make joining easier. Trim long tails and weave securely to the back of the motif.
— Alternative Petal Texture (Optional extra rounds) :
Round 21 :
If you want the petals extra tall, return to medium denim and work behind-petals: join at the base of each petal cluster, ch2, work 6 dc into the space behind the petal creating a raised petal back - repeat 12 times
Info :
This alternative gives a deeper 3D petal. It adds bulk and may change the motif diameter; only use if you plan block and join carefully and expect larger overall spread.
Round 22 :
Join light denim and work one round of sc around to even out petal backs and prepare for mesh joins
Info :
Use this option sparingly - it creates dramatic texture but increases yarn usage and thickness of the final spread.
— Join-As-You-Go Mesh & Assembly :
Round 23 :
Start joining motifs in rows: position new motif next to an already-completed motif; when you reach a ch5 loop in Round 17 equivalent, instead of making a ch5, sl st into corresponding peak of neighbor motif, ch1 and continue. Repeat around until motifs share 1-3 connection points dependent on layout
Info :
Join-as-you-go method: always align motifs with the same orientation. Pin both motifs with the centers aligned on a flat surface. When joining, make the first connection in the center of an edge, then continue clockwise. Work slowly for accurate alignment — it’s easy to mis-count join points.
Round 24 :
When three or four motifs meet at a junction (four-point), create a tidy join by sl st to the intersection, ch3, sl st into each adjacent motif peak, then sc over the intersection to lock the junction in place. Repeat for each new junction point.
Info :
At internal junctions, the lattice naturally forms small hexes; secure each junction with an extra sl st or single crochet to reduce gaps. Keep joins slightly loose to preserve drape.
Round 25 :
Continue adding motifs row by row. When joining motifs along an edge, you will make roughly 6-8 join points per motif side (counts vary by motif diameter). Keep a running tally of motifs per row to match your bed layout. If adding the motif to the top/bottom edge, leave outermost ch loops unjoined - they will be incorporated into the border round later.
Info :
Layout suggestion: For a queen-size bed, a typical layout with ~13 cm motifs is 7 motifs across by 10 motifs down (this yields approximately 91 motifs). Confirm your motif gauge; you may need to change motif count for desired coverage and overhang.
Round 26 :
After joining a full panel, work a stabilizing round in light denim across the entire worked area: sc in each available stitch and around chain joins to even out the surface. This may reduce the total width slightly - account for it in final layout.
Info :
When working across many motifs, use long circular crochet hooks or flexible yarn to move across larger areas comfortably. Stop periodically to check alignment and countersink any bulky joins with additional single crochet if needed.
— Border (Scalloped edge and finishing) :
Round 27 :
Once all motifs are joined into the panel that fits your bed, work an even round of sc along the outer edge where there are exposed chains and petal tips. Work 1 sc in each stitch or chain space to create a foundation row. Count stitches as you go.
Info :
Take special care at corners: if your panel doesn't create a sharp corner naturally, add a few extra sc or a short ch-space to form a neat turning corner for the scalloped border.
Round 28 :
Work a decorative shell foundation: *skip 2 sts, 5 dc in next st, skip 2 sts, sc in next st* around forming scalloped arches. Adjust spacing if shell count doesn't match edge length exactly; add small adjustments near corners to keep scallops even.
Info :
If you prefer a delicate scallop, reduce to 3 dc shells. For more pronounced waves, use 7 dc shells. Match shell size to motif scale for pleasing proportion.
Round 29 :
Work another round in light denim attaching shell tops: *ch3, sl st into center dc of shell, ch3, sc between shells* around finishing with a sl st. This makes a raised rope-like scallop visible in photos.
Round 30 :
Finish with one round of slip stitch or crab stitch (reverse sc) across outer edge to create a clean, durable edge. Fasten off and weave in ends thoroughly.
Info :
Blocking tip: After border is complete, block the entire spread again to even out shell shapes. Use gentle steam or spray blocking—cotton-yarns respond well to warm steam and will set the shell shape nicely.
— Pillow Covers (Make 2) :
Round 31 :
Make motif for pillow using same motif instructions through Round 20 but stop before outer join round if you'd like a tighter square. Work 4 motifs and join them with round 23-26 style to form a square 2x2 motif pillow front (or use single motif sized to pillow).
Round 32 :
Edge pillow front with one round of sc and one round of shell border as in Rounds 27-29. For the pillow back, make a square of dc rows in medium denim to match size, then sew or overlap to create an envelope closure.
Info :
Pillow tassels: make a tassel for each corner by wrapping yarn around a 6-7 cm width of cardboard 30-40 times, tie and trim. Cover the knot with a small sc-wrapped head for a neat finish and attach to pillow corners securely.
— Tassels & Corner Details :
Round 33 :
Create corner tassels for the bedspread: use light denim to wrap 60-100 strands depending on desired fullness. Make 4 tassels per corner to form a substantial tassel cluster (or single large tassel per corner as in photo).
Round 34 :
Secure tassel top with a length of yarn wrapped tightly multiple times, then make a small loop at the top. Attach tassel loop through the corner junction of motifs (where four motifs meet) using a tapestry needle and secure with additional wraps and weaving inside adjacent stitches.
Info :
Tip: add a small wooden bead inside the tassel knot for extra weight and to help tassels hang straight. Trim tassels evenly and steam them lightly into shape if needed.
— Finishing & Care :
Round 35 :
Weave in all ends by threading them into the motif backs, going under multiple stitches and trimming close. Use matching color yarn to invisibly knot if necessary.
Round 36 :
Lightly block the entire spread if required: pin to shape on blocking mats and spray with warm water or use a steam iron from a distance. Allow to dry completely before using on bed.
Info :
Washing: machine wash gentle cold or hand wash; reshape while damp and dry flat. Cotton yarns will soften and bloom slightly after washing—expect modest change to motif definition after first wash.
— Technical Notes & Stitch Math Verification :
Info :
Each motif uses 12 principal repeats. Base circle expands to 48 stitches after round 8 so that petals align into 12 groups of 4 base stitches. Petal and mesh rounds do not change base stitch counts; they add chains and clusters anchored into base stitches. Keep this grouping consistent while joining so the honeycomb grid lines up evenly across motifs.
Info :
When joining motifs, joining points per motif side will equal number of mesh arches you made (approx 6 major join points per side for a motif diameter of ~13 cm). Count and plan joins before joining to ensure triangular/hex junctions are consistent.
Round 37 :
Optional: if you want a denser coverage with fewer holes, work an extra mesh fill round in light denim: into each honeycomb opening, work *sc, ch3, sc*, reducing open space and increasing warmth.
Info :
Adding extra fill rounds increases yarn usage significantly—estimate an additional 400-800g depending on spread size. Sample photos use the open honeycomb method for a light drape.
— Layout & Sizing Guidance :
Info :
Sample layout for a generous double/queen bed (with overhang similar to photo): 7 motifs across x 10 motifs down = 70 motifs. At motif diameter after blocking ~13 cm, this gives approximately 91 x 130 cm before border; actual finished size with border and scallops will be larger. Measure and adjust motif count to match your bed and desired overhang.
Info :
For smaller bed or lap throw, reduce motif counts proportionally. For king-size, increase counts and consider extra yarn in all colors (add ~30% yarn to queen estimate).
Round 38 :
Professional finishing: after entire piece is assembled and blocked, run a narrow whip-stitch in matching light denim along joins on the underside to tidy any loose chain loops and secure motifs for heavy use.
Info :
Under-sewing is optional but recommended if the bedspread will be washed frequently or used as a duvet topper where edges will rub.
— Extended Stitch & Technique Tips :
Info :
Puff stitch tension: keep consistent pull height on each puff. Yarn over once between each pull of a puff cluster helps avoid overly tight puffs. Block puffs gently to shape petals if needed. Use stitch markers to mark every 3rd or 4th petal while practicing until your counts are perfect.
Info :
Working with many motifs: keep motifs stacked by color so you can work them in production batches. Weave tails as you go to avoid an overwhelming end-weaving task. Keep a notebook of motif counts per row to track layout progress.
Making this denim flower granny bedspread is a deeply satisfying, tactile journey—each motif is like a little floral triumph that joins into a soothing whole. The layered petals against the lacy grid create a beautiful play of texture, and the tasselled corners give it a playful, finished style. Whether you make it for a gift or your own bedroom, every stitch contributes to a cozy, handmade heirloom. 🧶🌿