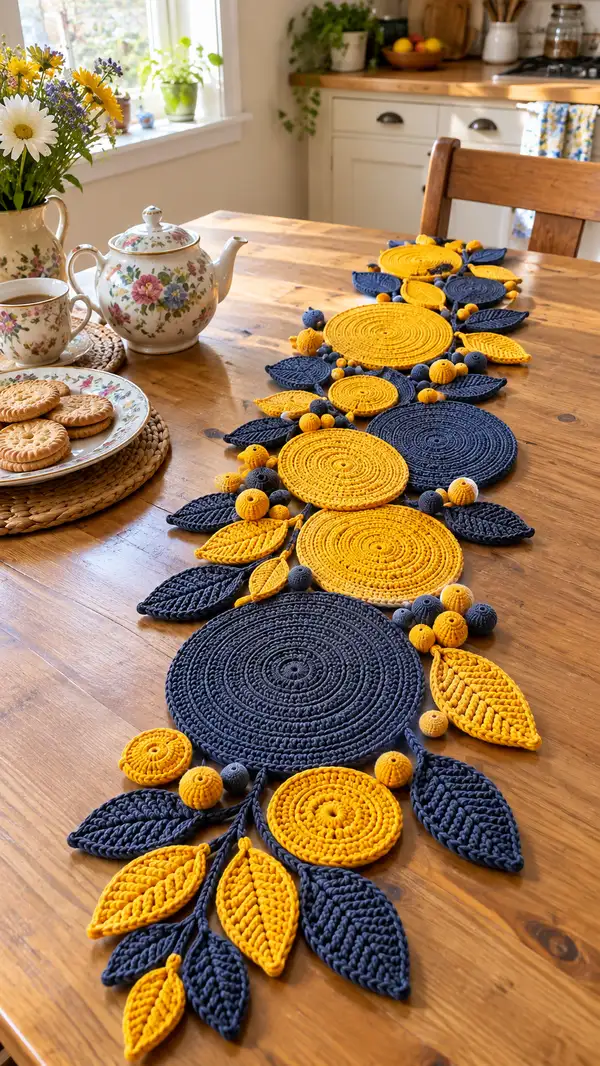
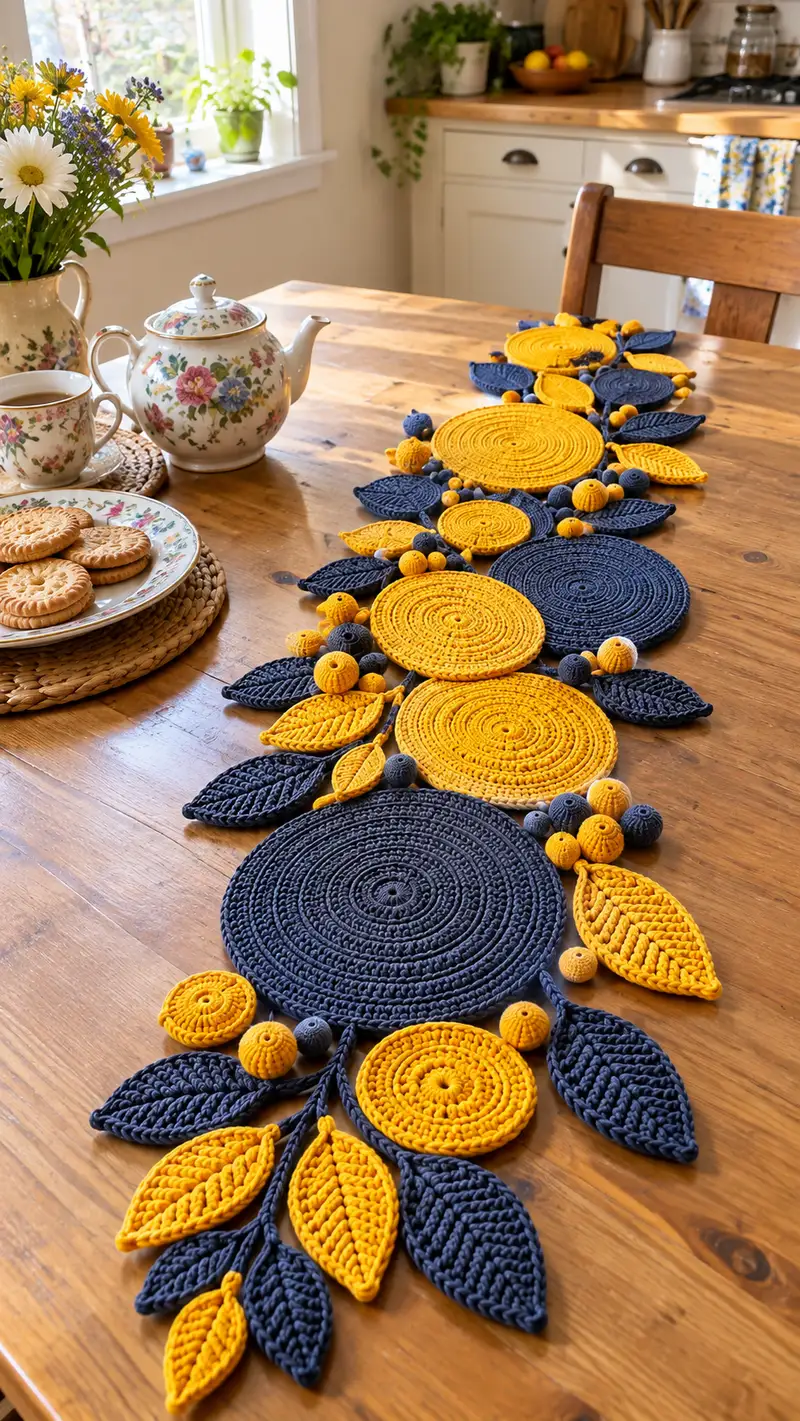
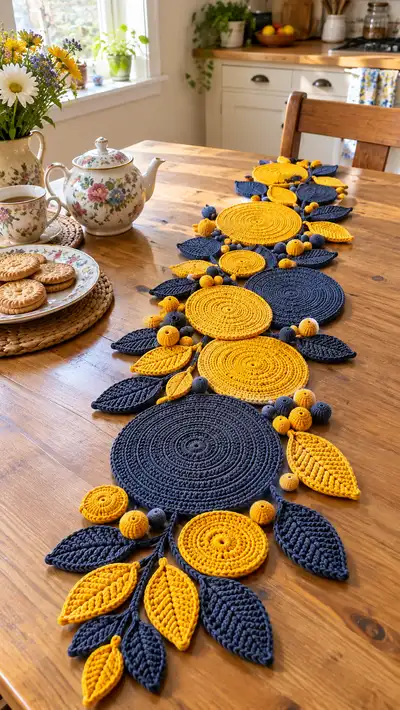
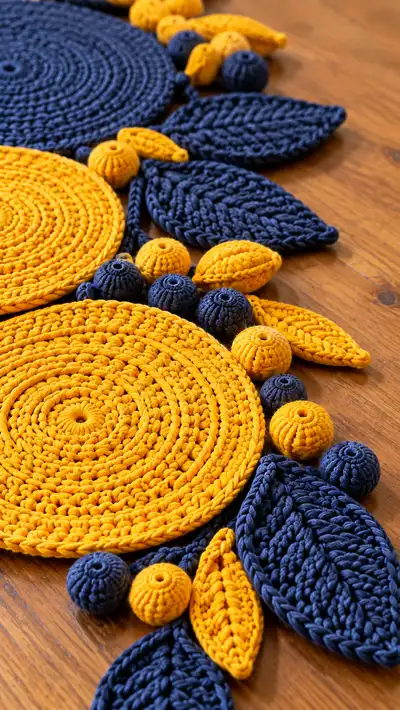
Bright mustard and deep navy circular motifs are joined with sculpted leaves and small crocheted beads to create a striking, modern table runner. This pattern uses bold color blocking, textured ridges and leaf ribs for a high-impact centerpiece. Modular motifs are made separately then joined for an organic cluster look—perfect for dining tables, sideboards, or seasonal styling. Suitable for crocheters comfortable with circular increases, BLO texture techniques and joining-by-slip-stitch or whip-stitch.
Progress Tracker
0% Complete
— Materials & Gauge :
Info :
Gauge is flexible for decorative runners. With bulky (#5) cotton and a 5.5mm hook, a 28-30 round large disc measures about 20-22cm (8-9in) across. Keep hook/yarn consistent across motifs for uniform scale.
Info :
Work all circular motifs in spiral rounds unless noted. Use a stitch marker to mark the first stitch of each round and move it up as you progress. When rounds say '1 sc in each st', the stitch count remains the same.
— Large Circular Motif (Make 4-6, approx 20-22cm/8-9in) :
Round 1 :
6 sc in magic ring (6)
Round 3 :
(1 sc, inc) x 6 (18)
Round 4 :
(2 sc, inc) x 6 (24)
Round 5 :
(3 sc, inc) x 6 (30)
Info :
For a denser coil effect, work these initial rounds in sc; to add texture, replace some even rounds with hdc as described below.
Round 6 :
(4 sc, inc) x 6 (36)
Round 7 :
(5 sc, inc) x 6 (42)
Round 8 :
(6 sc, inc) x 6 (48)
Info :
At this point your disc is growing quickly. If using a slightly smaller hook for a tighter fabric, you may reach a flatter disc sooner. Keep stitches evenly spaced and avoid stretching while working.
Round 9 :
(7 sc, inc) x 6 (54)
Round 10 :
(8 sc, inc) x 6 (60)
Round 11-14 :
1 sc in each st (60)
Info :
Rounds 11-14 create the main flat plane of the disc. If you'd like a coiled look, on Round 12 work in hdc instead of sc; this produces a subtle ridge.
Round 15 :
1 sc in each st BLO (60)
Round 16 :
1 sc in each st (60)
Round 17 :
1 sc in each st BLO (60)
Info :
Alternate a BLO round every few rows to create narrow ridge rings in the disc that emulate the spiral surface shown in the photos. Move your marker each round to keep track.
Round 18 :
1 sc in each st (60)
Round 19 :
1 hdc in each st (60)
Round 20 :
1 sc in each st (60)
Round 21 :
1 sc in each st BLO (60)
Round 22 :
1 sc in each st (60)
Round 23 :
1 sc in each st (60)
Info :
Decide now whether to stop here for a medium-large disc or add additional rounds to reach approx 22cm depending on yarn/hook. If your disc begins to cup, omit the next inc round and continue even rounds to flatten.
Round 24 :
1 sc in each st (60)
Round 25 :
1 sc in each st BLO (60)
Round 26 :
1 sc in each st (60)
Round 27 :
Slip stitch evenly around the edge to create a neat finished border; do not change stitch count (60)
Round 28 :
Fasten off leaving long tail for sewing (no st change)
Info :
Wet-block or steam-block the finished disc flat and pin to shape before final assembly. If edges ripple, add one more even round of sc using slightly larger tension to ease the curve.
— Medium Circular Motif (Make 4-7, approx 12-15cm/5-6in) :
Round 1 :
6 sc in magic ring (6)
Round 3 :
(1 sc, inc) x 6 (18)
Round 4 :
(2 sc, inc) x 6 (24)
Round 5 :
(3 sc, inc) x 6 (30)
Info :
You can switch to hdc on Round 6 for a slightly taller fabric which becomes useful when stacking a medium disc against a large disc to create dimensional contrast.
Round 6 :
(4 sc, inc) x 6 (36)
Round 7-10 :
1 sc in each st (36)
Round 11 :
1 sc in each st BLO (36)
Round 12 :
1 sc in each st (36)
Round 13 :
1 hdc in each st (36)
Round 14 :
1 sc in each st (36)
Round 15 :
Slip stitch around for clean edge; fasten off leaving long tail (36)
Info :
For a smaller, denser motif stop at Round 12. Use contrasting color for a thin edge by joining the new color with sl st and working one round of sc.
— Small Circular Motif (Make many, approx 4-6cm/1.5-2.5in) :
Round 1 :
6 sc in magic ring (6)
Round 3 :
(1 sc, inc) x 6 (18)
Round 4 :
(2 sc, inc) x 6 (24)
Round 5 :
1 sc in each st (24)
Round 6 :
1 sc in each st BLO (24)
Round 7 :
Slip stitch around then fasten off leaving tail for sewing (24)
Info :
Small discs function as accent petals or centers and can also be stacked on medium discs. Make several in both colors for balance across the runner.
— Bead Spheres (Crocheted or Covered) :
Large Bead Cover - Option A (cover wooden bead 16-18mm) :
Place bead on a small bowl to keep steady while crocheting.
Round 1 :
6 sc in magic ring (6)
Round 3 :
(1 sc, inc) x 6 (18)
Round 4 :
(2 sc, inc) x 6 (24)
Round 5-6 :
1 sc in each st (24)
Round 7 :
(2 sc, dec) x 6 (18)
Round 8 :
(1 sc, dec) x 6 (12)
Info :
Insert wooden/plastic bead snugly inside the crocheted cover before finishing the last decreases. Ensure bead sits centered; if cover is loose, add a dab of fabric glue inside the ring to secure bead, then finish closing with a tapestry needle.
Round 10 :
Fasten off and weave tail through remaining stitches to close; hide tail inside bead (no st change)
Medium Bead (Fully Crocheted, approx 12mm) :
Work in continuous rounds to create a small filled sphere.
Round 1 :
6 sc in magic ring (6)
Round 3 :
(1 sc, inc) x 6 (18)
Round 4 :
1 sc in each st (18)
Round 5 :
(1 sc, dec) x 6 (12)
Info :
Stuff firmly before final decreases. Use small amounts of fiberfill to keep the bead round and dense. Fasten off and weave in ends.
Small Bead (Tiny, 8-10mm) :
Follow Medium Bead pattern but finish at Round 4 and stuff lightly, then close as in Round 5-6.
— Leaf Motif (Ribbed Leaf, Make many in both colors) :
Round 1 :
Ch 11, sc in 2nd ch from hook, sc across to last ch, 3 sc in last ch to turn working on other side of foundation chain, sc across back down the chain to first st (approx 20 sc total - count depends on foundation chain) (20)
Round 2 :
Ch 1, sc in same st, 1 sc in next 3 sts, fpdc around next 2 sts (to make central rib), 1 sc in next 3 sts, sc2tog to shape tip, 1 sc in next 3 sts down opposite side, bpdc around next 2 sts, 1 sc in remaining sts, sl st to join (20)
Info :
This leaf is worked flat but we present it as rounds for consistency. fpdc and bpdc create a pronounced raised central rib. Adjust the foundation chain length for larger/smaller leaves—each additional pair of chains adds two sc at the widest point.
Round 3 :
Ch 1, 1 sc in each st around working into BLO where indicated to create a neat edge (20)
Round 4 :
Ch 1, sc around but in the central rib area work alternating fpdc and sc to exaggerate ribbing (20)
Round 5 :
Ch 1, sc around in BLO to define edges, fasten off leaving long tail for sewing (20)
Info :
Make small leaves with ch 7 foundation chain (approx 12 st final) and larger leaves by increasing chain to 15-17. For extra texture, work Round 4 in hdc instead of sc.
— Long Narrow Leaves / Stem Strips (Make many) :
Round 1 :
Ch 30, sc in 2nd ch from hook and each across to end (29)
Round 2 :
Ch 1, turn, sc in each st back across (29)
Round 3 :
Ch 1, fold strip lengthwise and sl st along long edge to form a sturdy cord; fasten off leaving tail for sewing
Info :
Use these strips as stems between motifs. Tension and strip width determine how stiff stems are; for stiffer stems, use a tighter hook or smaller yarn scrap inside before sl stitching closed.
— Assembly & Joining Motifs :
Info :
Lay out the discs, leaves and beads following the reference layout: large discs alternate navy and mustard, medium discs nest near edges, small discs and beads fill gaps. Pin pieces in place to test balance before joining. Use long tails left on motifs for whip stitch sewing or join motifs with slip stitch through both edges for a flatter join.
Joining Tip :
To achieve the organic clustered look, overlap edges slightly: sew medium and small discs partially onto the edge of large discs using a sequence of evenly spaced whip stitches (approx every 3-4 sts depending on motif size). For visible decorative joins, use contrasting color and visible surface stitches.
Round 1 (Joining Round) :
Position two motifs overlapping by 6-10 stitches. Insert hook through both loops of Motif A and Motif B and sl st to join, working sl st every 3rd st across the overlap (no overall stitch count change)
Round 2 (Reinforce) :
Sew along the join with a yarn needle and matching yarn with a ladder stitch or whip stitch, 6-10 small stitches along the overlap for strength (no st change)
Info :
Where beads cluster, thread small crocheted beads onto a length of yarn or twine and stitch them in place through the center of bead holes. For covered wooden beads, run the sewing yarn through the bead core to anchor them in the layout.
Edge Unification Round :
Once motifs are positioned and loosely joined, work a unifying sc round around the outermost perimeter: pick up edge stitches from motifs sequentially and work 1 sc in each picked-up stitch, working a sl st when moving between gaps to traverse small spaces (stitch count varies by runner length)
Info :
This outer unifying round creates a visual border and helps lock motifs together. Keep tension loose enough to allow the runner to lie flat but firm enough to hold shape.
— Final Finishing Rounds (Neaten & Stabilize) :
Round 1 :
Work 1 sc in each apparent edge stitch around entire runner perimeter; when crossing a join use sl st to move across gaps (stitch count varies)
Round 2 :
Work 1 sc in each st BLO to create a subtle raised rim (optional for definition)
Round 3 :
Work 1 sc in each st (same stitch count) and finish with 1 sl st to starting stitch; fasten off and weave in ends
Info :
Block the entire runner gently: pin it to a flat surface and spritz or steam lightly to set stitches. Cotton responds well to wet-blocking—allow to dry fully before unpinning.
— Optional Decorative Techniques and Tips :
Info :
To replicate the raised braided leaves in the photo, work extra rows of fpdc and bpdc into the central leaf area and steam block while pinched to define the vein. For extra heft, slip small washers or discs between layers of a disc before closing to make the runner lie flat.
Info :
Alternate between using fully crocheted beads and covered wooden beads to vary weight and texture. If using uncovered wooden beads, secure the cover with a tiny dot of fabric glue inside the cover and stitch a few anchor points through the bead hole to the base motif.
Info :
To lengthen the runner, add additional large or medium discs to either end and simply continue the perimeter unifying rounds. To shorten, remove motifs and adjust the final border to the new perimeter.
Info :
Store the finished runner flat or rolled with tissue to avoid creasing. As cotton will relax slightly after use, you may need to re-block occasionally.
This sunflower-inspired runner brings color, texture and a handcrafted presence to your table — every motif arranged like a tiny garden. The modular pieces make it fun to make and easy to customize; whether you keep it short for a centerpiece or extend it across a long table, it will draw admiring glances at tea, dinner and every gathering. Enjoy assembling each cluster like arranging blooms — a satisfying, creative process that ends in a beautiful, usable piece of home decor. 🧶🌼