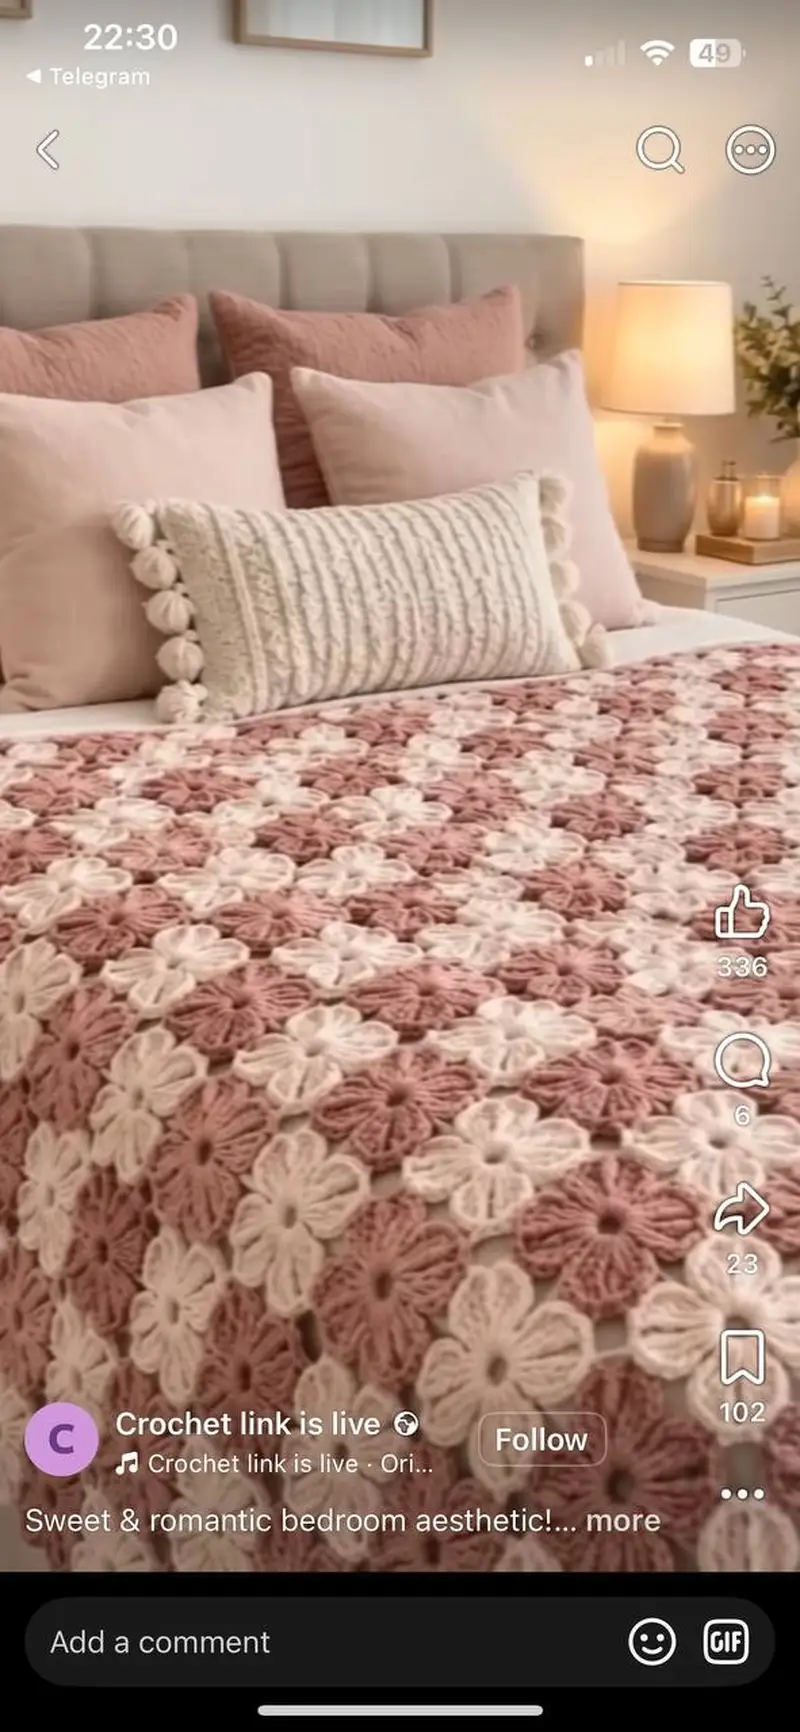
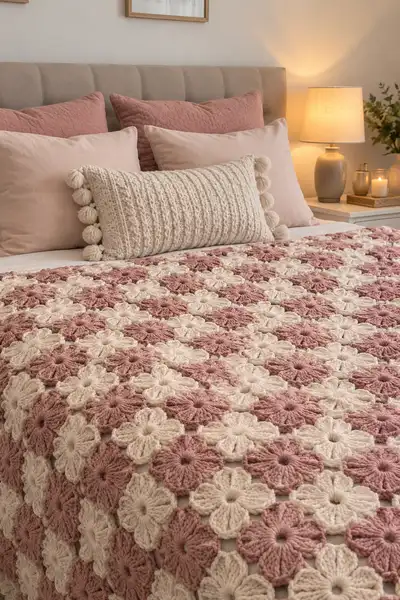
A romantic dusty rose and cream floral bedspread made from open floral motifs joined together to form a lightweight, textured throw for a bed. This pattern uses puff/cluster petals arranged in alternating color squares for a delicate vintage look. The bedspread lays flat with small, pretty openings between motifs and a layered scalloped border for a finished, cozy edge. Perfect for a statement throw across the foot of a bed or as a full cover depending on motif count.
Progress Tracker
0% Complete
— Motif (Flower Unit) :
Info :
This motif is an 8-petal floral square worked flat. Each petal is made with a 5-loop puff cluster worked into chain spaces created around a small round of double crochet. The motif ends with a round that prepares three-sided join points for join-as-you-go assembly. Gauge: one motif measures approximately 12.5 cm / 5 in across when worked in worsted yarn with a 5.0mm hook. Adjust hook if your motif is larger or smaller.
Round 1 :
Make a magic ring. Ch 2 (does not count as stitch for this round), work 8 dc into ring. Pull ring tight. Joining with sl st to first dc. (8)
Round 2 :
Ch 2, 1 dc in same st, *ch 2, 2 dc in next dc; rep from * around. After final repeat ch 2 and sl st to top of first dc to join. This forms 8 sets of 2 dc separated by ch-2 spaces. (16 dc, 8 ch-2 sps)
Info :
These ch-2 spaces are the anchors for the petals. Place a stitch marker at the first ch-2 if you like to keep track of starting petal.
Round 3 :
*In next ch-2 sp work: ch 1, (yo insert hook into ch-2 sp, pull up loop) 5 times to make a 5-loop puff, yo and pull through all loops, ch 1, sl st into the base of the same ch-2 sp to secure petal; sl st into next dc to position for next petal; rep from * around to make 8 petals. Fasten off color if changing for next round. (8 puff petals)
Info :
Puff technique: yarn over, insert into space, yarn over pull up loop—repeat required number of times—then yarn over and draw through all loops, ch 1 to close. Keep uniform tension for neat petals. Practice making one petal before continuing to keep petal height consistent.
Round 4 :
Join with chosen yarn color (same or contrast). Join with sl st in the top of any puff st base. Ch 1, *3 sc around the base of next puff (work sc evenly into sts around the puff so petals are held flat), ch 1, sl st into top of next puff base; rep from * around. You will have 8 groups of sc clusters separated by ch-1 sps. (24 sc, 8 ch-1)
Round 5 :
Ch 1, 1 sc in same st, *ch 3, skip the 3-sc cluster, 1 sc into next sc (center between next puff bases) – this creates small chain arches between petals; rep from * around, end with ch 3 and sl st to first sc to join. This creates 8 chain-3 arches around the motif. (24 sc, 8 ch-3)
Info :
The ch-3 arches will be used to join motifs during join-as-you-go. Keep any carried yarns short and weave tails on the wrong side to avoid catching into later rounds.
Round 6 :
Ch 2 (counts as dc), 1 dc in same st, *in ch-3 arch work: (2 dc, ch 2, 2 dc) - shell worked into that arch; sl st into next sc (center between clusters); rep from * around to create 8 shell spaces. Sl st to top of starting ch-2 to join. (32 dc in shells, 8 ch-2 corners)
Round 7 :
Ch 1, sc into same st, *ch 1, work 3 sc into center top of shell (between the two dc groups), ch 1, sc into next sc (this frames the shell and reinforces corners); rep from * around. Join with sl st. (32 sc approx)
Info :
This round tightens the motif edge and forms the small corner points used when joining motifs into a square grid. If you prefer a looser open look skip one sc and add an extra ch-1 between shell tops.
Round 8 :
Ch 1, sc in each sc and ch-1 across to create a neat edge: 1 sc in each sc and 1 sc in each ch-1 sp around. Join with sl st to first sc. (approx 40 sc depending on tension)
Round 9 :
Optional texture round: change to BLO and work 1 sc in each st BLO around to create a slightly ridged edge for easier joining. Join with sl st. (same stitch count as previous round)
Info :
Fasten off and leave a 20-25 cm tail for weaving when motifs will be joined later by sewing. If using join-as-you-go method, do not fasten off; continue to the join round instructions below.
Round 10 :
If finishing motif as a stand-alone square instead of join-as-you-go: With right side facing, *ch 3, sl st into the center of the next ch-3 arch (that you created in Round 5) to create a small picot bridge; rep around to accent the floral openings. Fasten off and weave ends. (8 picot bridges)
Info :
At this stage you should have a flat motif with 8 puff petals and a neat edge. Make a sample motif in both colors to ensure consistent size before making multiples. Count your stitches and measure the motif across the widest point to confirm gauge.
— Motif Color & Alternate Motif :
Info :
Alternate dusty rose and cream motifs in a checkerboard pattern across the bedspread. Change color at the start of Round 3 (petal round) or Round 4 depending on which element you want colored (petals alone or petals with outer rounds). For a dusty rose petal on cream background: work Round 1-2 in cream and Round 3 in dusty rose, then rounds 4-8 in cream. The opposite sequence makes cream petals with dusty rose background.
Round 11 :
Make sample stacked motifs until you are satisfied with motif count. Example queen-size throw using these motifs with 8.5 in / 21.5 cm motifs will require approximately 8 motifs across by 10 motifs down (adjust for desired coverage). Plan motif count before starting full assembly.
Info :
Because the final spread size is determined by motif count, take time to calculate how many motifs per row and how many rows you need. Measure your bed or desired throw area and divide by motif width. Add 1-2 motifs for tuck over edges if desired.
— Join-As-You-Go Method (Row by Row) :
Info :
This join-as-you-go approach uses the ch-3 arches and sc edge of a newly completed motif to attach it to previously completed motifs. It avoids sewing many seams later and keeps the right side clean. Work motifs in rows from left to right (if right-handed) and join each new motif to the motif above and to its left as you come to those connection points.
Round 12 :
Prepare first motif of Row 1: complete Motif Rounds 1-8 fully and fasten off. This is your starting motif; not joined on its left or above edges.
Round 13 :
Make second motif of Row 1 through Round 5 as usual. On Round 6 when you come to the ch-3 arch that sits adjacent to the completed left motif, instead of working (2 dc, ch 2, 2 dc) entirely in that ch-3 arch, work (2 dc, ch 2) in the new motif's arch, then insert hook into the corresponding sc or ch-1 space on the edge of the already completed left motif, yarn over and pull through to complete the last 2 dc of the shell so the shell is worked through both motifs, creating a secure join. Continue around and finish motif; join ends as usual.
Info :
When joining to the left motif, align petals and shell points so the motif edges sit flush. Gently pin motifs together or hold with a small stitch marker across the seam while you complete the join stitch so tension stays even.
Round 14 :
For joining to motifs above (when you are in Row 2 or greater): when you arrive at the ch-3 arch on the edge that should connect to the motif above, work (2 dc, ch 2, 2 dc) in that arch except that the final sl st into the shell top should be worked through the corresponding sc on the top motif by inserting hook through both the current motif shell top and the above motif's edge sc, draw through and complete the sl st to lock pieces together. This technically makes a slip-stitch seam at the top of the shell; the seam is nearly invisible on the right side.
Info :
Practice this join on two sample motifs: make them and join with a single shell to see how your tension holds. Keep tension slightly loose on the join stitch—tight joins pull motifs in and create puckers.
Round 15 :
Continue making motifs across the first row joining each to its left neighbor as you go. For the first row you only need to join left neighbors. At the end of the row fasten off and weave tails if desired. (Complete Row 1 with motifs joined left-to-right)
Round 16 :
Start Row 2 with the first motif: make the motif through Round 5, position it under the first motif of Row 1 and join to the single motif above along the upper ch-3 arches using the technique in Round 14. Continue the motif, also joining to the left neighbor after the first motif is placed. This motif will join to both the motif above and the motif to the left in the same sequence—join above first, then join left. Repeat across the row.
Info :
When joining above and left, always match the corners/shell tops. If the motifs are slightly off, unpick only the last join and adjust rather than unmaking the complete motif. Keep a spacing of 2-3 mm between motifs for a neat lace appearance.
Round 17 :
When you reach a motif that must join to two motifs above (for motifs not on the first column), join to the upper-left and upper-right motifs by inserting the hook through the correct sc or ch space on each adjacent motif when finishing each corresponding shell. Work the shell so that half of its final stitches are through the new motif and half through the adjoining motif—this interlocks the motif grid. Continue completing the row. Repeat this pattern until your motif grid reaches desired width and length. (Row sections vary depending on motif count.)
Info :
Keep a clean right side by always working joins from the right side where the final sl st completes the lock. If working left-handed, mirror instructions and work left-to-right if that is natural.
Round 18 :
After several rows are joined you will notice seams forming a small diamond-shaped opening between petals. This is normal and contributes to the bedspread's lacy look. If you prefer smaller openings, on the final joining round after the motif is completed, run a row of sc across the seam to tighten slightly (see Border tightening rounds below).
Round 19 :
Continue assembling rows until the full grid of motifs is achieved. Work evenly, alternating dust rose and cream motifs per your planned checker layout: e.g., Row 1: Rose, Cream, Rose… Row 2: Cream, Rose, Cream… Repeat. Fasten off and weave ends periodically to keep the wrong side tidy.
Info :
Count motifs regularly to ensure you have the planned number across and down. Mark completed full rows with a removable stitch marker or paper clip so you can see progress at a glance and avoid doubling up or missing a motif.
— Panel Finishing & Flattening :
Round 20 :
Once all motifs for the main panel are joined, spread the piece on a flat surface and check for curled edges. If any small areas are tight, use blocking to even out the row and reduce puckering. Wet-block gently (spritz with water) and pin each motif corner to a blocking mat to match overall measurements.
Info :
Allow to dry completely before working the border. Blocking evens motif sizes and makes the border lay flat. If you cannot wet-block, steam-block carefully with an iron at a distance to avoid flattening puff petals.
Round 21 :
Measure the full panel dimensions. If you want to add a pieced border (extra motifs) rather than a worked border, make and join additional motifs to reach desired dimensions before finishing edge rounds. Otherwise proceed to Edge Preparation Rounds below to create a neat foundation for the scalloped border.
— Edge Preparation :
Round 22 :
With right side facing and chosen border color, join yarn at any corner sc. Work 1 sc in each edge sc and 3 sc evenly across each side of the ch corner openings to create a consistent foundation round. Place 3 sc in each corner for square corners. Join with sl st. This evens out the stitch count around the edge. (Stitch count depends on finished panel width)
Info :
Count stitches on one long edge and write it down. This will help you maintain even repeats for the scalloped edging and determine how many scallops will fit. Adjust by adding or removing single crochets across edges to reach a multiple that works for your scallop repeat (see next rounds).
Round 23 :
Ch 1, sc in each sc around for one even round, placing 3 sc in each corner. Join with sl st. This round creates a second straight edge foundation. (same stitch count)
Info :
After this foundation, the edge should be straight and uniform. If it dips or waves, adjust by adding or removing one sc every 10-15 stitches until the edge lays flat.
— Scalloped Border (Multiple Decorative Rounds) :
Round 24 :
Scallop foundation: *skip 2 sc, (5 dc) in next sc, skip 2 sc, sc in next sc; rep from * around. Place 3 sc in corner sc blends. Join with sl st. Count and ensure scallops are symmetrical across edges. (Number of scallops will depend on edge stitch count)
Info :
This creates a wide rounded scallop. If you prefer a smaller scallop use (3 dc) instead of (5 dc) per scallop. Keep regular repeats by slightly adjusting spacing across corners.
Round 25 :
Ch 1, sc in each sc and dc around, placing 2 sc in the center dc of each scallop to anchor. Join with sl st. This secures scallops and reduces stretching. (same nominal stitch count)
Round 26 :
Decorative picot round (optional): *ch 3, sl st into the top of the center dc of each scallop; rep from * around. Fasten off and weave ends for a delicate finish. (one picot per scallop)
Info :
For a layered border do not fasten off in Round 26. Instead change color and create a reverse scallop on top by working reverse shells between existing scallops to create a frilly double-edge effect (detailed below).
— Alternative Decorative Border (Layered Scallop) :
Round 27 :
Change to contrast color if desired. Join yarn at the base of any scallop. *Ch 2, work (tr, ch 1, tr) into the gap between scallops (the sc placed at inner round), ch 2, slip stitch in the middle top dc of next scallop; rep around. This creates small arches above each scallop for a frilly layered look. Join with sl st. (one arch per scallop)
Info :
This layered border adds body and dimension and is particularly beautiful in a lighter color to frame dusty rose motifs. Be sure to maintain even tension so the layered edge does not pull the panel inwards.
Round 28 :
Secure and tidy: Ch 1 and sc evenly around to finish the top of the layered arch; join and fasten off. Weave in all ends and trim close. Block the entire spread again if needed to settle the border and scallops evenly. (final finishing round)
Info :
If you have long edges that feel loose after quilting, add an extra single crochet round on the wrong side under the scallops to stabilize. This is especially useful for bedspreads that will be laundered frequently.
— Tightening Option & Small Seam Conceal :
Round 29 :
If seams between motifs look open, work 1 sc in each seam gap along each join on the wrong side: insert hook through back loop of both adjacent motif edge sc and pull up a loop and work a sc across to link them tightly. Work across entire seam rows to reduce visible gaps. Fasten off and weave ends.
Info :
Do this tightening pass only if you want a denser coverage. For the airy look seen in the image skip this step — the small diamond openings add to the romantic aesthetic.
— Optional Extra Wide Fringe or Pom Pom Edge :
Round 30 :
Option A - Pom Pom edge: Make pom poms approximately 3.5-4 cm diameter using same yarn. Attach pom poms evenly around the scalloped edge by tying through the base of each scallop with a double knot on the wrong side and securing with a little yarn tail woven in. Space pom poms so one sits at each scallop center.
Round 31 :
Option B - Long fringe: Cut yarn strands double the desired fringe length. Fold and attach using lark's head knots through the base of each scallop or every second scallop for a sparser fringe. Trim to even length and gently steam to fluff. (fringe density depends on personal taste)
Info :
Pom pom and fringe add a boho or cottage look. The pictured bedspread uses an unadorned scalloped border to keep the floral motif front and center; choose a decoration that suits your decor.
— Troubleshooting, Tips & Extended Info :
Round 32 :
Info: Tension control: puff stitches are most affected by tension. If petals are too tall and collapse, switch to a slightly smaller hook for puff rounds (Round 3) only, then return to main hook for body rounds.
Round 33 :
Info: Color changes: fasten off at the end of a round and join new color with sl st to avoid lines of carried yarn showing on the wrong side. If you prefer fewer ends, carry color across the back only across up to 3 motifs to avoid long floats that tangle.
Round 34 :
Info: Counting: use a tally sheet listing motifs per row and finished rows. On long projects like bedspreads losing track of one motif per row scales into a large mismatch. Check counts at the end of each row.
Round 35 :
Info: Seam strength: If the spread will be used frequently, reinforce corners by sewing through multiple rounds at corner points with a strand of yarn folded double to add durability.
Round 36 :
Info: Washing and care: Hand-wash cold or machine wash gentle in a mesh bag and lay flat to dry. Repeat blocking if needed after washing to reshape scallops and even motifs.
Round 37 :
Info: Scaling up: To make a king-size spread, increase motif counts proportionally. Keep sample motif number and scale to bed width and length. For a full coverage bedspread add 20-40% more motifs depending on motif size and desired tuck under.
Round 38 :
Info: Yarn substitution: If substituting fiber (acrylic, cotton, wool blends), note that petals may behave differently. Cotton yields crisp petals but heavier drape; acrylic retains loft but can be warmer. Adjust hook and blocking accordingly.
Round 39 :
Info: Stitch counts: because motifs are joined-as-you-go, final stitch counts per edge will vary. Use the scallop foundation rounds to normalize counts before final border work. Record your final stitch count on one long side and mirror it on the opposite edge to keep symmetry.
Round 40 :
Info: Organization: Work motifs in batches of 5-8 and join as you go. This reduces errors and helps you keep color pattern consistent. Store completed motifs flat to avoid crushing petals before joining.
Round 41 :
Info: Visual placement: Lay motifs in the planned layout on a large surface before starting. Shuffle motifs around until color balance feels right (this is particularly important when skeins may vary slightly in dye lot).
Round 42 :
Info: Edge correction after joining: If one side grows slightly longer due to tension differences, add or remove sc from very end stitch groups in the edge foundation round to bring the edges in line. Make small changes (1-2 stitches) not large ones.
Round 43 :
Info: Storing and transporting: Fold the bedspread gently with tissue between layers when storing. Avoid sharp folds on puff petals to prevent flattening; re-block if petals compress.
Round 44 :
Info: Finishing the wrong side: If you want a neat wrong side, weave ends inward and create a wrong-side sc round before the final scallop to hide joins and tails beneath the border.
Round 45 :
Info: Adding extra motifs later: If you decide to expand the bedspread later, make new motifs and join them to the full piece using the same shells/ch-3 join method, working along a chosen edge.
Round 46 :
Info: Alternative join: If join-as-you-go is not comfortable, complete all motifs and use mattress stitch or whip stitch with matching yarn to sew motifs together invisibly. Leave a 20-30 cm tail on motifs for sewing.
Round 47 :
Info: Counting motif repeats for diagonal pattern: when alternating colors in a checkerboard, ensure even counts per row to maintain an alternating offset; odd/even motif counts shift the checker pattern and that's an intended design choice.
Round 48 :
Info: Safety & baby use: If this will be used for a baby or toddler, avoid pom poms and long fringe as choking hazards; choose embroidered edges or small loops instead.
Round 49 :
Info: Yarn economy: To estimate exact yardage, make 5 motifs, weigh them together and extrapolate using total motif count. This is the most accurate method to avoid running out of color mid-project.
Round 50 :
Info: Making larger petals: To get fuller high-relief petals, use a 6-loop puff instead of 5-loop in Round 3. Increase hook size by 0.25-0.5 mm for puff rounds to keep petals from curling.
Round 51 :
Info: Replacing motifs mid-project: If a motif becomes damaged or stained, carefully remove it by cutting connecting stitches and make a new motif and rejoin with mattress stitch to keep the seam invisible.
Round 52 :
Info: Seam alignment marker: When joining rows, put a removable stitch marker on the center of the motif row to help align the next row and ensure the grid remains squared.
Round 53 :
Info: If your bedspread will see heavy use, consider reinforcing joins by sewing a hidden running stitch with matching yarn through the back loops of the join stitches locally at high-stress points.
Round 54 :
Info: Decorative optional center: If you prefer a more defined flower center, after Round 1 you can embroider a tight spiral of surface dc into the ring area before making Round 2 to create a denser flower core.
Round 55 :
Info: Recording progress: Create a chart or grid on graph paper marking motifs as completed to keep track. For large spreads this simple visual log avoids repeating rows by mistake.
Round 56 :
Info: Border scaling: The scalloped border scale should be proportional to motif size. For very large motifs you may prefer larger scallops (7 dc per scallop) and more repeat spacing to keep the edge balanced visually.
Round 57 :
Info: Needle and thread backing: For an ultra-flat back, after motifs are joined and blocked, you can work a single crochet round on the wrong side to compress joins slightly for a smoother underside.
Round 58 :
Info: Stitch markers: Use small safety pins or locking stitch markers to secure motifs into place when joining especially at critical points such as corners and triple-join intersections where three motifs meet.
Round 59 :
Info: Final inspection: After the last border round, inspect the entire spread for stray loose ends, skipped joins, or uneven scallops. Correct immediately before removing pins and finishing. This saves undoing large sections later.
Round 60 :
Info: Enjoy the process: Work in comfortable segments and listen to your body; projects of this size are rewarding but long. Keep a small supplies kit nearby with extra hooks and stitch markers to avoid interrupting the flow.
This Dusty Rose Bedspread is a loving combination of puff petals and airy joins that brings instant vintage romance to any bedroom. The alternating dusty rose and cream squares deliver warmth and texture without being heavy, and the scalloped border frames the design beautifully. Working this project is relaxing and rewarding — each row of flowers builds into a stunning, tactile surface you'll be proud to display. Whether made as a throw for your favorite chair or a full bedspread, it makes a thoughtful handmade gift. 🧶🌸