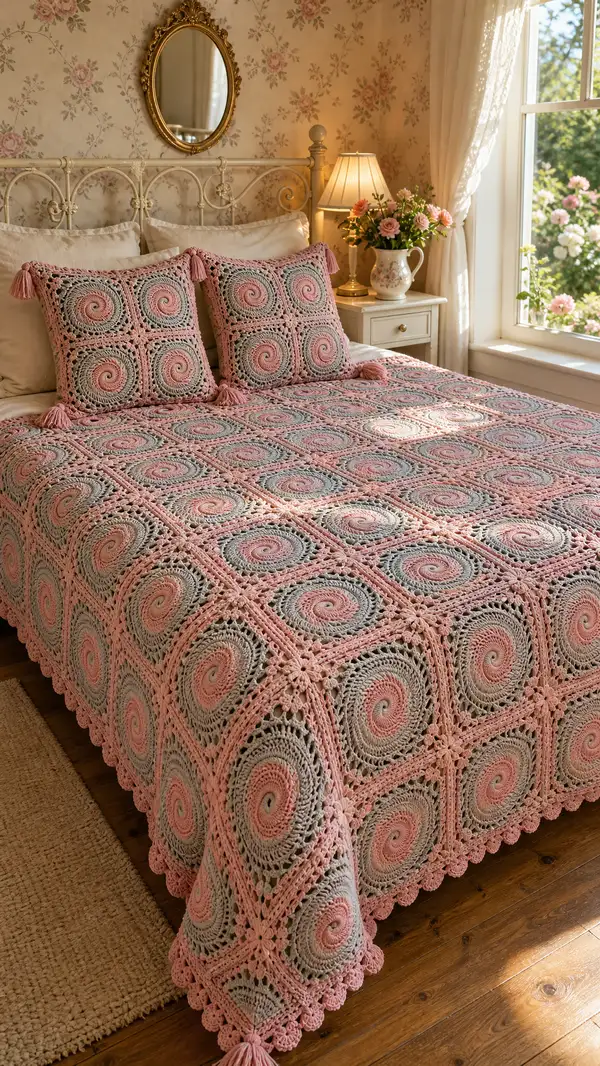
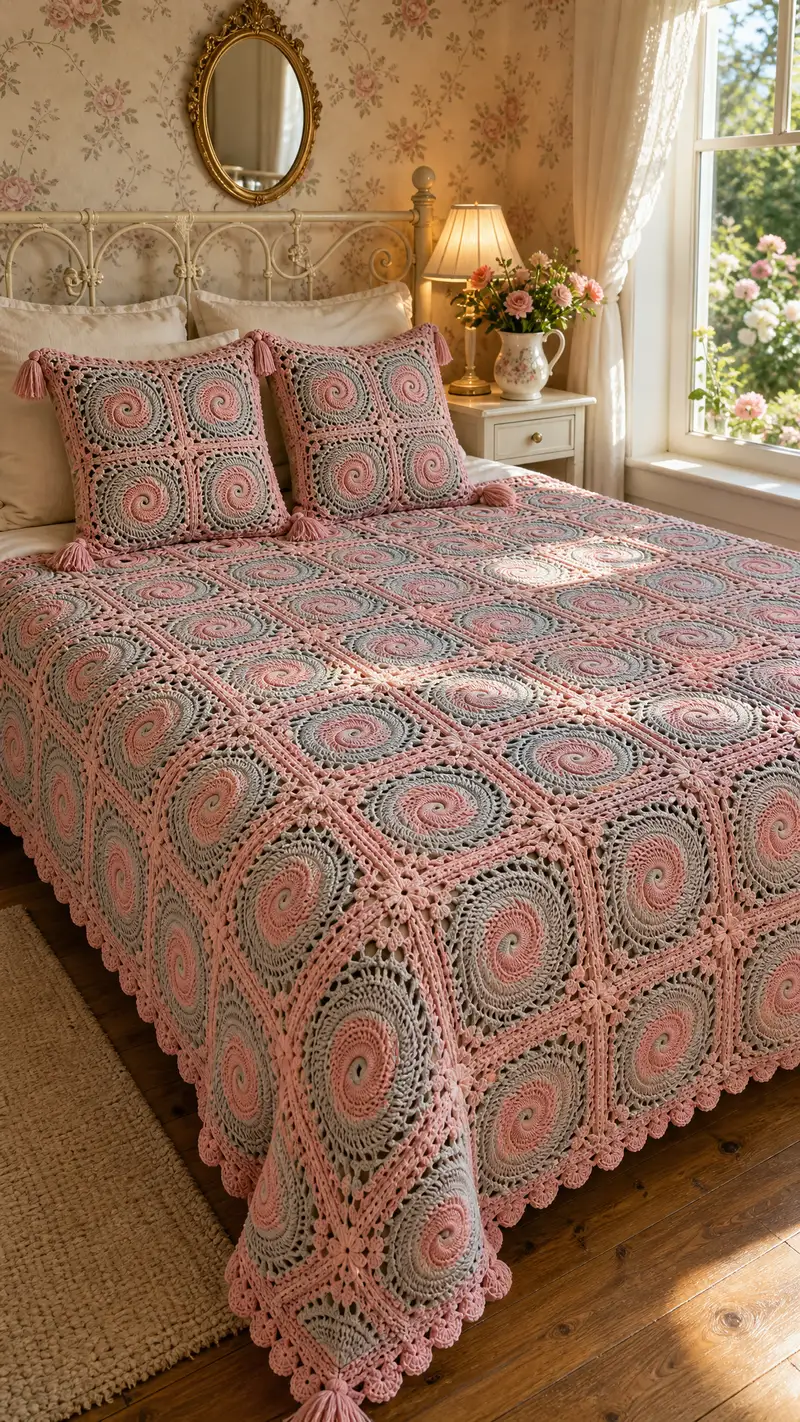
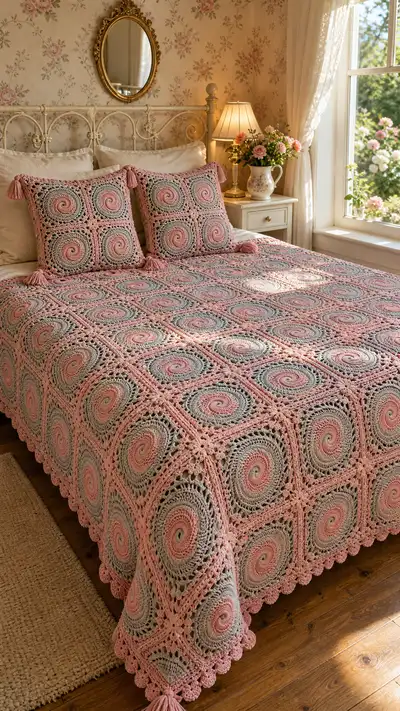
A romantic dusty rose and soft grey bedspread made from spiral-centered granny squares. This elegant bedspread features 9x7 large squares with a delicate lacy join and scalloped edge, finished with tassels at the corners. The repeating spiral motif blends two soft tones into a vintage-inspired, airy coverlet that dresses a bed beautifully.
Progress Tracker
0% Complete
— Spiral Granny Motif (Make 63 or as needed) :
Round 1 :
With dusty rose, make a magic ring. Ch1, 6 sc in magic ring. Pull tight. (6)
Round 2 :
Inc in each st around (2 sc in each st). (12)
Round 3 :
(1 sc, inc) x6 — place inc after each sc. (18)
Round 4 :
(2 sc, inc) x6. (24)
Info :
These first rounds form the tight spiral center. Work in continuous rounds (do not join) if you prefer a smooth swirl; otherwise join with sl st and ch1 between rounds. Using continuous rounds creates a more seamless spiral.
Round 5 :
(3 sc, inc) x6. (30)
Round 6 :
(4 sc, inc) x6. (36)
Round 7 :
(5 sc, inc) x6. (42)
Round 8 :
(6 sc, inc) x6. (48)
Info :
By round 8 the spiral center is well established. Keep tension even to avoid a necking effect — the spiral should lie flat. If it wants to curl, block flat before proceeding to the next rounds.
Round 9 :
Switch to soft dove grey. Ch3 (counts as first dc), dc in each st around. (48)
Round 10 :
(7 dc, inc) x6 — inc = 2 dc in next st. (54)
Round 11 :
(8 dc, inc) x6. (60)
Round 12 :
1 dc in each st around. (60)
Info :
These dc rounds create the wide coil that will later transition to an open lacy round. If you prefer a slightly larger motif, add one more increase round in dc evenly (eg (9 dc, inc)x6 to 66).
Round 13 :
Switch back to dusty rose. Ch3, (dc, ch1) in next st, *skip 1, dc in next 3 sts, ch1* around adjusting last repeats to finish with dc into top of ch3. Aim for 60 stitches with ch-1 spaces distributed. (60 + ch-1 sps)
Round 14 :
Work lace: sl st into first ch-1 space, ch3, (2 dc, ch2, 3 dc) in that ch-1 space to make a shell; *skip next series of 3 dc, sl st into next ch-1 space, (3 dc, ch2, 3 dc) in space* repeat around to create shells separated by sl st. You should create 12 shells evenly spaced. (Shell clusters and ch-2 sps)
Round 15 :
Ch1, sc in same stitch, *ch4, sc in center dc of next shell* repeat around to create chain arches between shells. (12 arches)
Info :
Round 14–15 begin to open the motif and give the airy lacy look that contrasts with the spiral center. If you're seeing too many or too few shells, adjust by redistributing sl sts across ch-1 spaces so shells sit evenly.
Round 16 :
Switch to pale pink for the upcoming square shaping. Into each arch work: (sc, ch3, sc) to create a small picot arch point; in each shell top work 3 dc. This builds slight corner points as we prepare to form a square. (Count depends on arches; approx 24 small arches)
Round 17 :
Ch1, sc in same st, *ch5, skip arch, sc in center of next shell top* repeat around making longer chain loops—these will be converted into corner chains. Aim for 12 larger loops. (12 long loops)
Round 18 :
Into each long loop: (3 dc, ch3, 3 dc) to form a petal/cluster; between petal clusters, work (sc, ch2, sc) into center of previous shell top. This begins to define four quadrants. (12 petals)
Info :
From rounds 16–18 we are transitioning from a circular motif into a rounded square. The strategy is to establish 4 main quadrant points at roughly cardinal points then fill sides later. Count petals and long loops; if you have more than 12 adjust placement so you can group petals into groups of three for each side.
Round 19 :
Ch1, work in BLO for a defined ridge: 1 sc in each st and in each ch-2 between petals. The total will be about 84–96 stitches depending on spacing — aim for an even number allowing grouping into 4 sides. (approx 92)
Round 20 :
Switch to dusty rose. Begin forming corners: *[sc in next 10 sts, (3 dc, ch3, 3 dc) in next petal cluster]* repeat 4 times. This creates 4 raised corner clusters; count will be around 92 + 12 (clusters) but remain consistent. (approx 104)
Round 21 :
Ch2, dc in each st around working 2 dc in corner ch-3 sps to broaden corners — aim for a rectangular/square shape. (approx 110)
Round 22 :
Ch1, sc evenly around working (sc, ch3, sc) into each corner ch-3 for a defined corner chain. This creates 4 corner chain spaces for later join. (approx 110)
Info :
At this stage your motif should read as a gently rounded square with a spiral center. Block square flat to exact measure before doing final rounds so joins will be tidy. Measure across flats and diagonal to ensure symmetry.
Round 23 :
Switch to pale pink. Work a decorative round: *(ch3, skip 2, 5 dc cluster in next st, skip 2, ch3, sl st)* repeat around across sides to create an open lacy band. Adjust cluster spacing to keep four corner clusters intact. (approx 110 clusters/positions)
Round 24 :
Ch1, sc in each st where practical, placing 3 sc into each corner ch-3 space to reinforce corners and create square geometry. (approx 110)
Round 25 :
With dusty rose, join motifs' outer edge: *(ch3, skip 2, 3 dc shell in next, ch3, skip 2, sl st)* repeat around to produce small loops that will sit neatly when joining squares. (final outer round loops)
Round 26 :
Fasten off leaving long tail for weaving/blocking. Weave tail through edge and block square to desired size (approx 12.5" or 31.5cm square when using worsted cotton/hook 4.0mm; gauge may vary). This is one complete spiral granny motif.
Info :
Motif finished size should be consistent across all squares. If your squares measure smaller or larger, re-tension or change hook. Blocking is essential — pin each square squarely and steam or wet-block and dry flat before joining.
— Joining Motifs (Join-As-You-Go Floral Join) :
Info :
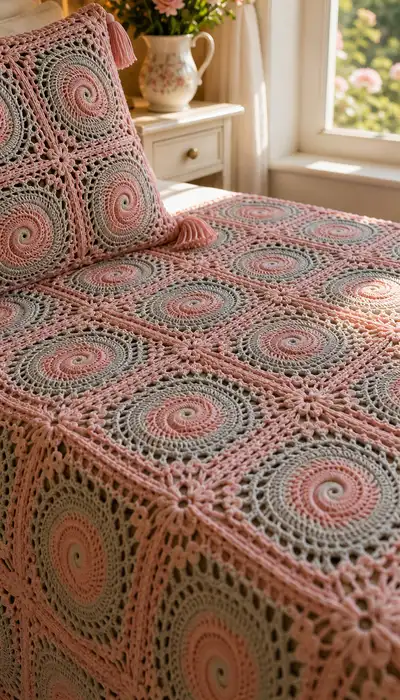
Join motifs with the pale pink yarn using a floral 8-petal join in the corner ch-3 spaces so the join looks like small 8-petal flowers at each intersection. We describe joining pairwise and then in rows, finishing with borders.
Round J1 :
Place two blocked motifs with right sides facing up. Join pale pink into corner ch-3 of first motif (corner A). Ch1, sc in same corner, ch3, work 8 sc evenly into corner ch-3 to form a little flower (8 petals in sc). Sl st to join center of corner. (flower formed)
Round J2 :
Continue along edge: into next outer loop of motif, work *(ch3, 3 dc cluster, ch3, sc in next loop)* repeat along the side until you reach the adjacent corner; do the same flower join into the adjacent corner but when you are joining to an already placed motif, join by sl st through corresponding stitch on placed motif instead of forming a new flower center so flowers are shared between four motifs. This creates interlocking floral joins. (one side joined)
Info :
When joining rows, always align motifs on a flat surface to ensure petals align. Use pins sparingly to hold motifs in place. The join should create small 8-petal flowers at each cross of four motifs; where motifs meet along edges they will share petals and lace loops.
Round J3 :
When joining the second motif along the same side, insert your hook through the corresponding ch-3 corner of the already-placed motif and sl st to secure the corner petal; then continue the side join as above. Repeat along rows until you have joined full bed layout (in image: 9 across x 7 down = 63 motifs).
Round J4 :
After joining edges of all motifs into rows, join rows together using the same floral corner join at each corner intersection: work flower (8 sc) into corner of motif and when you come to the corner that is already attached to another motif, join by sl st into the corresponding stitch so the flower is shared among 4 squares. This produces small floral nodes at every junction.
Info :
If you prefer a seam rather than shared floral nodes, you can use whip stitch with matching yarn. The method shown provides decorative open joins with small floral motifs visible from the bed surface.
— Main Bedspread Border and Scallop Edge :
Round B1 :
With assembled bedspread laid flat, join pale pink at any outer corner. Ch1, sc evenly into each exposed outer loop around perimeter of entire bedspread; place 3 sc into each outer corner ch-3. Work evenly to get a uniform number of stitches. (perimeter sc)
Round B2 :
Ch3 (counts as first dc), dc in each st around, working 3 dc in each corner to create broader corner swell. (perimeter dc)
Round B3 :
Ch1, sc in each st around but every 8th sc do: *sc, ch3, sc* to create chain loops evenly spaced along each side to prepare scallop placement. (chain loop spacing)
Info :
Measure your loop spacing visually across the side to ensure scallops will be evenly distributed. If the bedspread side is long, spacing of ch3 loops every 8–12 sts works well; adjust to keep symmetry.
Round B4 :
Work scallops into each ch3 loop: *(5 dc, sl st into base of loop)* across each loop to create small shell scallops along the edge. (scallop shells)
Round B5 :
Ch1, sc in each st around placing 3 sc in each corner; this secures shells and evens the edge. Fasten off and weave in ends. If you want a deeper scallop, repeat rounds B3–B5 to build up two rows of shells for a more decorative edge.
Round B6 :
If you desire a larger crab-stitch decorative finish, with dusty rose, work reverse sc (crab stitch) along the very outer edge working left-handed reverse sc into each outer loop for a rope-like finish. (optional decorative finish)
Info :
For the bedspread in photo there is a subtle scalloped edging that gives a vintage look; if you prefer a flat hem, finish with two rounds of sc and skip the shell scallops.
— Pillow Shams (Make 2) :
Info :
Each pillow sham in the photo is made from 4 motifs (2x2) with the same motifs as the bedspread and a small gusset/edge to form an envelope or zippered pillow case. Make 8 motifs for two shams (4 motifs per sham).
Round P1 :
Make 4 motifs as instructed in Motif section; block them square and join them together using the floral join method so they form a neat 2x2 square. Join inside-right sides out so that the decorative floral joins appear on the front.
Round P2 :
With pale pink, work 1 round sc evenly around the 2x2 block, placing 3 sc into each corner where motifs meet to create a neat frame. (outer sc frame)
Round P3 :
Switch to dusty rose. Ch3, (dc in each st around) for 2-3 rounds to create a small gusset depth (approx 2.5–3 cm). For an envelope sham, leave one side open or add buttons/zipper; for a fully covered pillow add a backing panel of fabric or additional motifs and join with whip stitch. (gusset created)
Info :
Pillow shams in the image have tassels at each corner; make tassels as described below and attach after final assembly. Add a pillow form slightly smaller than the sham block for a neat, full finish.
Round P4 :
Finish edge with one round of shell scallops as done for the bedspread border or reverse sc for a rope look. Fasten off and weave ends. Attach a zipper on the back if desired or make an envelope closure by overlapping backing panels by 10–12 cm and slipstitching into place.
— Tassels (Make 4 large tassels + extra small tassels optional) :
Round T1 :
Cut multiple lengths of dusty rose yarn each 18–22 cm for the large tassels pictured. Wrap yarn around a 10 cm card about 35–45 times depending on desired fullness. Slide loops off card and tie a 6–8 cm length of yarn around the top, then fold loops in half and tie tightly near the top to form a head. Trim loops evenly to form fringe.
Round T2 :
Create a small neck by wrapping additional yarn several times around the top near the head and secure with knot. Bury knot tail into tassel head with a needle for tidy finish. Attach tassel to bedspread corners by threading the top loop through corner ch-3 and tying securely on the underside; weave ends in tightly. (tassel attachment)
Info :
Make tassels in matched size and fluff by washing and lightly steaming or misting them and trimming to uniform length. For extra weight you can place a small washer or bead inside the tassel head before finishing to help it hang nicely.
— Alternate Edging (Deep Scallop Border) :
Round E1 :
For an enhanced deep scallop, after B2 ch3 round, work *(7 dc shell, sl st to next loop)* in each ch loop, leaving 5–7 dc per shell depending on desired depth. Work additional rounds of 3 dc shells in the valley between shells to create layered scallops. Each added scallop round increases border depth by ~2 cm.
Round E2 :
Finish with a final sc round and crab stitch if desired (reverse sc) to tidy edges. Fasten off and weave in all tails thoroughly.
Info :
Adding layered scallops gives a dramatic, vintage look like the image. Keep shells consistent: count shell stitches and mark with removable stitch markers every 4–6 shells while working around large perimeter to avoid drift.
— Finishing & Assembly Details :
Round F1 :
Weave in all ends from motifs and joins on the wrong side with a tapestry needle. Use blocking pins and steam or wet block entire spread laid flat to ensure straight edges; let dry completely before use.
Round F2 :
If you have any unevenness between joined motifs, reinforce with small slip stitches along the join on the back side to flatten. For heavier bedspread use extra joining stitches through motifs at seams to strengthen load-bearing areas.
Info :
Check whole bedspread for loose ends and secure them by weaving through several stitches. Press lightly on the finished scallop border if you need to shape it; do not overheat cotton yarn when blocking — use steam at a safe distance.
Round F3 :
Attach tassels: tie securely at outer four corners. Add extra tassels along sides if you prefer more decoration; in image each corner has a large tassel and subtle small motif clusters at outermost joins.
Round F4 :
Final inspection: check that floral join petals are evenly shared; if any floral join looks loose, tighten by sewing the center with small invisible stitches on the wrong side and trimming any stray threads. Enjoy your finished bedspread.
Info :
The full project relies on repeating the motifs consistently and blocking them before joining. Take your time with alignment during joining — this is what makes a bedspread look professionally finished.
This Dusty Rose Spiral Granny Bedspread turns simple repeating motifs into an elegant, vintage-inspired coverlet. Each spiral square and floral join brings a delicate, handcrafted charm to the bedroom. Working it is wonderfully meditative — one motif at a time — and the finished project is truly a labor of love. 🧶💗 Add tassels and scalloped edges for extra romance and heirloom style. Happy hooking and enjoy your cozy, handmade sanctuary! ✨