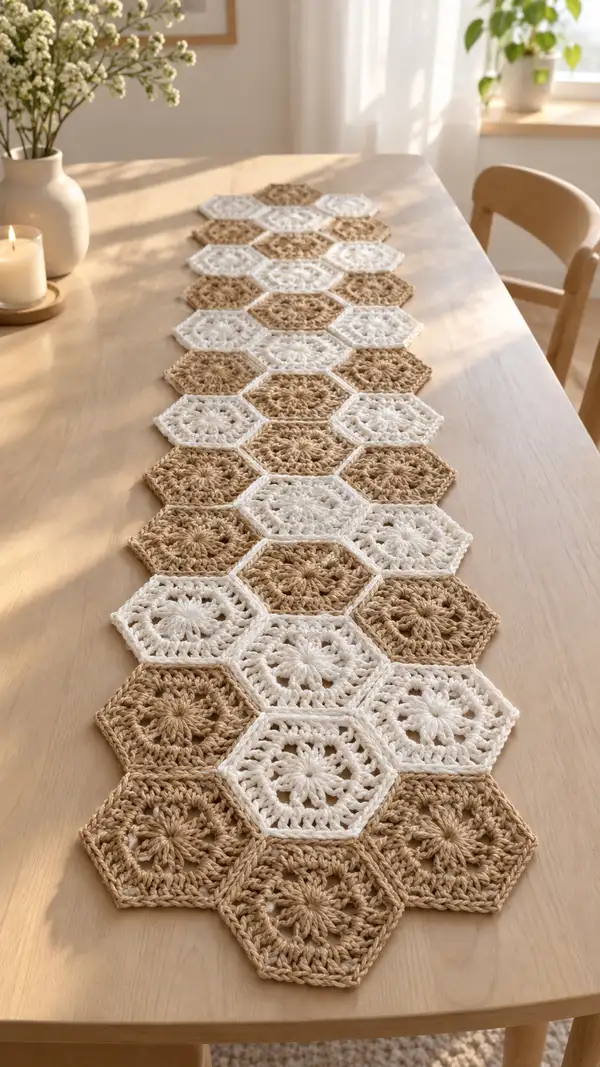
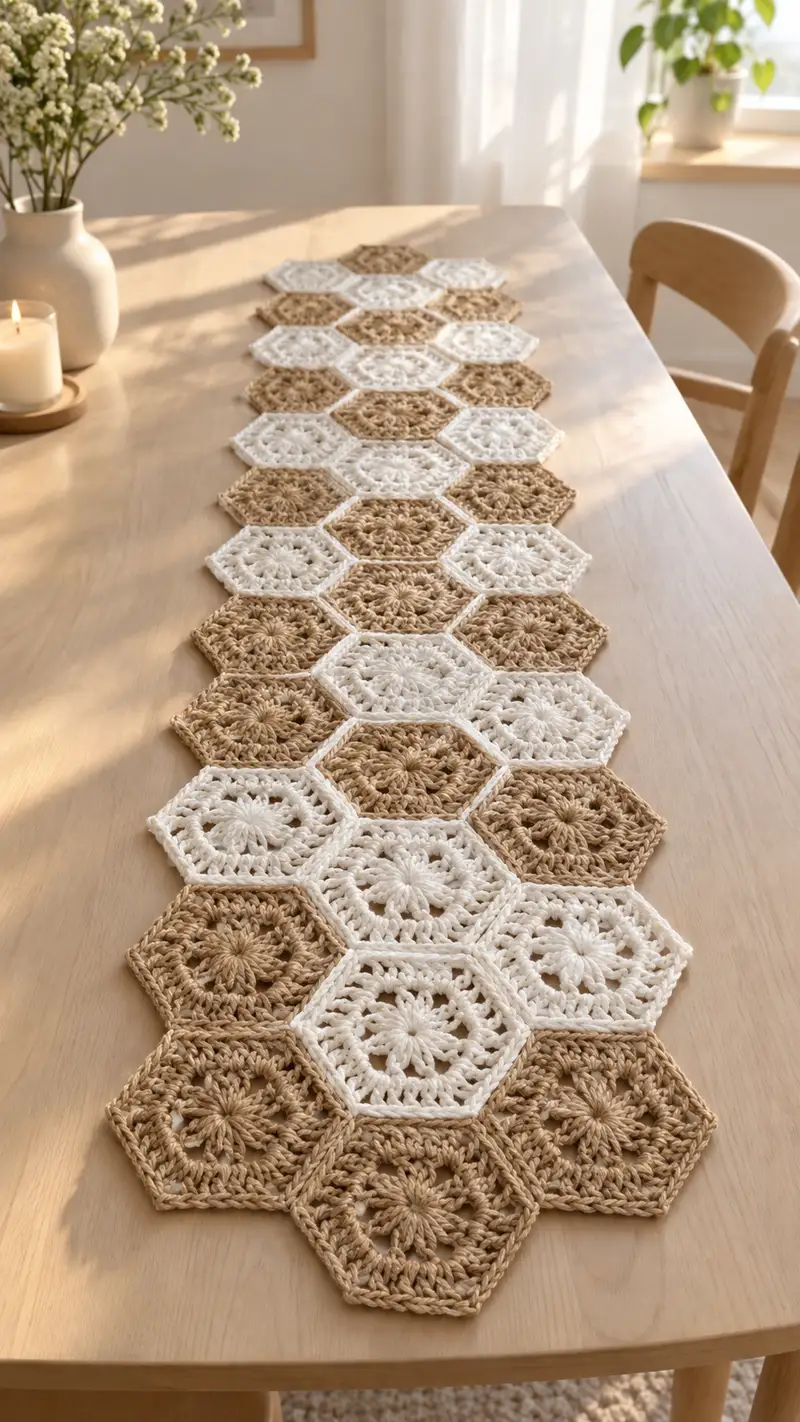
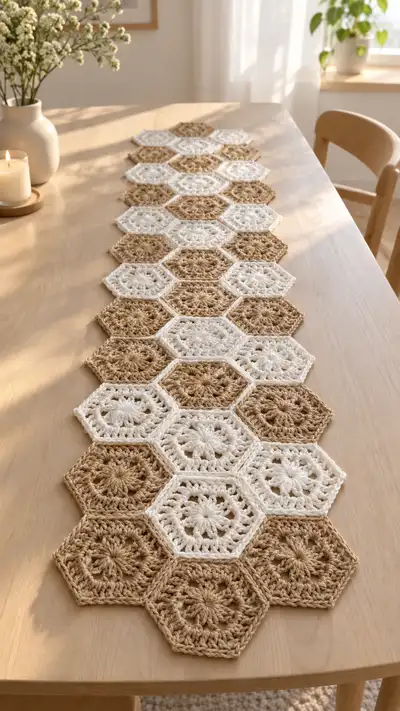
Create a warm, neutral table runner made from linked hexagon motifs in soft tan and creamy white. This pattern uses a lacy floral center and clean hex edges to form a modern, organic runner perfect for dining tables and sideboards. The modular design is easy to scale — add or remove motifs to fit your table. Detailed joining and edging instructions ensure a flat, professional finish.
Progress Tracker
0% Complete
— Hexagon Motif (Base floral version) :
Round 1 :
6 sc in magic ring (6)
Round 3 :
(1 sc, 1 inc) x 6 (18)
Round 4 :
(2 sc, 1 inc) x 6 (24)
Round 5 :
(3 sc, 1 inc) x 6 (30)
Info :
These first five rounds create a stable circular base. Keep stitches tight but not so tight you can�t work into them. Use a stitch marker to mark the start of each round.
Round 6 :
(4 sc, 1 inc) x 6 (36)
Round 7 :
(5 sc, 1 inc) x 6 (42)
Round 8 :
(6 sc, 1 inc) x 6 (48)
Info :
By round 8 you will have a broad, even circle—this will be the foundation for the lacy petal round that visually becomes the motif�s center.
Round 9 :
Ch 3 (counts as dc), 1 dc in same st, *ch 1, skip 1 st, (2 dc, ch 1, 2 dc) in next st (cluster), ch 1, skip 1 st; rep from * around, join with sl st to top of ch 3 (48 clusters/spaces maintained visually)
Round 10 :
Ch 2 (counts as hdc), 1 hdc in same sp, *ch 2, in each ch-1 space around work (2 hdc, ch 2, 2 hdc) in the ch-1 spaces to create petal arches; rep to end, join with sl st (48 visual points)
Info :
If you prefer a puff center, you can replace R9 with 12 puff clusters worked into the MR stage; the rest of the rounds can remain the same. Puff clusters give a raised flower look but use slightly more yarn.
Round 11 :
Change to dc for more body: Ch 1, 1 sc in same st, *sk next 2 sts (these will be the ch-2 spaces), in the center of the ch-2 space work: (3 dc, ch 1, 3 dc); sk next 2 sts, 1 sc in next; rep around to form 6 distinct lobed sections aligning with the hex sides (48)
Round 12 :
Ch 1, sc in same st, *[in top of first dc of next 3-dc group: work 1 sc, ch 2, 1 sc] to form the corner-rise at the boundaries between lobes; then 6 sc evenly across each side between corners; rep around and join (48)
Info :
Rounds 9�-12 create the visible floral-and-lace center. Use a smooth, flat surface to count your sections; there should be 6 visually distinct sides/sections that will become the hexagon sides.
Round 13 :
To begin forming hexagon sides: *work 8 sc across the worked area for each side (use the sc and dc groupings as markers), at the corner (where the ch-2/ corner space sits) work (sc, ch 2, sc) to form a corner; rep 6 times (6 corners) ending with sl st to join (6 corners, total stitch count approx 48-54 depending on how you count sc across sides)
Round 14 :
Ch 2, in each side work 1 hdc in each sc across side (approximately 8 hdc per side), at corner work (hdc, ch 2, hdc) to maintain hexagon corner; rep around and join (approx 54)
Info :
At this point the motif will read as a hexagon even though internal stitch counts may vary slightly depending on how tightly you worked the earlier lace rounds. The corner ch-2�s create the six vertices.
Round 15 :
Change to a slightly larger stitch for definition: Ch 3 (counts as dc), 2 dc evenly along each side across the existing hdc row (approx 3 groups of dc per side), at corner work (dc, ch 2, dc) in corner ch-2; rep and join (approx 60)
Round 16 :
Working in BLO: Ch 1, 1 sc in each st BLO around to create a crisp outer ridge (approx 60). Join and fasten off. Weave ends but do not trim short yet so you can use tails for joining.
Info :
Fasten off leaving a 30-40cm / 12-16in tail for each motif if you plan to sew motifs together rather than join-as-you-go. If you plan to join-as-you-go, leave a shorter tail (10-15cm) and prepare to join on the final round.
— Alternate Hexagon Motif (Puff-Center Variation) :
Round 1 :
Make a magic ring, ch 1, work 12 puff stitches into ring (each puff = yarn over, insert hook, pull up loop, yarn over, pull through 2 loops three times to make 6 loops on hook then pull through all loops and ch 1 between puffs) separating with ch 1 where comfortable; join to first puff (12 puff petals)
Round 2 :
Ch 1, 1 sc in same puff, *ch 2, sk next puff, 1 sc in next puff; rep around to create 6 small arches (12 sc total), join
Round 3 :
Ch 3 (counts as dc), in each ch-2 arch work (2 dc, ch 1, 2 dc) to make 6 petal clusters; join (6 clusters)
Info :
Puff centers give a raised textured floral centre similar to the motifs in the photo. Use the puff motif interchangeably with the base floral motif for a subtle alternating texture across the runner.
Round 4 :
Ch 1, sc in same st, then 6 sc across each petal area delimiting sides with (sc, ch 2, sc) at corners; rep around to form 6 sides (approx 48)
Round 5 :
Ch 2, hdc across each sc of next round to smooth sides, at corners (hdc, ch 2, hdc); join (approx 54)
Round 6 :
Ch 3, dc evenly across each side (approx 8 dc per side), at corners (dc, ch 2, dc) to form strong vertices; join and fasten off leaving joining tail if required (approx 60)
Info :
Alternate motifs should end with the same outer stitch count so they will join uniformly. Aim for approximately the same number of stitches at the outermost round across all motif variations.
— Join-As-You-Go Method (JAYG) — Joining Each Hexagon Side :
Info :
We recommend joining on the last round of each hexagon as you complete it, for a flat, seamless join. The photo shows motifs joined at edges with a single-row seam that keeps vertices crisp. Before joining, block your finished motif lightly to flatten and align edges.
Round 1 (Joining step) :
Begin motif outer round as instructed, but when you reach the first corner where the next motif will join, insert hook into the corresponding outer loop (or corner st) of the adjacent completed motif and sl st to join. Then continue working the remaining stitches of the round on your working motif.
Round 2 :
Where motifs meet along a side, join each side by sl st in every 2nd or 3rd outer stitch of the already-made motif while you work the final round of the current motif; for a neat seam aim for 6-8 joining points per side depending on stitch density.
Info :
For a strong join, make the sl st connection snug but not tight. You want the seam to be flat. If you pull too tight you will pucker the fabric; if too loose, gaps will appear. Use pins to line up motif edges so corners meet precisely.
Round 3 :
Alternate method: Use a slip stitch join on the final round by replacing some sc or hdc with sl st joins into adjacent motif�s outer loops: example: (sc, sl st into adjacent motif 1 ch-space, sc) across the side, and at corner work (sc, ch 2, sc) joining both motifs at the vertex with an extra sl st in the corner loop.
Round 4 :
For the runner pictured use an alternating join pattern: every other hexagon in the layout is worked and joined to three neighbors during final round; then fill in the remaining hexagons joining them to previously joined motifs on three sides as you go.
Info :
Plan your layout before joining: the pictured runner uses a staggered grid of 3 hexes across and 13-15 hexes long (depending on desired length). Work from the center outward or from one end to the other to make consistent seams easier to manage.
Round 5 :
If you prefer sewing rather than JAYG: leave a 30-40cm tail at each motif, position motifs on a flat surface, pin vertices and sides carefully, then whip stitch through the outer-most two loops of both motifs at regular intervals (approximately every 2-3 stitches) to produce a durable seam.
Round 6 :
When joining three or more sides at a vertex, ensure each corner ch-2 is aligned; weave tails through the corner to lock it in place. For flat seams, catch only the outermost loops, not the full post of the stitch.
Info :
Consistent seam tension is crucial: practice on two sample motifs to dial in how many sl sts or whip stitches you need per side. Too many tight stitches will pucker; too few will leave gaps.
— Assembly Plan (Layout & Stepwise Joining) :
Round 1 (Layout) :
Decide your grid: the runner shown is 3 hexes wide and 13 hexes long (3x13 = 39 total hex motifs). To achieve this, work an initial central row of 13 hexagons, then add the staggered rows above and below, alternating color and pattern for a checkerboard effect.
Round 2 :
Work the first central row of 13 hexagons entirely (either all tan or alternating tan/cream). For each hexagon you may use either motif variation so long as outer round counts match.
Info :
As you work the central row, leave tails or use JAYG to join the motifs to neighbors. If working JAYG, join each hex to its immediate left neighbor on completion. This anchors the row for adding the next staggered row.
Round 3 :
Once the central row is complete, start the second row (staggered). For each motif in the second row, during the final round join into the top edges of two adjacent hexagons in the central row (one on the left and one on the right) and also into the corner point between them: this anchors the motif at three points.
Round 4 :
Repeat this process row by row: alternate motif colors (tan, cream) so the runner has a pleasing alternating pattern like a checkerboard; the photo shows alternating colors along the length and across each row so no two adjacent motifs share the same color.
Info :
To scale the runner up or down, add or subtract hexagons in the central row and the number of staggered rows. Each added motif increases length by approximately the width of one motif (~11-13cm depending on yarn and hook).
Round 5 :
When you reach the last motif at either end of a row, finish its outer round without joining on the exposed outer edges. These outer edges will be addressed by the border rounds.
Round 6 :
After joining all motifs into the runner shape, gently block the entire assembly to square corners and smooth seams. Stretch to exact desired measurements and pin flat until dry.
Info :
Blocking is the secret to a professional-looking runner. Use warm water according to yarn instructions. For cotton, steam blocking or wet blocking both work well. Pin each corner at equal distances to keep the runner straight.
— Border/Edging (Flat crochet border to frame runner) :
Round 1 :
With contrast or main color (photo uses both colors interspersed), attach yarn to any outer corner. Ch 1, sc evenly across exposed outer edges in each outer stitch (avoid sewing into join seams), work approximately 2 sc per motif edge stitch; at each vertex work (sc, ch 2, sc) to form a neat corner loop; continue around entire runner and join with sl st (estimate 220-260 sc total depending on runner size)
Round 2 :
Ch 2, hdc in each sc around, at corner work (hdc, ch 2, hdc) to preserve corner points; join with sl st (same stitch count as R1)
Info :
This first border round evens out the outer silhouette and hides irregular joins. If you used contrasting color motifs, choose a border color that harmonizes; in the photo a cream border is used sparingly to define the hex shapes.
Round 3 :
Optional decorative ridge: Working in BLO, ch 1, sc in each st BLO around; this creates a raised ridge just inside the outer hdc band; join and fasten off (same stitch count)
Round 4 :
Final decorative round: Use crab stitch (reverse sc) for a subtle finish: working from left to right, sc in each st along the outer edge alternating with sl st in corners to preserve shape; this lays the border flat and creates a hand-sewn look.
Info :
The crab stitch is worked in reverse direction and creates a rope-like finished edge — it�s optional but very effective on cotton yarn for runners and placemats.
Round 5 :
If you prefer a scalloped edge: replace the crab stitch with small shells: *skip 2 sts, (5 dc in next st), skip 2 sts, sl st in next st; rep around. This adds a soft feminine edge at the expense of a little extra yarn.
Info :
Measure and check that your runner maintains straight edges. If the runner wavers, adjust border tension or add a second border round to stabilize the fabric.
— Finishing Rounds & Details :
Round 1 :
Weave in all remaining tails using a yarn/tapestry needle. Weave tails through several stitches along seams rather than into the body of a single motif to distribute stress.
Round 2 :
Trim excess tails leaving about 5-8mm length from fabric. If you anticipate washing frequently, consider using a small knot at the end of each tail before weaving to prevent unraveling.
Info :
If using multiple colors for edges or motifs, try to weave tails into the same color section for an invisible finish. Where you switch color mid-side, tuck ends neatly under the border rounds.
Round 3 :
Final blocking: dampen the whole runner slightly and pin flat one last time. Ensure vertices are pointy and straight; allow to dry fully before use.
Round 4 :
Optional: Lightly press with steam if yarn label allows. Avoid ironing directly on textured puff areas; place a cloth over runner before pressing.
Info :
Your runner is now complete. If you plan to make matching placemats or coasters, use the same motifs and repeat the same joining and border strategy on a smaller scale.
— Tips, Variations & Scaling :
Round 1 :
To make a shorter runner: reduce the central row length by removing motifs in multiples of one; to make longer, add more motifs to the central row. The width is controlled by number of motifs across (the sample is 3 across).
Round 2 :
To make placemats: create a cluster of 7 hexagons (one center with six around) and add a 3-4 round border as described above. For coasters, use single hex motif with edge finish.
Info :
Color play: For a striped look alternate rows of the same color; for a checkerboard like the image alternate every adjacent motif. Use tonal variation for subtlety or high-contrast for a bolder statement.
Round 3 :
If using a different yarn weight, swatch a single motif: create one motif in the yarn you plan to use and measure motif width and height; adjust number of motifs to desired runner length accordingly.
Round 4 :
For a sturdier runner, use mercerized cotton or a cotton-blend worsted yarn. For a softer, more drapey look choose cotton/acrylic blends and adjust hook size to keep motifs flat without gaping.
Info :
Throughout the project keep notes: motif counts, yarn color order, and whether motifs used puff or flat centers. This simplifies replication and makes additional runners easier to produce.
Bringing all hexagons together into this neutral table runner is a satisfying and meditative process 🧶. The alternating tan and cream hexes form a timeless, textured pattern that flatters wooden furniture and contemporary interiors. Each motif contributes to a handmade rhythm along the table — the final blocking and border are the magic that make the runner look store-bought. Enjoy the slow, creative rhythm of joining and finishing; your table will thank you with everyday beauty 🌿✨