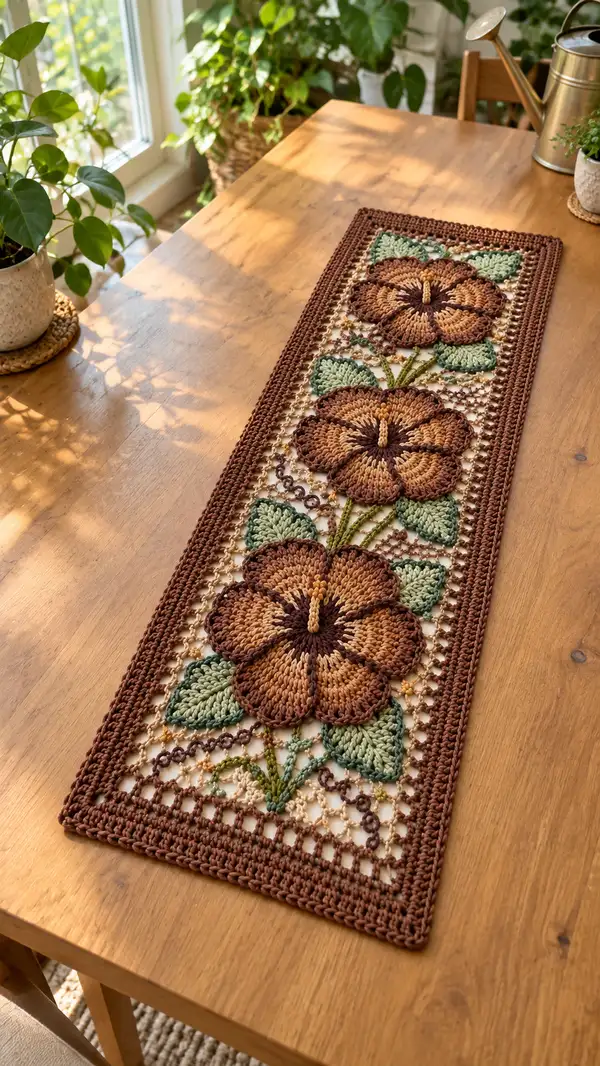
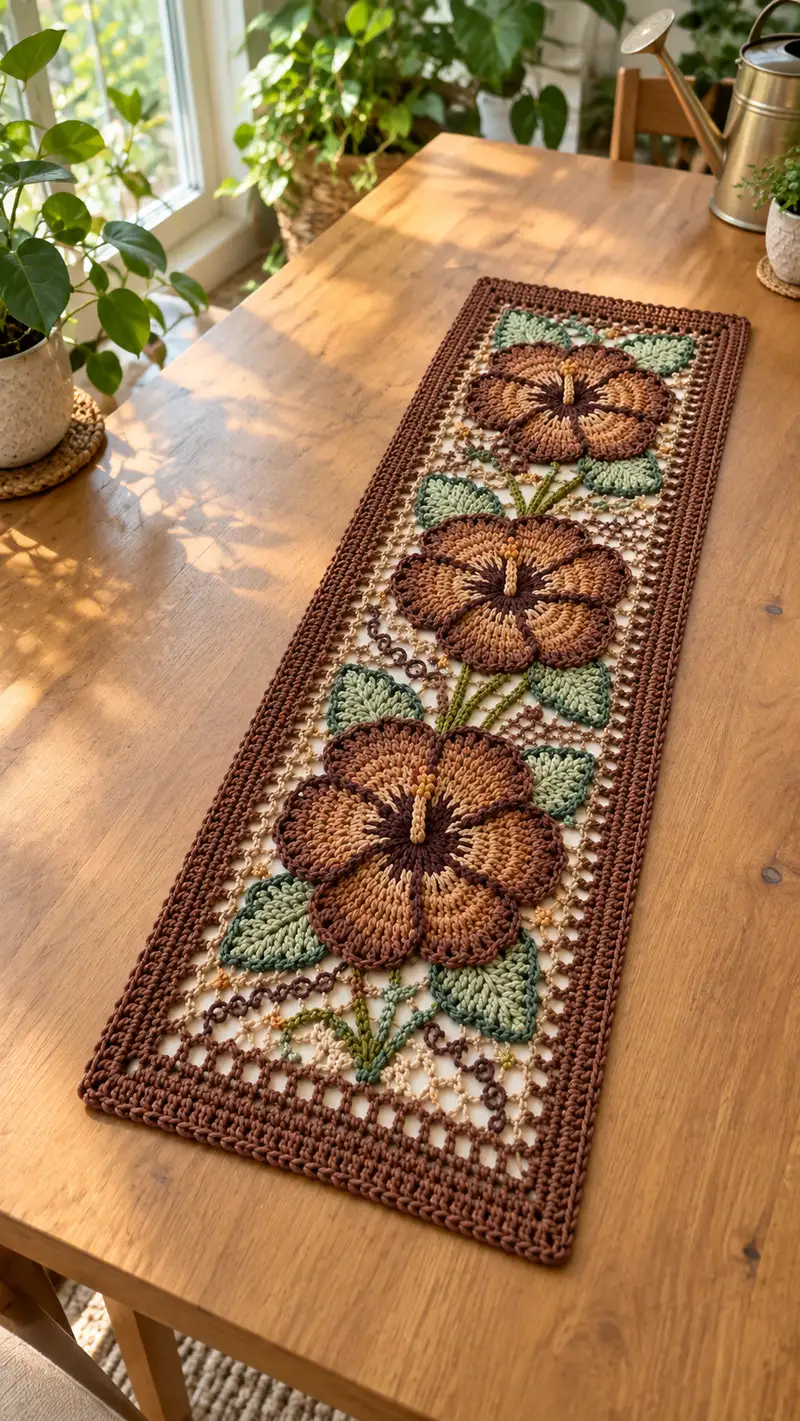
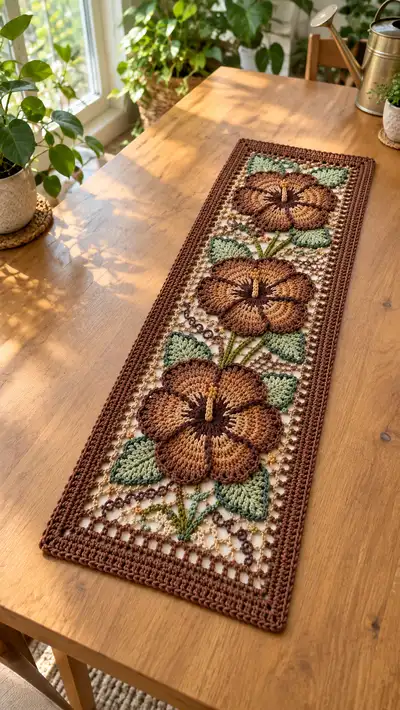
A warm, vintage-inspired table runner featuring three large layered flowers, leafy sprays, and an airy mesh background. Worked in warm browns, soft greens and cream tones, this runner uses modular motifs joined into a rectangular lace panel and finished with a solid crocheted border. The finished piece brings handcrafted charm to any tabletop with textured petals, embroidered stems, and a tidy single-color edging.
Progress Tracker
0% Complete
— Notes & Overview :
Info :
This runner is made up of three identical flower assemblies centered on a rectangular mesh background and finished with a solid border. Each flower assembly includes one center disk, six petal motifs, and three leaves. The pattern presents full, explicit rounds for every motif and step-by-step joining instructions. Gauge is not critical but affects final size. Work tightly enough that the mesh is airy but not holey where details will be sewn.
Info :
Puff stitch used in petals: yarn over, insert hook into stitch, yarn over and pull up a long loop, repeat 4 more times (5 loops on hook), yarn over and pull through all loops, ch1 to close puff. Compress puff slightly with hook to keep texture consistent. Practice puff tension on a small swatch.
— Flower Center Disk (Make 3; one per flower) :
Round 1 :
6 sc in magic ring (6)
Round 3 :
(1 sc, 1 inc) x 6 (18)
Round 4 :
(2 sc, 1 inc) x 6 (24)
Round 5 :
(3 sc, 1 inc) x 6 (30)
Round 6 :
(4 sc, 1 inc) x 6 (36)
Round 7 :
(5 sc, 1 inc) x 6 (42)
Round 8 :
(6 sc, 1 inc) x 6 (48)
Round 9-10 :
1 sc in each st (48)
Info :
These rounds form a firm center disk. Make sure the disk is flat; if it cups, loosen tension slightly or add one more even round before attaching petals. Fasten off with a 20 cm tail for sewing petals later. Make 3 center disks.
— Petal Motif (Make 18 - 6 petals per flower; Petals 1-18 below presented individually for precise shaping) :
Petal 1 - Round 1 :
6 sc in magic ring (6)
Petal 1 - Round 2 :
6 inc (12)
Petal 1 - Round 3 :
(1 sc, 1 inc) x 6 (18)
Petal 1 - Round 4 :
Working on one side only to begin oval shaping: sc in first 6 sts, inc in next 6 sts (24)
Petal 1 - Round 5 :
Sc evenly in each st (24)
Petal 1 - Round 6 :
Begin texture: *ch2, puff in next st, ch1, sl st in next st* around to create 8 puff anchors (24 active base sts remain)
Info :
Round 6 anchors puffs at approximately every third base stitch; puffs create the raised petal body. Adjust number of puffs so that there are 8 per petal for a broad look, or 6 for a narrower petal.
Petal 1 - Round 7 :
Working into puff anchors only: (ch1, 3 dc, ch1, sl st) in each puff anchor to build height (do not change base stitch count)
Petal 1 - Round 8 :
Rotate work and work around outer edge of the dc groups: (2 dc, tr, 2 dc) in the peak of each puff group to create a rounded outer edge (24)
Petal 1 - Round 9 :
Shell edging: *ch2, (3 dc) in next sp, ch2, sl st* repeat for each petal peak (24)
Petal 1 - Round 10 :
Finish edge with sc around outer perimeter of the petal, working 1 sc in each dc and 1 sc in ch spaces to produce a tidy rim. Fasten off leaving a generous tail for sewing (approx 25 cm).
Info :
Sew each petal to the center disk overlapping slightly. Use the tail to whip-stitch along the inner curve; place 6 petals evenly around the center disk. Block petals lightly if needed to curve them outward.
Petal 2 - Round 1 :
6 sc in magic ring (6)
Petal 2 - Round 2 :
6 inc (12)
Petal 2 - Round 3 :
(1 sc, 1 inc) x 6 (18)
Petal 2 - Round 4 :
sc in first 6 sts, inc in next 6 sts (24)
Petal 2 - Round 5 :
1 sc each st (24)
Petal 2 - Round 6 :
*ch2, puff in next st, ch1, sl st in next st* around (24)
Petal 2 - Round 7 :
Work into puff anchors: ch1, 3 dc, ch1; sl st between groups (24)
Petal 2 - Round 8 :
Outer shaping: (2 dc, tr, 2 dc) in each peak (24)
Petal 2 - Round 9 :
Shell edge: ch2, 3 dc in ch sp, ch2, sl st across peaks (24)
Petal 2 - Round 10 :
Sc around outer edge to finish and fasten off with long tail for sewing
Info :
Repeat Petal 1 and Petal 2 sequence for Petals 3-6 to complete first flower. Each petal uses identical shaping; keep puff tension consistent so petals match. Make 6 petals per flower (repeat to make 18 total for three flowers).
— Assembling Flower (Do this for each of the 3 flowers) :
Info :
Place the center disk flat with right side up. Pin six petals evenly around the disk so petal tips point outward. Use the long tails to sew the inner curve of each petal to the disk with neat whip stitches. Sew from the underside where possible for tidy finish. Once all petals are attached, flatten and adjust petal placement so petals overlap slightly and look radial.
Info :
After sewing petals, use a short length of mustard or dark gold yarn to embroider a small clustered center: make a tight French-knot style stitch or a small vertical loop (approx 6 embroidery loops) to give a stamen effect. Secure yarn ends on the underside.
— Leaf Motif (Make 6 per runner; 2-3 leaves per flower cluster; presented individually) :
Leaf 1 - Round 1 :
Ch6, sc in 2nd ch from hook, hdc in next, 2 dc in next, 1 dc in next, 1 hdc in next, 1 sc in last (counts across foundation = 6 sts worked)
Leaf 1 - Round 2 :
Turn on opposite side of chain foundation: 1 sc in first st, 1 hdc in next, 1 dc in next, 2 dc in next, 1 hdc in next, 1 sc in last. Sl st to join at base. (no counted stitch expansion; shape is an oval leaf)
Leaf 1 - Round 3 :
BLO only: 1 sc in each st to create a slightly veined underside (approx 12 sc total around leaf)
Leaf 1 - Round 4 :
Surface ribbing: With contrasting sage green, use surface slip-stitches to draw a central vein from base to tip. Secure yarn and fasten off leaving tail for sewing.
Info :
Make leaves slightly differently in size if you want more natural variety: extend foundation chain by 2 to create a longer leaf variant. Make 6 leaves total and block them flat to match petal shapes before sewing.
Leaf 2 - Round 1 :
Ch6, sc in 2nd ch from hook, hdc, 2 dc, dc, hdc, sc (foundation as Leaf 1)
Leaf 2 - Round 2 :
Return on opposite side: sc, hdc, dc, 2 dc, hdc, sc. Sl st at base. Fasten off leaving long tail for placement.
Info :
Repeat Leaf 1 and Leaf 2 variations until you have 6 leaves, or make 3 small leaves and 3 large leaves for visual balance. Attach leaves to the mesh background before attaching flower centers so you can hide tails under petals.
— Stem Embroidery (Make per flower, connecting petals and leaves) :
Round 1 :
Using sage green yarn and an embroidery needle, chain elongated surface stitches along the mesh background to form stems. Stitch from the bottom leaf base to center of flower with a series of surface sl st or couching stitches approximately 20-30cm long depending on runner spacing.
Info :
Stem thickness: use two strands of yarn held together for a more pronounced stem, or a single strand for subtle veins. Secure at both ends with a few small stitches on the wrong side of the mesh panel.
— Mesh Background Panel (Center Panel - make 1 long strip sized for three flowers) :
Info :
The mesh panel is worked flat in rows and will be joined to motifs. Determine panel width by measuring the assembled width of three flower assemblies plus margins. In this pattern we recommend a starting chain of 62 (this produces a narrow runner width suitable for three flower assemblies and an outer sc border); adjust multiples of 4+2 to change width.
Row 1 :
With cream yarn ch62, turn, sc in 2nd ch from hook and in each ch across (61 sc)
Row 2 :
Ch4 (counts as tr), skip 2 sts, *1 dc in next, ch3, skip 3 sts, 1 dc in next* repeat across, end with ch1, turn. (Creates first lattice row.)
Row 3 :
Ch1, sc in each dc and sc across, working sc into ch3 spaces as sc, produce evenly spaced sc row (61 sc or equivalent if counting ch spaces)
Row 4 :
Repeat Row 2 to continue mesh: ch4, *dc, ch3* across to end. Turn.
Info :
Continue rows 2-4 pattern for the length of the runner, working a lattice every other row with a sc row in between. For a runner long enough for three flower assemblies, work 48 rows total (16 lattice units). This creates an open mesh that showcases the tabletop while providing structure for sewing motifs.
Rows 5-48 :
Repeat Rows 2-4 pattern (lattice row, sc consolidation row, lattice row) until piece measures required length. End with a sc row to stabilize edge. Fasten off and weave in ends.
— Positioning & Joining Motifs to Mesh :
Info :
Place the mesh panel wrong side up on blocking board. Position Flower 1 center disk approximately 6 rows from top edge and centered horizontally. Position Flower 2 centered vertically about 1/3 down from top and Flower 3 1/3 from bottom. Use measuring tape to ensure even distances between flower centers (recommended spacing 18-20 cm between centers). Pin petals and leaves in position. Leave stems unfastened until embroidery step so you can adjust where stems meet leaves.
Info :
Sew petals to the mesh by stitching around the inner curve using the tails left from petal construction. Use small whip stitches into the underlying sc rows or ch spaces of the mesh. Make sure each petal is secured at multiple points to hold the raised texture in place.
Info :
Sew leaves to mesh at their base using the long tail and secure with several back-and-forth stitches. Tuck stitch tails under petals where possible for a neat finish. Once all petals and leaves are attached, carry out stem embroidery to unify the composition.
— Decorative Chain Accents (Optional ringed chain seen between motifs) :
Round 1 :
With contrasting dark brown, ch10, sl st into first ch to make small ring. Fasten off leaving tail for sewing. Make 24 rings and sew them into the mesh openings in symmetric rows to echo the pictured decorative chain between flowers.
Info :
These rings are purely decorative. Space them evenly in lattice openings between flower motifs to add a vintage chain-like accent. Sew securely on underside so rings sit flat on mesh surface.
— Border / Edging (Worked around entire assembled panel) :
Info :
Before edging, block entire assembled panel lightly to square it up. Edging is worked in rounds around the perimeter. Use main border color (chocolate brown) and a slightly larger hook (4.0 mm) if you want a softer edge.
Round 1 :
Attach border color with sl st at one corner. Ch1, 1 sc in each st along side edges and working 3 sc in each corner to turn smoothly. Work 1 sc in each st across all four edges. (Maintain consistent count; for a 62ch foundation you will work approximately 2 sc per ch across edges; count will vary after assembly)
Round 2 :
Ch2 (counts as hdc), hdc in each st around, working 3 hdc in each corner to maintain flatness.
Round 3 :
Ch2, BLO hdc in each st around. This creates a subtle ridge that frames the runner and helps the border sit flat.
Round 4 :
Ch1, sc in each st around; for a decorative finish: *sc in next 2 sts, ch2, skip 1 st* around to create a picot-like openwork, placing 5 sc evenly across each side between corners. Work 3 sc in each corner. Fasten off and weave in ends.
Info :
If your border puckers, try blocking again while the border is damp and pin to shape. Adjust tension by using a larger hook if necessary. For a heavier border, add an extra round of sc before finishing the decorative picot round.
— Finishing Touches :
Info :
Weave in all tails from underside neatly. Trim stray fibers. Lightly steam-block the finished runner, avoiding direct high heat on cotton blends—use a towel barrier if steaming. Press gently to set the shape and make petals lie naturally outward. Optionally, add a small non-slip pad under runner for table protection.
Info :
Optional bead accent: add a small bead or sequin in the center of each flower when sewing the stamen to add a subtle metallic highlight. Sew beads on before finishing stamen embroidery so knots are hidden.
— Full Repetition Notes (Detailed counts & repetition guidance) :
Info :
Flower units, leaves and rings are modular; you can scale runner length by repeating the sequence: Mesh rows to next placement, then attach next flower assembly. For an extra-wide runner, increase mesh foundation chain by multiples of 4 and add extra flowers or double rows of mesh between flowers.
Info :
Care: machine wash cold on gentle cycle if working in machine washable cotton yarn; reshape while damp. Avoid tumble drying to protect raised petal texture. Spot-clean delicate embroidery and beads by hand.
This floral table runner combines layered textures and airy mesh to create a timeless centerpiece. The modular construction makes it satisfying to assemble, and the warm palette brings a cozy, handcrafted charm to any table. Whether kept for yourself or gifted to someone special, every stitch adds personality and warmth. 🧶🌼✨