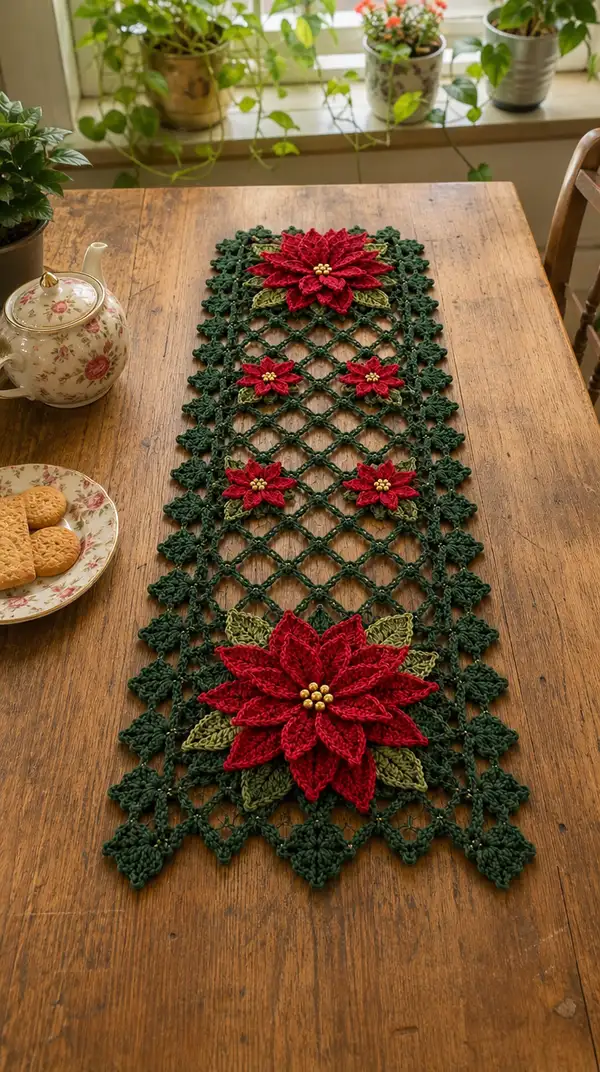
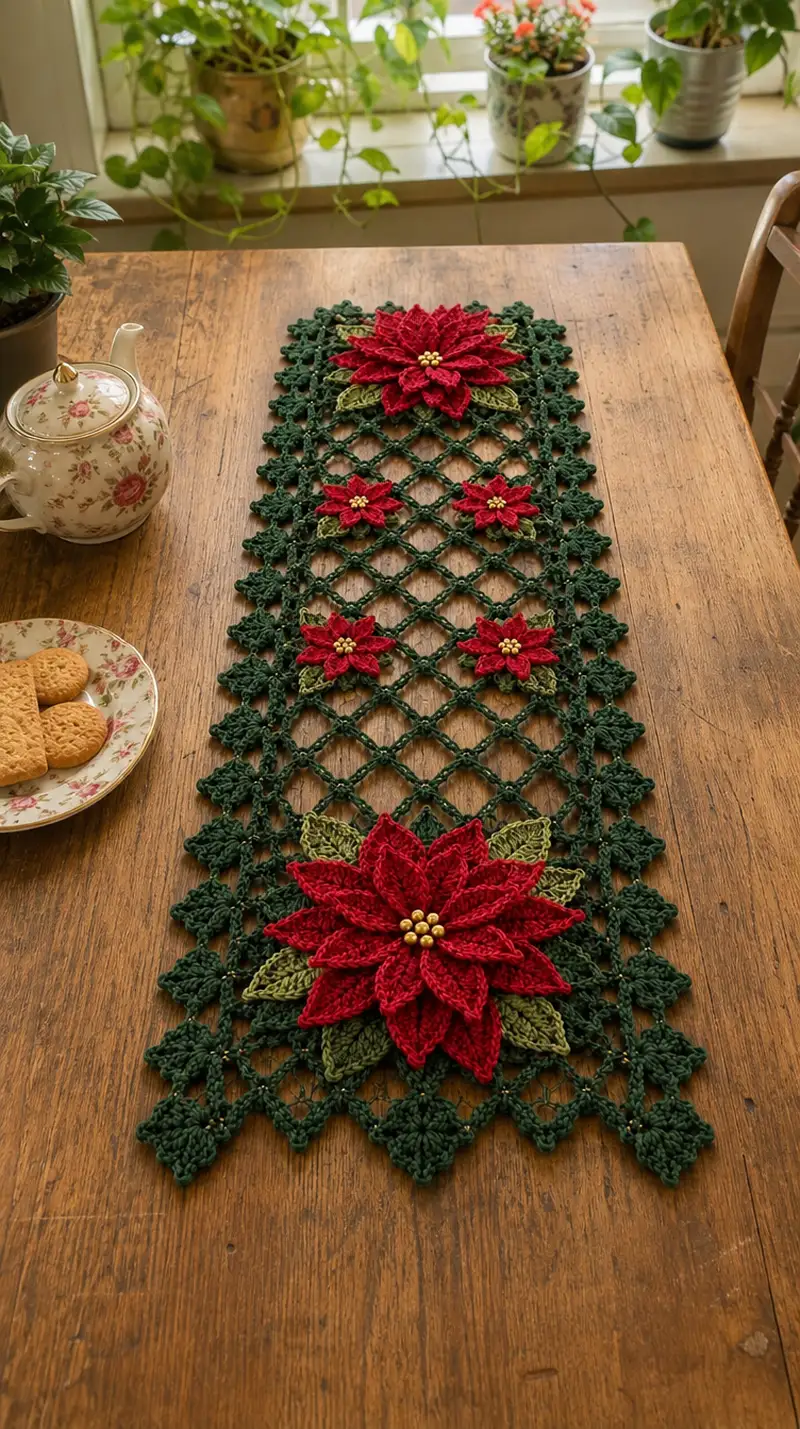
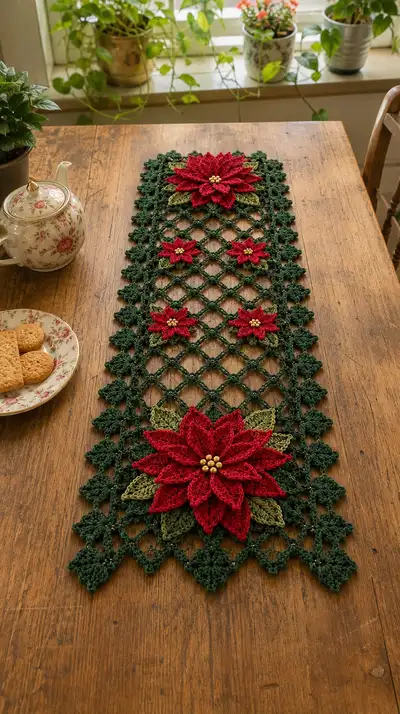
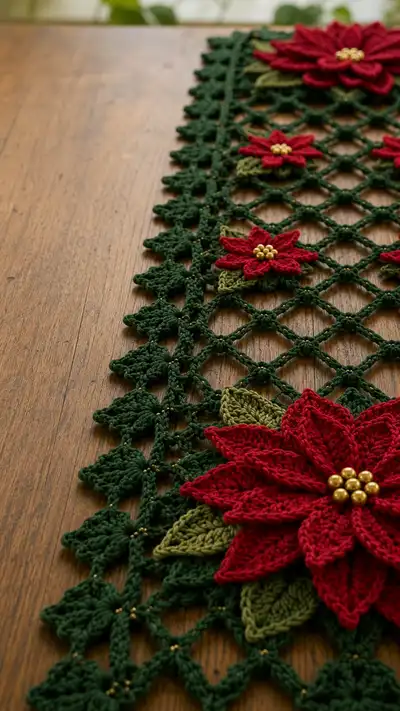
Create a festive, vintage-inspired table runner featuring a deep green lattice background and layered red poinsettias with olive leaves and gold bead centers. This stunning runner is perfect for holiday tables and seasonal decor. The open mesh construction keeps it light while the layered flowers add rich texture and dimensional charm. Detailed step-by-step instructions guide you through motifs, joins and finishing touches.
Progress Tracker
0% Complete
— Notes & Gauge :
Info :
This runner is modular: the central lattice is formed of repeated diamond units joined row-to-row. Gauge is not critical but use a 4.0mm hook for the mesh and a slightly smaller 3.5mm hook for petals and leaves if you want crisper petal edges. One diamond unit measures approximately 2.0" across when blocked with worsted weight yarn and 4.0mm hook.
— Abbreviated Construction Overview :
Info :
Work individual motifs: large poinsettia (make 2), small poinsettias (make 3), leaves (make as many as indicated for each flower), then work a long mesh strip built from repeating diamond units and edge leaf clusters. Join flowers to mesh with slip stitches and sew beads into centers. Finally add leafy scallop edging and block the entire runner.
— Center Mesh (make 1 long strip, repeat diamond units across width and length) :
Foundation Chain :
Ch 75 + 2 turning ch (this creates a runner approximately 12-14" wide with 24 diamond repeats across; add/subtract multiples of 3 ch to lengthen)
Row 1 :
Sc in 2nd ch from hook, *ch5, sk 5 ch, sc in next ch; rep from * across. End with sc in last ch. (Approx 24 sc and 23 ch-5 loops across)
Row 2 :
Ch1, turn. Sc into first sc, *ch5, sc into next sc (working into sc from previous row), rep from * across. (24 sc and 23 chain-5 loops)
Info :
The mesh is built as alternating rows of sc and ch-5 loops that form diamonds when offset. Keep tension steady; do not work too tightly or the mesh will not lie flat.
Row 3 :
Ch1, turn. Sc into first sc, *ch5, sc into center of ch-5 loop below (work sc into space constituted by the ch-5 from previous row), rep from * across. (24 sc and 23 chain-5 loops)
Row 4-8 :
Repeat Row 2 and Row 3 alternately to build height. At Row 8 you will have established 4 full diamond rows. Keep mesh loose enough so diamonds open to approximately 1.75-2.0" across when blocked. (24 sc each even row)
Info :
Place small scrap markers every 6th diamond across at the top and bottom of the panel to help you align flower positions later. Mark the center diamond for flower anchoring.
Row 9 :
Work Row 2 pattern but when you reach the center marked diamond, ch5, insert small bead onto the chain (use beading needle) before completing the sc, then continue across. This adds subtle gold highlights to center intersections.
Row 10-20 :
Continue alternately repeating Row 3 and Row 2 across the panel until the runner reaches the desired length. For shown sample make 36 rows total of alternating rows (this gives about 36-40" length depending on blocking). Keep count with a row counter. (Each even row retains 24 sc)
Info :
Every 8th row, add a bead at central junctions to mimic the sample sparkle: slip bead onto yarn and secure across the ch-5 by tacking with sl st on next row. Beads should sit inside intersections and not protrude prominently.
— Diamond to Diamond Join Variation (for longer runner) :
Row 21-36 :
Maintain the same mesh rhythm. To lengthen, chain additional multiples of 3 in foundation chain at start. If making very long runner, measure periodically and block short sections to keep lattice even.
Info :
If you prefer an entirely modular approach, you can create diamond squares (one diamond = 1 motif) and join them with slip stitches; the instructions above create a continuous strip for minimal seaming.
— Large Poinsettia (Make 2 identical big flowers) :
Round 1 :
With red and 3.5mm hook: Make a magic ring, ch1, 8 sc in ring (8). Pull ring tight. (8)
Round 2 :
2 sc in each st around (16). (16)
Round 3 :
(1 sc, inc) x8 (24). (24)
Round 4 :
(2 sc, inc) x8 (32). (32)
Round 5 :
Ch1, *sc in next 4 sts, ch5, sk 4 sts, sl st into next st (this begins petal bases to be worked into ch-5 loops later); rep from * around until 8 petal-base loops are formed. Adjust to have 8 petals. (8 ch-5 loops)
Info :
Petal architecture uses petal-base loops of ch-5 created around a small central disc. Place marker at start of Round 5 for reference to petal 1. Keep petals evenly spaced—8 petals in large flower.
Round 6 (Petal Round - Layer 1) :
Working into each ch-5 loop: (sc, hdc, 3 dc, hdc, sc) in ch-5 loop; sl st into next petal base to secure. Repeat for 8 petals. This creates broad outer petals. (8 petals)
Round 7 :
Ch1, sl st into base between petals to bring yarn to next petal base. Work 1 sc between petals around to firm up the join. (Approx 8-16 sc depending on spacing)
Round 8 (Second Petal Layer Base) :
Ch3, *sk to base of next large petal, sl st to secure ch-3 loop around the petal base; rep to create 8 ch-3 loops sitting above first petal layer. These will anchor the second, smaller, inner petal layer.
Info :
At this stage the flower has a full outer layer. Work inner petals slightly taller and narrower to produce a tiered look. Keep each petal shaped identically by counting stitches at each petal.
Round 9 (Inner Petals) :
Into each ch-3 loop: (sc, hdc, 2 dc, hdc, sc). Repeat for all 8 loops. Inner petals will be slightly shorter than outer petals creating depth. (8 small petals)
Round 10 :
Form a third inner ring of petite pointed petals: ch4 loops in bases between inner petals (8 loops), then work (sc, hdc, 1 dc, hdc, sc) into each ch4 loop. This yields a 3-tier layered flower. Secure with sl st and fasten off leaving a long tail for sewing. (8 petite petals)
Round 11 :
Stitch counts: center disc remains 32 sts; outer petal loops anchored to 8 points around disc. Fasten off and block flat. Repeat to make second large flower. (Finished large flower: 3 petal layers, 8 petals per layer)
Info :
Optional: For extra dimension, make additional middle ring by repeating a mid-size petal round between Rounds 6 and 9. You can also use a slightly smaller hook for inner petals to make them sit higher.
— Small Poinsettia (Make 3) :
Round 1 :
With red and 3.5mm hook: Magic ring, ch1, 6 sc in ring (6). (6)
Round 2 :
2 sc in each st around (12). (12)
Round 3 :
(1 sc, inc) x6 (18). (18)
Round 4 :
Ch1, *sc in next 2 sts, ch4, sl st in next st; rep around to make 6 ch-4 loops that become small petals. (6 ch-4 loops)
Round 5 (Petals) :
Into each ch-4 loop: (sc, hdc, 2 dc, hdc, sc). Repeat 6 times to produce 6 small petals. Fasten off leaving long tail for sewing. (6 petals)
Info :
Small flowers are used between large ones as accents. Make 3 and block flat. Add small gold bead clusters to centers later when assembling.
— Leaves (Make as needed; 6 larger leaves per large flower, 2 per small flower) :
Leaf Round 1 :
With olive green and 3.5mm hook: ch8, sc in 2nd ch from hook, hdc in next, 2 dc in next, 3 tr in center ch, 2 dc next, hdc next, sc next, ch1 turn to work along opposite side of foundation chain: sc in next, hdc next, 2 dc next, 3 tr over center, 2 dc next, hdc, sc. Sl st to join at base. Fasten off. (Leaf length approx 1.75-2.0")
Leaf Round 2 :
Optional shaping: With same color, work picot along outer edge: *sl st in 1 st, ch3, sl st into 3rd chain to form picot, continue around outer curve only. Fasten off leaving tail for sewing.
Info :
Leaves should be slightly cupped so they sit under flower petals; block each leaf with a damp cloth and pin to shape. Use fewer picots if you prefer a smoother leaf edge.
— Leafy Side Motif / Scallop Edge (Make along both long sides) :
Motif 1 - Base Cluster :
With green and 4.0mm hook: ch5, sl st to form ring, ch1, 6 sc in ring (6 sc cluster). Fasten off. (6)
Motif 2 - Petaled Cluster :
Join yarn to ring edge of Motif 1: ch3, (dc, ch2, dc) into ring, sl st to next point to create a 3-lobed petal cluster. Repeat to make a diamond of 4 petal clusters around edge. Each cluster approximates 1 small leaf shape.
Info :
These small clusters are worked repeatedly along each side of the mesh, joined into the mesh ch-5 intersections to form the leafy scallop border seen in the sample. Place clusters every other diamond intersection for a balanced scallop.
Repeat Motif Rows :
Work a row of small clusters along both long edges of the mesh: attach at each ch-5 intersection with sl st, chain 5 and form a petal cluster, then sl st to next intersection. This row will be reinforced later with a second edging round.
Edge Round 2 :
With deep green, work around the outermost mesh along both long sides: *sc into top of each cluster, ch3, sl st into mesh intersection to tack; rep until whole edge is finished. Add small golden bead at every 3rd cluster by threading bead on yarn before working a sl st to trap it in place.
Info :
Edge clusters set the runner's silhouette. Keep the clusters consistent in height and curve. If necessary, use a 3.5mm hook to make clusters slightly tighter than the mesh so the edge reads firmly.
— Attaching Flowers to Mesh (Placement & Method) :
Info :
Large flowers sit over the end-most diamond blocks (1 at each end), each spanning roughly 4 diamonds across. Small flowers sit centered in three evenly spaced diamonds down the center. Block flower and mesh and pin into position for accurate sewing.
Attachment Round 1 :
Using a long tail from the flower, insert yarn needle under center disc of flower and stitch through mesh junctions at 8 base points. Make sure to catch the mesh at the top of the diamond intersections to give a raised look but secure connection. Sew 8 evenly spaced secure stitches around to anchor the flower.
Info :
For a floating look, sew only through the petal bases and the ch-5 intersection directly beneath each petal; this anchors without pulling the mesh down. Add a small satiny stitch under outer petal tips if you want the flower fixed flat.
Attachment Round 2 :
Position leaves under the outer petal layer: using the leaf tail, whip-stitch the leaf base to the mesh at 3-4 points so leaves fan evenly from under the flower. Use small invisible stitches to hide ends under petals.
Info :
Place small flowers using the same method but with 6 attachment points. Ensure leaves are not sewn over bead positions to avoid bulging.
— Bead Centers (Gold Beads) :
Bead Cluster Step 1 :
Thread 6 small gold beads onto yarn tail or beading thread. Tie a small knot at the end to stop beads sliding off. Insert the beading needle through the flower center and pull beads down so they sit in the center of the flower over the disc.
Bead Cluster Step 2 :
Sew beads down securely by passing needle under disc yarn and back through beads at different angles until cluster sits stable and does not move. Fasten off and weave ends under petal bases. Repeat for each flower (6 beads for large, 5-6 for small depending on scale).
Info :
If you prefer no beads, embroider center with French knots using gold embroidery thread; use 4-6 small knots for a similar visual effect and child-safe finish.
— Final Joining & Reinforcing Rounds :
Round 1 :
With deep green and 4.0mm hook, work a tidy round of sc around the outermost mesh edge: sc evenly into the top of each outermost sc from the mesh foundation, ch3 at corner diamonds to maintain shape. This stabilizes edges. (Approx 2 sc per diamond side)
Round 2 :
Work picot accents along the outer sc round for a subtle scallop: *sc in next st, ch3, sl st in base of ch3 (picot), sc in next 2 sts; repeat across edges. Fasten off and weave ends.
Info :
Ensure picots are small and consistent so the runner's perimeter reads as a delicate leaf fringe. Reduce picot frequency if runner becomes too frilly.
Round 3 (Optional Gold Accent Chain) :
With metallic thread and small beading needle, lay a thin chain of gold between outer clusters: weave a continuous running stitch catching each outer cluster base and adding a bead at every 3rd catch for sparkle. Tie off invisibly and weave ends inside the lace.
Info :
Press lightly with a damp cloth if necessary to even beads and flatten joins; do not steam block beads or metallic thread which may tarnish. Use minimal heat on cotton/wool blends.
— Blocking & Finishing :
Info :
Gently steam or wet block the runner. Pin out diamonds and flower petals so they are flat and the lattice is even. Stretch only lightly to avoid distortion. Allow to dry completely before removing pins. Weave in all remaining ends into the underside of the mesh.
Info :
Final measurements for the sample: approx 12 - 14" wide x 40 - 44" long depending on tension and blocking. To lengthen, add more mesh rows in sets of 2 (one ch-5 row and one sc row) to keep pattern symmetrical.
Info :
Alternative colorways: deep wine red petals with cream centers, sage green mesh for a lighter look, or use sparkly metallic yarn in the inner petal layer for holiday shimmer.
Finishing this table runner is a wonderfully satisfying project that transforms simple yarn into a festive heirloom. The layered poinsettias and open lattice create a timeless, elegant look perfect for holiday tables or special occasions. Each careful stitch adds texture and charm—blocking and bead placement bring everything to life. 🧶🌺 Enjoy the peaceful rhythm of making and the bright reward of a handmade centerpiece. Share your creation, and let it bring warmth to your gatherings! ✨