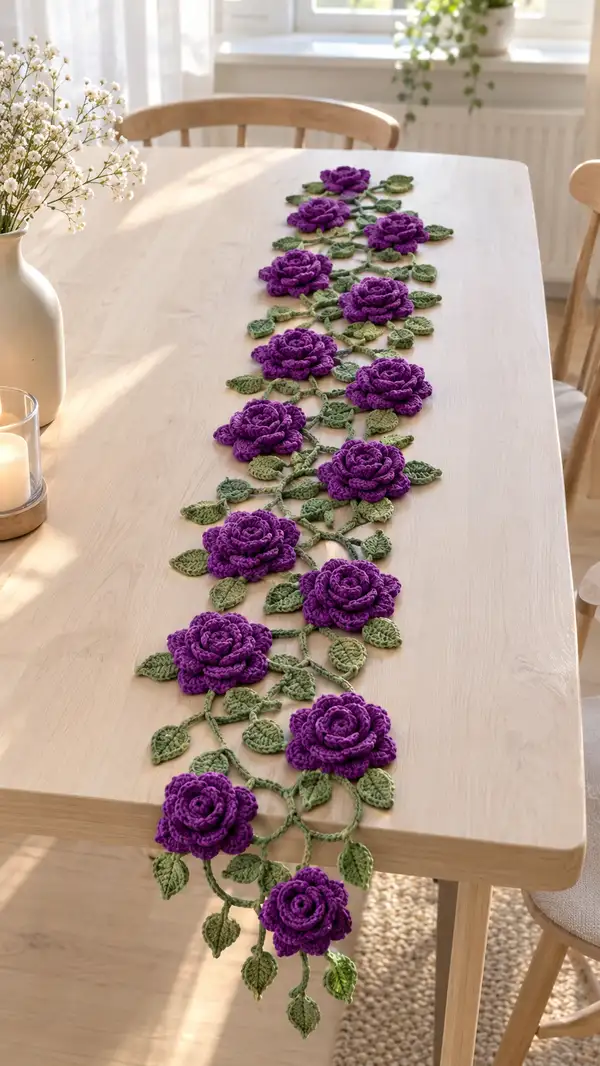
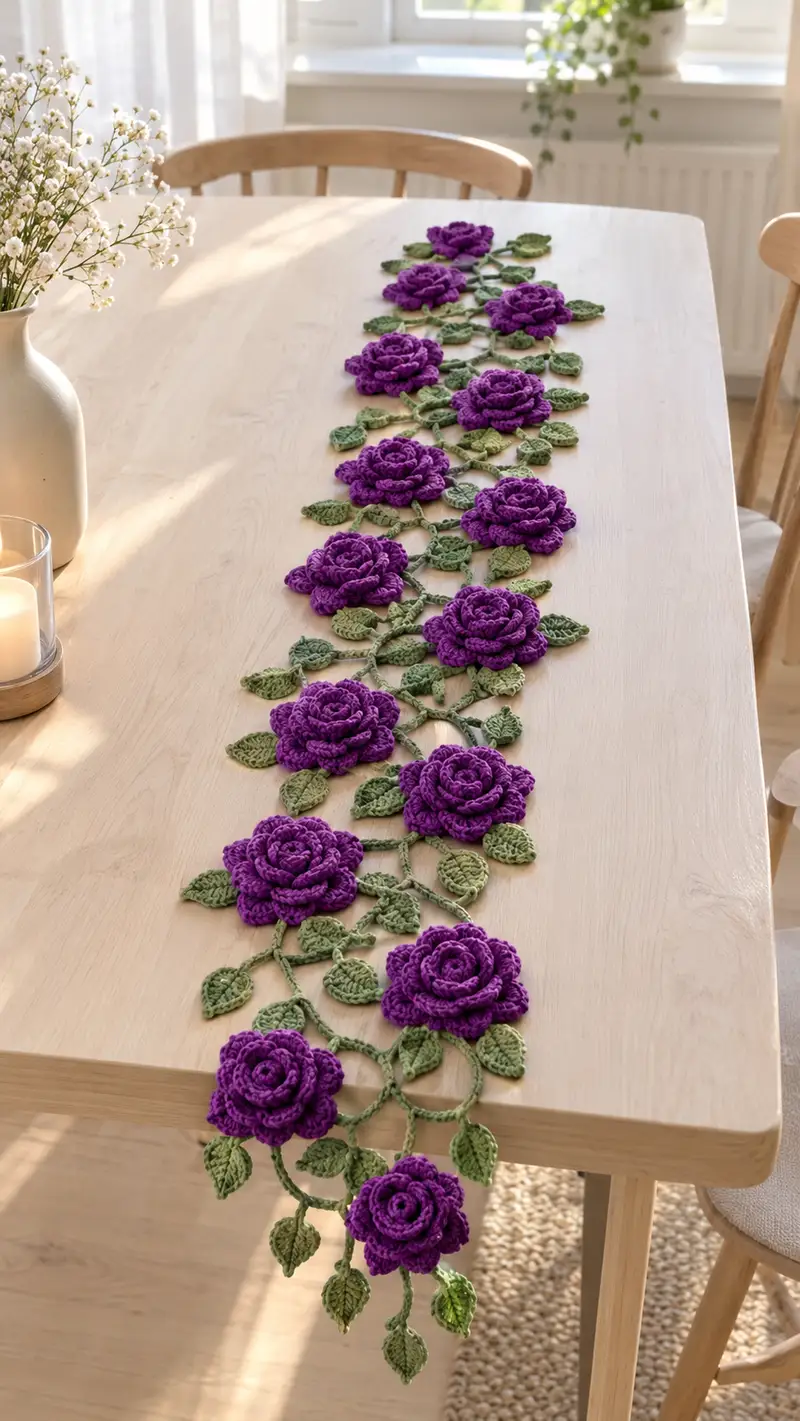
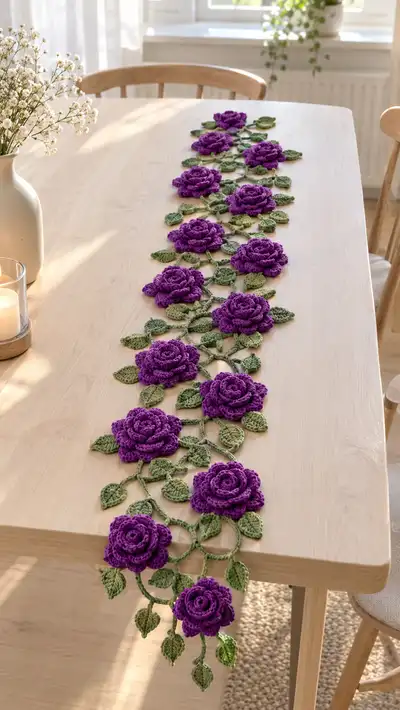
Create a stunning floral table runner made of layered purple crochet roses connected by leafy green vines. This pattern yields a long, elegant centerpiece perfect for dining tables or console tables. The design features dimensional rosettes, two sizes of leaves, and chain vines for an organic, flowing arrangement. Detailed round-by-round instructions guide you through each rose, leaf, vine and final assembly.
Progress Tracker
0% Complete
— Notes & Overview :
Info :
This pattern describes how to make one three-layered rose, two leaf sizes, chain vines and how to join motifs into a long runner. The sample in the photo contains 11 roses spaced along vines and joined by leaf clusters. Adjust the number of roses to fit your table. Work with a consistent hook and yarn weight. Gauge is not critical but each rose should measure approximately 9-10 cm (3.5-4") across when blocked.
Info :
When the instructions say 'Make X' this refers to how many identical motifs you need for the sample runner. When joining, always pin motifs in place and sew with a tapestry needle using matching yarn. Use Info sections sprinkled throughout for tips on shaping and assembly.
— Rose (make 11) :
Round 1 :
6 sc in magic ring (6)
Round 3 :
(1 sc, 1 inc) x 6 (18)
Round 4 :
(2 sc, 1 inc) x 6 (24)
Round 5 :
(3 sc, 1 inc) x 6 (30)
Round 6 :
(4 sc, 1 inc) x 6 (36)
Round 7 :
(5 sc, 1 inc) x 6 (42)
Round 8 :
(6 sc, 1 inc) x 6 (48)
Info :
These first rounds build a circular base for petal anchors. Keep tension even and use a stitch marker at round start. By round 8 you should have 48 anchor stitches—the petals will attach into these stitches in later rounds.
Round 9 :
1 sc in each st around (48)
Round 10 :
1 sc in each st around (48)
Info :
Work two even rounds to set the base and make a slightly raised disk. If desired, leave a long tail after round 10 for sewing later but it's optional—most joins will use matching yarn ends.
Round 11 :
*Sc 3, skip 1, sc in next st; rep from * around to create 12 petal anchor points (48 sts worked, 12 anchors)
Info :
We create 12 petal anchors evenly spaced around the disk. Mark the first anchor with a removable marker to keep track.
Round 12 :
Join yarn at an anchor point. For each anchor (12 times): (ch1, sc in anchor st, ch3, hdc, dc, hdc, ch3, sc in same anchor) — move to next anchor. After 12 petals slip stitch to first sc. (12 petals)
Info :
Each 'petal' here is a cluster worked around an anchor stitch. This creates the first inner layer of petals. Keep the petals light and do not pull too tightly so they can be shaped later.
Round 13 :
Ch 1, *sc in top of each petal (work 2 sc into the middle of the base cluster to secure), ch2, sl st into next gap between petals; rep from * around. End with sl st to first sc. (12 base petal anchors)
Round 14 :
Begin Layer 2 petals: Attach yarn to the base between two petals. *Ch2, (sc, hdc, 2 dc, tr, 2 dc, hdc, sc) into next gap to form a larger petal; ch1, sl st into next base between petals; rep from * around (12 larger petals)
Info :
Layer 2 creates more outward-facing petals. Work petals so they overlap the base petals slightly. Use your fingers to coax petals up and slightly outward as you go to form a rosette shape.
Round 15 :
Flowing edge: Ch1, *sc in each stitch across each large petal (around 8-10 sts across each petal depending on your tension), ch1, sl st into the valley between petals; rep around. (Maintain 12 petal groupings)
Round 16 :
For subtle ruffle: *In the top center of each large petal work: (sc, hdc, 3 dc, hdc, sc) into same stitch; sl st to join and move to next petal; rep x12 (12 ruffled petal centers).
Info :
If you prefer a fuller rose, increase counts in this round by adding (1 extra dc in center) so petals puff more. Be cautious—extra volume may require light blocking to maintain shape.
Round 17 :
Ch1, 1 sc around each petal and in valleys between (this secures the ruffle and tidies the outer edge). (Approx 72 sc around depending on counts)
Round 18 :
Layer 3 (outer petals) — Attach yarn behind a large petal base. For each of 12 positions: ch2, (sc, hdc, 2 dc, 3 tr, 2 dc, hdc, sc) to form tall, curved outer petals; sl st into valley and repeat around (12 tall petals)
Info :
Outer petals are taller and create the full rose silhouette. Work tr stitches loosely so the outer petals curl back slightly. Gently shape each petal by pinching and pulling as you work the surrounding stitches.
Round 19 :
Slip stitch around petal tops to tidy, then ch1, sc around all outer petal tops (approx 84 sc depending on your counts) to create a neat edge.
Round 20 :
Optional textured edge: *In the top of each outer petal work (sc, ch2, sc) to form a tiny scallop, sl st to next petal; rep around.* Fasten off and weave ends. Rose should be domed and measure approx 9-10 cm across after gentle shaping and blocking.
Info :
If you want a slightly smaller rose, omit Round 16 or reduce outer petal treble height. If you want a fuller rose, add an additional petal row similar to Round 18 but worked with a ch3 start and extra dc stitches in the petal center.
Round 21 :
Finishing inner coil: If the rose center looks loose, use the yarn tail to stitch a small spiral across the center (from the MR area outward) making 5-8 small stitches to keep the center compact. Weave in ends securely.
Info :
Blocking: gently dampen the rose and shape each petal with pins on a foam board. Let dry to hold shape. Light steam-blocking also works but keep steam from directly touching acrylic yarn if used; use a cloth barrier.
Round 22 :
Repeat shaping: use fingers to fold and overlap inner petals so rose reads as layered and dimensional. No stitches—manual shaping only. (This is a shaping step)
Round 23 :
Optional stabilizer: stitch a small running stitch around back of base disc to slightly gather the underside so rose sits higher on the front; knot and weave in tail neatly. (No stitch count)
Info :
You now have one completed rose. Make a total of 11 identical roses for the pictured runner. Keep each rose roughly the same size by using the same hook and tension and checking against your first rose while you work.
— Large Leaf (make 22) :
Round 1 :
Ch 7, sc in 2nd ch from hook, hdc in next, dc in next 2, hdc in next, sc in last (form basic leaf spine) (6 sts across chain)
Round 2 :
Working along opposite side of starting chain: sc in first ch, hdc in next, dc in next 2, hdc in next, sc in last; slip stitch to base to form a symmetrical leaf. (Approx 12 worked stitches)
Info :
This simple two-sided leaf forms a base leaf. Work evenly so both sides mirror each other. Leaves should measure approximately 3.5-4 cm long after shaping.
Round 3 :
Edge detail: Ch1, *sc in next stitch; (ch3, sl st in next stitch) to create tiny vein indentations; rep across each side of leaf; fasten off.*
Round 4 :
Vein embroidery: With same or lighter green, embroider a center vein from base to tip with a running stitch; secure and weave in ends. (No counted stitches)
Info :
Make 22 large leaves for anchor clusters around roses—two leaves per rose cluster on average. Block leaves lightly to flatten and form a subtle cupped shape so they tuck nicely under petals.
Round 5 :
Optional raised ridge: Use surface slip stitch to outline leaf edge for added texture. Work around perimeter with sl st in each stitch. (Approx 20 sl st)
Info :
Change greens between rounds 3-4 to give leaves a two-toned look—work base in primary green and embroider veins with lighter green for contrast.
— Small Leaf (make 33) :
Round 1 :
Ch 5, sc in 2nd ch from hook, hdc, dc, sc in last ch to create a petite leaf (4 worked stitches)
Round 2 :
Turn and sc back along chain to base, then sl st to anchor. Fasten off. (Simple 1 sided leaf)
Info :
Small leaves act as filler between roses and along vines. Make about 3 small leaves per rose zone; trim and block lightly for a natural look.
— Bud (optional, make 4) :
Round 1 :
6 sc in magic ring (6)
Round 3 :
1 sc around (12)
Round 4 :
*Ch2, (sc, hdc, dc, hdc, sc) into each of 6 sts to form small closed petals; fasten off.* (6 small petals)
Info :
Buds can be used to vary rhythm in the runner. Tuck buds between larger roses in clusters of 1–2 for visual interest.
— Vine & Connector Chains :
Round 1 :
Make vine chain: ch 40 (this chain will act as a vine segment between two roses, adjust length as needed). (40 ch)
Round 2 :
Return along chain with single crochet for stability: sc in 2nd ch from hook and in each ch back to beginning (39 sc). Fasten off and leave tail for sewing.
Info :
Chains between roses in the photo vary in length; for the sample layout use about 40-ch connectors to create an airy, looping vine. You will create 10–12 connectors depending on how you space roses.
Round 3 :
Create loop connectors: At chosen intervals along the vine, ch 10 and sl st back into vine to create a loop (forms a leaf attachment point). Make 3-5 loops per connector depending on spacing.
Round 4 :
Securing loops: Work sc around the base of each loop (6 sc) to tidy and strengthen the loop. Fasten off, weave ends. (6 sc per loop)
Info :
These loops are where leaves and small buds are attached. Pin them into place relative to the rose positions before final sewing to ensure natural arrangements.
Round 5 :
For curved vine sections, create a 1-row cord using ch 20 then 20 sc back to form a short cord; use several cords to make gentle S curves between clusters.
Round 6 :
Optional texturing: Work some vine segments in hdc instead of sc for a slightly thicker stem. Hdc will sit flatter and look more like a stem. (20 hdc for 20-ch return)
Info :
Make enough vine connectors to join all roses with natural spacing. For the sample runner (11 roses) you will need approximately 10 connectors of varying lengths plus a few extra short cords for hanging leaves at ends.
— Joining Motifs & Assembly Prep :
Round 1 :
Layout: Arrange roses on a flat surface in the desired order with connectors between them. Pin vines and leaves in place and test the look before sewing.
Info :
Work from the center out. Place your largest leaves on either side of each rose, then add small leaves and buds on vine loops to create an organic feel like the photo layout.
Round 2 :
Attach rose to vine: Use a length of leaf-green yarn and a tapestry needle. Secure the underside base of the rose to the vine at two opposite anchor points (approximately round 3-4 on the rose underside) with 6–8 stitches through the base disc. Tie a secure knot and weave in ends. (No working stitches on hook; sewing step)
Round 3 :
Attach leaves: Place large leaves so they overlap the base of each rose. Sew each leaf with a line of small whip stitches across the base to the vine and underside of rose. Use 5–6 stitches per large leaf for stability.
Info :
When sewing leaves and roses, sew through the vine chain and the back of the rose base to ensure a flat, secure join. Keep stitches small and neat so they blend into the motif. Hide knots on the underside.
Round 4 :
Join connectors to connectors: When two vine segments meet between roses, overlap the last 5–6 chains, and sew them together with matching yarn using small stitches every 3–4 ch. This creates a continuous vine look with no bulky knots showing on the right side.
Round 5 :
Finish ends: For the runner ends, attach a short hanging vine with 2–3 small leaves to mirror the photograph. Sew securely and weave in ends under the underside of the leaves so they are invisible from the top.
Info :
Make sure all joins lie flat. If any rose sits too high, gently ease a few stitches from the base to lower it or use a couple of hidden stitches to anchor the underside more tightly onto the vine.
— Edging & Final Touches :
Round 1 :
Optional tidy edge: With matching green, sc around visible vine edges where raw chains are exposed to give a tidy finished look. Work evenly along each exposed chain with sc in each ch. (Count depends on exposed chain length)
Round 2 :
Optional leaf placement: Add a few more small leaves at random along the runner for balance—sew them in place with a few small stitches.
Round 3 :
Weave in ends: Using a tapestry needle, weave each yarn tail through the back of motifs and vine chains for at least 10–15 stitches to secure, then trim tails close to work.
Info :
Blocking final runner: Pin the finished runner to shape on a flat padded surface and mist lightly, then leave to dry. This final blocking evens out vine tension and shapes petals and leaves so they sit nicely across the table.
Round 4 :
Final inspection: Turn runner over and check for loose stitches or visible knots. Reinforce any joins that feel weak with extra tiny stitches. Remove pins and enjoy your completed floral runner.
Info :
Care instructions: Hand wash gently in cool water and reshape while damp, or spot-clean for small spills. Avoid rough handling that may distort petals.
This floral table runner brings garden charm indoors—each layered rose blooms with personality and texture. As you join petals, leaves and vines, you build a flowing, organic centerpiece that brightens any table. The process is rewarding and relaxing; assembly becomes meditative as the runner takes shape. 🌸🧶 Display it across a dining table or a console to add handcrafted elegance to your home. Enjoy every stitch and the lovely finished result! ✨