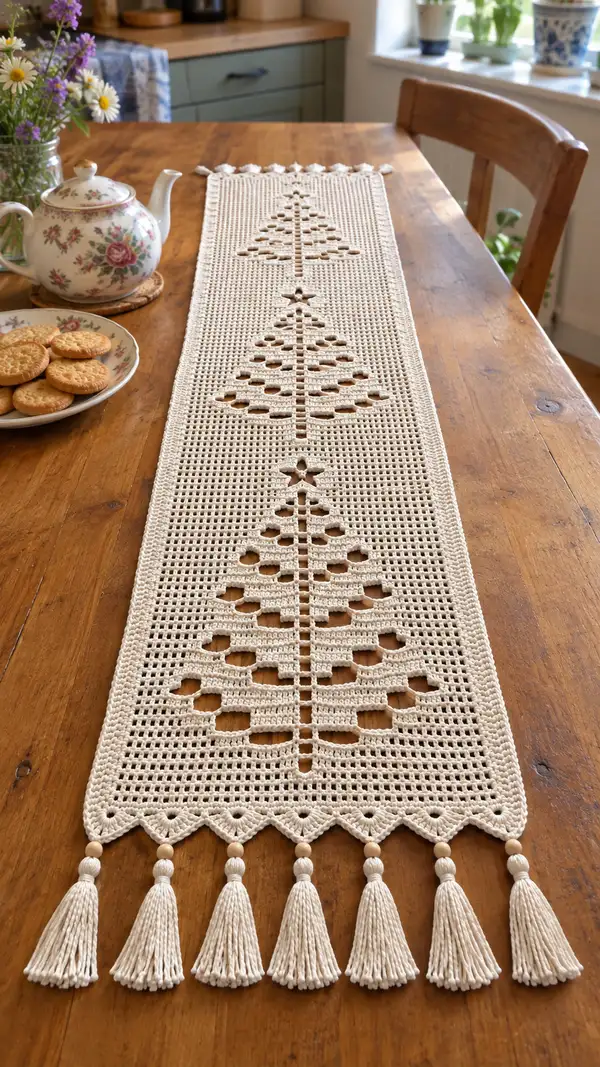
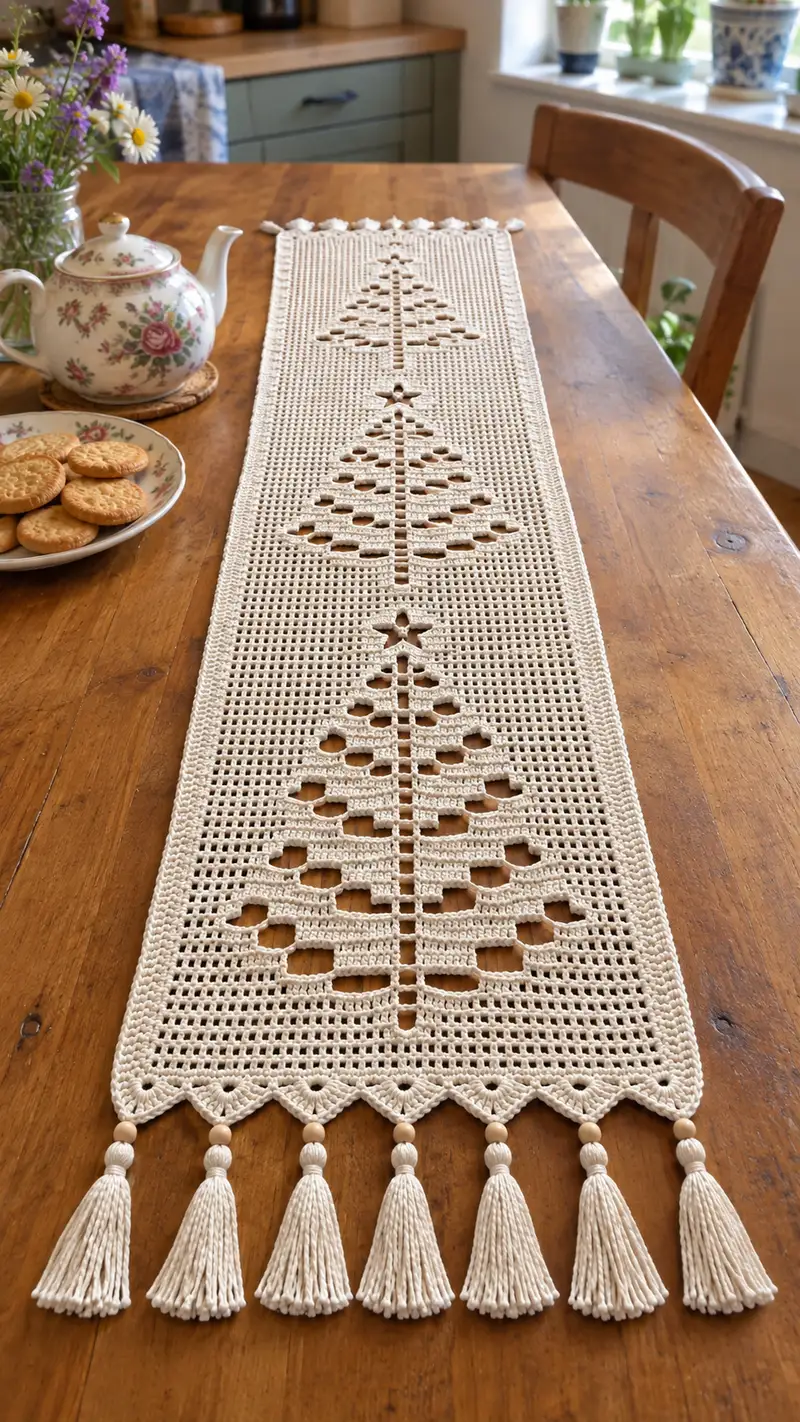
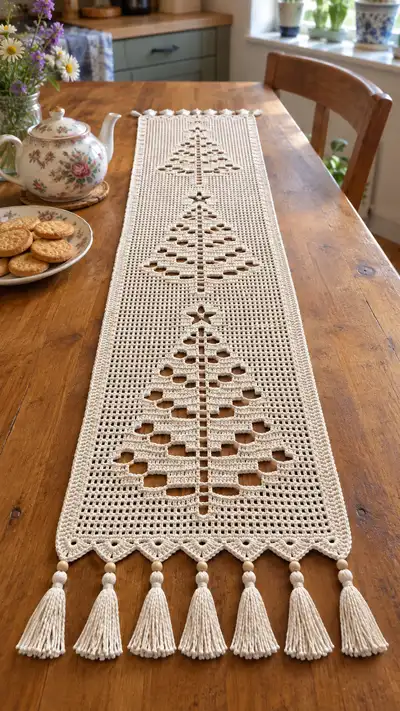
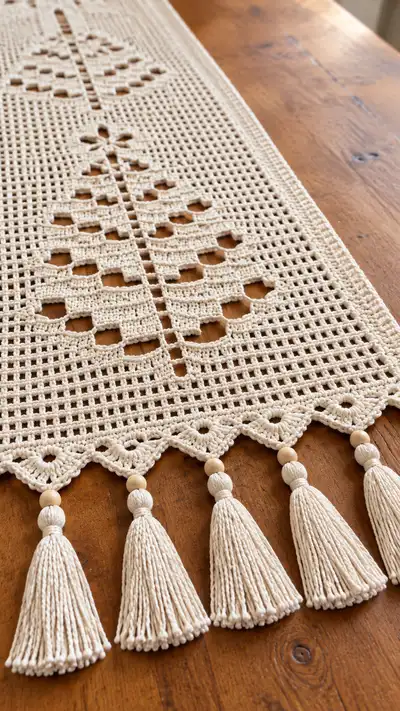
A timeless neutral table runner worked in classic filet crochet with three centered Christmas tree motifs, scalloped ends and soft beaded tassels. This runner uses a cotton yarn for a crisp, structured grid and finishes with delicate wooden beads and long tassels. Ideal for an understated holiday or year-round farmhouse table accent, the design focuses on clean negative-space trees and tidy edges.
Progress Tracker
0% Complete
— Notes & Gauge :
Info :
This runner is worked flat in traditional filet crochet using double crochet (dc) and ch-2 open meshes. One mesh = (1 dc + ch 2) and the turning ch-3 counts as first dc of the row. Gauge is not critical for pattern repeat but for reference: 10 meshes x 10 rows = approx 4.5" (11.5 cm) when using worsted cotton and 3.5mm hook. Adjust hook to match desired density. The pattern is worked in meshes; each row across contains 61 meshes unless you choose to change the overall width. Foundation chain = (2 x number of meshes) + 3.
— Foundation :
Round 1 :
Chain 125 (this forms 61 meshes across; formula: 2 x 61 + 3 = 125)
Info :
Check your chain length against a ruler if you prefer a different overall runner width. Keep chains loose and even to avoid tight foundation that shrinks the first row.
Round 2 :
Row 1 (RS): Dc in 4th ch from hook (counts as first dc); *ch 2, sk 2 ch, dc in next ch; rep from * across until you have worked 61 meshes (ending with dc). Turn. (61 meshes)
Info :
After this first row, you will be working each subsequent row into previous row's dcs and ch-2 spaces. Place a stitch marker in the first mesh of each row for easier counting (move marker each row).
— Establishing Rows (Rows 2-6) :
Round 3 :
Row 2: Ch 3 (counts as dc), *ch 2, sk next ch-2 sp, dc in next dc; rep from * across to end, working last dc in top of turning ch-3. (61 meshes)
Round 4 :
Row 3: Repeat Row 2 across (61 meshes)
Round 5 :
Row 4: Repeat Row 2 across (61 meshes)
Round 6 :
Row 5: Repeat Row 2 across (61 meshes)
Info :
Work 6 establishing rows of plain open mesh to create a tidy field at each short end before the first motif begins. These also act as an anchor for the later scalloped edge.
— Main Panel: Spacer Rows Before First Tree (Rows 7-12) :
Round 7 :
Row 6: Repeat Row 2 across (61 meshes)
Round 8 :
Row 7: Repeat Row 2 across (61 meshes)
Round 9 :
Row 8: Repeat Row 2 across (61 meshes)
Round 10 :
Row 9: Repeat Row 2 across (61 meshes)
Round 11 :
Row 10: Repeat Row 2 across (61 meshes)
Round 12 :
Row 11: Repeat Row 2 across (61 meshes)
Info :
These spacer rows set the trees away from the runner ends; if you want a shorter runner, reduce the spacer rows equally between motifs or omit one motif repeat later described.
— First Tree Motif Block (Rows 13-46) :
Info :
The tree motifs are built over 34 rows. The panel width is 61 meshes; the center column is mesh 31. For each motif row below we will indicate filled meshes (solid blocks) measured as mesh numbers across the row—count from left edge (mesh 1) to right edge (mesh 61). A filled mesh is worked by making 3 dc across the mesh space of the previous row: dc in next dc, dc in next ch-2 sp, dc in next dc. An open mesh is worked as dc, ch2. Always start each row with ch3 (counts as first dc) and finish so there are 61 meshes per row.
Round 13 :
Row 12: Repeat Row 2 across (61 meshes) — start of motif block plain spacer row
Round 14 :
Row 13: Plain open mesh row (61 meshes)
Round 15 :
Row 14: Plain open mesh row (61 meshes)
Round 16 :
Row 15: Plain open mesh row (61 meshes)
Round 17 :
Row 16: Plain open mesh row (61 meshes)
Round 18 :
Row 17: Begin tree shaping — work open meshes across except fill meshes 22-40 (centered band) with solid meshes to form the bottom large branch: Filled meshes = 22–40 (19 filled meshes). Work as: ch3, work open meshes until mesh 21, then work 19 filled meshes across, then open meshes to end. (61 meshes)
Info :
Count carefully from left edge: mesh 22–40 is the base 'full' triangle level. To work a filled mesh, make 3 dc across the corresponding previous-row area (dc in next dc, dc in next ch-2 sp, dc in next dc). This creates a solid square in the graph.
Round 19 :
Row 18: Open mesh row across all 61 meshes (this creates a open line above the filled band and helps form the scalloped branch edges)
Round 20 :
Row 19: Fill meshes 23–39 (17 filled meshes) to begin tapering the triangle (centered on mesh 31). (61 meshes)
Round 21 :
Row 20: Open mesh row across (61 meshes)
Round 22 :
Row 21: Fill meshes 24–38 (15 filled meshes). (61 meshes)
Round 23 :
Row 22: Open mesh row across (61 meshes)
Round 24 :
Row 23: Fill meshes 25–37 (13 filled meshes). (61 meshes)
Round 25 :
Row 24: Open mesh row across (61 meshes)
Round 26 :
Row 25: Fill meshes 26–36 (11 filled meshes). (61 meshes)
Round 27 :
Row 26: Open mesh row across (61 meshes)
Round 28 :
Row 27: Fill meshes 27–35 (9 filled meshes). (61 meshes)
Round 29 :
Row 28: Open mesh row across (61 meshes)
Round 30 :
Row 29: Fill meshes 28–34 (7 filled meshes). (61 meshes)
Round 31 :
Row 30: Open mesh row across (61 meshes)
Round 32 :
Row 31: Fill meshes 29–33 (5 filled meshes). (61 meshes)
Round 33 :
Row 32: Open mesh row across (61 meshes)
Round 34 :
Row 33: Fill meshes 30–32 (3 filled meshes) — this forms the narrower mid-section. (61 meshes)
Info :
Now we form the tree tip and star. The tip will be a single filled mesh and a small star above using a tiny shaped motif made of filled/open meshes.
Round 35 :
Row 34: Open mesh row across (61 meshes)
Round 36 :
Row 35: Fill mesh 31 only (single filled mesh centered) — the tree tip. (61 meshes)
Round 37 :
Row 36: Small star row — create a 6-mesh star shape centered on mesh 31 using this arrangement: fill meshes 30,31,32 and directly above (in terms of the graph) place open mesh rows that shape a tiny star—practically: Row 36: Fill meshes 30–32 (3 filled meshes). (61 meshes)
Round 38 :
Row 37: Open mesh row across (61 meshes)
Round 39 :
Row 38: Begin trunk — fill mesh 31 for 3 consecutive trunk rows to create the vertical trunk center: Fill mesh 31 only. (61 meshes)
Round 40 :
Row 39: Fill mesh 31 only (trunk). (61 meshes)
Round 41 :
Row 40: Fill mesh 31 only (trunk). (61 meshes)
Round 42 :
Row 41: Open mesh row across (61 meshes) — spacer after motif
Round 43 :
Row 42: Open mesh row across (61 meshes)
Round 44 :
Row 43: Open mesh row across (61 meshes)
Round 45 :
Row 44: Open mesh row across (61 meshes)
Round 46 :
Row 45: Open mesh row across (61 meshes)
Info :
That completes the first motif block. Keep a note of these rows so you can repeat the exact placement for the middle and lower trees, or adjust spacing if you prefer smaller or larger motifs. You can also substitute any other simple filet graph in this central band.
— Spacer Rows Between Trees (Rows 47-54) :
Round 47 :
Row 46: Plain open mesh row (61 meshes)
Round 48 :
Row 47: Plain open mesh row (61 meshes)
Round 49 :
Row 48: Plain open mesh row (61 meshes)
Round 50 :
Row 49: Plain open mesh row (61 meshes)
Round 51 :
Row 50: Plain open mesh row (61 meshes)
Round 52 :
Row 51: Plain open mesh row (61 meshes)
Round 53 :
Row 52: Plain open mesh row (61 meshes)
Round 54 :
Row 53: Plain open mesh row (61 meshes)
Info :
These spacer rows determine the vertical separation of motifs. The pictured runner shows equal spacing, producing three balanced trees down the length.
— Second Tree Motif Block (Rows 55-88) :
Round 55 :
Row 54: Plain open mesh row (61 meshes)
Round 56 :
Row 55: Repeat Rows 13–46 exactly to form the second tree motif (i.e., a 34-row motif block). Follow the same filled-mesh ranges as for the first tree: base filled 22–40, then 23–39, 24–38, 25–37, 26–36, 27–35, 28–34, 29–33, 30–32, then tip center 31 and trunk 3 rows.
Info :
Be sure to position the filled meshes using the left-edge count each row (or count from the center column mesh 31 outward). Use pins on your blocking board after finishing to verify that the motifs line up vertically.
Round 57 :
Row 56: After completing motif rows, work 6 open mesh spacer rows to match the top motif spacing (Rows 67–72 equivalent). (61 meshes)
Round 58 :
Row 57: Plain open mesh row (61 meshes)
Round 59 :
Row 58: Plain open mesh row (61 meshes)
Round 60 :
Row 59: Plain open mesh row (61 meshes)
Round 61 :
Row 60: Plain open mesh row (61 meshes)
Round 62 :
Row 61: Plain open mesh row (61 meshes)
Info :
At this stage you have created two identical motifs; repeat the motif block one more time for the third tree. If you prefer fewer motifs, stop here and proceed to edging.
— Third Tree Motif Block (Rows 89-122) :
Round 63 :
Row 62: Repeat Rows 13–46 one more time to create the lower motif. This gives the runner its three-tree repeat. Maintain exact filled mesh positions for visual symmetry.
Round 64 :
Row 63: After motif complete, work 6 open mesh spacer rows (Rows 124–129 equivalent) to create the end spacer before edging. (61 meshes)
Round 65 :
Row 64: Plain open mesh row (61 meshes)
Round 66 :
Row 65: Plain open mesh row (61 meshes)
Round 67 :
Row 66: Plain open mesh row (61 meshes)
Round 68 :
Row 67: Plain open mesh row (61 meshes)
Round 69 :
Row 68: Plain open mesh row (61 meshes)
Round 70 :
Row 69: Plain open mesh row (61 meshes)
Info :
Check entire panel for counts and symmetry now. The panel should read three similar tree motifs centered along the length with equal open mesh spacer rows above, between, and below them. Fix any counting mistakes by unpicking back to error and re-working; do not fudge counts.
— Border Preparation (Row 123-126): Stabilizing Edging Rows :
Round 71 :
Row 70: Work 4 rows of solid dc across to create a firm border base for scallops. Work across in dc stitches: Ch 1, sc in first stitch across? (Prefer: convert grid to dc base) For consistency: Turn work to RS, ch 3, *dc in next mesh's dc (work 2 dc in each mesh area) to create a solid row across; perform 4 such dc foundation rows to firm the short end.
Info :
Because the runner is worked as open mesh, the scalloped edge responds better with a few solid rows. If you prefer a lighter edge, use sc rows instead. The formula here is to create 4 solid dc rows spanning the entire width, counted as approximate (61 mesh units turned into dense dc coverage).
Round 72 :
Row 71: Repeat solid dc row across (work approximately 183 dc across — equivalent to 3 dc per mesh if you prefer to count in dc; the mesh count remains 61)
Round 73 :
Row 72: Repeat solid dc row across
Round 74 :
Row 73: Repeat solid dc row across
Info :
If you counted exactly 183 dc per solid row, the arithmetic is 61 meshes x 3 dc per mesh area when converting mesh grid to solid stitches. This yields sturdy ends for the scallop row.
— Scalloped End Edge (Rows 127-130 / Scallops) :
Round 75 :
Row 74 (Scallop setup): Ch 1, sc evenly across the final solid row placing 31 sc on each side and central sc to mark center. This ensures scallops align with bead/tassel positions later. (Approx 183 sc reduced to 61 sc positions via grouping — work evenly across).
Info :
We will create 11 scallops across the short edge (mirroring the image). To do so, group the width into 11 equal sections — with 61 meshes across, that is 11 scallops with 5-6 mesh spacing: 5 meshes x 11 = 55 (plus extra 6 meshes spread as single extra stitches in alternate scallops). The exact distribution here is: scallop centers at mesh positions 3,8,13,18,23,28,33,38,43,48,53 (approx). Mark these positions with safety pins or temporary stitch markers.
Round 76 :
Row 75 (Scallop round): Working from right to left: *skip to scallop center marker, (ch 2, 5 dc in same position — shell), ch 2, sl st in next anchoring sc; rep from * across for all 11 scallops. Adjust shell size (5 dc) to fit your width; you may use 6 dc for a fuller scallop if desired. Fasten off and weave ends. (11 scallops)
Round 77 :
Row 76 (Scallop finishing): On WS, work a picot or small 3-ch picot at shell peaks for decorative eyelets: sl st to center of each shell, ch 3, sl st in base. This creates small loops above each scallop used to anchor the bead and tassel later. Fasten off and weave ends.
Info :
Scallop counts may vary slightly depending on your exact tension and conversion of mesh to solid rows; prioritize even spacing and aesthetic balance. Mark scallop centers before working shells to align them with bead positions.
— Repeat Scalloped Edge on Opposite Short End :
Round 78 :
Row 77: Repeat the exact 4 solid rows and scallop rounds on the opposite short end of the runner so both ends match. Work the same number and placement of shells and picots. Fasten off and weave ends neatly.
Info :
Blocking both ends together helps ensure scallop symmetry; pin both ends side-by-side and check bead/tassel spacing before attaching tassels permanently.
— Tassels & Beads Assembly (Attach 11 tassels per short end) :
Round 79 :
Info : Prepare tassels — make 11 tassels per end. For each tassel wrap yarn around a 3.5" (9 cm) template 40 times for a full tassel. Cut the loops and tie the top tightly with a 6" (15 cm) length of yarn, leaving a long tail for attaching. Trim evenly at bottom.
Round 80 :
Info : Add beads — slide a wooden bead onto the tassel top using the long tail. Position the bead above the wrapped knot so it sits on the scallop point. If bead hole is too small, wrap a small piece of yarn to bulk the knot to hold bead in place.
Round 81 :
Info : Attaching tassels — using the picot loops created on scallop finishing, thread the long tail through the picot and secure with a knot under the bead. Sew once or twice into the underside of the scallop for security, then weave the tail back into the runner fabric to hide. Repeat for all tassels on both ends.
Round 82 :
Info : Final trimming and neatening — comb the tassel ends lightly if using cotton to fluff them, then trim to even length. Block the entire runner on a flat surface using pins to square corners and flatten motifs, allowing to dry fully for best results.
— Finishing & Optional Border Accent :
Round 83 :
Info : Optional double-row border — if you prefer a more finished framed edge along the long sides, work 2 rows of sc around the entire perimeter: first row sc in each dc and sc across sides, chain 1 at corners; second row sc in BLO for a neat ridge. This will slightly reduce runner width.
Round 84 :
Info : Weaving ends — weave all loose ends at least 3" (7.5 cm) into the fabric under several stitches on the WS and trim close. Use a small dot of fabric glue inside beads if tassels will be handled often to prevent shifting.
Round 85 :
Info : Blocking — wet block by spritzing or pinning the runner damp on a blocking mat to square edges and flatten the filet grid. Allow to dry completely; this final step makes the motifs crisp and the scallops even.
Round 86 :
Info : Customizing length — to make a longer runner, repeat the motif spacer block (the 34-row tree motif + spacer rows) as many times as needed. To make a shorter runner, remove one motif repeat and balance spacers equally top and bottom.
Round 87 :
Info : Alternative lace effect — for a lighter look replace the 3-dc filled mesh with a 2-dc filled mesh if you prefer slightly smaller solid squares; this will subtly change the visual density but is optional.
Round 88 :
Info : Care instructions — hand wash cold or gentle machine wash in a mesh bag; reshape and dry flat. Avoid high heat to preserve bead finish and tassel shape.
Round 89 :
Info : Final quality check — ensure all tassels are secure, all picots reinforced, and all motifs centered. Make any reinforcement stitches from the WS to secure shells or tassel attachments before gifting or display.
Completing this runner is such a satisfying finish — the crisp grid highlights the stylized trees while the wooden beads and long tassels add that handmade, cozy detail. Pin and block carefully, and you’ll end up with a warm table accent that feels both timeless and modern. 🧶✨ This piece makes a lovely gift or a centerpiece for seasonal styling. Enjoy every stitch and the calm rhythm of filet crochet as the design grows row by row. 🌲