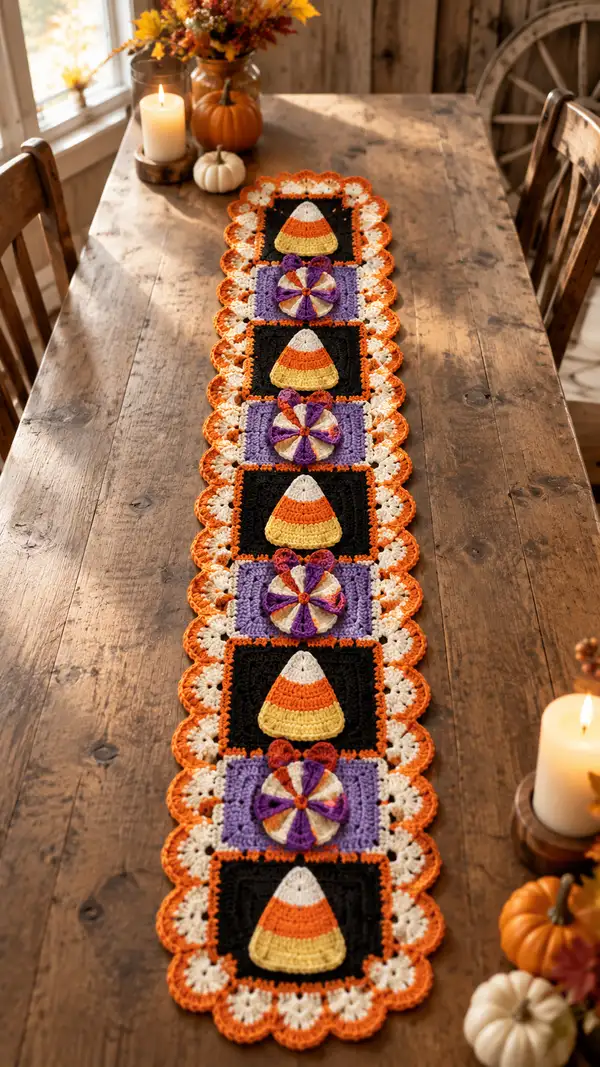
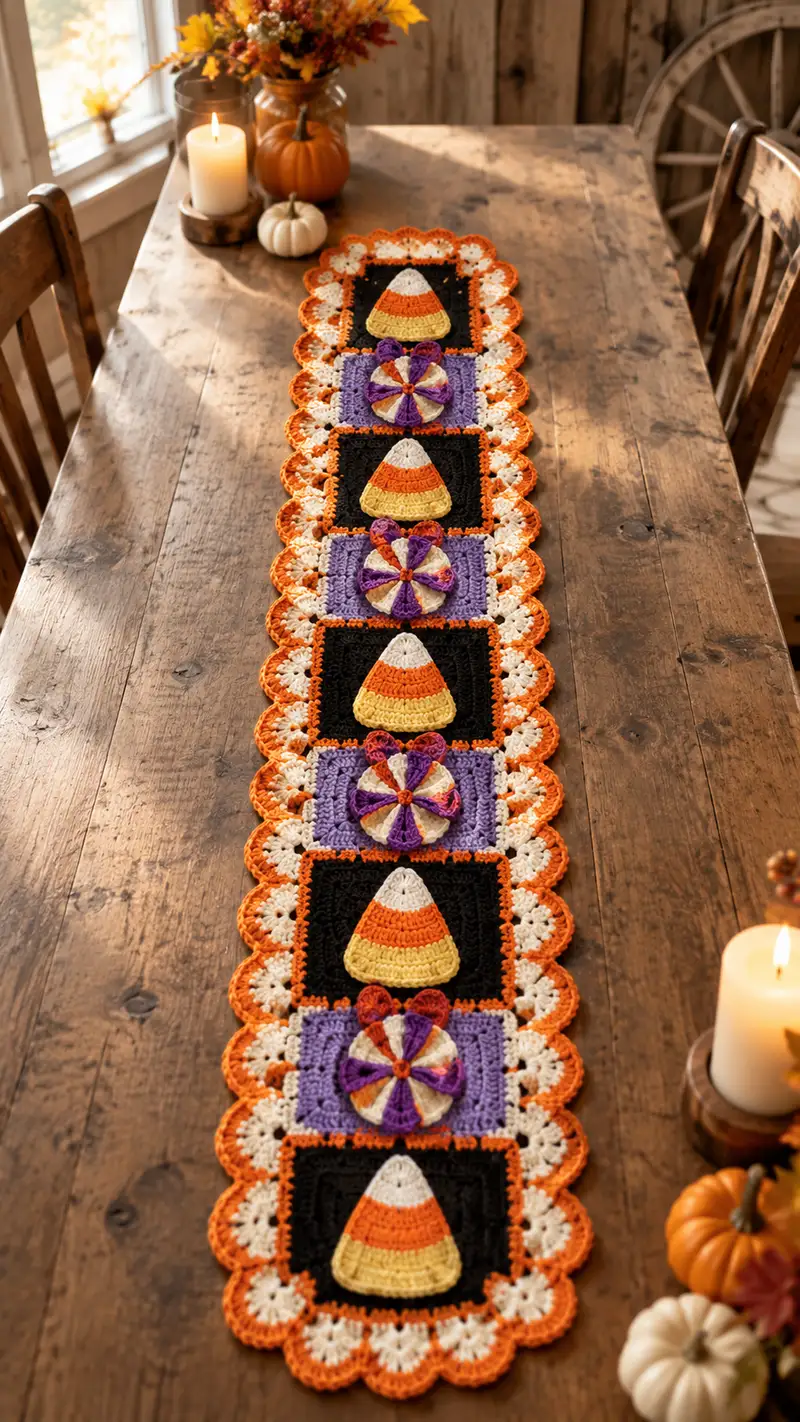
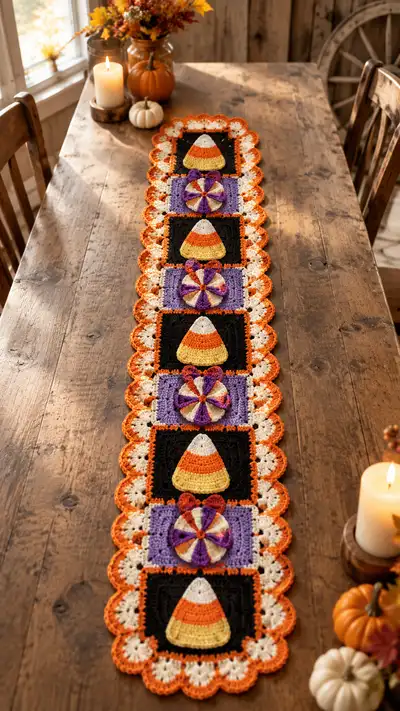
Bring a touch of autumnal charm to your table with this festive Candy Corn Table Runner. This long runner is built from repeating square modules — bold black squares featuring a textured candy-corn applique alternated with lavender squares showcasing a 3D pinwheel rosette — all joined and edged with a scalloped orange-and-cream border. The finished look is playful, seasonal, and perfect for pumpkin-spiced gatherings or cozy fall decorating.
Progress Tracker
0% Complete
— Candy Corn Applique :
Round 1 :
With Cream/Off-White, make a magic ring. 6 sc in magic ring (6)
Round 2 :
Inc in each st around (12)
Round 3 :
(1 sc, inc) x 6 (18)
Round 4 :
(2 sc, inc) x 6 (24)
Info :
This small round will form the tip of the candy corn. Keep stitches tight so the tip is defined. Fasten off Cream and join Bright Orange with a standing sc in the next round.
Round 5 :
Change to Bright Orange. 1 sc in each st around (24)
Round 6 :
(3 sc, inc) x 6 (30)
Round 7 :
1 sc in each st around (30)
Info :
Round 6 begins to widen the cone for the middle stripe. Keep count accurate; this will ensure candy corn proportions match the square size. If you prefer a longer orange section, add an extra even round here.
Round 8 :
Change to Canary Yellow. (4 sc, inc) x 6 (36)
Round 9 :
1 sc in each st around (36)
Round 10 :
(5 sc, inc) x 6 (42)
Info :
The yellow base should be the widest band. Note that these increases are concentrated to form a gently triangular wedge. Keep a shallow dome by using sc only; the applique should remain slightly convex to mimic candy corn curve.
Round 11 :
1 sc in each st around (42)
Round 12 :
(6 sc, inc) x 6 (48)
Round 13 :
1 sc in each st (48) - Fasten off, leaving a 12-14 inch tail for sewing.
Info :
Use the tail to sew the candy-corn applique onto the black square later. Block lightly with steam or pins if desired to flatten the cone shape. The applique is slightly raised — do not stuff.
— Pinwheel Rosette Motif (Lavender Squares) :
Round 1 :
With Deep Purple, ch 5, sl st to first ch to form ring. Ch 1, 8 sc into ring (8)
Round 2 :
(sc, ch 3, sc) in each st around to form 8 small loops; join with sl st to first sc (16 small loops)
Info :
These loop spaces become the petal anchors. Keep loops even; count carefully so there are 8 well-spaced petals.
Round 3 :
Switch to Lavender. Working into each ch-3 loop: (ch1, 3 dc, ch1, sl st) to form a petal shell. Repeat for all 8 petals. Join. (8 petals)
Round 4 :
Ch 1, sc around petals working 2 sc into the top of each shell to create a round base (16 sc)
Round 5 :
Change to Cream. (sc in next st, puff in next st) repeat around to add texture (16 sts total with 8 puff placements)
Info :
Puff stitch: yo, insert hook, yo, pull up loop 3 times, yo and draw through all loops on hook. Ch 1 to close puff. These create petal body depth.
Round 6 :
Switch to Deep Purple. Ch 2, in same st 3 hdc, (3 hdc in next st) repeat around to thicken the rosette base (48 hdc)
Round 7 :
Fasten off Deep Purple. Using Burnt Orange, join with sl st in center between petals and make a small flower center: ch 3, (sl st, ch3) x 3. Fasten off and leave long tail for sewing (this will be the rosette center).
Info :
Sew the small orange center over the central join of the petal shells with a few whip stitches; this secures the rosette to the square and adds a contrasting pop.
— Black Square Base (Candy Corn Background) :
Round 1 :
With Black, ch 4 and join with sl st to form a ring. Ch 3 (counts as dc), 11 dc in ring, join (12 dc) - This establishes a circular center to be squared out.
Round 2 :
Ch 3, dc in same st, 2 dc in each st around, join (24 dc)
Round 3 :
Ch 3, (dc in next st, 2 dc in next) around, join (36 dc)
Round 4 :
Ch 3, (dc in next 2 sts, 2 dc in next) around, join (48 dc)
Info :
We will now convert the rounded motif into a square by adding corner increases and working in rows of dc and ch spaces. Count carefully; these corner clusters are the key to getting even sides.
Round 5 :
Ch 3, dc in next 11 sts, (2 dc, ch 2, 2 dc) in next st (corner), dc in next 11 sts, (2 dc, ch 2, 2 dc) in next st, repeat two more sides; join (forming 4 corners)
Round 6 :
Ch 3, dc to corner ch-2 sp, (2 dc, ch2, 2 dc) in ch-2 sp, continue around working sides evenly - each side should have 14 dc between corners (total approx 56-60 dc per round depending on exact spacing)
Info :
At this stage, block each square slightly to encourage straight edges. Working a dc-square is forgiving: focus on maintaining four corner clusters (2 dc, ch2, 2 dc) which clearly define corners for later joining.
Round 7 :
Ch 1, sc evenly around the square working 3 sc in each corner ch-2 space for stability (approx 60 sc)
Round 8 :
Change to Bright Orange. Work in FLO, sc around to create a subtle ridge at the border (approx same count as Round 7). Fasten off Bright Orange and weave ends.
Round 9 :
With Black, join and work 1 round of sc evenly to tidy edge and prepare for applique placement (same stitch count). Fasten off leaving long tail for sewing appliques.
Info :
Make as many black squares as you need for runner length. The sample runner alternates five black squares with four lavender square modules. Use a blocking mat and pins to square edges for easier joining later.
— Lavender Square Base (Rosette Background) :
Round 1 :
With Lavender, ch 4 and join to form a ring. Ch 3, 11 dc in ring; join (12 dc)
Round 2 :
Ch 3, dc in each st around (12 -> 24 dc) - increase evenly (24 dc)
Round 3 :
Ch 3, (dc in next st, 2 dc in next) around (36 dc)
Round 4 :
Ch 3, (dc in next 2 sts, 2 dc in next) around (48 dc)
Info :
This creates a round base that we will square in the next rounds. Keep counts parallel to black square so both module sizes match precisely.
Round 5 :
Ch 3, dc across side until corner, (2 dc, ch2, 2 dc) in next st (corner), repeat for 4 corners, join.
Round 6 :
Ch 1, sc around, working 3 sc in each corner ch-2 space (approx 60 sc)
Round 7 :
Switch to Deep Purple and work 1 round sc in FLO to create a framed ridge for the rosette (same stitch count)
Info :
Center the Pinwheel Rosette over the lavender square: use the long tail left from the rosette's center to stitch it to the square, securing at 8 points (petal tips) and around the center, making sure the rosette sits flat and centered over the square.
— Detailed Candy Corn Assembly on Black Square :
Round 1 :
Place Candy Corn Applique centered on black square. Using the long tail from the applique, sew applique starting at the tip: take a small stitch through the square's center area and through the back loops of the first round of the applique. Sew around following the edge of the applique at approx every 3-4 stitches to secure (no stitches counted).
Info :
Sewing tip: Use a blunt tapestry needle and matching thread color to make small, nearly invisible stitches. Pull each stitch gently so the applique is snug but not puckered. Reinforce the base by sewing a few stitches through the center to anchor it.
Round 2 :
Optional: Add a small surface slip-stitch outline around the applique using Bright Orange to define the cone perimeter: join yarn with sl st at bottom edge of cone and sl st around just outside the applique edge.
Info :
For a more dimensional candy corn, use a single round of seed stitches around the base with Canary Yellow to emphasize the curve. This is decorative and optional.
— Joining Motifs into Runner Strip :
Info :
Layout: Arrange modules in the order you prefer. The sample runner alternates (Black Candy Corn, Lavender Rosette, Black, Lavender, Black) and finishes with a scalloped border. Before joining, block all squares to exact same size.
Round 1 :
Place two modules right sides together (e.g., Black square and Lavender square). With Bright Orange, seam through the back loops only using sc whip stitch method: insert hook through back loops of both squares and sc through both loops to join. Work evenly across the side, making sure corner clusters remain aligned. Repeat for all side joins to create a long strip.
Round 2 :
Work all joins in same manner until runner length is achieved. For stronger seam, work a second round of sc in same color through both loops on top of the first joining round.
Info :
If you prefer a visible seam like the photo, use Bright Orange for the join to provide a pop and visual continuity with the scallop border. Use pins to align corners before you start sewing; this prevents twisted joins.
Round 3 :
At each seam intersection (corners where modules meet), add a small picot or cluster: (ch 3, sl st in 3rd ch) or make a 3-dc cluster to add decorative interest that will catch the scalloped outer border.
Info :
Allow the assembled strip to relax for a few hours; press/block gently if needed to ensure seams are flat before starting the scalloped border. Taking time here yields a neater final scallop placement.
— Scalloped Outer Border :
Round 1 :
With Cream/Off-White, join in any outer edge stitch. Work 1 round of sc evenly around entire perimeter of the assembled runner, placing 3 sc in each corner ch-2 space and working 2 sc in each side corner stitch to maintain evenness (approx count will depend on number of modules; aim for even spacing).
Round 2 :
Ch 3 (counts as dc), *skip 2 sts, (5 dc) in next st (shell), skip 2 sts, sl st in next st*; repeat around to create shells. At seams between modules, use extra sl sts to keep shells aligned with module centers. Join and fasten off Cream.
Info :
This round creates the inner scallop base. If your runner is very long, count shells per module side and try to align midpoints at consistent intervals so the outer shape remains symmetrical.
Round 3 :
Switch to Bright Orange. Attach with sl st to center top of a shell. Work picot-edge scallops: *(ch 1, sc) in each of next 2 dc of shell, ch 3, sl st in top of shell,* repeat across shell and between shells to create a decorative picot rim. Join and weave in ends.
Round 4 :
For additional depth, work 1 round of surface slip-stitch shading in Bright Orange across the shell tops: with yarn held on surface, sl st across shell tops to highlight scallop ridges.
Info :
Edge tip: Use a smaller hook (3.5 mm) for the Bright Orange round to make picots and shells crisp. If your shells ripple, block the entire runner by pinning scallops into shape and lightly steaming from a distance.
— Alternate Decorative Border Option (More Lacy) :
Round 1 :
With Cream, ch 1, sc around as before to tidy. Round 2: *ch 3, sk 2, sc in next*, repeat around to create open lace. Join.
Round 2 :
Switch to Bright Orange, work (5 dc in ch-3 sp, sl st in next sc), repeat to form scallops. This alternative gives a lighter, airier finish while keeping the orange highlights.
Info :
Either border yields a charming finish; choose based on desired look for your table. The photo shows a dense scallop with cream interior and orange outer edge for bold contrast.
— Finishing Touches and Embellishments :
Round 1 :
Optional: Add small crocheted pumpkins or mini appliques at either end of the runner for seasonal flair. Use a small 10-12 round pumpkin pattern and stitch to the outermost scallop centers.
Round 2 :
Weave all tails: using a tapestry needle, weave each tail through 6-8 sts on the wrong side; trim close. For color changes at join rows, weave yarn into the surrounding stitches to hide ends thoroughly.
Info :
Final block: Lay runner flat on blocking mat, pin scallops to perfect semicircles, lightly steam from an iron 6-8 inches away. Allow to cool and dry before removing pins.
Round 3 :
Label & care: Hand wash gently in cool water and reshape while damp. Lay flat to dry to preserve scallop shape and appliques.
Info :
Congratulations: Your runner is complete. Measure final dimensions and note how many modules you made so you can repeat or reproduce the runner consistently in the future.
Finishing this runner brings a genuine sense of seasonal delight — each candy-corn cone and pinwheel rosette adds personality and warmth to your table. The scalloped edge ties everything together with vintage charm and a bright pop of orange. Whether you keep it for yourself or gift it, this runner is a lovely reminder that handmade details make every meal feel special. 🧶🍂