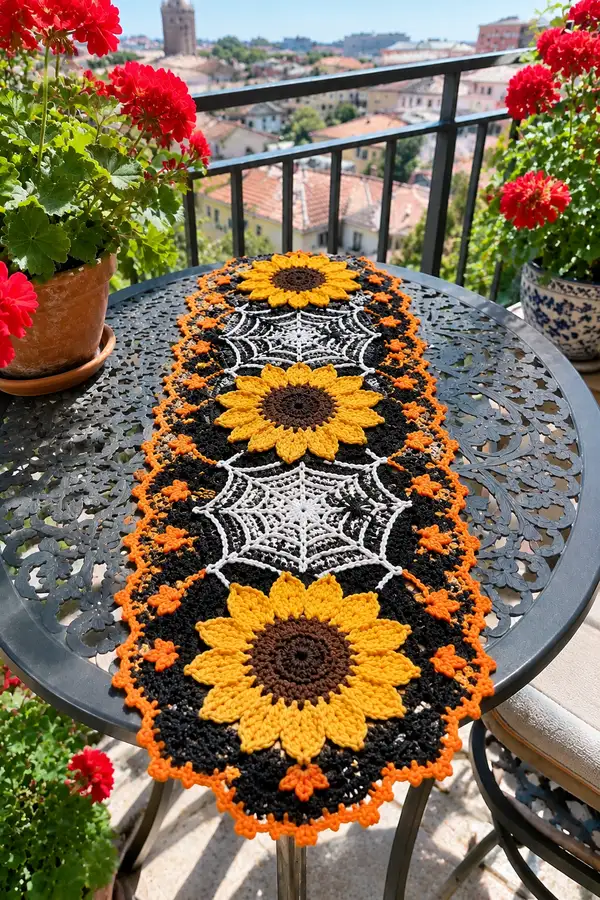
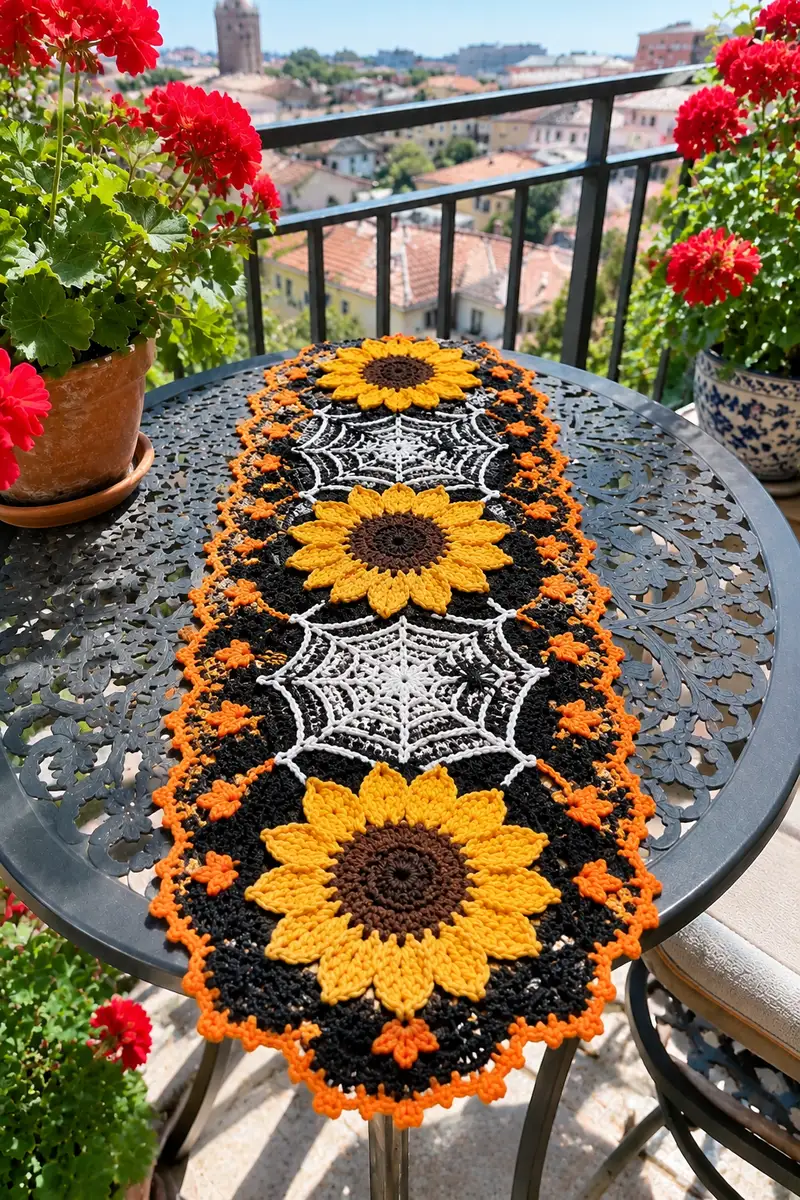
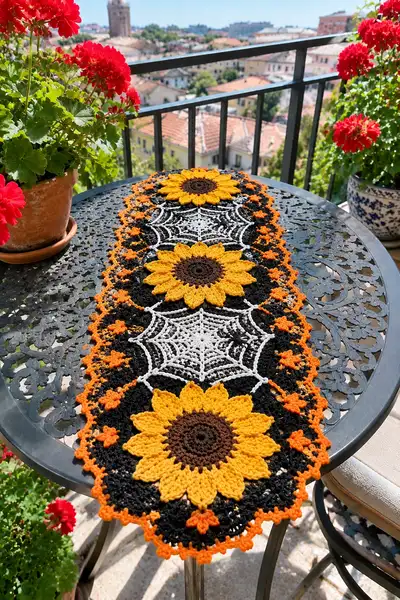
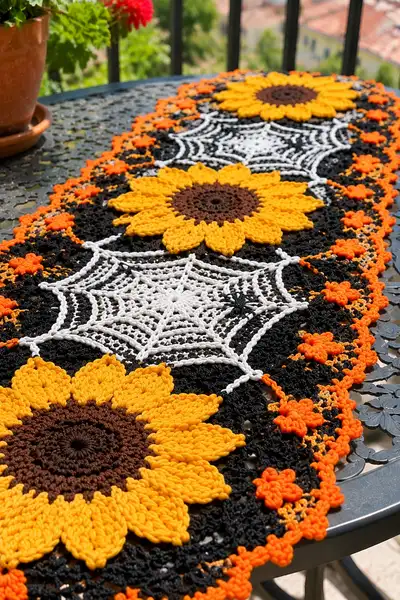
A festive Halloween table runner combining bold sunflowers, lacy spiderweb motifs and tiny orange blossoms on a dramatic black mesh background. This runner uses sunflower-yellow, deep brown, bright orange, black and crisp white to create a seasonal centerpiece with texture and contrast. The design is worked in separate motifs (sunflowers, spiderwebs, small blossoms) then joined and edged with a scalloped orange border for a finished, polished look. Perfect for a dining table, console or mantel to celebrate autumn and Halloween.
Progress Tracker
0% Complete
— Sunflower Motif (make 3 large sunflowers) :
Round 1 :
With deep brown, 6 sc in magic ring (6)
Round 3 :
(1 sc, inc) x 6 (18)
Round 4 :
(2 sc, inc) x 6 (24)
Round 5 :
(3 sc, inc) x 6 (30)
Round 6 :
(4 sc, inc) x 6 (36)
Info :
This brown center is worked compactly to create a sturdy base for sunflower petals. Keep tension slightly tighter than petals so the center sits slightly recessed.
Round 7 :
1 sc in each st around (36)
Round 8 :
1 sc in each st around (36)
Round 9 :
Switch to sunflower yellow. Join with sl st to any st, ch1.
Info :
Change to sunflower yellow now to begin the petal base. Carry brown inside or fasten off and weave in later; the yellow rounds will anchor petals.
Round 10 :
(1 sc, ch2, skip 1) x 12 forming 12 ch-2 loops (36 loop bases)
Round 11 :
Working into each ch-2 loop: (sc, hdc, 3 dc, hdc, sc) around to form long petals (12 petals). Each petal occupies one loop (12 petals)
Info :
The petal cluster above uses 7 stitches into each loop (sc,hdc,3dc,hdc,sc) which increases the stitch count visually but does not change base stitch count of 36; petals sit on alternating spaces for a rounded crown.
Round 12 :
Rotate work and behind the petals work 1 sc in each of the 36 base sts around to anchor petals (36)
Round 13 :
FLO: (2 sc in next st, 1 sc in next 2) x 12 (48)
Round 14 :
1 sc in each st around (48)
Info :
FLO round creates a textured ridge behind petals that helps them stand out. Keep stitches even and do not pull too tightly.
Round 15 :
(5 sc, inc) x 8 (56)
Round 16 :
1 sc in each st around (56)
Round 17 :
Begin second layer of petals: *ch3, join with sl st in next st, ch3, sl st in next; rep around to create 28 small chain loops (56 loop anchors)
Round 18 :
Working into each ch-3 loop: (sc, 2 hdc, 3 dc, 2 hdc, sc) to form smaller decorative petals (28 petals)
Info :
The second layer of petals is staggered between the primary petals to give fullness. Use slightly looser tension for these decorative petals so they lift and overlap naturally.
Round 19 :
1 sc in each base st around through the back loops where possible to anchor new petals (56)
Round 20 :
Switch to a slip-stitch rib: (1 sc BLO in next 2, 1 sc in next 4) around to create subtle ridge (56)
Round 21 :
Work decorative puff petals: *in the space between two main petals: (ch1, make 5-dc puff: yarn over, insert, pull up loop x5, yarn over and draw through all loops, ch1) rep around placing 14 puffs equally (14 puff petals)
Info :
Puff stitches create the sculpted, raised look of the sunflower petals; keep consistent loop height. After each puff, secure with a small ch and a sl st to the base to keep shape.
Round 22 :
Secure puffs by crocheting 1 sc in each st around across the back, ensuring even spacing (56)
Round 23 :
Optional: Add a slip-stitch picot round along each petal tip—(ch3, sl st in 3rd ch) into petal tips to add crisp points
Round 24 :
Fasten off sunflower yellow leaving long tails for weaving and blocking. Weave in brown center tail and tidy any ends.
Info :
Block each sunflower flat, gently stretching petals and pinning so petals open uniformly. Steam or use spray starch if you want stiff petals for display.
— Spiderweb Motif (make 3 spiderwebs) :
Round 1 :
With white, 8 sc in magic ring (8)
Round 3 :
(1 sc, inc) x 8 (24)
Round 4 :
(2 sc, inc) x 8 (32)
Info :
This compact center gives the web stability. Work tight rounds to avoid floppy web center.
Round 5 :
1 sc in each st around (32)
Round 6 :
Ch6, sl st into next cluster to form 8 spokes (repeat ch6, sl st across center at even intervals). You will create 8 ch-6 loops around the center for spokes.
Round 7 :
Working into each ch-6 loop: sl st into first ch, *ch3, tr in same loop, ch3, sl st into next spoke base; rep to make 8 raised spokes. Fasten off small tail for neat web base.
Info :
The spokes are the structural lines of the web. Keep them slightly raised by working taller stitches (tr). Place them evenly—pin spokes if needed.
Round 8 :
Rejoin to center, ch1. For the first concentric ring: *(ch4, sl st around next spoke), rep 8 times forming a ring of ch4 arches (use sl st into spaces between spokes)
Round 9 :
Working around ring: in each ch4 arch work (sc, ch3, sc) to create a small looped ring. This creates the first web ring (counts remain visual)
Round 10 :
Continue: Join each arch to the spoke with a sl st and form second concentric ring of (ch6, sl st) between rings (this expands the web evenly)
Round 11 :
In each ch6 arch work (sc, hdc, 3 dc, hdc, sc) to create a slightly puffed ring giving the web gentle texture (8 rings)
Info :
The web is composed of concentric chained arches connected to spokes by single stitch anchors. Gauge and even tension are vital so the web lies flat.
Round 12 :
Repeat expansion: ch8 arches joined to spokes with sl st forming openwork; aim for roughly double the diameter of the center (visual expansion)
Round 13 :
In each ch8 arch: (sc, ch5, sc) creating airy web loops; then secure each loop to the spoke with a sl st for stability
Round 14 :
Switch to reverse side and add a decorative cord: *ch10, sl st into spoke base to add radial cord between main web rings; rep around (8 cords) giving classic web geometry
Info :
For crisp white web lines, use a slightly smaller hook than for petals so the cords hold their shape. Pin and block the web carefully into a near-flat hexagon/octagon shape.
Round 15 :
Optional spider: use black small amount to embroider or crochet a tiny spider sized about 6-8 mm and sew onto a web intersection (see assembly notes)
Round 16 :
Fasten off white leaving long tail for joining. Block web flat and let dry thoroughly before joining to background.
— Small Orange Blossom Motif (make 18 small blossoms) :
Round 1 :
With bright orange, 6 sc in magic ring (6)
Round 3 :
Switch to small puff petals: *(ch2, make 3-dc puff in next stitch, sl st) around to create 6 puff petals (6 puffs)
Info :
These tiny blossoms are accent decorations between major motifs and on the border; make them crisp and slightly firm for a neat look.
Round 4 :
Secure by stitching 1 sc through the base of each puff and fasten off with long tail for joining (12 base sts remain visually)
Round 5 :
Block lightly and set aside. Make 18 of these small blossoms to space evenly along runner edges and between major motifs.
— Black Background Mesh Panel (make 1 long panel to join motifs) :
Round 1 :
With black, ch54, join with sl st to first ch to form a ring, or work foundation chain long enough to fit motif spacing (approx 52-56 ch depending on desired runner width)
Round 2 :
Ch3 (counts as dc), dc in each ch around, join (54 dc)
Round 3 :
Ch1, *sc in next 2, ch3, skip 1, rep across to create mesh arches; end with sc to keep edge neat (mesh pattern repeats to create even holes)
Info :
This base panel is worked as a long rectangular lace that will form the negative space between motifs. Keep the chain consistent to maintain even motif spacing.
Round 4 :
Repeat mesh: in each ch3 sp work (sc, ch3, sc) to build height and openwork; repeat for 8 rounds to produce a consistent mesh area (counts are variable but aim to keep edge counts equal)
Round 5-8 :
Continue mesh pattern (sc in sc, ch3 in arch) maintaining width and length to approximately match three sunflowers + two spiderwebs spaced with 6 small blossoms between (visual guidance)
Info :
Measure as you go: the finished runner in the photo measures roughly 36-40 inches long; adjust mesh rows to achieve desired length. Blocking will slightly alter final measurements.
Round 9 :
For motif anchors: at three even positions along the panel (approx 10-12 ch apart) create slightly larger motifs spaces by working ch5 arches over the mesh for secure web/sunflower attachment points
Round 10-14 :
Reinforce anchors with 2 rounds of (sc, ch3) around them so that when motifs are joined they remain secure (mesh maintains structure but anchors keep motifs flat)
Info :
Pin the panel flat often and measure motif spacing carefully—sunflowers and spiderwebs will be joined to these anchor points with slip stitches and weaving for an even layout.
Round 15 :
Fasten off leaving long tail for joining. Block the entire panel flat on a board to match motif sizes.
— Joining Motifs (Join-as-you-go suggestions and patterns) :
Info :
Layout: Alternate sunflower, spiderweb, sunflower, spiderweb, sunflower down the center of the black mesh panel. Space small orange blossoms along the edge scallops and between larger motifs. Pin everything first.
Round 1 :
Position first sunflower over anchor point. With long tail from sunflower center, sew center to panel using mattress stitch through brown center round 7 into mesh anchors; make 8-10 secure passes to hold flat.
Round 2 :
Join sunflower petals to mesh: using yellow tails, slip-stitch through petal base and mesh arches at even intervals—aim for 12-14 stitches around each sunflower connecting to the panel to flatten petals outward naturally.
Info :
When joining, keep tension gentle so petals remain three-dimensional and do not flatten entirely. Secure each petal with 2-3 slip stitches near the base for stability only.
Round 3 :
Position spiderweb over the next anchor. With white long tail, slip-stitch join spokes to mesh anchors at each spoke base. Then weave in the loop tails to secure web edge to the panel evenly at 8-12 points.
Round 4 :
Sew small orange blossoms between motifs by joining with long tails and using invisible ladder stitches; place them on the border holes and mesh intersections to match photo placement (approx 6-8 per long side).
Info :
Use small, even stitches for joining so seams are nearly invisible. If using a slip-stitch join-as-you-go technique, ensure you work through both motif and panel loops for a secure bond.
Round 5 :
After all main motifs are joined, check alignment and add extra stitches where petals or web edges lift to keep the runner flat. Secure all long tails by weaving through multiple stitches and trimming close.
— Border and Final Edge (scalloped orange border with tiny picot flowers) :
Round 1 :
With bright orange, join at any outer mesh stitch. Work 1 sc evenly around the outer edge to create a tidy base (count outer sts ~240-320 depending on runner width)
Round 2 :
*(ch3, skip 2, sc in next) repeat around to create small arches; this will be foundation for scallops (arch count approx 80)
Round 3 :
In each arch work (sc, hdc, 3 dc, hdc, sc) to form a scallop shell; repeat around (approx 80 scallops)
Info :
Scallop count depends on your runner circumference. Adjust by adding or subtracting arches in Round 2. Keep scallops evenly spaced for a neat finish.
Round 4 :
Between each scallop, add a tiny 4-chain picot flower: *sl st into center of next scallop, ch3, make 3-dc cluster into same sp, sl st to secure; rep between scallops (adds floral edging)
Round 5 :
For extra lift, work a final picot round: *ch3, sl st into 3rd ch at tip of each scallop to form tiny points. This gives crisp orange points as in photo.
Round 6 :
Fasten off and weave in all ends. Use blocking pins to reshape scallops and points so the border is smooth and uniform.
Info :
Blocking is crucial to open the lace and ensure scallops sit evenly. Spray lightly and pin to desired shape, allow to dry fully for best results.
— Finishing Details and Optional Decorations :
Round 1 :
Create tiny black spiders (optional): With black yarn, ch6, join into ring. Round 2: 8 sc in ring; Round 3: make 4 small legs by ch4 and sl st back into body around on opposite sides. Sew to web intersections.
Info :
Small black spiders add charm; make them very small to keep scale. Sew them at the edge of the white web for high contrast as seen in the photo.
Round 2 :
Final blocking: Pin the completed runner to a flat surface matching the layout. Use steam or spray starch for stiffer shape if desired. Remove pins only after completely dry.
Info :
Store runner flat or lightly rolled. Avoid heavy tableware without protective matting to prevent snagging delicate lace.
This Halloween Sunflower and Spiderweb Table Runner is a beautiful seasonal centerpiece that blends bold color with delicate lacework. Each motif is a joy to create, from the sculpted sunflower petals to the airy white spiderwebs, and the bright orange scalloped edge provides the perfect festive frame. The modular design makes it easy to customize length and layout—craft one runner or several matching pieces for a full table setting. Happy crocheting and enjoy the sparkle this runner brings to your autumn decor! 🎃🧶