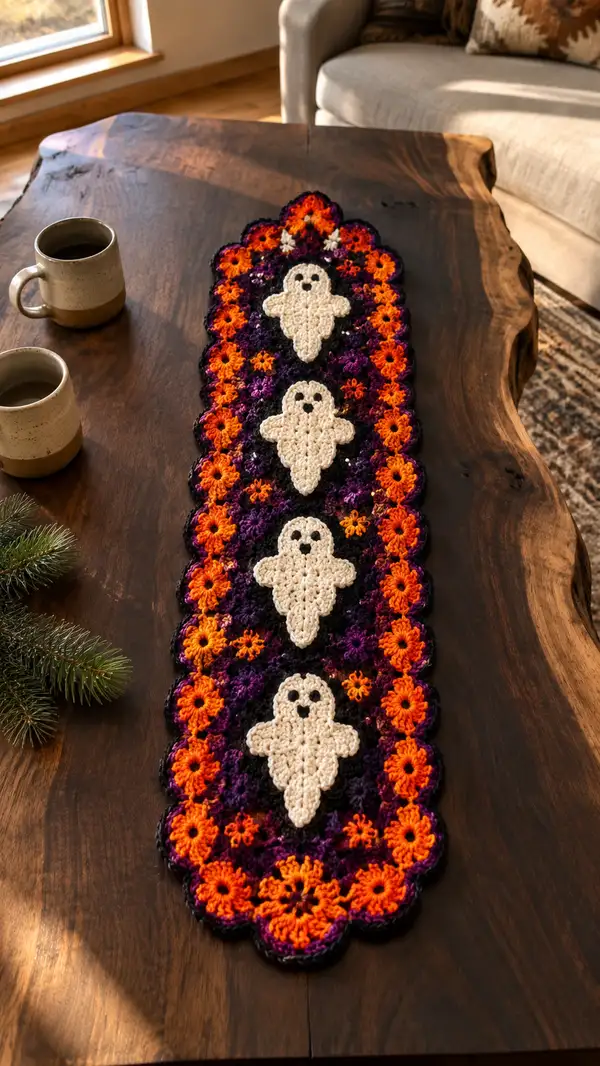
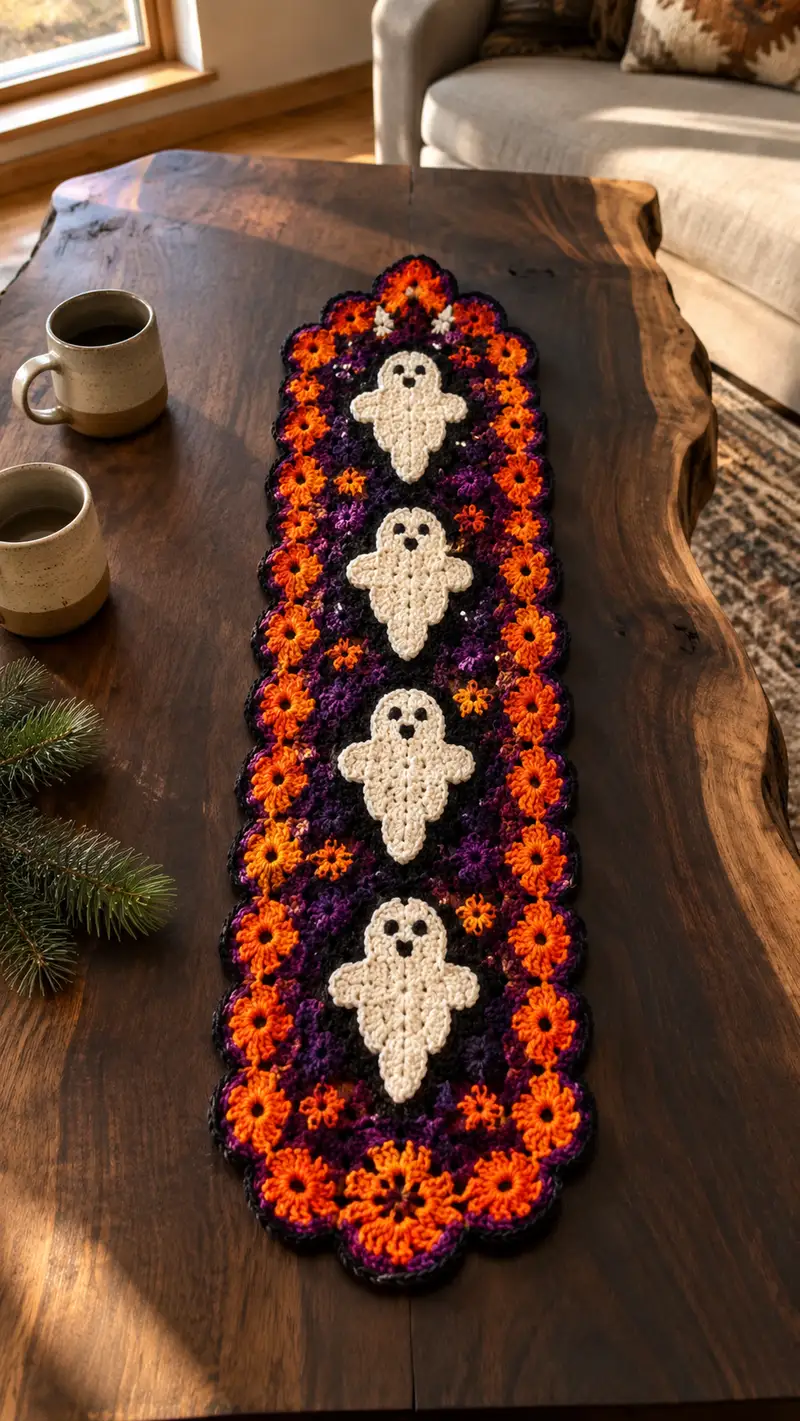
A festive Halloween table runner featuring four cream ghost appliques framed by rich orange, purple and black floral motifs. This elongated runner uses clustered flower motifs and scalloped edging for a vintage yet spooky look. Worked in worsted weight yarn with clear join-as-you-go instructions, it lays beautifully on a dining table or console. Perfect for seasonal decor, it blends bright accents and delicate appliques for a cozy, handcrafted centerpiece.
Progress Tracker
0% Complete
— Overview :
Info :
This pattern is built from two repeating motif types: a 10-round small floral sun motif (orange) and a 7-10 round clustered background motif (purple/black). Four ghost appliques are made separately in cream and appliqued to the panel. Join-as-you-go is used to join motifs into a single elongated runner. All rounds are worked in joined rounds unless otherwise noted; counts are shown at the end of each round in parentheses. If you prefer, motifs can be sewn together after completing each piece.
Gauge :
10cm x 10cm / 4in x 4in square = 10 dc x 6 rows with 4.0mm hook in motif cluster (blocked). Gauge is not critical but will affect final runner length.
Finished size :
Approximately 10-12 inches wide and 36-40 inches long with four ghosts spaced evenly, using worsted yarn and 4.0mm hook. Adjust by adding or removing motif rows to change length.
— Ghost Applique (Make 4) :
Round 1 :
Using cream yarn. 6 sc in magic ring (6)
Round 2 :
Inc in each st around (12)
Round 3 :
(1 sc, inc) x 6 (18)
Round 4 :
(2 sc, inc) x 6 (24)
Info :
Rounds 1-4 build a rounded head. Keep tension even to ensure the ghost head is smooth. Place a stitch marker at the starting stitch of Round 5 to track the facing direction for later placement.
Round 5 :
1 sc in next 6 sts, ch 2, skip 2 sts, 1 sc in next 12 sts, ch 2, skip 2 sts (24) Note: ch spaces here will later be used to start arm shaping
Round 6 :
Work along first 6 sc: (1 sc in each of 6 sts), into first ch-2 sp: (sc, ch2, sc) to form arm opening; 1 sc in next 12 sts, into second ch-2 sp: (sc, ch2, sc) (28)
Round 7 :
Fold ghost top slightly inward to begin showing shoulder shaping. 2 sc in first st, 1 sc in next 5 sts, sc in each st around including ch-2 clusters (28)
Info :
From round 5 we establish two arm openings. The ghost is still fairly flat here; we will create the body and scalloped tail below. Stuffing is optional — ghosts in the photo are largely flat with slight texture; lightly block rather than stuffing if you want a flat applique.
Round 8 :
(3 sc, inc) x 6 across the lower semicircle to expand body shape (34)
Round 9 :
1 sc in each st around for even body (34)
Round 10 :
(4 sc, inc) x 6 (40)
Round 11 :
1 sc in each st around (40)
Info :
Begin shaping the scalloped tail: the bottom of the ghost is shaped by strategically placed clusters and decreases in the next rounds. Keep the piece flat — do not overstuff; if you choose a raised applique, add a ribbon of thin batting under before sewing.
Round 12 :
Work tail shaping: *dc2tog over next 2 sts, 1 dc in next 3 sts, tr in next st* rep across lower edge to create staggered points (40)
Round 13 :
1 sc in each st around maintaining scalloped points, in each tr and dc place 1 sc to secure shape (40)
Round 14 :
(5 sc, dec) x 6 across lower body to begin tapering slightly towards tail points (34)
Round 15 :
1 sc in each st around (34)
Info :
To create the classic 'ghost flutter' points, use alternating dc and tr stitches on rounds 12-14. The counts above maintain symmetry; if you alter stitches, check that final counts match to avoid ruffling.
Round 16 :
Work small scallop edge along entire ghost: *ch2, skip 1, sl st into next st* repeat around to give a tidy picot-like trim (34)
Round 17 :
Fasten off leaving long tail for sewing. Weave in the first end lightly but leave tail to attach. Lightly block ghost flat to set shape. (no change)
Info :
Embroider face: Using black yarn, stitch two small round eyes placed approximately 4-6 sts apart centered on rounds 3-4 area of ghost head. Use satin stitch or French knots for small filled eyes and a tiny mouth beneath. For a more polished look, attach small black felt circles.
— Small Sun Flower Motif (Orange) (Make 14-16) :
Round 1 :
With orange. 6 sc in magic ring (6)
Round 2 :
Inc in each st around (12)
Round 3 :
(1 sc, inc) x 6 (18)
Round 4 :
Ch 2, *(3 dc, ch2, sl st) in next st* x 6 to create 6 petals, sl st to join (18 petals formed)
Info :
Round 4 forms pronounced petals that show as bright orange rings around purple background. Keep petals uniform; use stitch marker to identify first petal insertion point.
Round 5 :
Working into petal clusters: (sc, hdc, 3 dc, hdc, sc) in each ch-2 sp around to give full petal texture (6 petals; 36 stitches counted across cluster peaks but treat each petal as block)
Round 6 :
1 sc evenly across base loops to tidy petals and set motif (36)
Round 7 :
Fasten off leaving tail for join-as-you-go. Block lightly. (no change)
Info :
Make enough orange sun flowers to create the alternating border rows shown in the photo (typically two columns on each side of the runner per row). Adjust count to desired runner width and length.
— Purple Cluster Motif (Make 14-16) :
Round 1 :
With variegated deep purple. 8 sc in magic ring (8)
Round 2 :
Inc in each st (16)
Round 3 :
(1 sc, inc) x 8 (24)
Round 4 :
Ch3 (counts as dc), *skip next st, 3 dc cluster in next st, ch1* repeat around, finish with sl st in top of ch3 to form 8 clusters (24 cluster points)
Round 5 :
1 sc into each space and around cluster bases to stabilize motif (24)
Round 6 :
Join black yarn in back loop only of a chosen stitch. 1 sc in BLO in each st around to create a subtle outline (24)
Round 7 :
Ch2, *(2 dc, ch2, sl st) into center of each cluster* around to build texture and match photo depth (24)
Round 8 :
Fasten off leaving tail for joining. Block each motif flat. (no change)
Info :
Stack purple cluster motifs alternating with orange sun flowers to create the background lattice shown in the photo. The black BLO round adds definition and helps the motifs sit uniformly when joined.
— Join-as-You-Go Panel Construction (Panel made of alternating rows) :
Info :
Arrange motifs in a 4-motif-wide by 8-10 motif-long grid depending on the desired runner length. The pictured piece is roughly 4 wide by 10 long with alternating orange and purple motifs and a central vertical column of purple clusters where ghosts will be placed. Join-as-you-go method: in your final round of each motif (Round 7 or 8 for purple, Round 5 or 6 for orange), instead of finishing, sl st into corresponding st of adjacent motif to join. This creates a nearly invisible seam.
Round 1 :
Start with a center purple cluster motif. Complete to Round 7 and do not fasten off. Position a second purple motif to its right and, on Round 7, when you reach the joining point, sl st into corresponding sl st/space of the right motif then continue around motif to secure join (no new stitch count change; count remains 24 for purple)
Round 2 :
When joining an orange motif to a purple motif, align petal peaks and join on the final petal stitch: complete Round 5 of orange then sl st into the adjacent purple BLO round at the corresponding point. Secure with 2-3 joins per motif edge for stability. (orange motif stitch count remains 36)
Info :
Keep the panel flat by pinning motifs to a blocking mat and aligning centers before joining. Work slowly when matching petals to clusters—matching the visual peaks is easier if you lightly mark the motif edges with removable fabric chalk.
Round 3 :
Continue joining motifs in rows: attach consecutive motifs using 6-8 evenly spaced slip stitches along the meeting edge to hold two motifs together (counts for each motif unchanged). Ensure consistent orientation of clusters so the runner reads vertically with orange edges framing the purple column where ghosts will be attached.
Round 4 :
After joining each complete row, weave a short running stitch across the back to anchor joins if needed, then flip to join the next row below using the same join-as-you-go technique. Repeat until full panel is completed. (panel length variable; no single stitch count)
Info :
Leave a small seam allowance (use 2-3 slip stitches rather than continuous seam) if you want the runner to have slight flexibility for laying flat on uneven tabletops. Do not tighten joins too much, or the panel will pucker.
— Ghost Placement & Attachment :
Info :
Ghosts are centered on the purple motif column. Place top of the first ghost approximately 2-3 motif rows from the top edge so that all four ghosts are evenly spaced. In our pictured example, the four ghosts are centered on every second purple motif down the center column with one purple motif between each ghost.
Step 1 :
Pin the first ghost centrally on the chosen purple motif so the ghost head aligns with the motif center; the tail points toward the runner length. Use 4-6 pins to hold in place.
Step 2 :
Sew ghost to panel using mattress stitch or whip stitch with matching cream yarn: stitch through both ghost edge and the motif bases in even spacing, approximately 3-4mm between hand-sewn stitches. Work from top to bottom to avoid shifting. (no stitch count)
Info :
For added security, you can also use small invisible stitches into the seam allowances of adjacent motifs. Avoid sewing through too many clusters to retain motif texture. If you prefer a raised ghost, add a thin layer of batting behind the ghost before sewing and stitch around a slightly larger perimeter.
— Border & Scalloped Edging (Worked around entire runner) :
Round 1 :
With black yarn joined at an edge stitch, work 1 sc evenly around the entire runner edge, placing 1 sc in each join and 2 sc around pointed petals for smoothness (work evenly to maintain width) (panel perimeter count varies)
Round 2 :
1 sc in each st around to build a firm base for scallop (no change in perimeter count)
Info :
Use a smaller hook (3.5mm) for the black rounds if you want a tighter, neater edging that cinches joins together. Work evenly and count on the fly, placing extra scs at tight corners to prevent ruffling.
Round 3 :
*Skip 2 sc, work 5 dc in next sc, skip 2 sc, sl st in next sc* repeat around to form large scallops (this gives a prominent scallop visible in photo) (perimeter scallops count will match number of petal groups around panel)
Round 4 :
*Into each 5-dc scallop: sl st in 2nd dc, ch2, (2 dc, ch2, 2 dc) into scallop peak to create double scallop* repeat around and sl st to join at start (no perimeter count change)
Round 5 :
Fasten off and weave in ends. Optionally, add a very fine picot or contrast single crochet in variegated purple along scallop edge to add a three-color rim as pictured (use slip stitches of purple on front loop). (no change)
Info :
If your runner edge becomes wavy, re-block the entire runner and rework the edge with slightly more or fewer stitches in the black base round. Adjust scallop size to taste—smaller 3-dc scallops produce a subtler edge.
— Optional Decorative Accent Stitches :
Round 1 :
With orange or variegated yarn, work small starburst stitches into selected motif centers: ch3, (dc, ch2, dc) into motif center, sl st to base to add a tiny orange star as seen around smaller purple clusters (per accent; count varies)
Info :
These tiny starbursts add the small orange sparkles visible in the photo between clusters. Place them in alternate spaces to achieve an organic, scattered look.
— Finishing Touches :
Info :
Weave in all tails at the back of the runner. If any joins feel loose, use a matching yarn to reinforce with a few whip stitches on the wrong side. Lightly steam block the entire piece to settle the scallops and flatten motif intersections.
Step :
Trim all ends and ensure ghosts are securely sewn. If desired, add a light sprinkling of sparkly thread on select motif centers (use tiny couching stitches) to mimic the subtle flecks visible in the photo.
Info :
Store flat or rolled (not folded) to preserve scallops. For washing, hand wash gently in cool water and dry flat to maintain shape and color vibrancy.
— Pattern Notes & Troubleshooting :
Info :
If your motifs are slightly different sizes, a light blocking and gentle stretching while pinned will even them out before joining. When joining, always match petal peaks to cluster valleys to reduce tension across joins. Keep a reference motif nearby to check orientation pattern as you join rows to ensure the runner reads consistently.
Info :
To change runner length: add or subtract motif rows. To change width: add a column of alternating motifs and adjust ghost spacing accordingly. When changing yarn brands or hook sizes, make a test panel of 4 motifs and measure to estimate final size.
This Halloween table runner blends playful ghosts and jewel-toned flower motifs into a charming, handcrafted centerpiece. Each motif clicks into place for a satisfying rhythm of crochet, and the scalloped border gives a finished, professional look. It's a lovely seasonal accent that brightens any table and makes a perfect handmade gift. 🎃🧶 Add a cup of cocoa and enjoy your finished festive runner!